Monday, 19 November 2018

LinkedIn Profile Tips: 18 Research-Backed Ways to Stand Out Professionally

Improving your visibility on LinkedIn is important whether you're actively looking for a new job or passively considering new opportunities: Eighty-seven percent of recruiters use the site as part of their recruiting process. But even if you're not entertaining new roles, LinkedIn can help you build your personal brand and connect with others in your industry. And for business owners, it may even drive traffic to and interest in your business.

The starting point for deriving value from LinkedIn is creating a profile that not only shows off your experience and talents, but also makes it easier for people to discover you in search. Here we'll present you with research-backed LinkedIn profile tips that will help you optimize your LinkedIn presence.

LinkedIn Profile Basics

LinkedIn profile basics

If you don't want to invest too much time into your LinkedIn profile, you at least need to add or update your basic profile information. According to LinkedIn, completing the following sections makes your profile eight times more likely to get discovered by potential employers.

Profile picture

Adding a professional photo to your LinkedIn profile is key to boosting your visibility on the site. In fact, LinkedIn says that you'll get 21 times more profile views with a picture than without one.

Your profile photo should be square, 400x400 pixels, and ideally taken by a professional photographer. But if you don't have a few hundred dollars to shell out for a photography session, you can get away with something less formal if you follow these best practices:

  • Smile. It makes you seem more approachable.
  • Choose a solid—or otherwise non-distracting—background.
  • Avoid full-body or head-only shots. Show your head and shoulders.
  • Choose something recent that shows what you look like now—not 10 years ago.

If you're having trouble deciding if your profile photo is good—or if you're struggling to decide between a few pictures—here are two tools that can help:
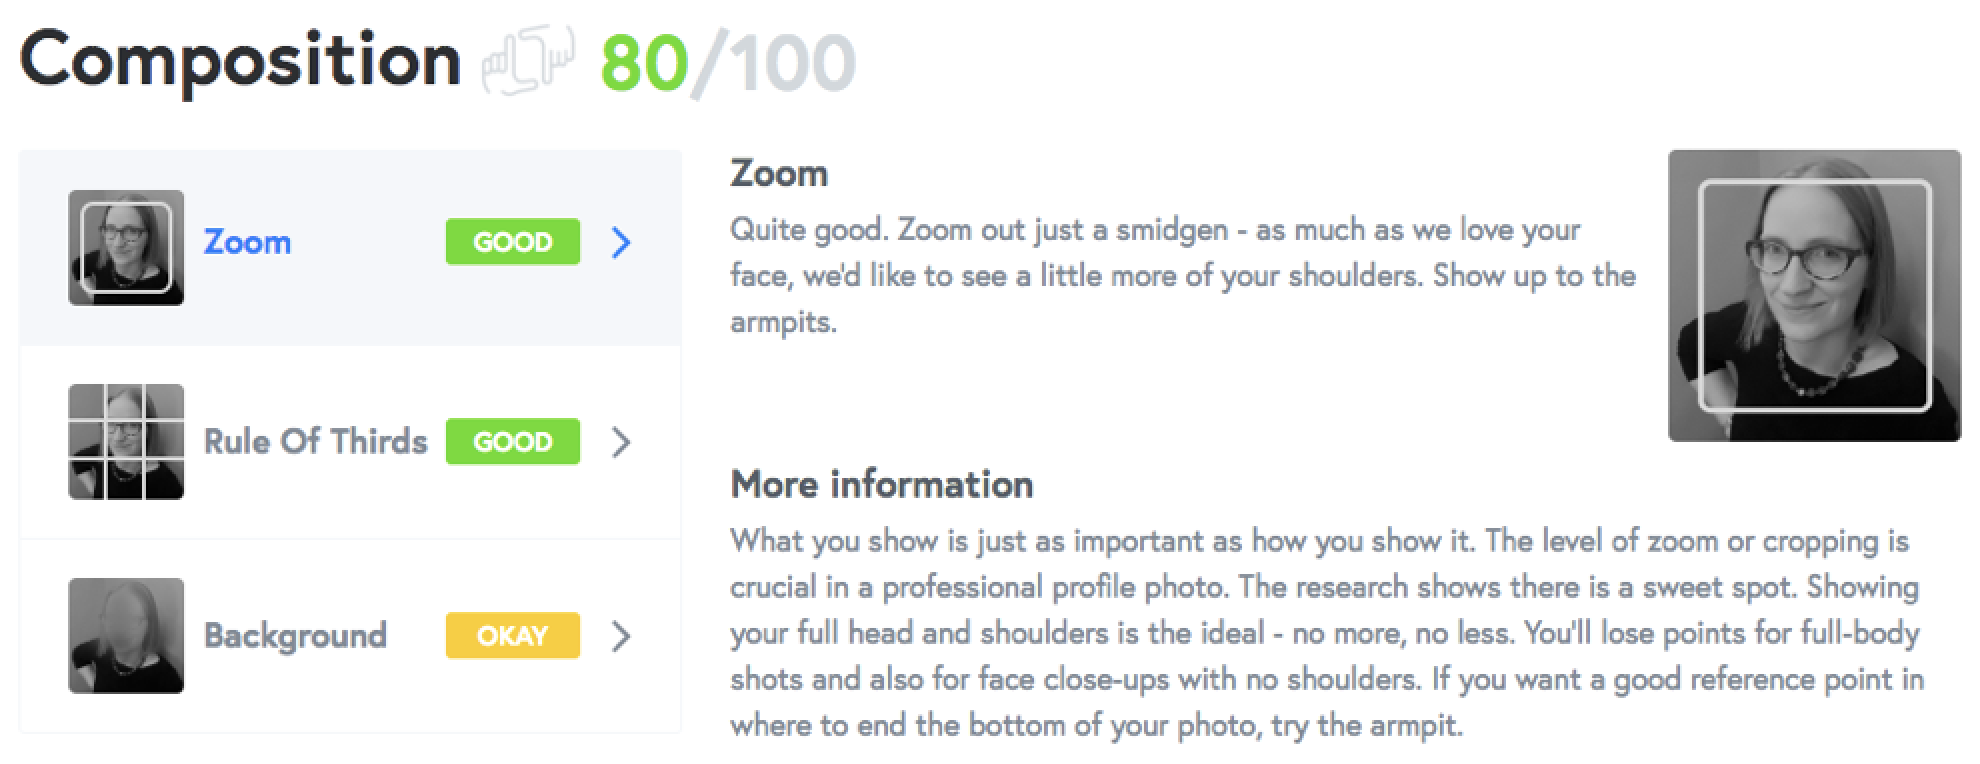
Snappr Photo Analyzer
  • Snappr Photo Analyzer (free if you vote on others' profile pictures) uses image recognition and machine learning technologies to score your profile photo and provide recommendations for how to improve it. If your favorite picture gets a bad score, Snappr gives you the information you need to take a better shot.

Photofeeler
  • Photofeeler (free) lets you share potential profile photos with others who cast votes on whether or not the photo makes you seem competent, likable, and influential. If you're having trouble choosing between multiple photos, it can help you crowdsource the decision and determine which is best.

Location

Location is another key detail to include on your profile. LinkedIn says that having a location makes you appear in 23 times more searches; in fact, LinkedIn's search results are heavily tied to location. Want proof? Go to LinkedIn and search for any job title. In all likelihood, all of the top results will be people who live in the same city as you.

If you're looking for jobs in the area where you currently live, just add your current location, save the changes, and you're set.

But if you're currently living in New York and looking for work in San Francisco, for example, you may want to list San Francisco as your location so you'll show up for searches by recruiters in that area. If you do so, it may be worth mentioning your current location in your summary or elsewhere so that listing the incorrect location on your profile doesn't come across as deceptive.

Industry

When recruiters conduct advanced searches for candidates on LinkedIn, they often filter results by industry. When creating or updating your profile, make sure to add the industry that best applies to your current career or the field you're trying to move into.

Note that the industry you select doesn't actually display on your LinkedIn profile; it's only used for search. To edit it, click the pencil icon directly below your cover image, scroll down until you see the industry selector, and choose the most relevant industry from the dropdown menu.

Summary
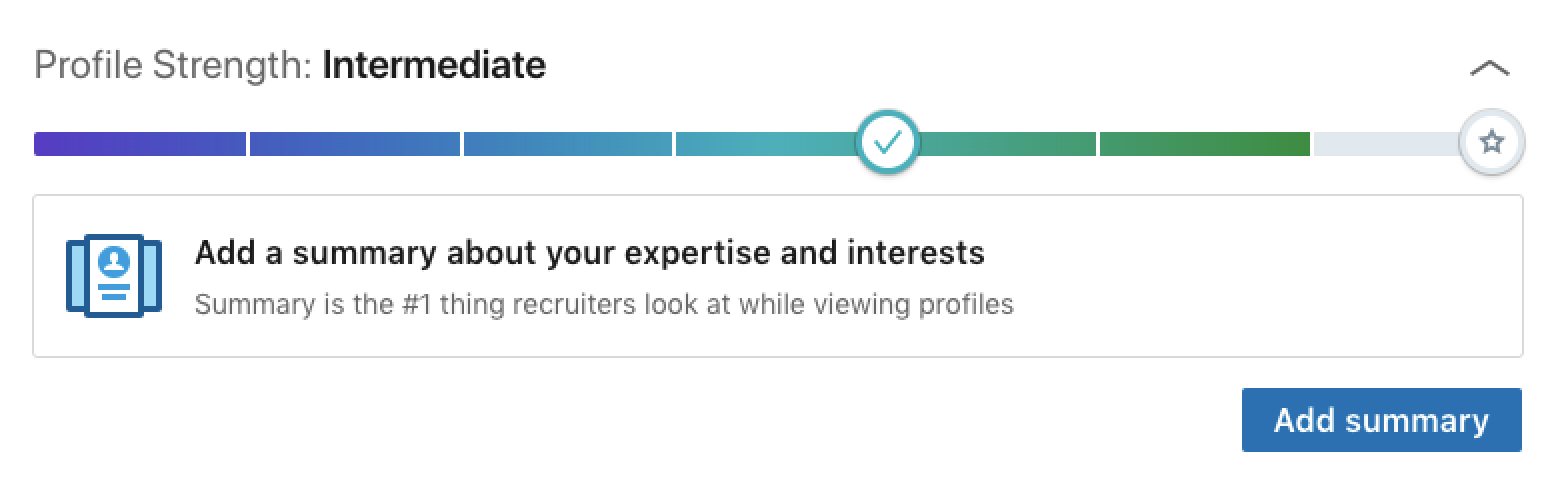
LinkedIn summary importance

LinkedIn asserts that "summary is the #1 thing recruiters look at when viewing profiles." This makes the summary section key to boosting your visibility on the site. If it's the first thing recruiters look at, it might be your only chance to grab their attention and encourage them to stick around for a while and learn more about you.

William Arruda, CEO of Reach Personal Branding, recommends focusing on six key pieces of information in your summary:

  • Significant career accomplishments
  • Your values and passions
  • Your "superpowers" (things you do better than anyone else)
  • Verifiable facts and statistics
  • What makes you different and unique
  • Social proof via quotes and testimonials

Focus on one or more of these pieces of information to tell a story about your career that stands out.

Here are a couple more tips to keep in mind when writing your LinkedIn summary:

  • You get 2,000 characters total for your summary, but only the first three lines display by default. That means you either need to pack the most essential information in up front, or you need to create suspense, encouraging profile viewers to click the "Show more" link.
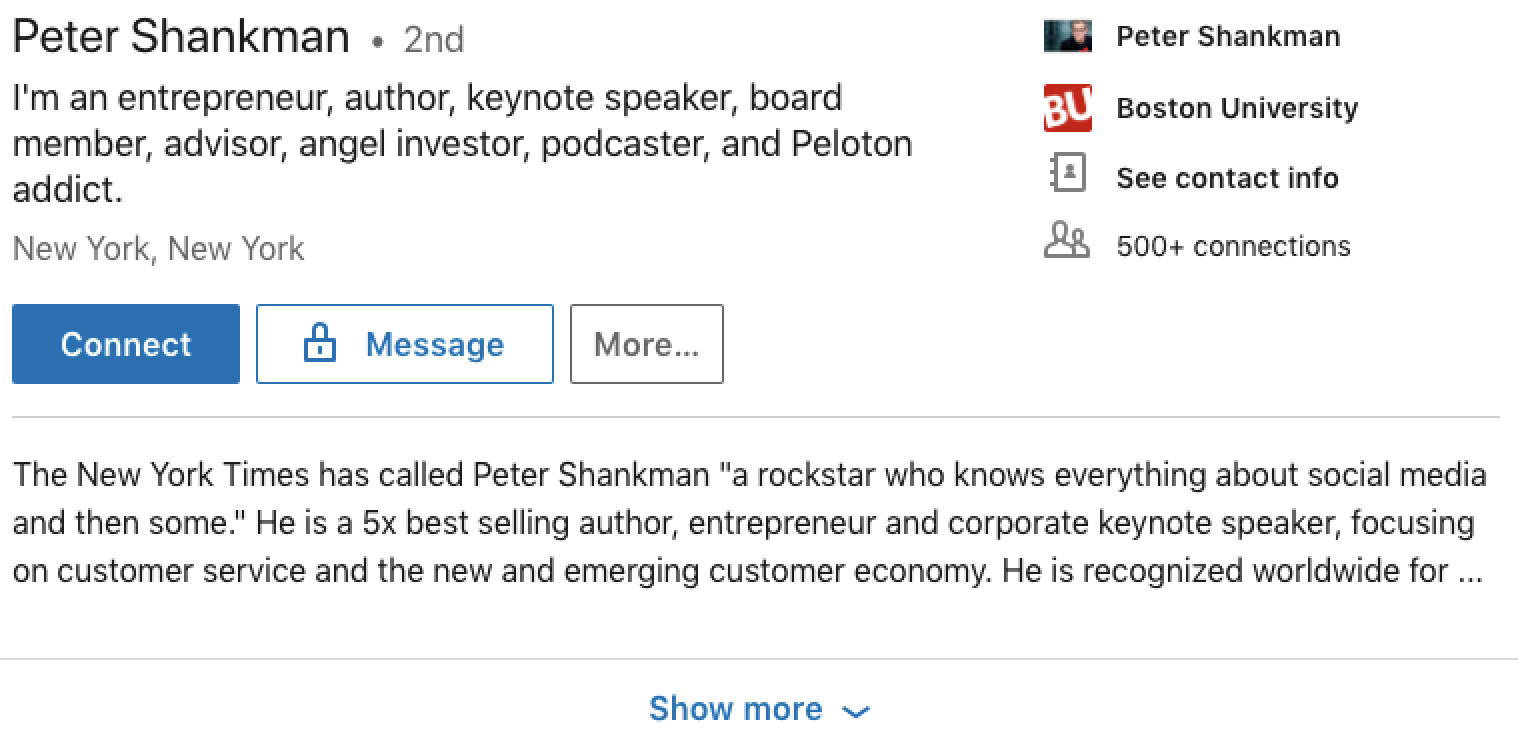
suspenseful LinkedIn summary
Peter Shankman's summary cuts off mid-sentence, encouraging viewers to click to keep reading.
  • Write your summary in the first person ("I am"). Third person ("Jessica is") can be off-putting since people know you wrote it yourself; it's like using the third person when you're asked to "tell me about yourself" in an interview. Second person ("We are") is acceptable if you own a business and are using your LinkedIn profile as an extension of your business's branding.
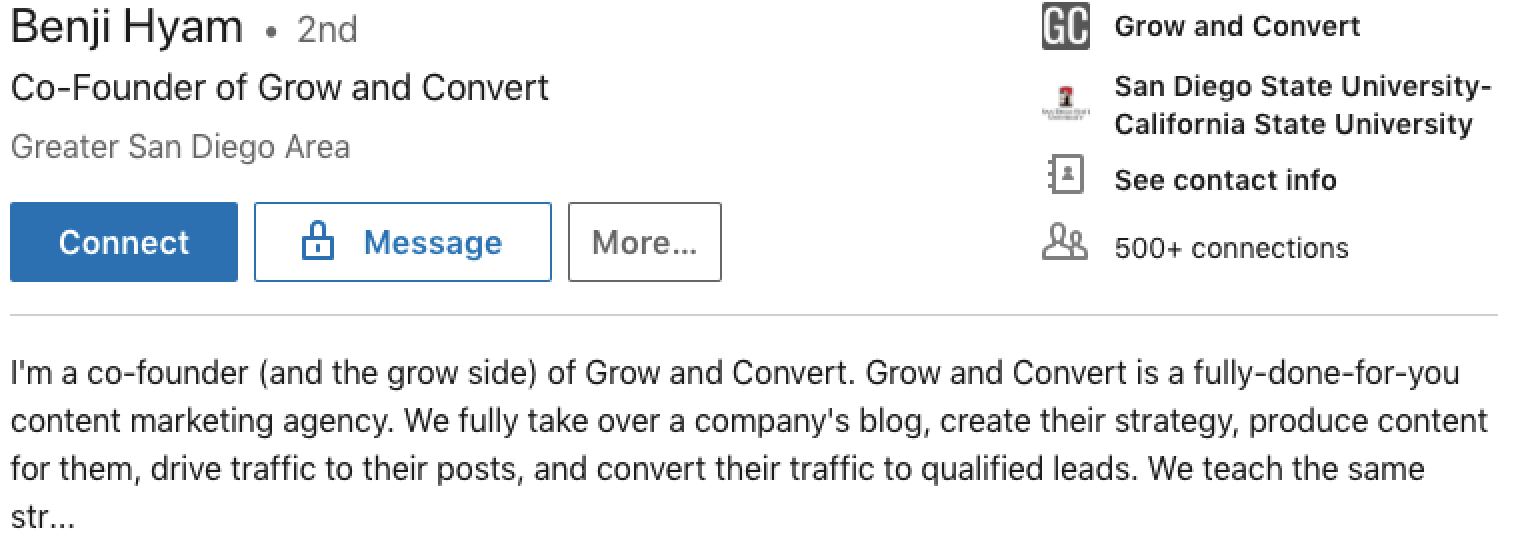
LinkedIn summary section
Second person is acceptable if your LinkedIn profile is an extension of your business's branding.

Think of your summary like a cover letter. Remember, it's designed to provide more context than your resume/experience—and it's a great opportunity to show off your personality.

Contact info
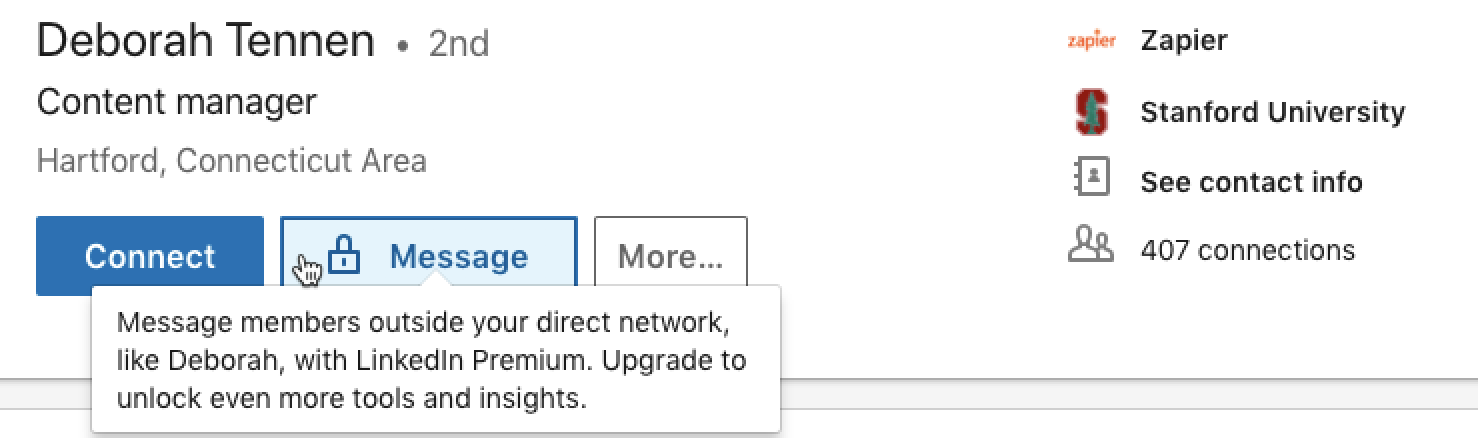
LinkedIn messaging restrictions

There's not a great way for people to contact you directly on LinkedIn. Only people who pay for a Premium LinkedIn subscription can send messages to people they're not already connected to, so if you don't include alternative contact info, you create a hurdle for potential employers.

Zapier's Contributed Content Manager, Deborah Tennen, says she runs into that issue a lot when looking for freelance writers: "Often, people's contact info links back to their LinkedIn profile, which I'm already viewing. To send them a message, I have to connect with them first, but even then LinkedIn only allows you to send 300 characters of text."

To make it easier for potential employers to get in touch with you, make sure to include alternative contact methods on your profile—particularly if you run a service business. LinkedIn lets you add a website, phone number, email address, Twitter handle, and/or instant messaging account (through AIM, Skype, Yahoo Messenger, ICQ, Google Hangouts, or WeChat).

Experience

The experience section of your profile is another key area of focus. With one position listed, you're likely to get up to eight times more profile views. And with more than one position listed, you're profile gets viewed up to 29 more times.

The experience section is the part of your LinkedIn profile that's most like your resume, but it doesn't have to be a straight copy-and-paste exercise. Most recruiters will eventually see both your resume and LinkedIn profile, so the better approach is to have the two complement—rather than replicate—each other. Just make sure that positions and dates are consistent across both.

There are a few different approaches you might take when writing the descriptions for current and past professional experiences:

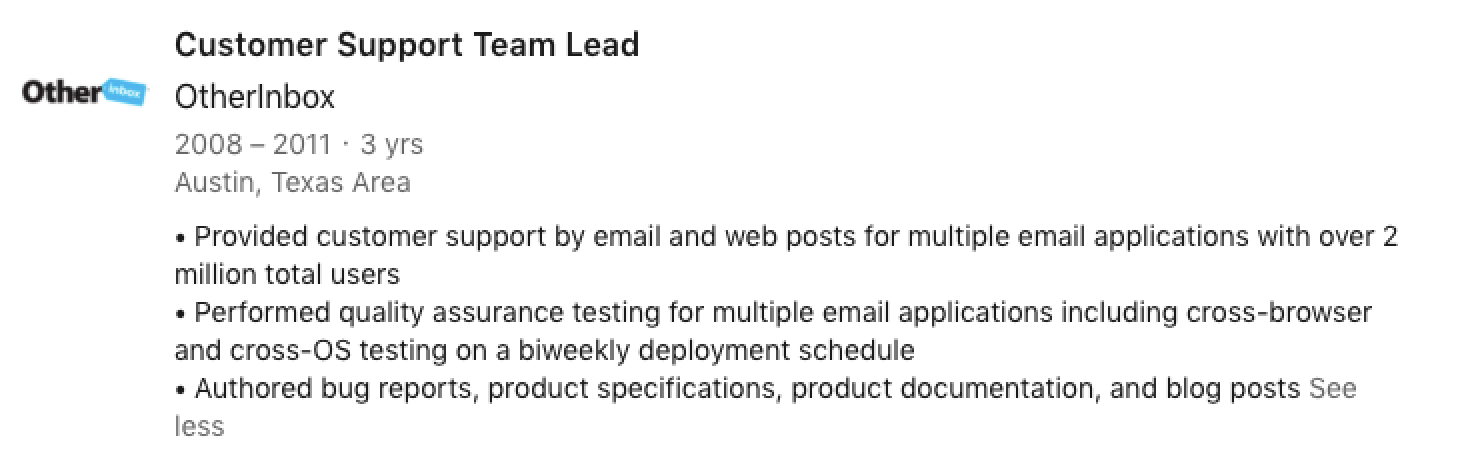
  • List your responsibilities and accomplishments. The most standard approach is a bulleted list of responsibilities and/or accomplishments for each role. Note: LinkedIn doesn't have a WYSIWYG editor that makes it easy to add bullet points, but you can do it by typing Alt + 0149 on a Windows machine, or option + 8 on a Mac.
LinkedIn bulleted responsibilities example
  • Tell a story. If you want your LinkedIn profile to complement the bulleted list of responsibilities on your resume, use the area to tell the story of your experience at a company.
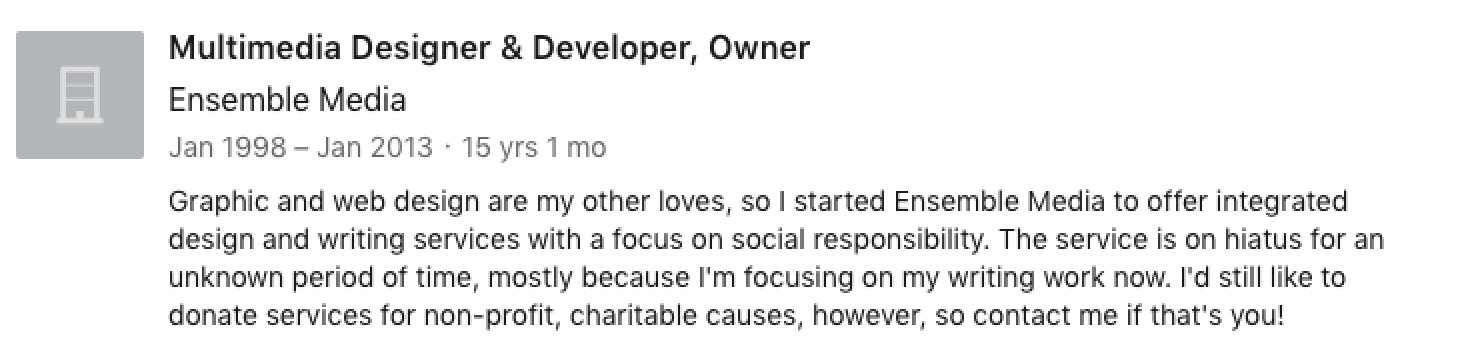
story format LinkedIn experience example
  • Do both. Of course, you're not necessarily relegated to one or the other of these approaches. You can always tell a brief story about the job and follow it up with a bulleted list of responsibilities/accomplishments.
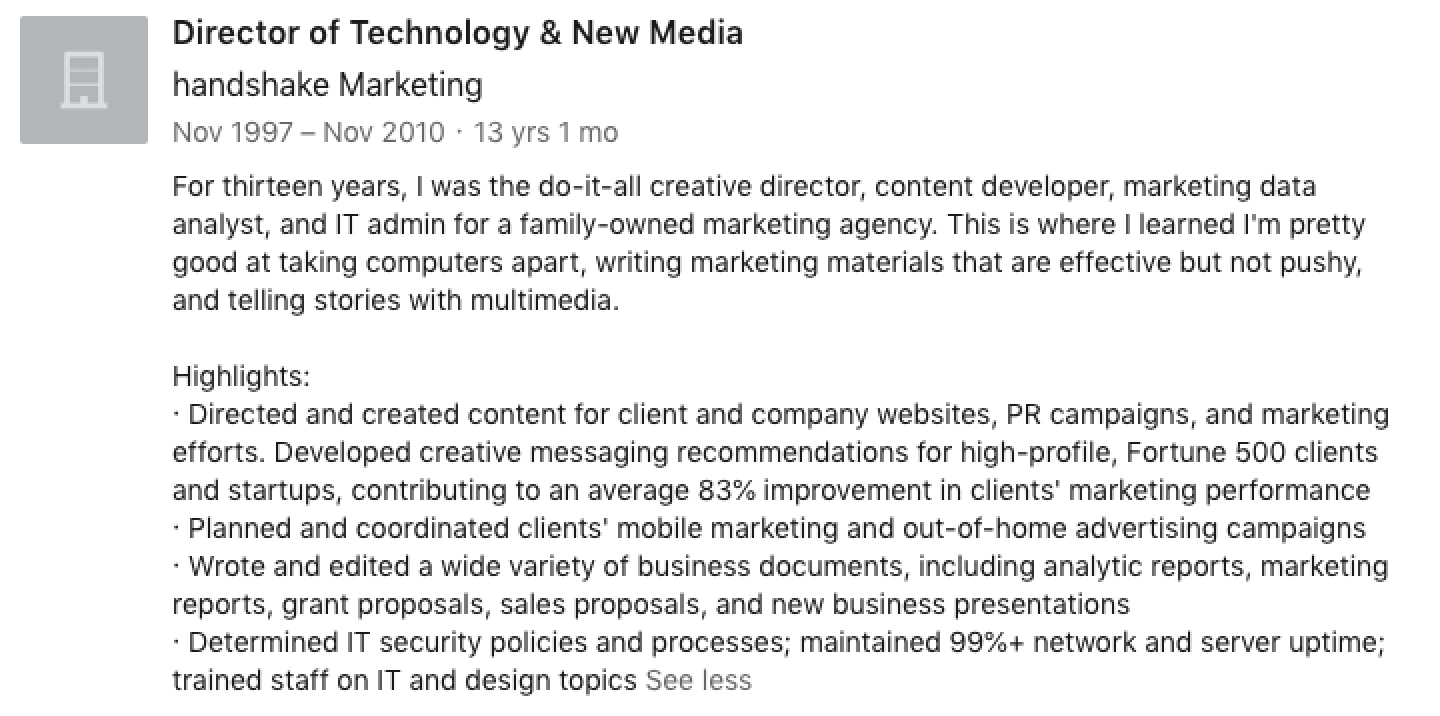
example formatting for LinkedIn job description

If you have a long career history, only include those that are relevant to the job you're looking for. There's no need to include your experience as a fast food cook if you're looking for work as a web developer.

If you're new to an industry and don't have direct job experience, include any relevant internships you participated in or work-study jobs you held.

Education
LinkedIn education section

If the degree you earned isn't relevant to your current career field or interests, you may be tempted to leave your education off of your LinkedIn profile. Don't. Often, recruiters filter candidates by the degrees required for a job, so if your degree isn't on your profile, you won't show up in their search results.

You can include a description of your activities at school as well—things like courses you took, awards you won, and societies you participated in—but it's probably only necessary if you're just out of college and need to use your school activities as evidence of your professional aptitude.

Skills
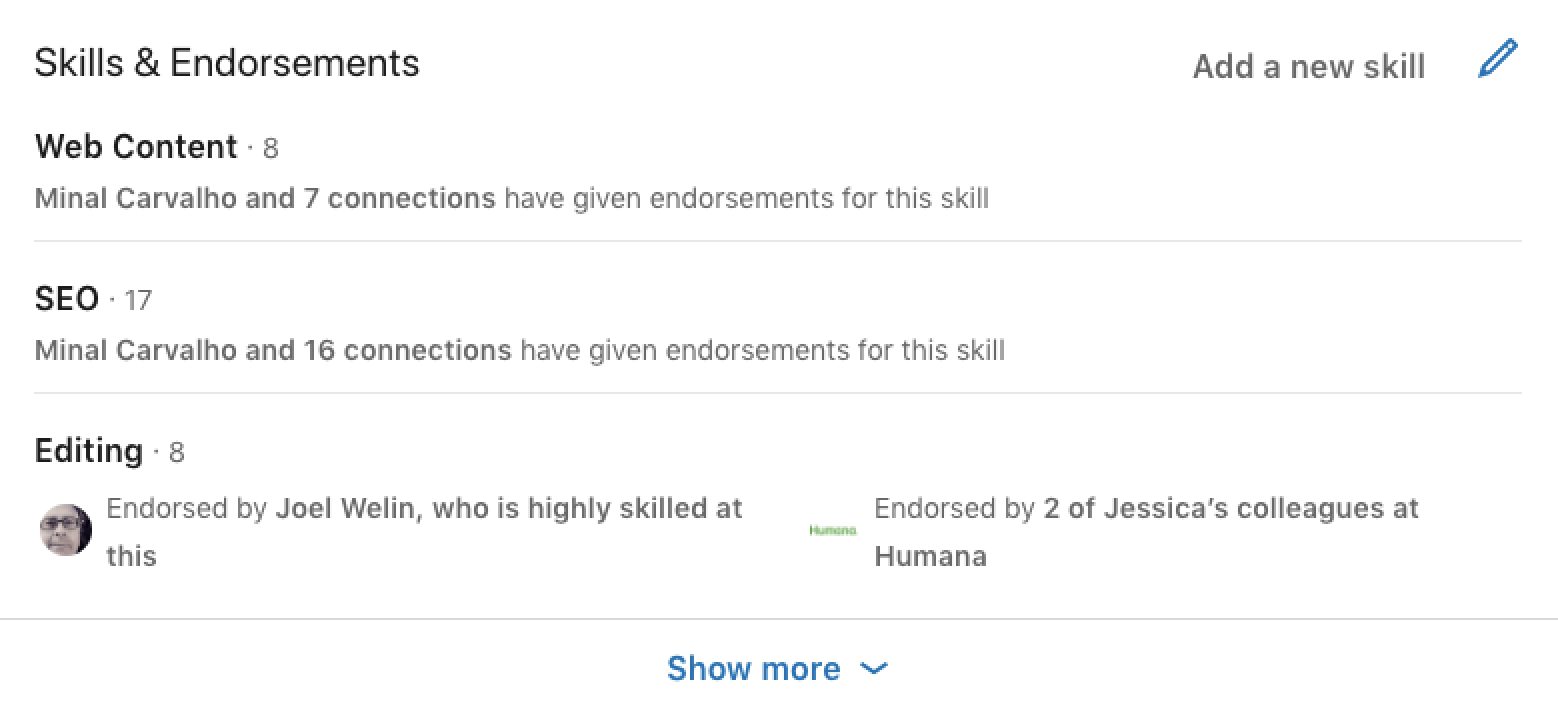
LinkedIn skills and endorsements

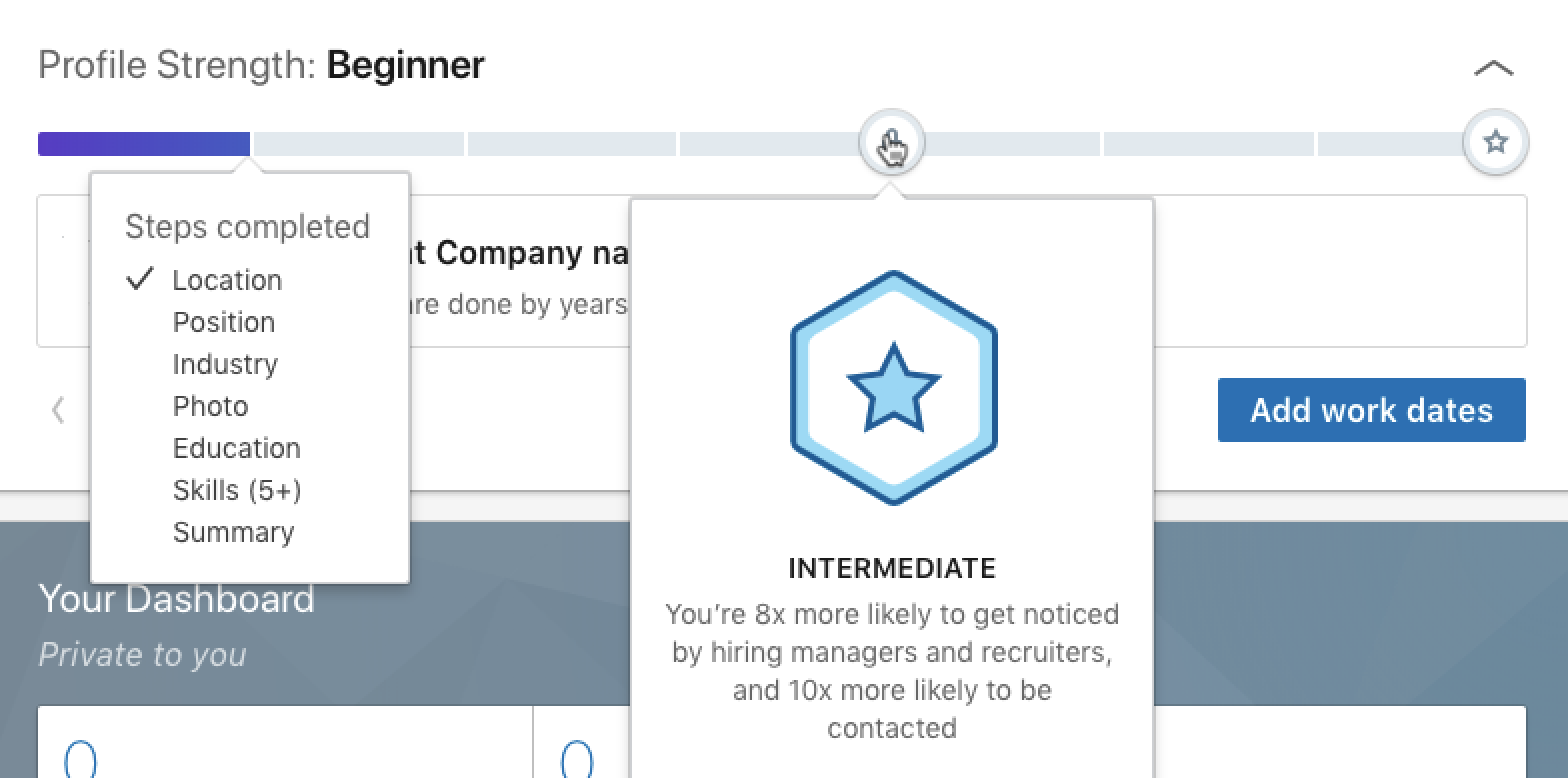
According to LinkedIn, people with at least five skills listed on their profiles get as much as 17 times more profile views and up to 31 times more messages from recruiters.

LinkedIn will recommend skills for you based on your education and experience, so you can easily select those, or search for other skills that aren't auto-recommended. Either way, be sure to choose from LinkedIn's prewritten skills—recruiters use these to filter candidates—unless there's no matching prewritten skill.

Once you have skills listed, you need to get endorsements for those skills. Studies have shown that having endorsements for your skills significantly improves your search rankings.

Ask your connections to endorse you for your skills directly (see an example post I sent out recently below). Or take some time to endorse others for their skills, and they may reciprocate without you having to ask.
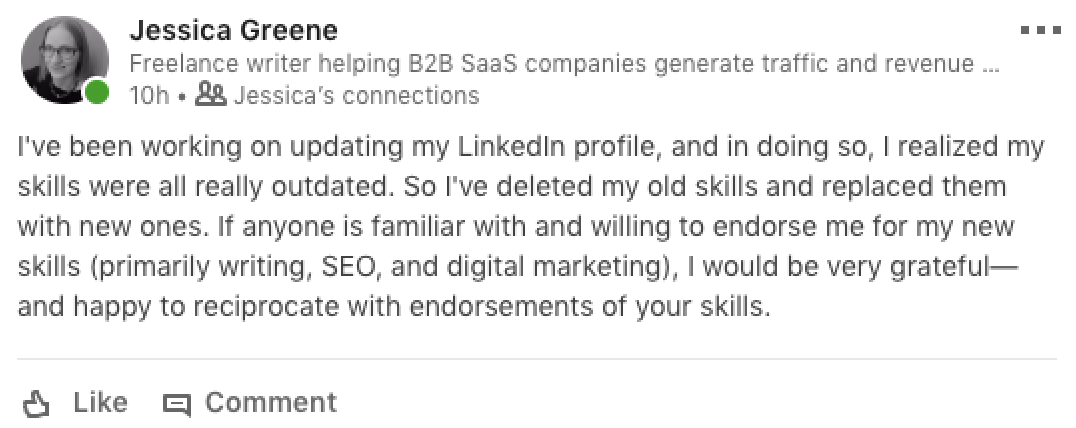
Request for skill endorsements

Finally, make sure you have your endorsement settings set to Yes to get LinkedIn to automatically prompt your connections to endorse you for your skills. To check/edit these settings, go into the skills editing view, click Adjust endorsement settings, and toggle the switches for all of the options to Yes.

With your skills set and endorsed, your basic LinkedIn profile is complete. But if you want to do more to boost your visibility and stand out, read on for more advanced LinkedIn profile tips.

Improving Your Visibility in LinkedIn Search

Most recruiters start the process of mining LinkedIn for potential candidates with a search. The better you rank in LinkedIn search results, the more likely it is that potential employers or clients will find your profile and get in touch.

Customize your headline
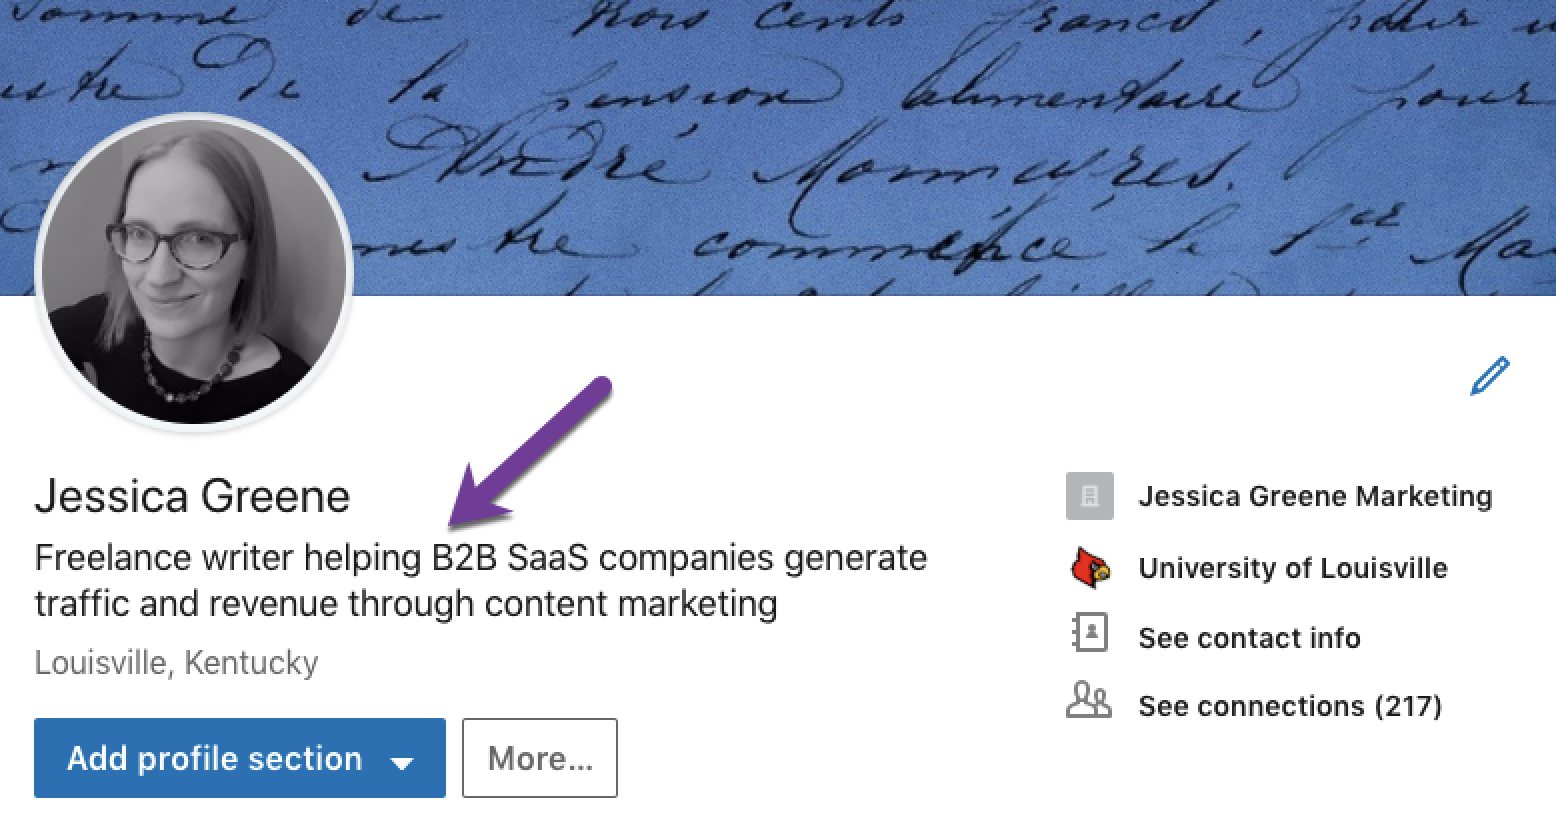
LinkedIn headline

By default, LinkedIn uses your existing job title as your profile headline. However, since your headline is often the only piece of information other than your name and location that appears in search results, you're better off writing an enticing headline that encourages recruiters to click through to see your whole profile.

Plus, a custom headline differentiates you from the millions of other "Marketing Manager," "Product Manager," and "Software Developer" profiles on LinkedIn.

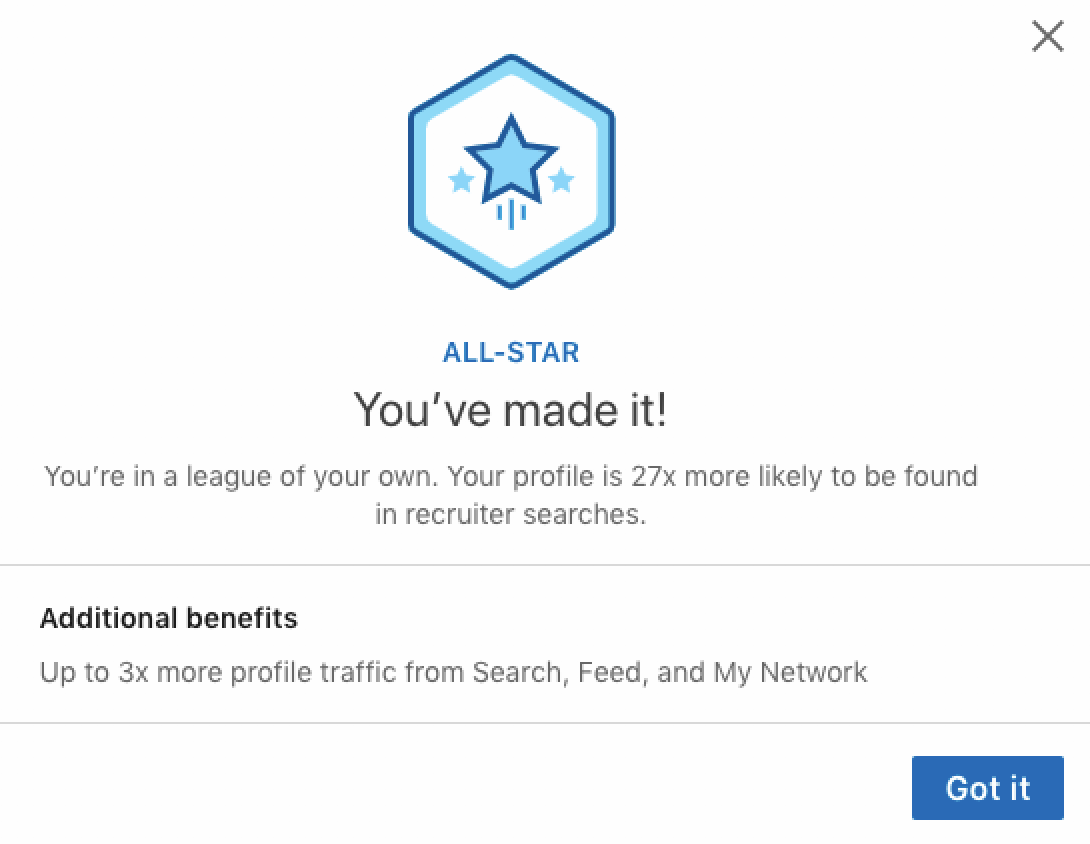
Customizing your headline also gets you to All-Star status (assuming you've completed all of the steps listed in the last section), which, according to LinkedIn, makes your profile 27 times more likely to appear in recruiter searches.
LinkedIn all-star status
Getting to All-Star status makes your profile 27 times more likely to be discovered in search.

You can add up to 120 characters in the headline field, but keep in mind that only approximately 80 appear in the search results on desktop—and approximately 65 on mobile—before getting truncated, so keep the most important information at the beginning of your headline.

There are a few different approaches you can take when writing a headline:

  • [Role] helping [who] do [what]. Start with your job title, explain what types of companies you work for/with, and describe what you do for those companies. Sure, it's formulaic, but that doesn't mean it has to be boring. See the example below.
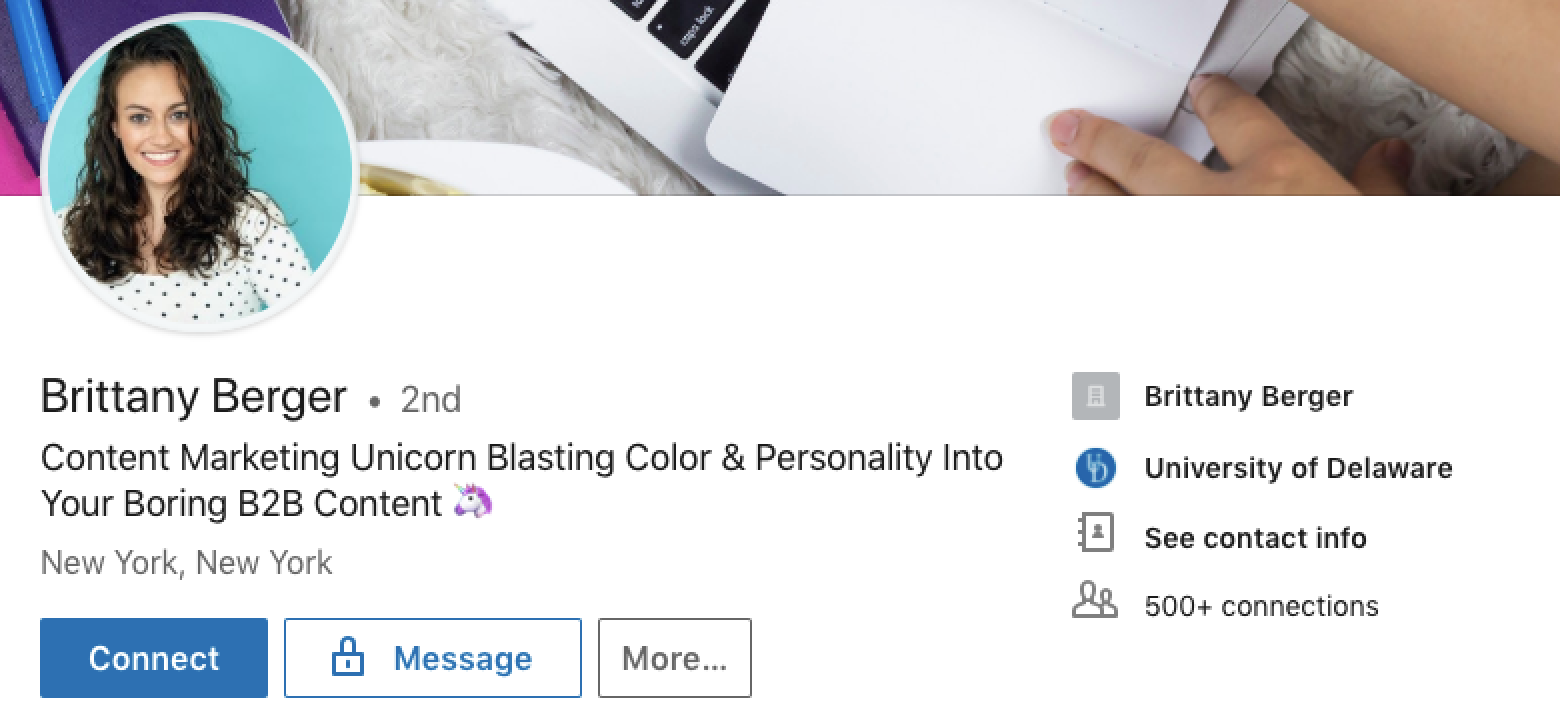
fun LinkedIn headline example
  • List your focus area or credentials. Another popular approach is to list the type of work you do, awards you've received, or your biggest accomplishments, and separate them by commas, pipes, or bullets.

LinkedIn headline example
  • Combine your focus and credentials. If you're succinct, you can fit the suggestions from both of the above bullet points—your focus and credentials—into a single summary.

succinct LinkedIn profile headline
  • Tell a very brief story. Your headline is another place you can let your personality shine, but you'll need to do so in a limited space. Here's a great example.
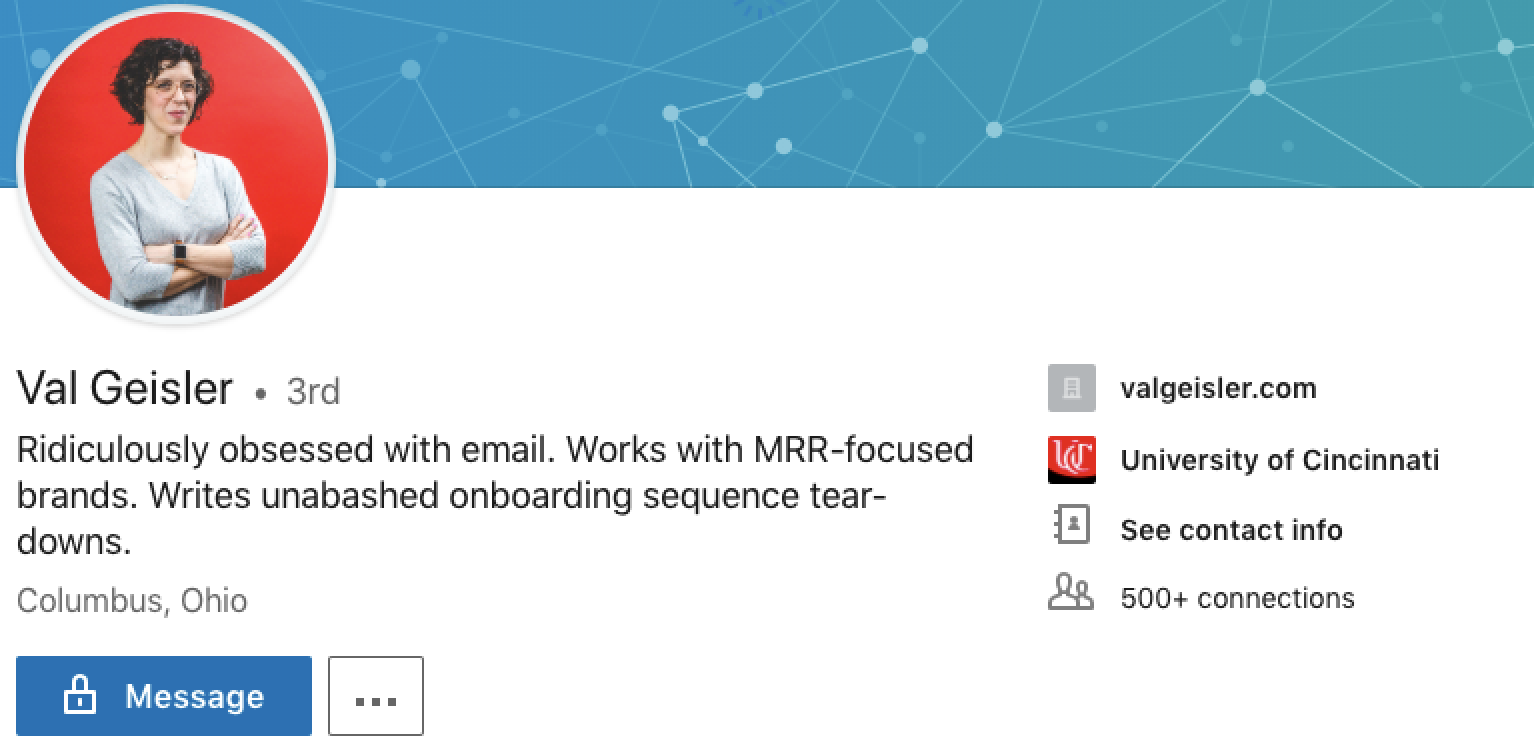
unique LinkedIn headline example

Include important keywords

Recruiters often search for candidates using job titles and other related keywords, so you'll want to make sure you have relevant keywords listed in different sections of your profile like your headline, summary, and job descriptions.

Include words and phrases you think recruiters might search for when they're looking for someone with your skills and experience, but make sure not to stuff keywords in unnaturally. Remember, your goal goes beyond getting someone to find your profile in search; to be successful, you need them to actually be impressed with your profile and contact you.

If you're not sure what keywords you need to include, use a tool like Jobscan to get recommendations. Upload a PDF of your LinkedIn profile to the site, paste three or more job descriptions for jobs you'd like to have, and Jobscan produces a report of recommended changes.
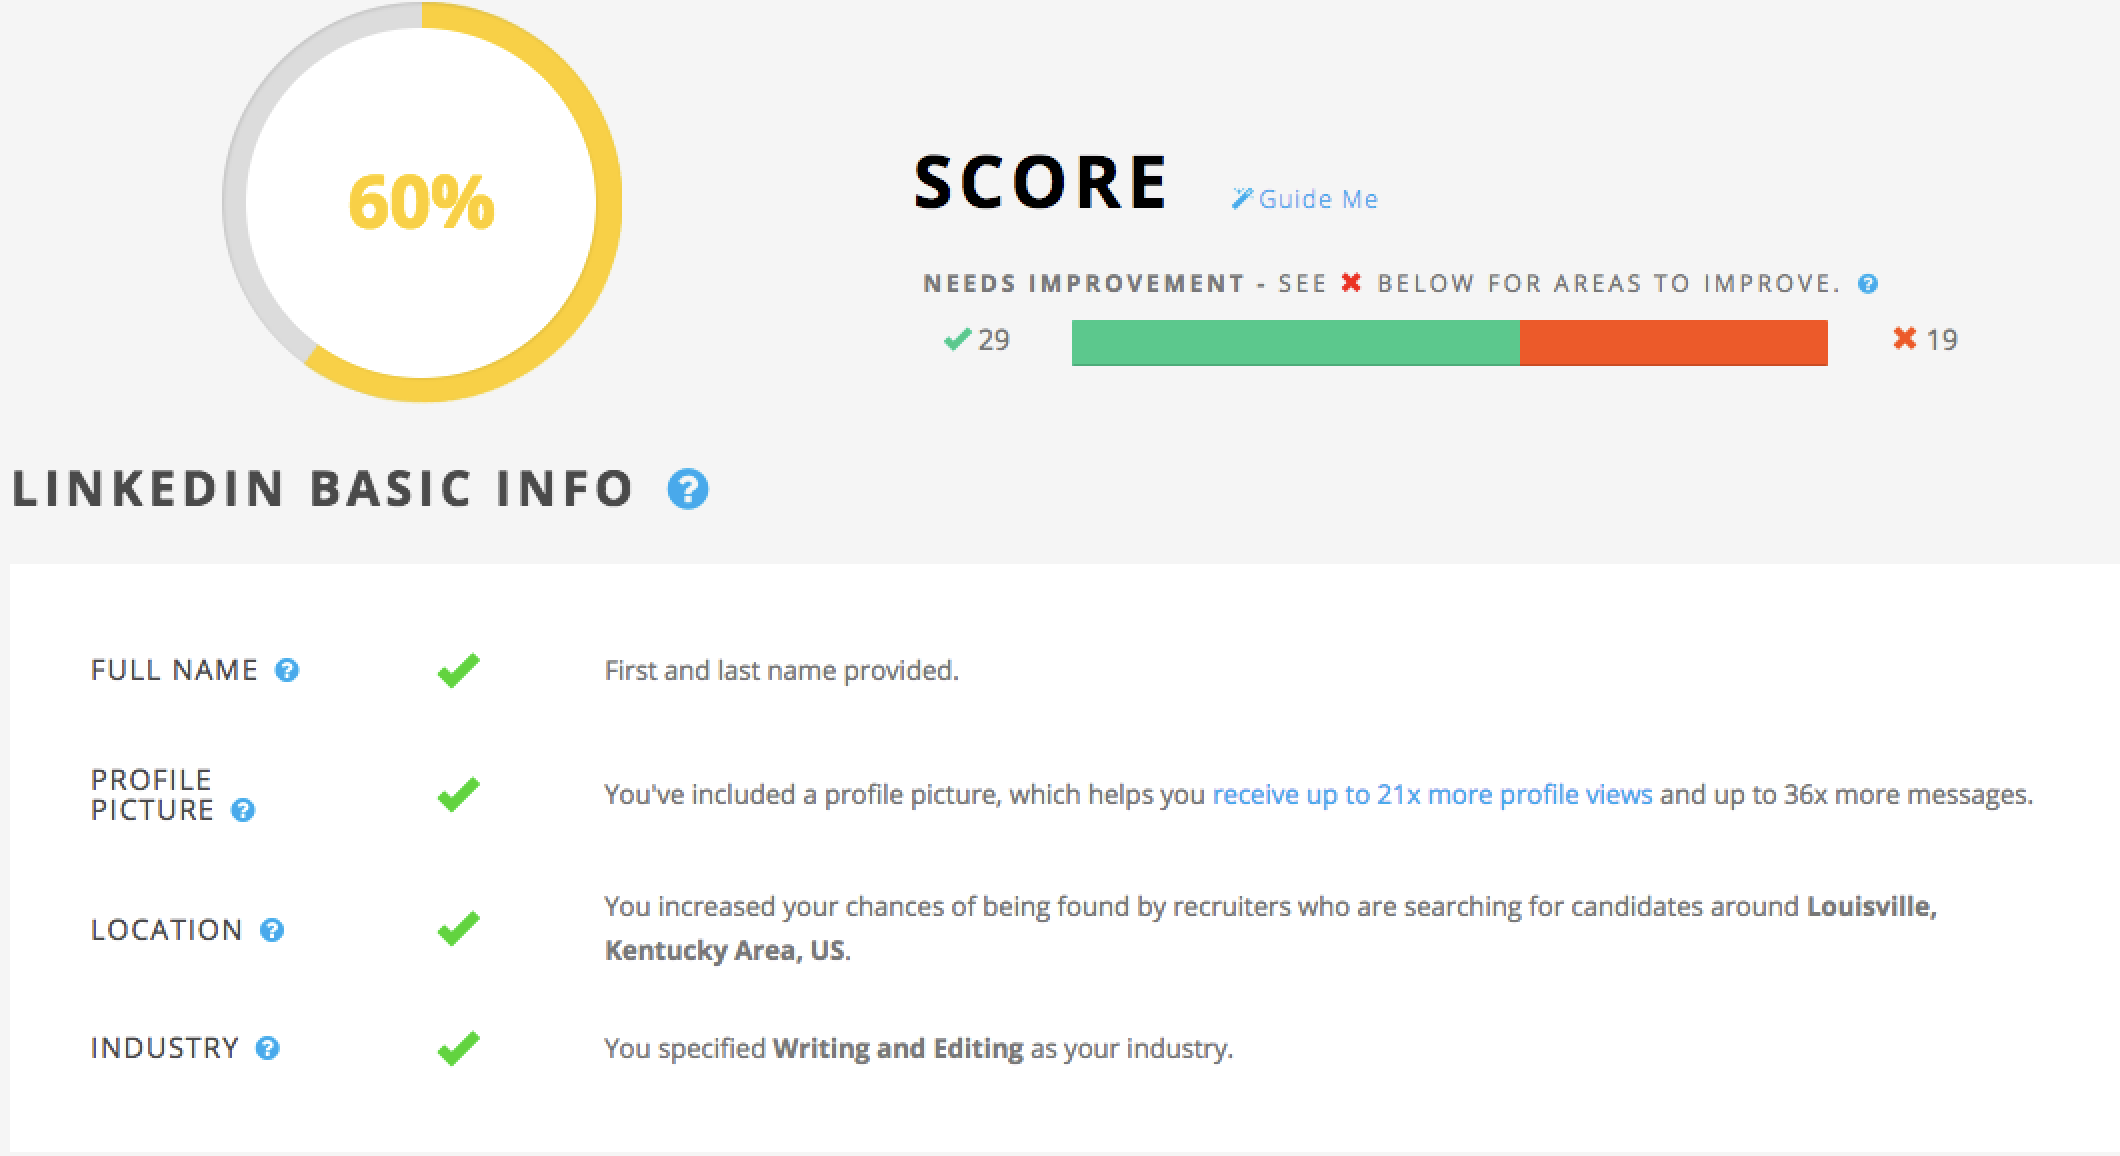
Jobscan LinkedIn report

Jobscan Price: From $49.95/month for the Monthly plan that includes unlimited LinkedIn profile scans.

Stay active on LinkedIn

LinkedIn prioritizes people who are active on the network, so you can easily get more profile views by using the site like you would Facebook or Twitter.

To increase your LinkedIn activity:

  • Connect with others. On LinkedIn's My Network tab, you'll find recommendations for people you might want to connect with. You can also sync LinkedIn with your email contacts to easily find people you know on the site.

  • Join groups. Type one of your interests into LinkedIn's search bar and search. Then, on the results page, filter your results by groups. Once you find a group you want to join, request an invite, then take time to add new posts to the group and comment on posts from others.
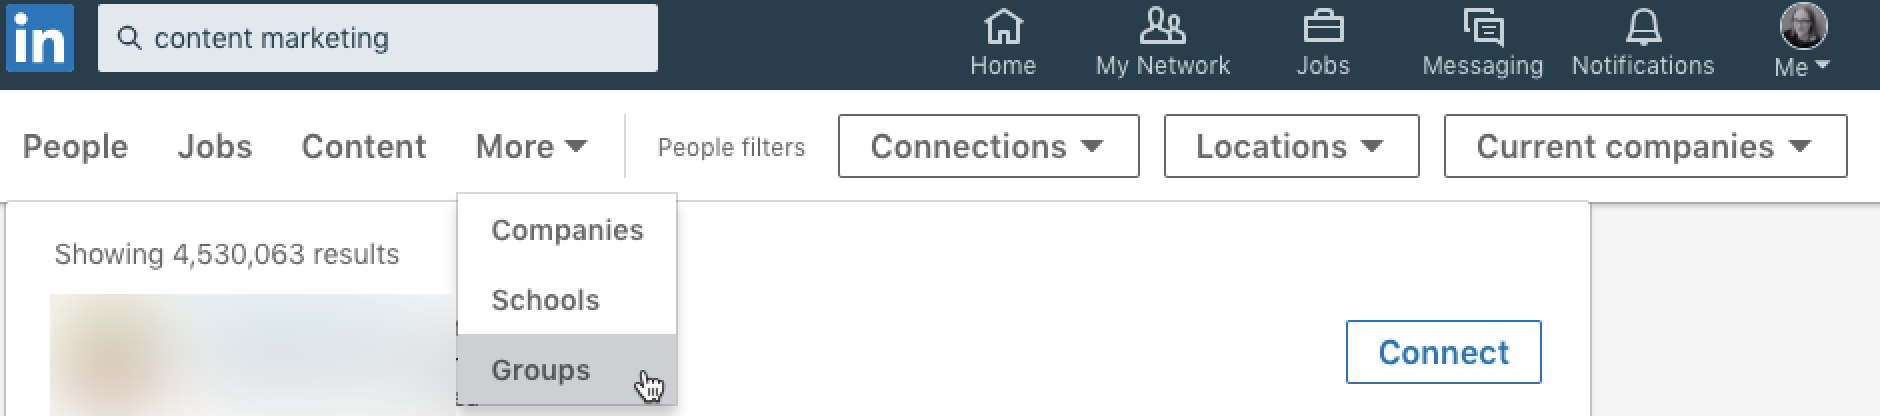
search for groups on LinkedIn
  • Post and comment on updates. You can post an update to LinkedIn like you would any other social media site. Share links to things you've read/seen that you like. Post career lessons or stories. Ask questions, and comment on posts from people in your network. You can even create updates automatically. Use the following Zaps (automated workflows on Zapier) to post an update to LinkedIn when you publish a new blog post, or to repost updates from another social media site to LinkedIn:
  • Write articles on the platform. You can even write entire blog posts on LinkedIn, and it's a great way to boost your visibility on the site. To publish on LinkedIn, click the Write an article button below the update box on your LinkedIn homepage.
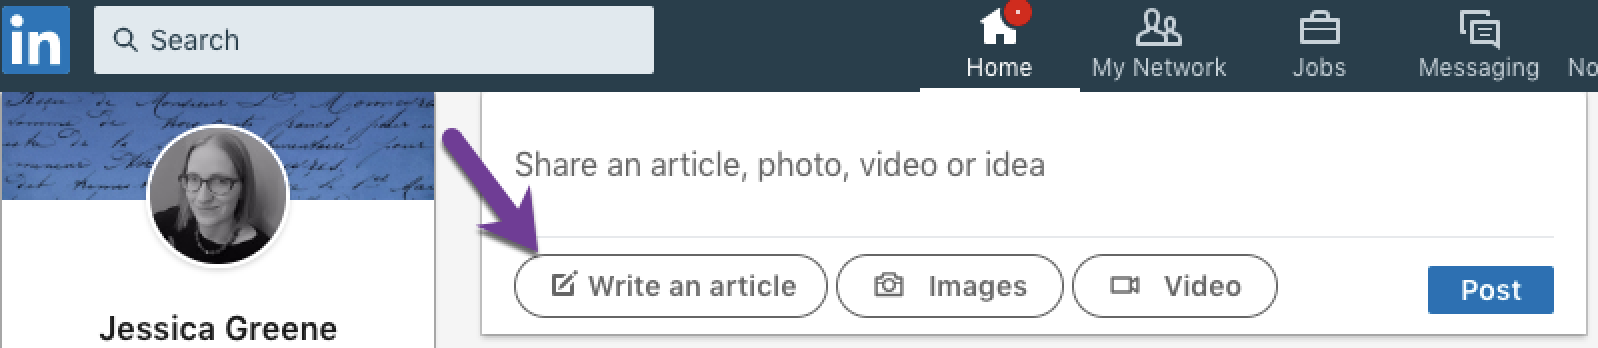
Link to write an article on LinkedIn

Adding Flair to Your LinkedIn Profile

If you want to take your LinkedIn profile to the next level, there are a few final customizations you can make to help your profile stand out:

Add a cover image

A cover image is completely optional, but it's another opportunity to create custom branding for yourself on the site (see the example below). When creating your cover image, remember that it needs to be 1,584x396 pixels (4:1 ratio).
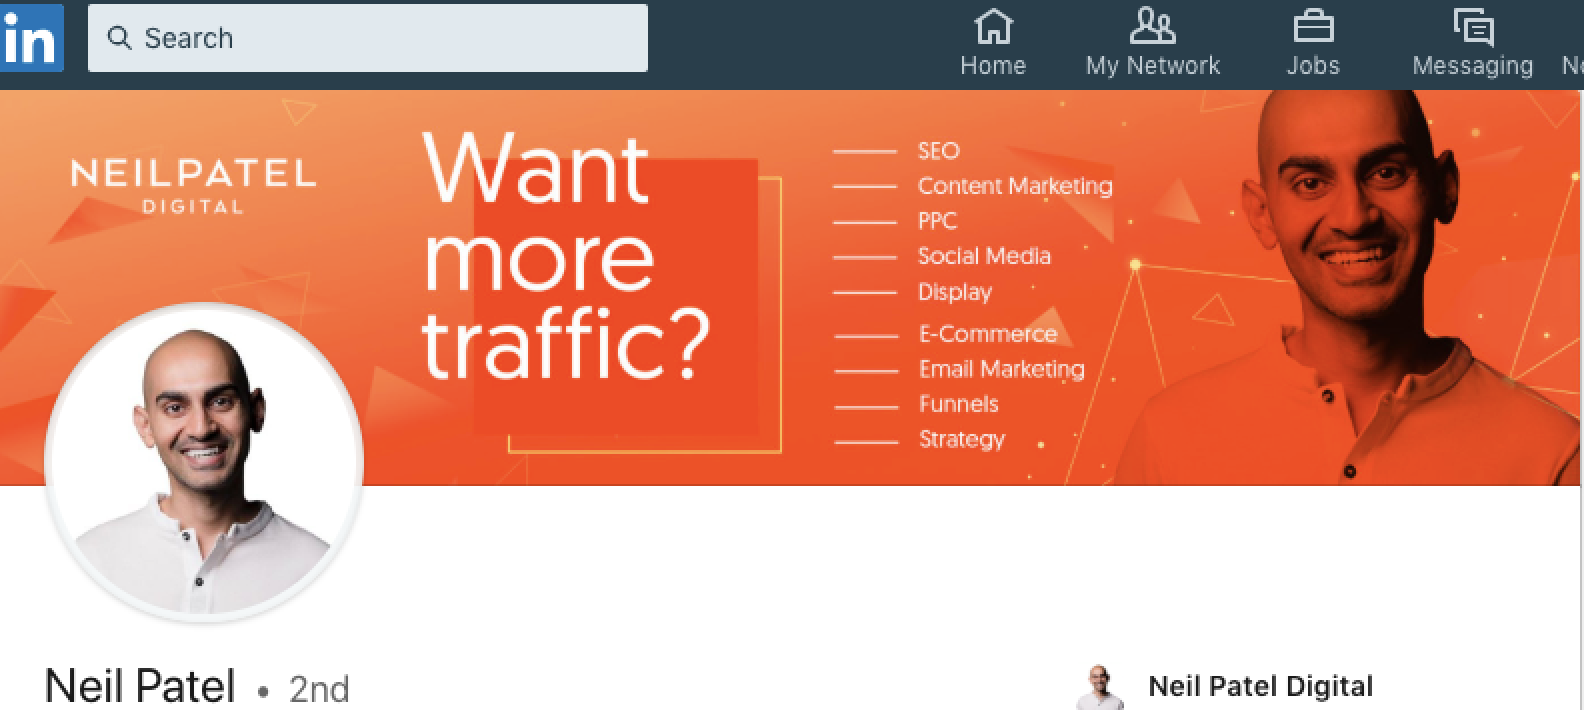
LinkedIn custom cover image
Your LinkedIn cover image is another opportunity to create a personal brand on the site.

Create a vanity URL

If you want to add the URL of your LinkedIn profile to a business card—or just create one that's easy to remember—you can customize your profile's URL. At the top-right corner of the site, select Edit public profile & URL. From there, you can set the portion of the URL that appears after www.linkedin.com/in/ to anything you want, assuming what you choose isn't already in use by another LinkedIn member.
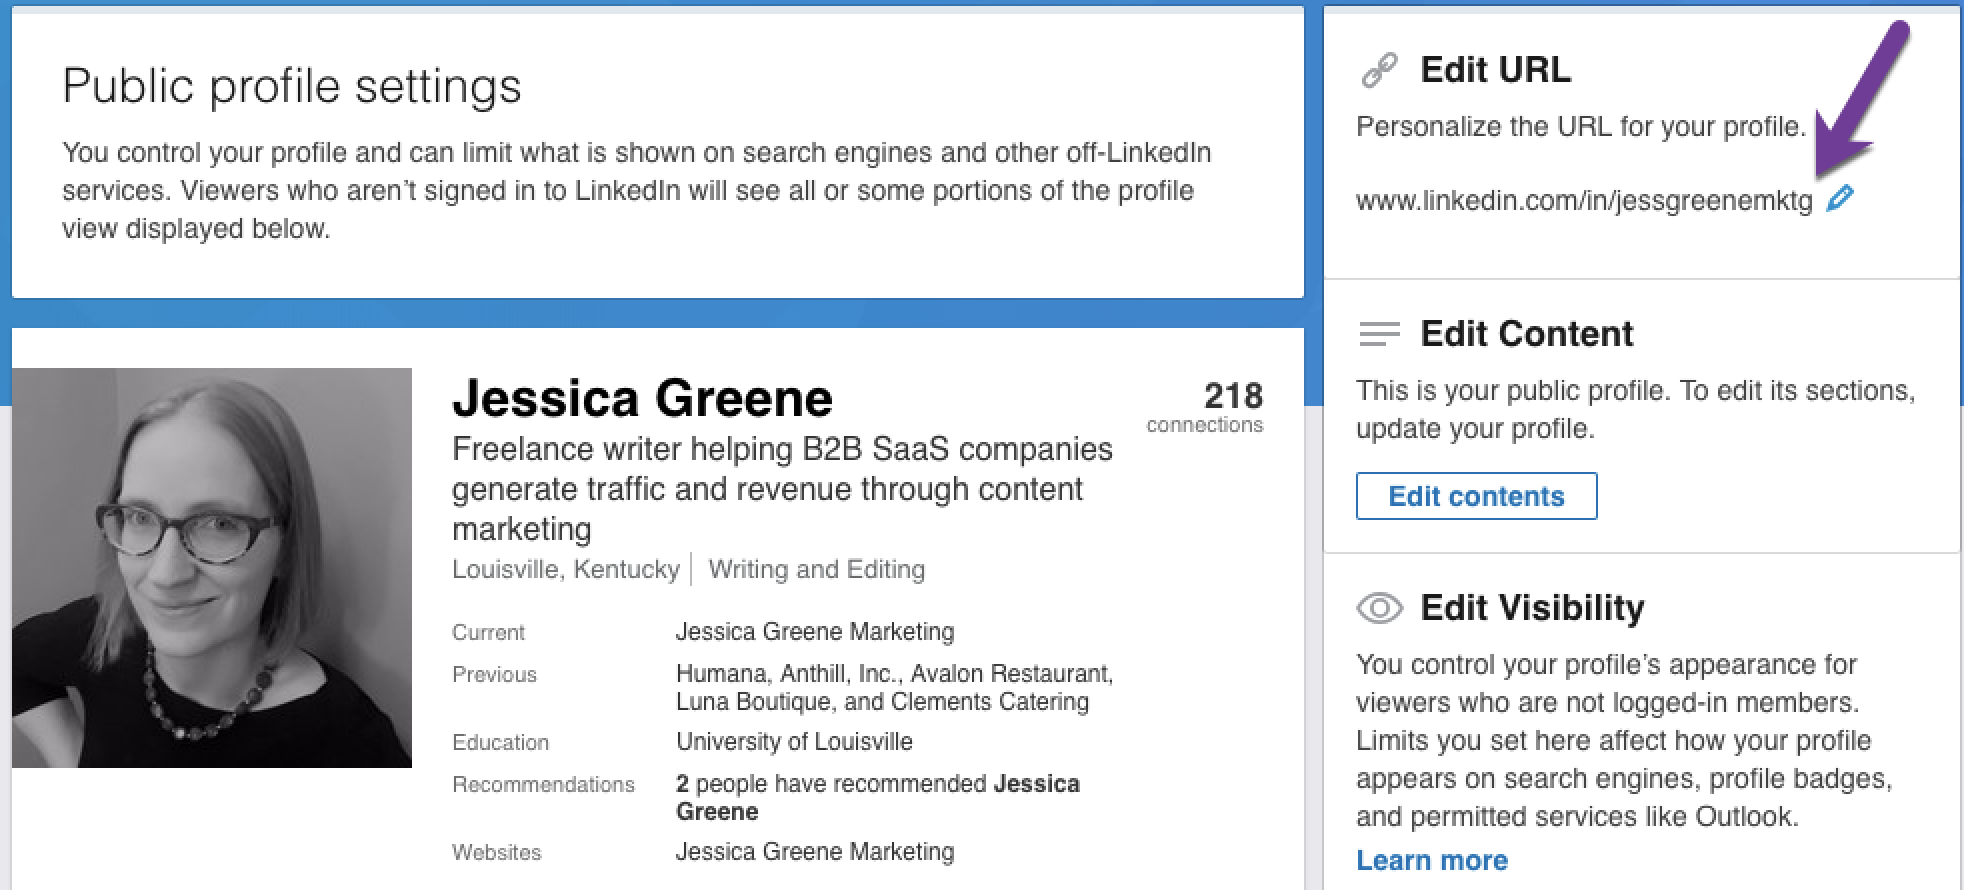
custom LinkedIn URL

Add media

If you have any digital artifacts that highlight your work—articles, videos, slideshows, images, graphics, etc.—there are a variety of places where you can add these to your profile, including in your summary section and under individual jobs.
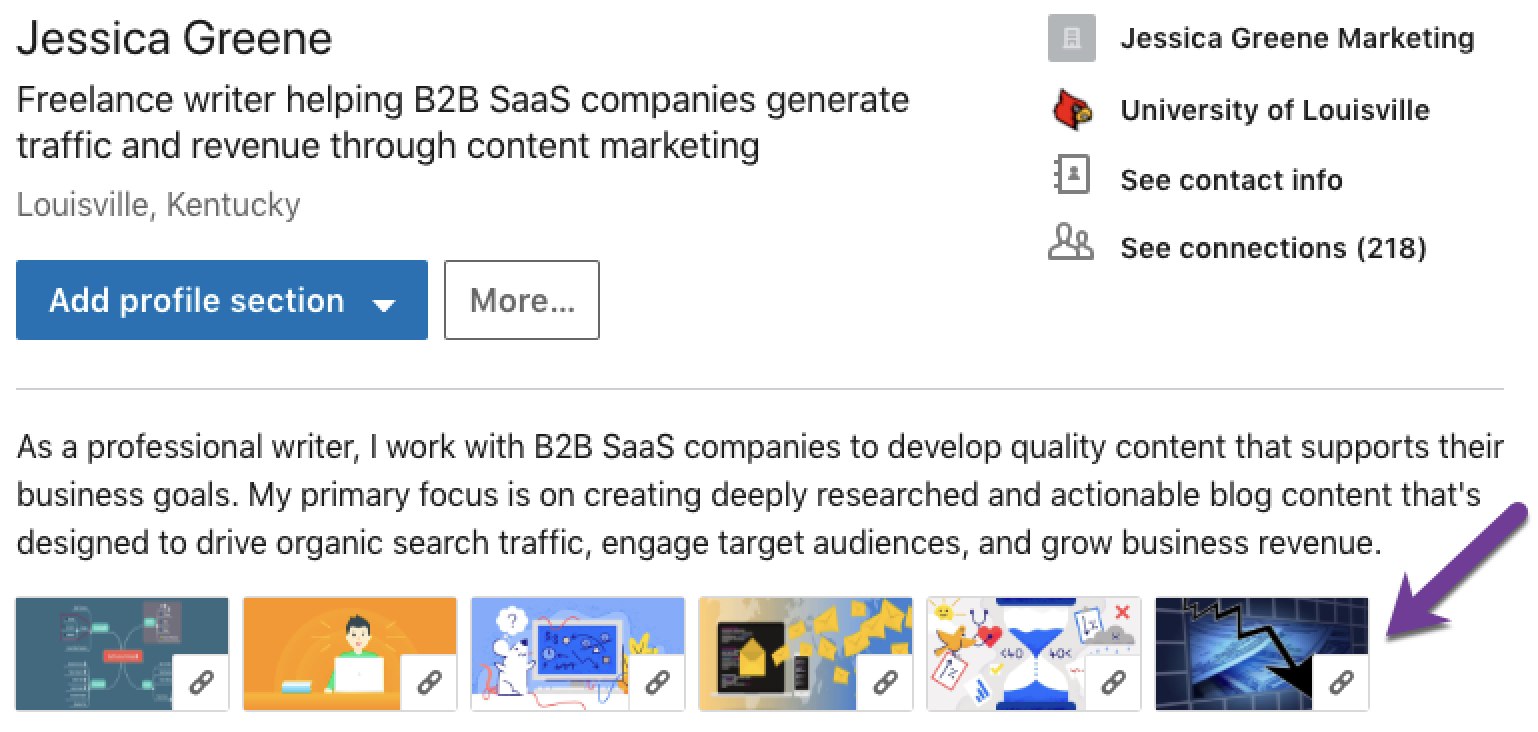
adding media to a LinkedIn profile

Solicit recommendations

Recommendations from clients, managers, and peers create social proof that back up the claims you make in your profile. You can ask a connection to write a recommendation for you directly in LinkedIn, or consider writing recommendations for others you've worked with in hopes that they'll return the favor.
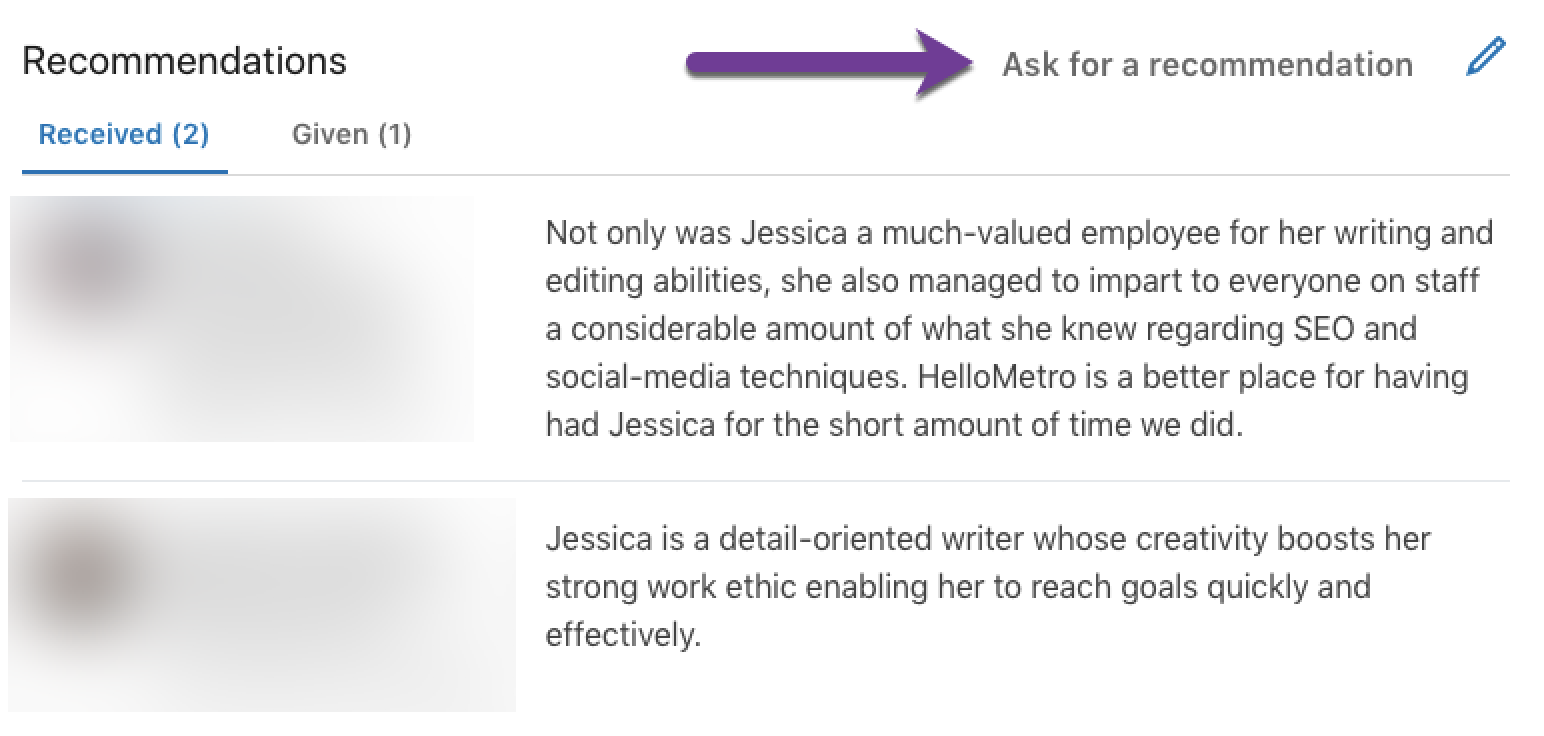
request LinkedIn recommendations

Finally, fill out any other relevant profile sections. LinkedIn allows you to add coursework, certifications, volunteer experience, languages, patents, awards, and more. These sections are completely optional, but if you have something relevant to mention, add it.

Finalizing Your Profile

After you finish creating/updating your LinkedIn profile, there are a few more steps to consider to finalize it, let people know you're looking for work, and/or remind yourself to update it regularly:

Let recruiters know you're looking for work

When you view your own LinkedIn profile, you'll see a private dashboard that displays only to you. On the dashboard, there's an option to "Let recruiters know you're open." If you're actively looking for work, click this section and turn this option on. On the next screen, you can write a note for recruiters, specify what type of work you're looking for (full-time, contract, etc.), and add locations you're willing to work in.
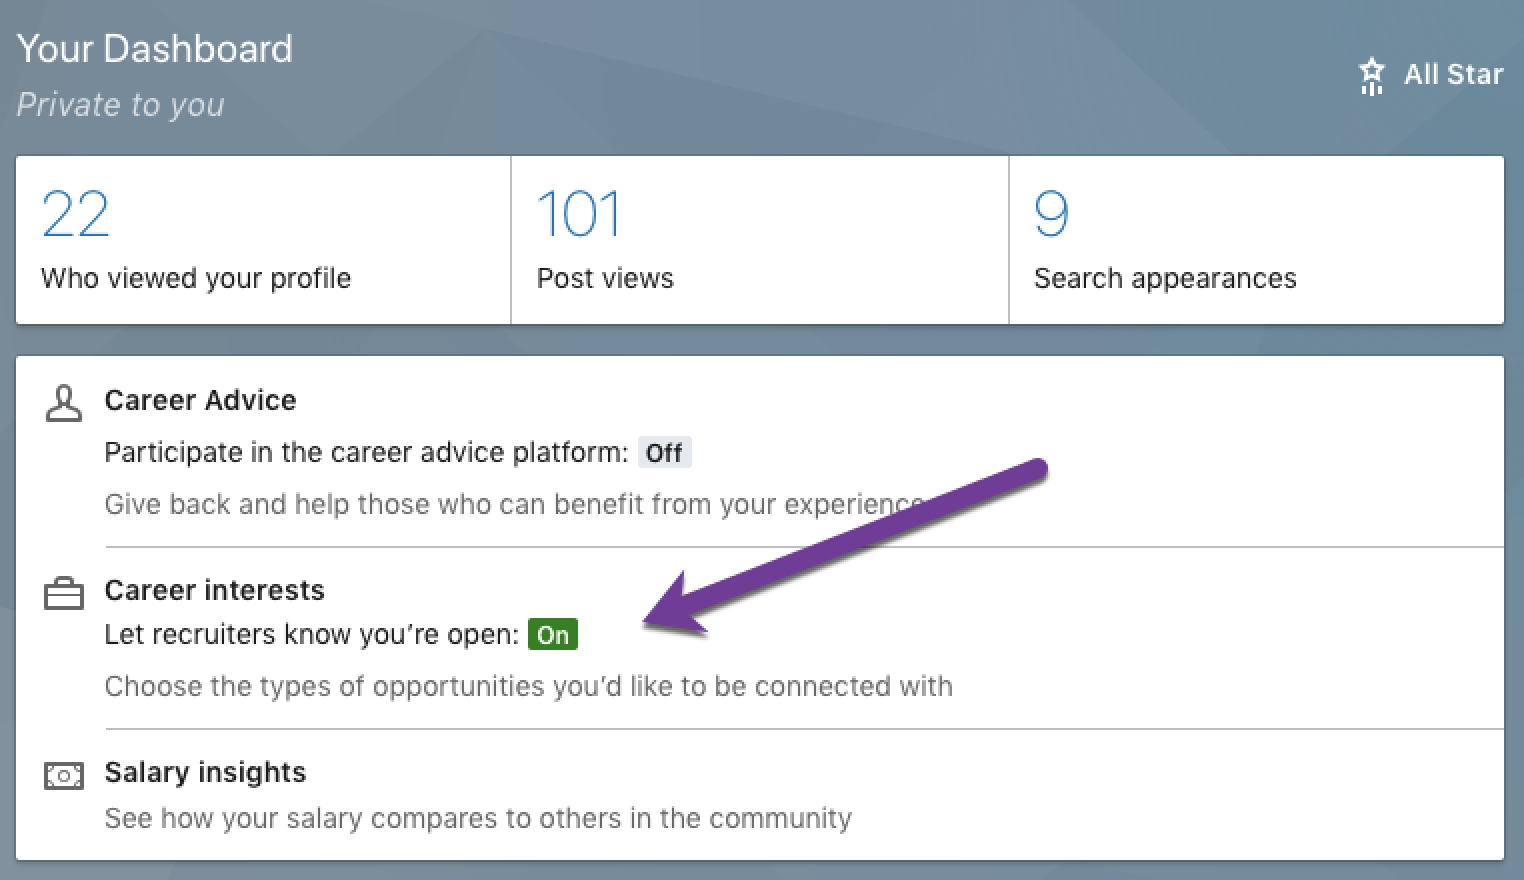
LinkedIn private dashboard
Toggle the career interests option to On to let recruiters know you're open to offers.

Customize your privacy settings

If there are certain sections of your profile that you only want your existing connections or logged-in LinkedIn members to see, customize your privacy settings. Click Edit public profile & URL at the top-right corner of the site, then customize your settings by toggling options on and off in the sidebar on the right side of the screen.

Set reminders for regular profile updates

It's important to keep your LinkedIn profile fresh, and it's easier to update it regularly than to wait until you're looking for work—and then trying to remember months' or years' worth of accomplishments. Use one of the following Zaps to have Zapier send a reminder to your preferred to-do app when it's time to update your profile:


We tend to only think of LinkedIn when we're actively looking for work, but there's value in keeping your profile fresh and staying active on the site even when you're just passively looking—or not looking at all.

By following these tips and keeping your LinkedIn profile up to date, you'll be able to take advantage of the site for more than job hunting, using it to grow your network, expand your connections, and build your business or personal brand.


source https://zapier.com/blog/linkedin-profile-tips/

Friday, 16 November 2018

Behind the Scenes of Pizza to the Polls

No one likes standing in line for hours, much less for a few minutes. When you're at the grocery store or the bank, you do it because you have to. But when it comes to voting, long lines can be the hurdle that prevents people from taking the action that truly matters and can make a difference for us all.

So we created Pizza to the Polls.

Run by three members of the Zapier team—Noah Manger, Scott Riker Duncombe, and myself—as a side project in our spare time, Pizza to the Polls has delivered over 10,000 pizzas to 568 different polling locations and collected over $400,000 in total donations. And it basically runs itself.

What Is Pizza to the Polls?

"The feedback was immediate and immense: It fortified hungry voters in line, cheered up beleaguered poll workers, and put followers and friends to work finding other voters in need so we could send in more ‘za."

Pizza to the Polls is a non-partisan non-profit organization founded around a singular mission: make in-person voting suck a little bit less by giving pizza to the people who are taking that sometimes inconvenient step of going out to vote.

We came up with the idea during the weekend before the United States 2016 Presidential election in response to unprecedented long lines across the US at early voting locations. In a few short hours, we came up with the name, a Twitter handle, and a website to collect donations. Pizza to the Polls was born.

In 2016, we took in reports of long lines via Twitter and submissions to a form on our website, and then we sent out pizza deliveries funded by donations.

The feedback was immediate and immense: It fortified hungry voters in line, cheered up beleaguered poll workers, and put followers and friends to work finding other voters in need so we could send in more ‘za.

What started out small in a few polling places in Ohio, Florida, and Illinois quickly ballooned into a nationwide effort. By the morning of Election Day, we had raised $10,000 and faced the seemingly impossible task of spending it all before the polls closed. As the day progressed, we were bringing in donations faster than we could place orders, so we recruited and trained a team of over 20 volunteers from across the US, England, and Australia to order and coordinate the delivery of 2,368 pizzas to 128 polling places across 24 states. By the time the dust had settled, we had raised over $43,000 and over 25,000 slices of pizza had been delivered.

How We Made Pizza to the Polls Work Better in 2018

"We still had about 20 volunteers, but with automation, we went from sending about three pizzas per minute to 13 per minute—- spending nearly a quarter million dollars on pizza before the last polling place closed up on Election Day."

Going into the 2018 election season, we knew we needed to scale up our operations. To make sure we had more time to focus on the most challenging parts of our process, we decided to automate as much as we could to make the human part of ordering pizzas as easy as possible.

We recognized two tasks that had taken up too many volunteer hours in 2016:

  • Verifying that the addresses sent to us were actual polling locations
  • Finding the closest pizzeria that could deliver to each polling place

It's kind of a logistical nightmare, but one that's solvable if you can get all the moving parts working in sync. If you're organizing an event or even a movement, you can probably relate. Here's how we did it.

We used app automation tool Zapier to streamline as much as possible. We built a Zap (what we call automatic workflows) to take submissions from our website and turn them into pizzas.

Pizzas at a polling place

This Zap did a lot of heavy lifting for us: We caught information with a webhook—these were the submissions from our site—and would then run it through filters, Slack, Google Sheets, more webhooks, some custom coding, and the next thing you know, we had verified polling place addresses and found local pizza places. And we made sure that information was back in a Google Sheet and a Slack channel for tracking.

Our Zap was definitely on the more complex side of things, but at its heart were a few simple Zaps:

Part of what we love about Pizza to the Polls is how we get to connect with new people, and we wanted to make sure our volunteers felt welcomed when they joined. So we created a Zap that sent a welcome message in Slack to each new volunteer, including a guide to our pizza ordering processes.

And we had another Zap that triggered whenever a new pizza order was set as "out for delivery" in our master Google Sheet. This Zap sent out a tweet that let our followers know about the incoming order. To keep these tweets interesting, we used Zapier’s Formatter app to randomly select from one of 30 funny messages to get our followers excited about the pizza.

Pizza tweet

Here's a simplified version of our Zap that creates a Tweet when a row in Google Sheets updates. It's the core of our Zap, just without the pizza wizard:

Results

Election Day 2018 was wild. Pizza to the Polls ended up sending over 10,000 pizzas and raised nearly eight times as much as in 2016.

Despite the explosion of donations and polling place submissions, our organization didn’t really increase in size. We still had about 20 volunteers, but with automation, we went from sending about three pizzas per minute to 13 per minute—spending nearly a quarter million dollars on pizza before the last polling place closed up on Election Day.

Pizza to the Polls results 2018

Pizza to the Polls started with a simple idea: What could we do from home to help people who turned out to vote? From the seed of that simple idea, we started creating a structure to make our job easier: a spreadsheet for tracking orders, a website to gather submissions, Twitter to let the world know and get support.

This year we took the next step—simplifying and scaling our organization with automation and streamlining the parts we learned took a lot of time. And in the end, more people who voted were rewarded with pizza. What's not to love about that?


source https://zapier.com/blog/pizza-to-the-polls-automation/

Thursday, 15 November 2018

Website Builder Showdown: Squarespace vs. WordPress

The quality of your website can make or break your online presence. A decade ago, this meant hiring a developer to make your site to look and feel professional. But now, building a website can take minutes instead of months, even if you have zero coding knowledge. All you have to do is choose a website builder, and it'll do the heavy lifting for you.

Two of the most popular website builders are WordPress and Squarespace, so we're going to take a look at how they stack up and which will work best for your needs.

Common Features and What We Looked For

If you're looking to create a website, WordPress and Squarespace will both get the job done—and done well. But the two platforms offer different experiences in terms of setup, maintenance, and growth opportunities. What's best for you will depend on your needs. Do you want a quick solution, or are you looking for lots of customization? Are you comfortable making your own tweaks and maintaining the site? Do you need to use your site to sell products and accept payments?

Here are the 10 features we'll be comparing to help you make your choice. Click on the section that matters most to you, or go directly to our comparison table.

Setup

Squarespace is a one-stop shop that makes setup easy. With WordPress, you'll have to fit all the pieces together yourself.

All websites need to be hosted on a server before they're accessible online. With Squarespace, hosting is a built-in service. With the hosting taken care of, the setup is short and sweet:

  1. Sign up for a Squarespace account.
  2. Buy a domain name right inside your Squarespace dashboard.
  3. Choose a design template, then customize it with your own content.

All in all, you can have a Squarespace site set up and ready for your own customization in the course of a few minutes. And if you're not a DIY-minded person, there's an official list of Squarespace specialists who can be hired to get the job done.

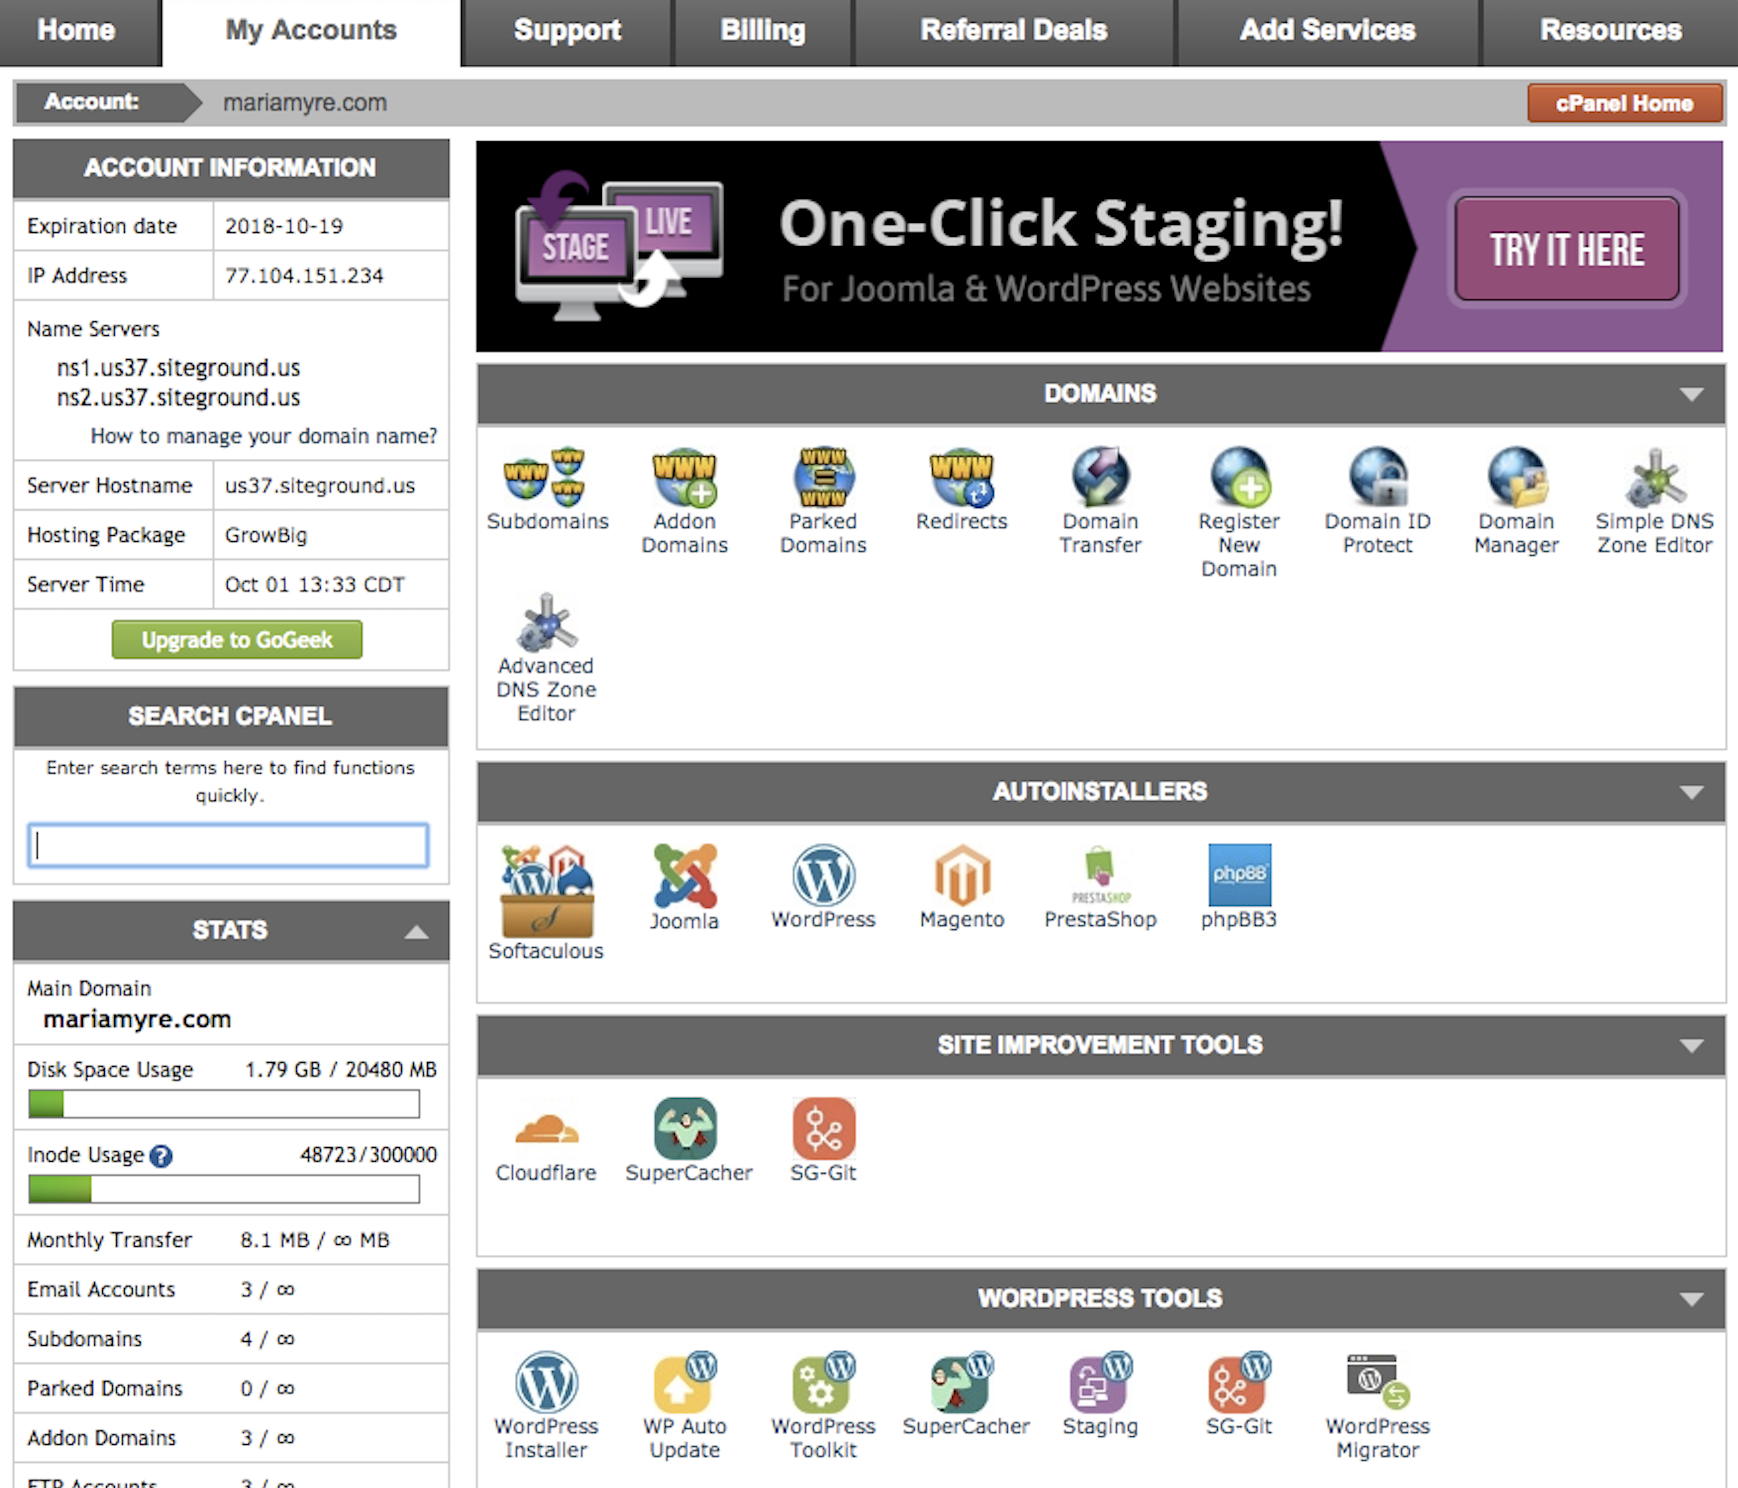
The process of setting up a WordPress site is more tedious, and you can't take any of the behind-the-scenes functionality for granted. You'll have to set up each part yourself, then link them together:

  1. Choose a hosting provider like SiteGround or WP Engine.
  2. Buy a domain name from your hosting provider (or another source like Namecheap).
  3. Purchase an SSL certificate, and install it on your domain name.
  4. Install WordPress on your domain name.
  5. Log in to your new WordPress site and start installing plugins and a design theme (more on those in a bit).
Third-party hosting provider
You'll need to purchase hosting from a third-party hosting provider to create your WordPress site.

Even though the WordPress setup is more time-consuming than the Squarespace system, having control over your hosting provider means that you can access all of your website files, know whether the hosting service is running the latest software for security, and even find ways to speed up your site as it grows. Plus, reputable hosting providers have support teams available to help if you get stuck anywhere along the way.

User Interface

The Squarespace interface is clean and minimal, but action items are hidden several layers deep. WordPress has a cluttered dashboard that can be confusing to navigate.

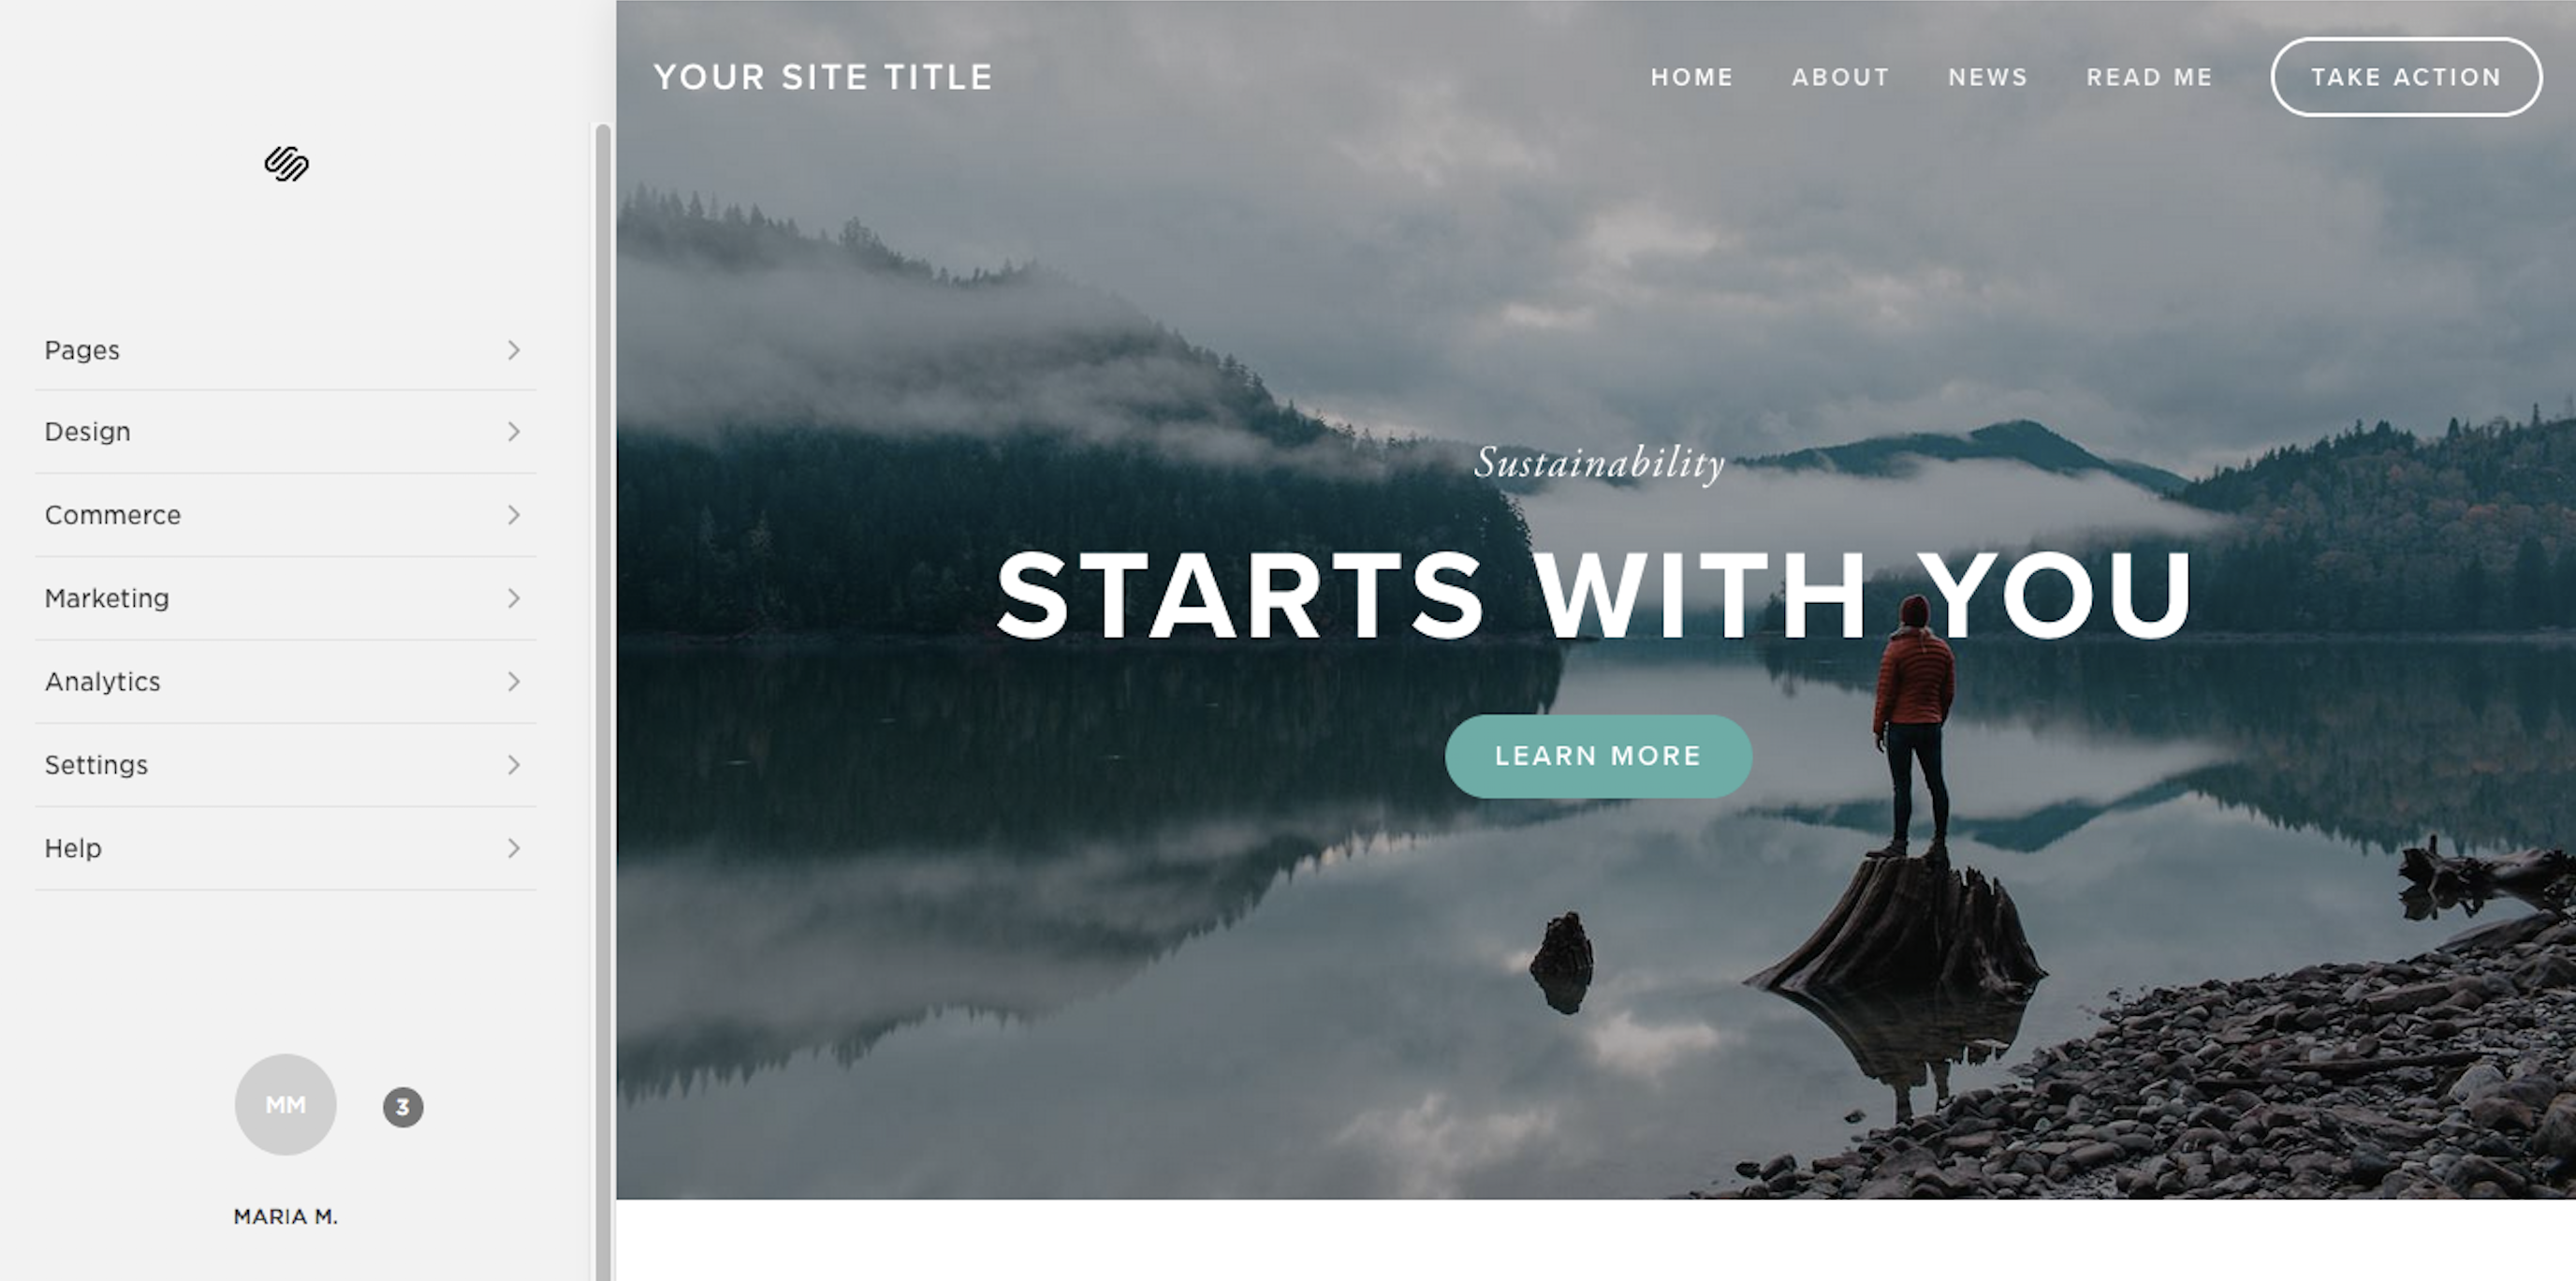
In Squarespace, the side navigation that you'll use for performing site admin options is simple and logical: You'll have no trouble finding what you're looking for, whether it's checking site analytics, editing your website's page content, or anything in between. The downside? The top-level navigation is intentionally kept minimalistic, so you might have to click four or five times to perform more detailed actions inside your site.

Squarespace main interface

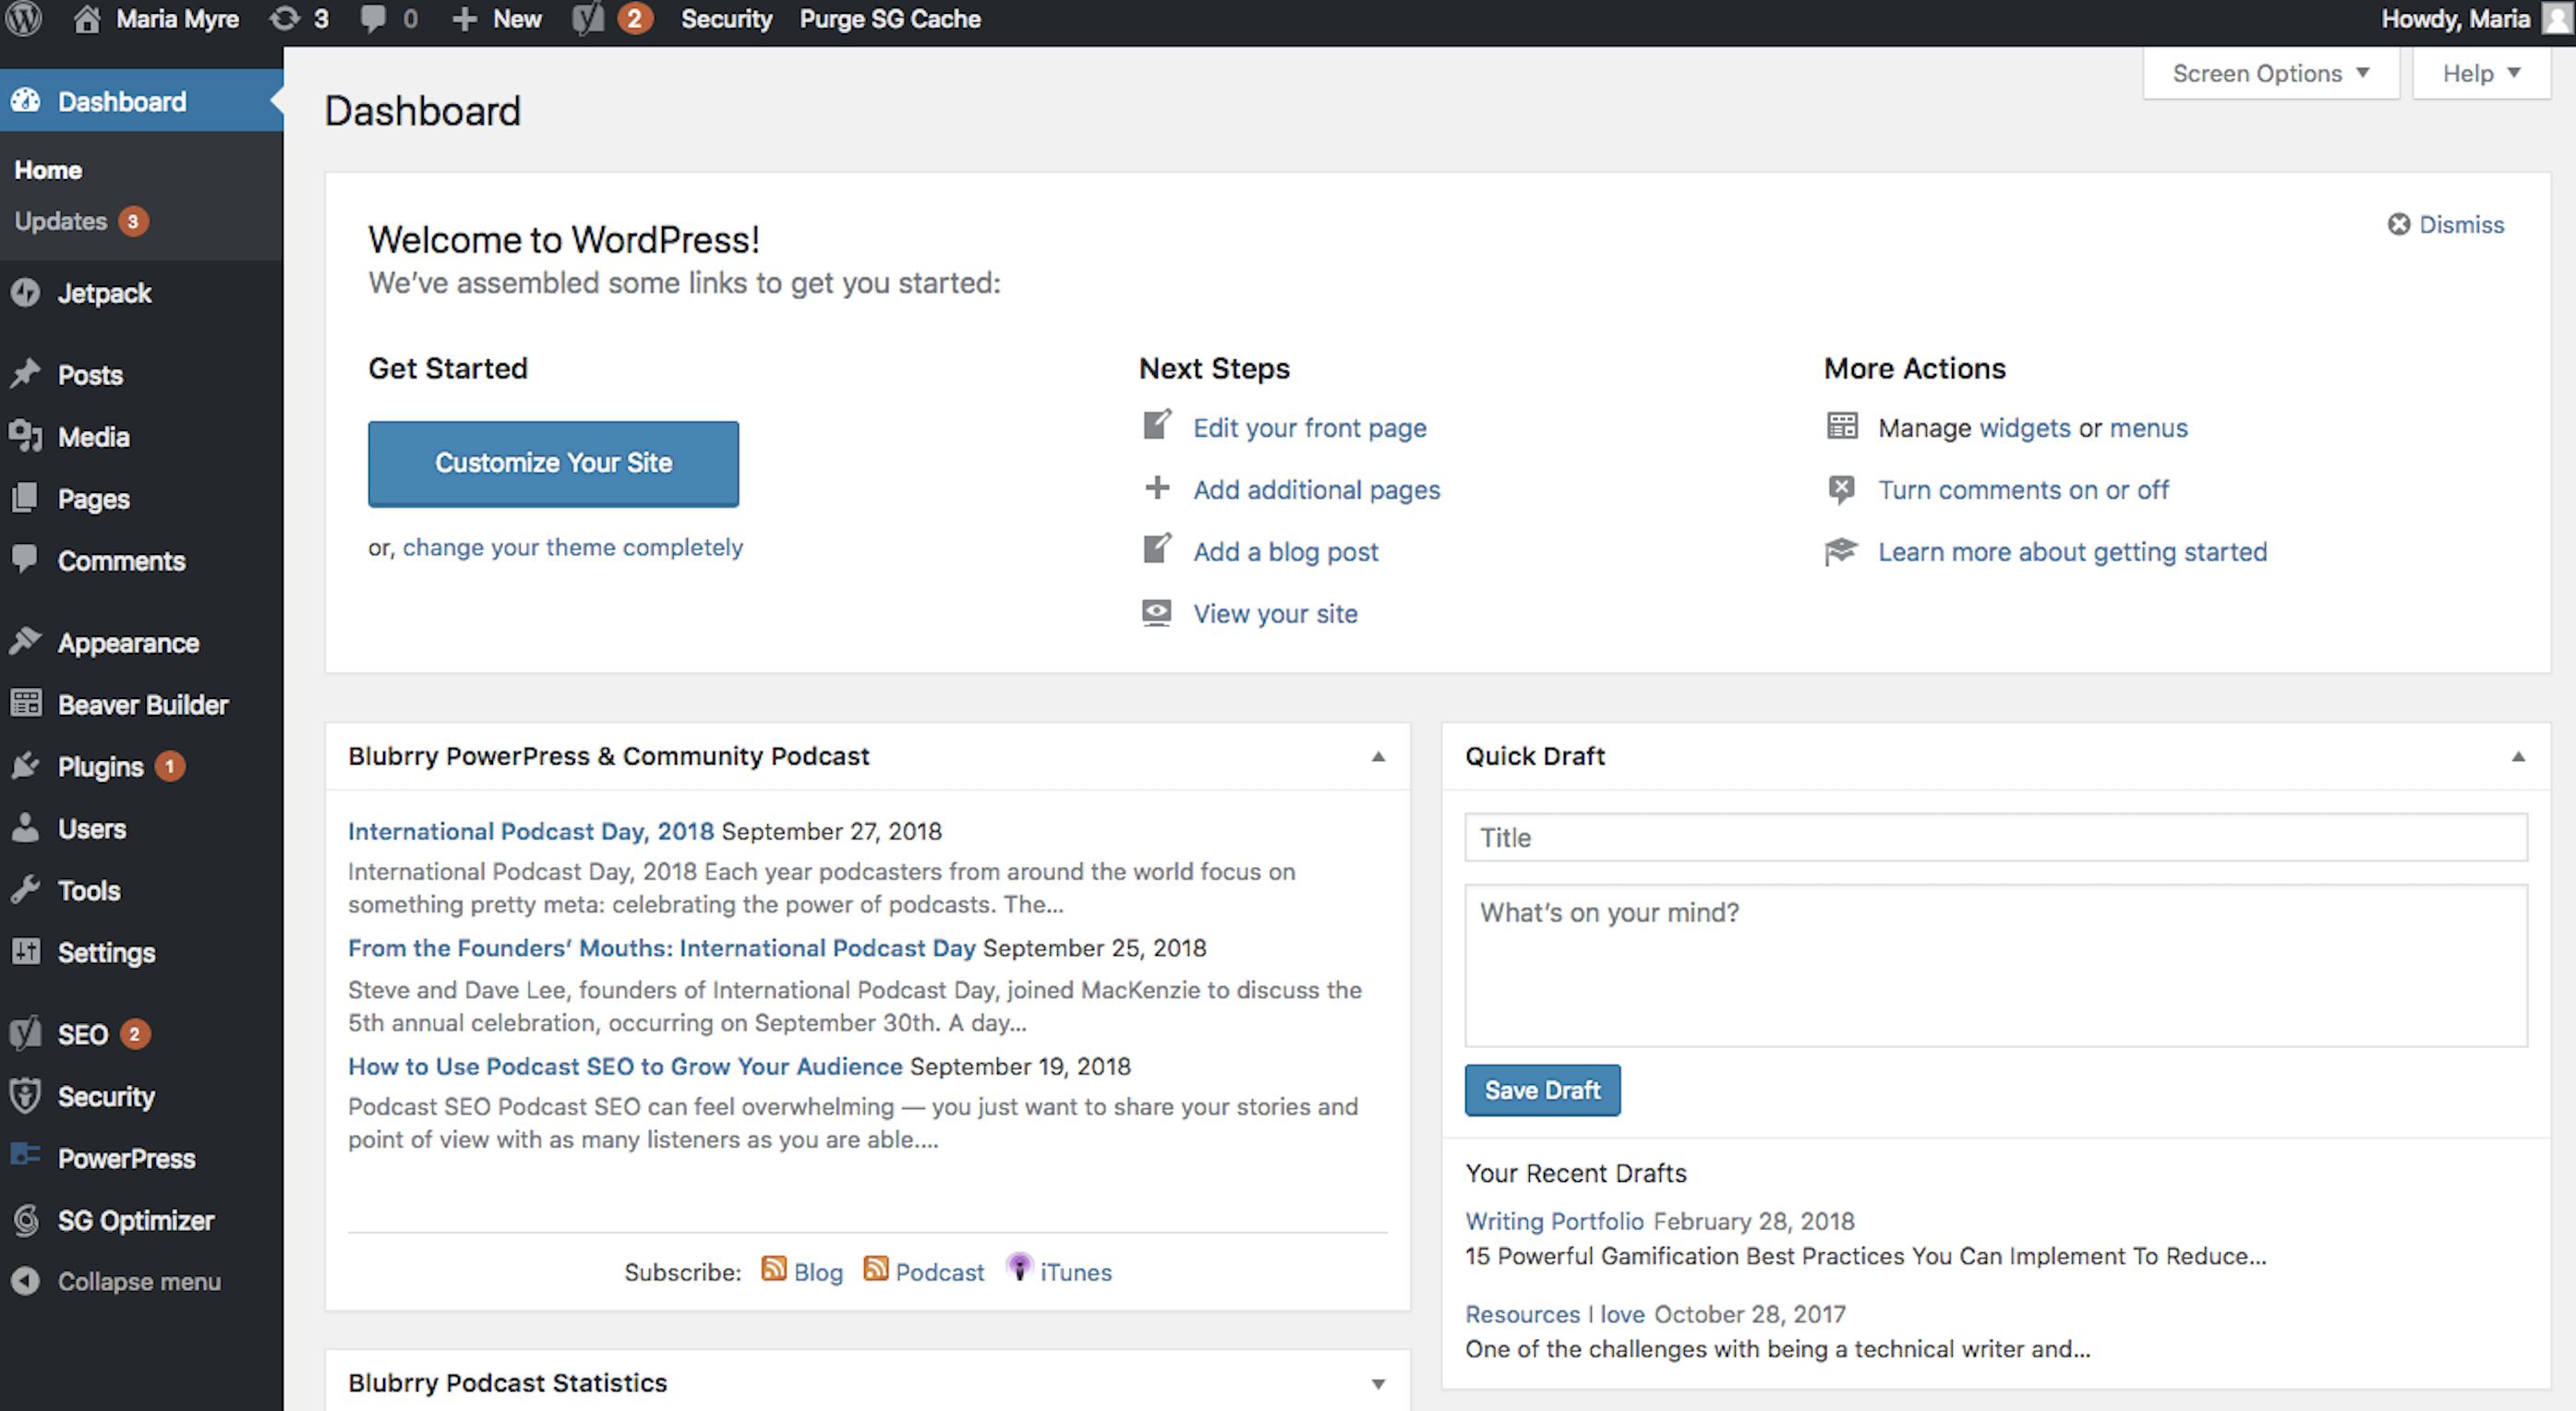
The WordPress interface is on the opposite end of the spectrum. In WordPress, the left sidebar holds all the links for you to manage your site, with no hierarchy. "Minor" actions (like viewing your users' permissions) appear right next to the more "important" actions (like editing page content with a text editor). Each time you install a new plugin, it will likely be added to this sidebar menu.

WordPress dashboard

There's certainly nothing fancy about the WordPress interface, and it can be confusing to navigate until you know the system backward and forward. But once the initial steep learning curve is over, you'll appreciate the speed at which you can get you from one corner of your site to the other.

Built-In vs. Add-On Features

Squarespace has a large selection of built-in features, but WordPress plugins outnumber Squarespace features by the thousands.

Squarespace has dozens of built-in features that come standard with your subscription (and more if you've chosen one of the more robust plans). Sign-up forms, site analytics, an eCommerce solution that allows you to post products for sale inside your website and sell them directly through built-in order forms—they're already configured and ready to go. Some of these features (like sign-up forms and product listings) can be added to your website with a couple clicks from the page design area; other features (like analytics tracking) run automatically without any additional configuration.

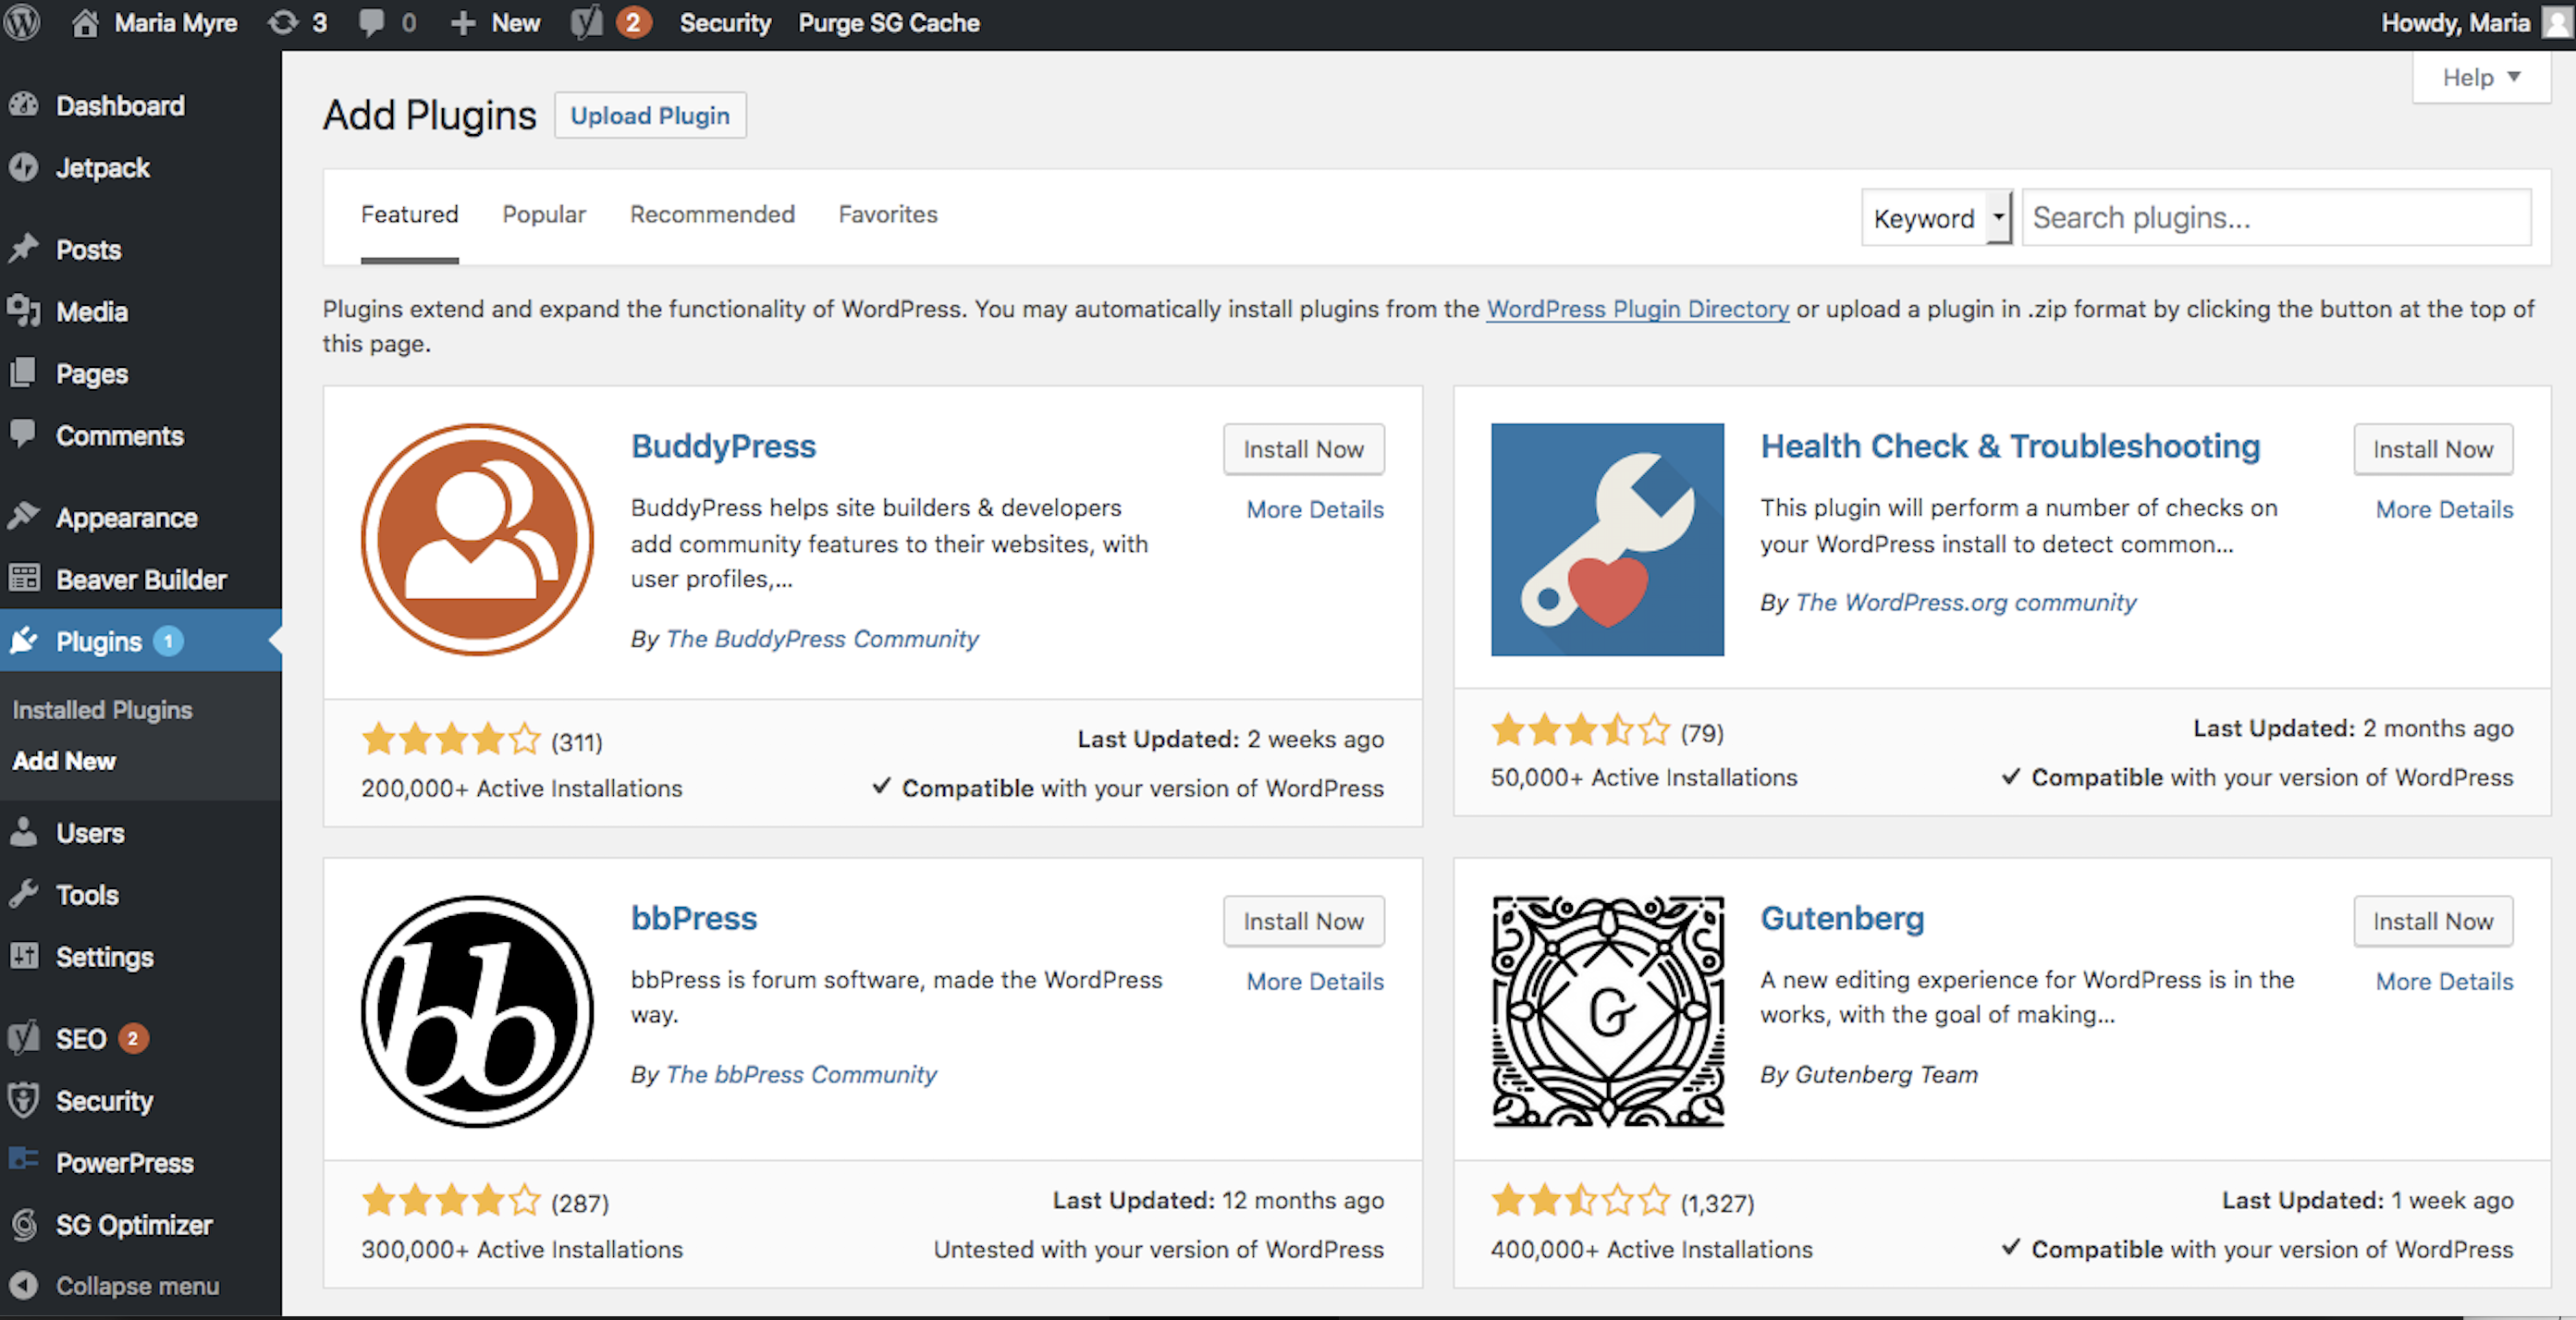
WordPress, on the other hand, survives on plugins. Here's why: At its most basic level, WordPress is a content management system (CMS). This means that the main built-in feature is simply the ability to add content to the page. To extend its functionality, it's designed to work with plugins. Once you log in to your website's dashboard, you can search for free plugins that allow you to do almost anything, from building opt-in forms to creating online courses to adding social sharing icons. If you're willing to shell out a few extra bucks, there are also thousands of paid plugins that you can connect with through a quick Google search.

Add more functionality to your WordPress site with plugins.

The downside to the plugin functionality is that the plugins aren't all designed and built by the same developers, so some plugins might conflict with each other and cause errors in your site—or leave it vulnerable to hacking. Although Squarespace's built-in features may feel limited compared to WordPress's offerings, they're all created with the same high quality standard that doesn't always translate into the WordPress world of plugins.

Website Design (Templates and Themes)

Squarespace templates are professional but limited in number. WordPress offers thousands of themes, but the quality varies.

Squarespace sites are known for their polished look. That's because they have a team of professional designers behind each of their 60+ design templates. To edit a template, you'll use Squarespace's visual site editor, which lets you see the design and content changes in real-time. Adding and rearranging content blocks (e.g., an image, text block, opt-in form, etc.) is an intuitive drag-and-drop process.

The biggest downside here is that each design template has its own limitations in terms of customization. For example, some templates will allow you to edit the site headers on a per-page basis, while others won't. And if you want to customize your fonts, you'll have to manually add your Typekit account info to Squarespace.

With WordPress, your site design comes from a manually installed "theme." These themes are similar to Squarespace templates in that they determine what your website looks like: typography, colors, layout, etc. While logged in to your site, you can access thousands of free themes, each of which can be installed with two quick clicks. Just be sure you do your research: Many WordPress themes are fairly inflexible, with only a handful of customization options. However, there are a few popular themes—available at a cost—that include a drag-and-drop visual builder similar to the WYSIWYG experience of Squarespace.

In the end, you have more options with WordPress, but you're also more likely to run into a lot of less-than-stellar themes before arriving at one that works for you.

SEO Optimization

Squarespace allows you to perform the SEO basics, but WordPress plugins will give you far more control.

If you want your website to show up in Google searches, you'll need to become familiar with the fundamentals of search engine optimization (SEO). On a basic level, this means paying attention to things like page titles, meta descriptions, alt tags, and URLs. But your site's visibility also relies on more complex things like XML sitemaps, page speed, and mobile optimization.

Squarespace has built-in SEO optimization features that allow you to edit your page titles and meta descriptions, as well as a clear SEO optimization guide in its support documentation to help you understand what happens automatically and what you'll have to take care of on your own.

With WordPress, nothing happens automatically, but as a result, you have more control over the process. To start, find and install an SEO plugin to handle things like meta descriptions, schema markup, and sitemaps. Then you'll have to do your own testing and research to gauge whether your site is mobile-friendly. (Responsive design tends to be an issue because many themes don't include the mobile optimization that comes standard with Squarespace templates.) For an in-depth look at the SEO optimization process in WordPress, read WPBeginner's SEO tutorial.

Security and Maintenance

Squarespace controls your site security, while WordPress gives you the control.

With Squarespace, your main responsibility for web security consists of keeping your login info secure. Since Squarespace takes care of hosting and managing your site files, it's up to them to keep your site safe and mitigate any damage from hackers. Likewise, ongoing maintenance is minimal: Squarespace is dedicated to keeping sites up and running with the latest software. They don't place any traffic bandwidth limits on your site, so even if your site starts getting thousands of visits every day, they'll work to keep it running fast.

With WordPress, the weight of site security and maintenance rests heavily on your shoulders. A few things you'll need to do:

  • Make sure your hosting provider is running the latest software for ultimate speed and security.
  • Purchase a dedicated IP for server hosting, if possible.
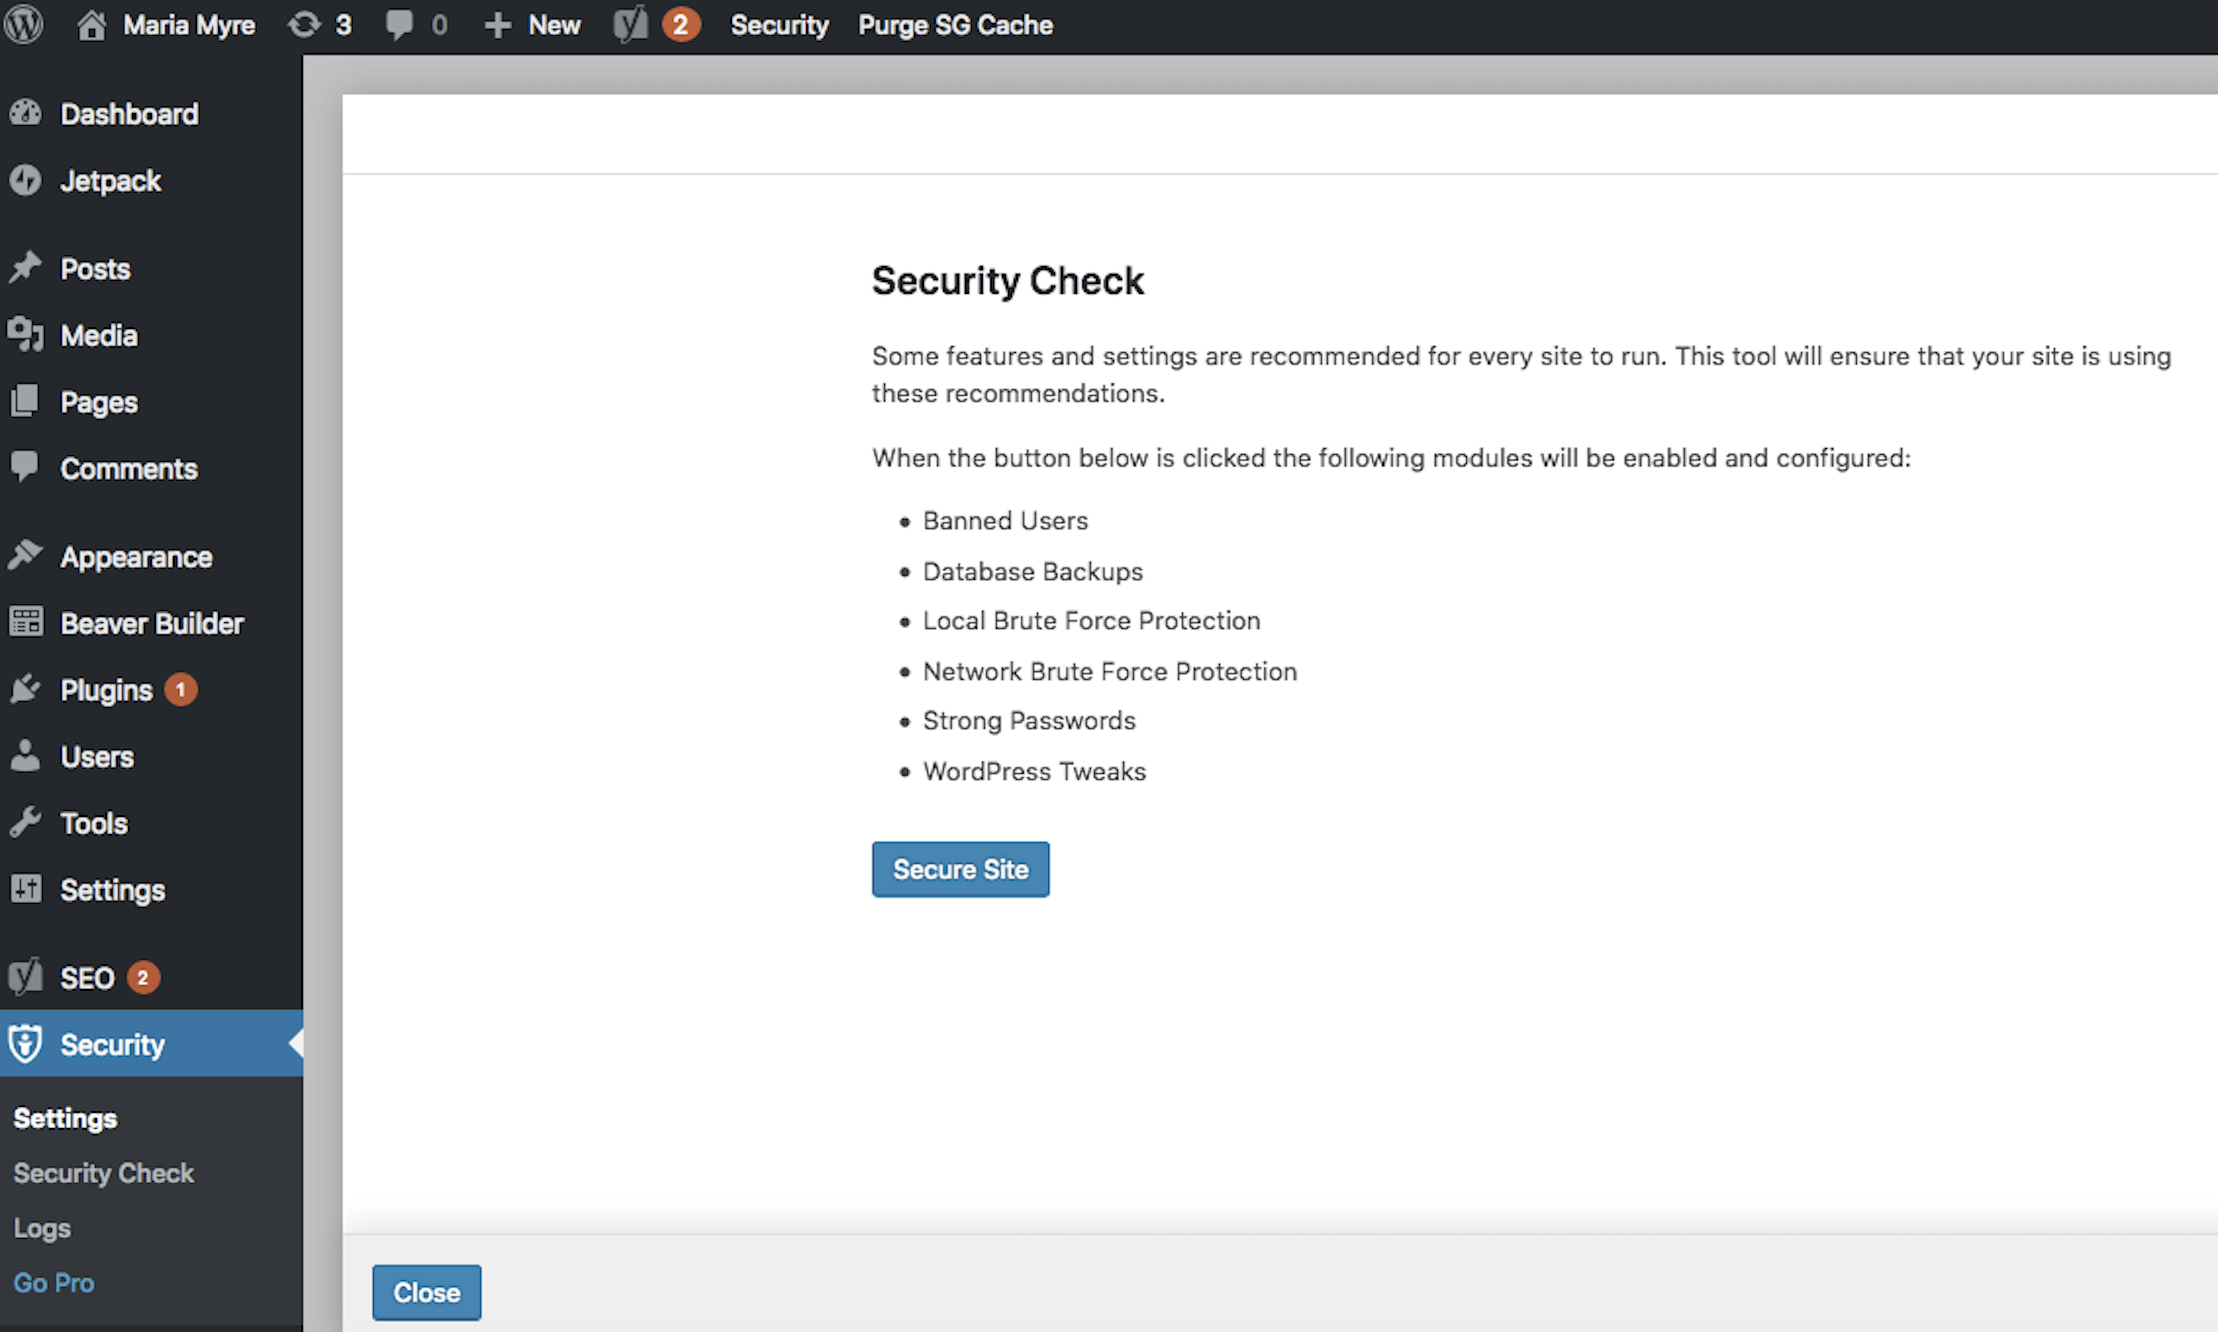
  • Install a trusted security plugin to protect against blunt force attacks (bots that try repeatedly to log in to your site) and monitor for file changes and unexpected site activity.
  • Create backups on a regular basis, so you can revert if security issues do arise.
  • Keep plugins updated, since outdated plugins can make your site vulnerable to hackers.
Install a security plugin on WordPress to help protect your site from hackers.

Security and maintenance require more work for a WordPress site, but there's an upside: If your site is hacked, you can simply restore a backup or move to a new hosting provider. With Squarespace, you are completely reliant on them to resolve issues—but, of course, their customer support is available 24/7 if anything comes up.

eCommerce Features

Squarespace includes all the features you need to run a simple online store, but you can fine-tune the checkout experience with WordPress plugins.

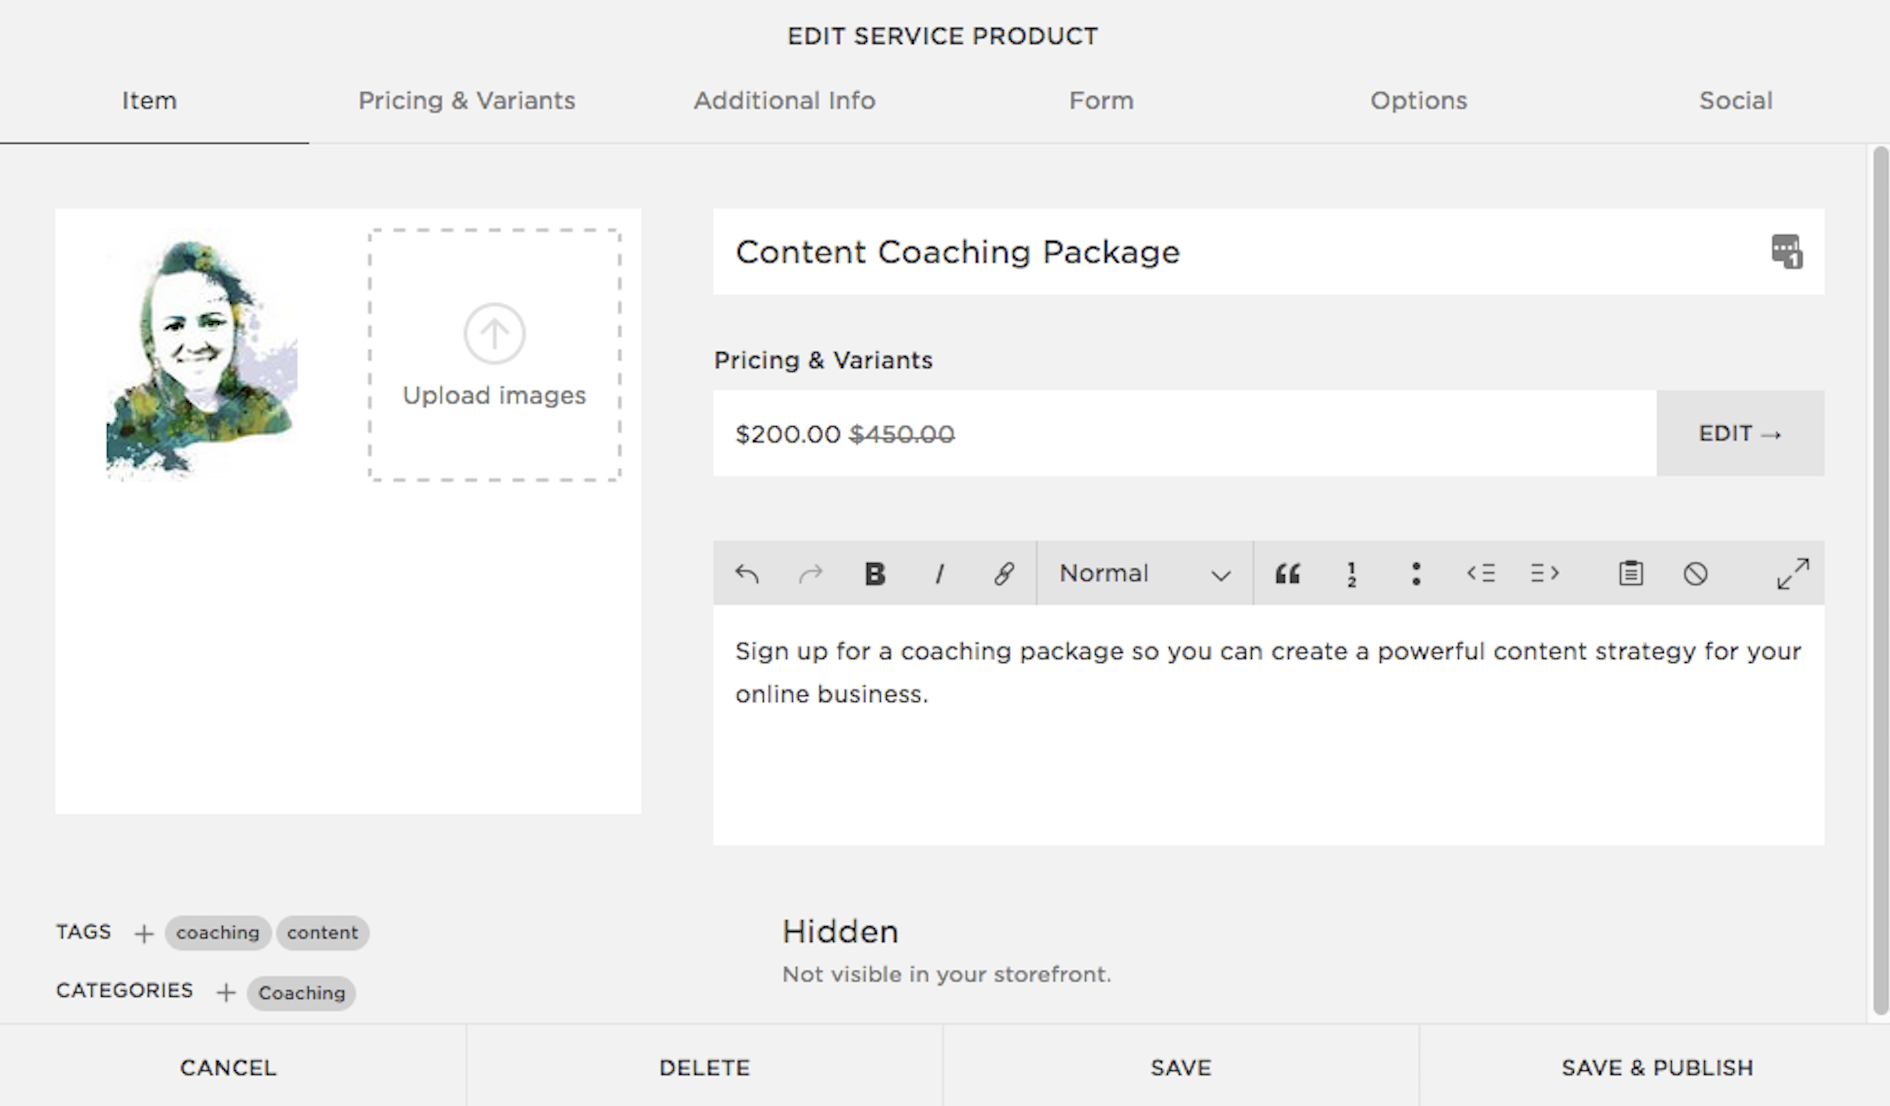
If you sign up for one of Squarespace's eCommerce plans, you can create an online store right inside your website. The setup is quick whether you're selling digital, physical, or service-based products. The customization options range from shipping rates and taxes to sale discounts and coupons. Unlike many eCommerce options available, Squarespace doesn't limit the number of products you can sell on your site. And once you've done the setup, website visitors can add your products to a shopping cart and checkout, without ever having to leave your site. Just note that you'll pay $40 per month to access all of Squarespace's eCommerce features.

The Squarespace product setup is hassle-free.

If you want to turn your WordPress site into an online shop, there's no shortage of plugin options to make it happen. However, very few are designed to have that one-stop shop experience available with Squarespace. Some plugins focus on digital products, others on physical, others on selling access to exclusive online content. Of course, the benefit is that you're able to focus on the exact setup you want, instead of having to work with a limited set of predetermined options. If you have custom setup needs, like automatically creating a site user whenever someone purchases a coaching package, all you have to do is find the right plugin. And if all else fails, you can always link your WordPress site to a third-party eCommerce system like Shopify or Etsy.

Lead Generation and Opt-In Forms

Both apps allow you to collect new signups and pass them to your email marketing tool, but WordPress gives you more flexibility.

Both Squarespace and Wordpress will allow you to build your email list through opt-in forms that pass the new signup info over to your email marketing software, but this is one area where WordPress really stands out.

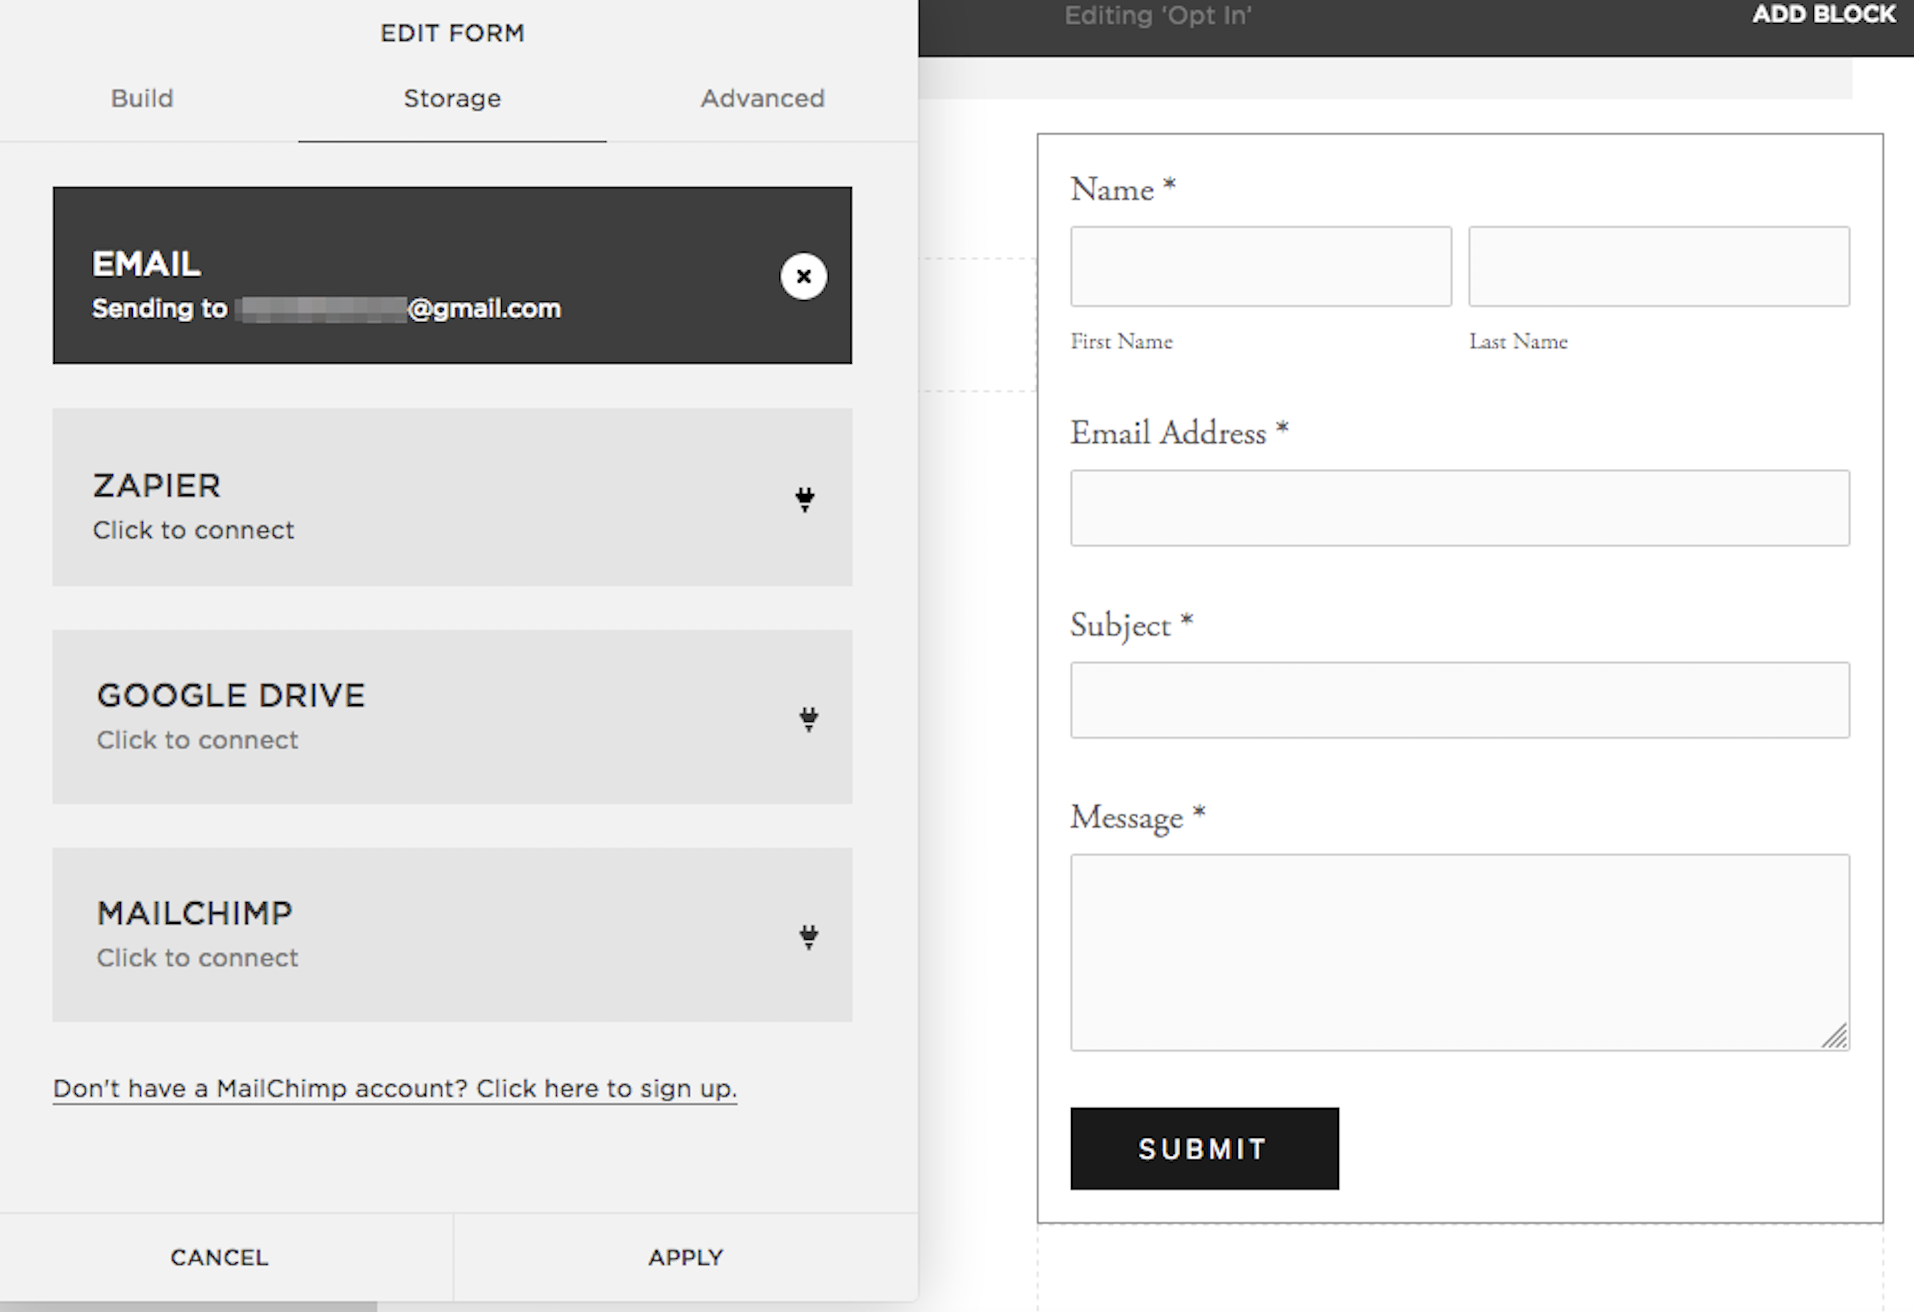
Squarespace has two built-in solutions: a regular form that can be added to any page and a promotional popup that can appear on any/all site pages. You only have two choices for when the popup appears: when the user starts scrolling down the page or after five, 10, or 30 seconds have passed. If the user signs up, you can opt to send the info to Google Drive or MailChimp. Not using either of these systems? You can use Zapier to connect Squarespace with other email marketing systems, or install a code snippet on your site to use third-party forms.

Squarespace opt-in forms

Thanks to the WordPress plugin community, you have a lot more to choose from when you're working on lead generation. There are a few different plugins that give you total customization for the popup design, so you can create anything from a tiny sidebar opt-in to a full-page banner. Or, if you want to do A/B testing, assign a unique popup to each page. You can even add an exit-intent popup. It's all possible, even with free plugins like Sumo or PopupAlly. Whether you choose to install a code snippet on your site and use your marketing automation tool's own opt-in forms or find a plugin to give you more flexibility, the choice is in your hands.

Pricing

Squarespace has defined pricing tiers that are easy to budget for. Although WordPress itself is free, you'll have to consider the cost of hosting and any paid plugins or themes.

A Squarespace website comes at a defined cost, which can range from $144 per year to $552 per year, depending on the subscription you choose. Since Squarespace does not offer multi-site accounts, you'll have to count that cost again for new sites, even if you simply want to build a site on a subdomain.

While WordPress itself is free, you will have to pay for your domain name and hosting provider. That can happen for as little as $36 per year if you're using an inexpensive host like BlueHost. But penny-pinching for hosting isn't always a good idea: Some of the cheap hosting providers will put limits on your site bandwidth and may be insecure. The good news is that many hosting providers offer multi-site capabilities, so you might hit a sweet spot where you're hosting three or four websites for less than the price of one Squarespace site.

Keep in mind that purchasing premium WordPress themes or plugins can quickly add to the cost of your website, making it many times more expensive than Squarespace.

Customer Support

Squarespace provides 24/7 online support. With WordPress, you're expected to do your own research.

When you hit a website-building roadblock, Squarespace goes above and beyond to get you back on the ground running with 24/7 online support and robust written documentation.

WordPress offer the WordPress codex, which has a wealth of written information, but it only covers WordPress-specific issues. Any questions concerning a plugin, theme, or your hosting provider will have to be taken to the team offering support for that particular piece of the puzzle. (And some simply don't offer support. Period. You're on your own.)

Because of this, WordPress can be frustrating and overwhelming to beginners who are just getting their feet wet. Having recourse to an experienced developer can be a lifesaver.

Squarespace vs. WordPress: Which App Should You Choose?

Squarespace and WordPress are both trusted platforms that will undoubtedly give you a high-performing website.

Squarespace stands out as a winner when you're looking for an all-in-one solution that offers quick setup, easy maintenance, and a professional-looking site. If you need more customizable features, work with multiple domains or subdomains, or simply anticipate high growth and new opportunities for your website, you'll love the unmatched flexibility that WordPress offers.

Finally, here's an at-a-glance feature comparison:

Squarespace WordPress
Setup Easy and quick: Everything happens inside Squarespace Multiple tech pieces must be fit together manually
User Interface Modern and easy to navigate Not pretty, but gives quick access to all parts of your website
Built-In vs. Add-On Features Static set of features, depending on your subscription package Very few built-in features, but plugins with additional functionality are easy to install
Website Design (Templates and Themes) Easy-to-use visual builder allows you some customization for template layouts Varying levels of design flexibility, depending on your installed theme
SEO Optimization All the fundamental SEO components included with your site Plugins available to give you SEO control with minute detail
Security and Maintenance Squarespace is responsible for updates and tech maintenance; support team available if there are issues You control all security and maintenance, so you have more responsibility and control
eCommerce Features Impressive suite of basic eCommerce features available Find a plugin that will offer the exact checkout experience you want for your site
Lead Generation and Opt-In Forms Basic opt-in and popup forms available More flexibility
Pricing Between $144/year and $552/year per website Free, but you need to pay for hosting and any premium themes and plugins
Customer Support 24/7 online support Some plugins and themes have their own support teams to approach with questions, but many do not

Automate Squarespace and WordPress

Once you've selected a website builder, you can automate the tool to save time managing your website and connect it with the other apps you use most.

  • Automatically post to your blog:
  • Automatically share your blog posts on social media:
  • Automatically send your leads to your CRM or email marketing tool:


source https://zapier.com/blog/squarespace-vs-wordpress/

10 Tips and Tricks for Zoom

The best video conferencing apps can do more than merely enable a virtual face-to-face meeting. They let you show what's on your screen to everyone else on the call, seamlessly pass control of the meeting to another person, and record the call as a video.

Web conferencing service Zoom offers these features and more, some of them hidden options in advanced menus. The tricks and tips below will show you how to use the app better to work, learn, and communicate with others virtually.


1. Create Recurring Meetings With Saved Settings and One URL

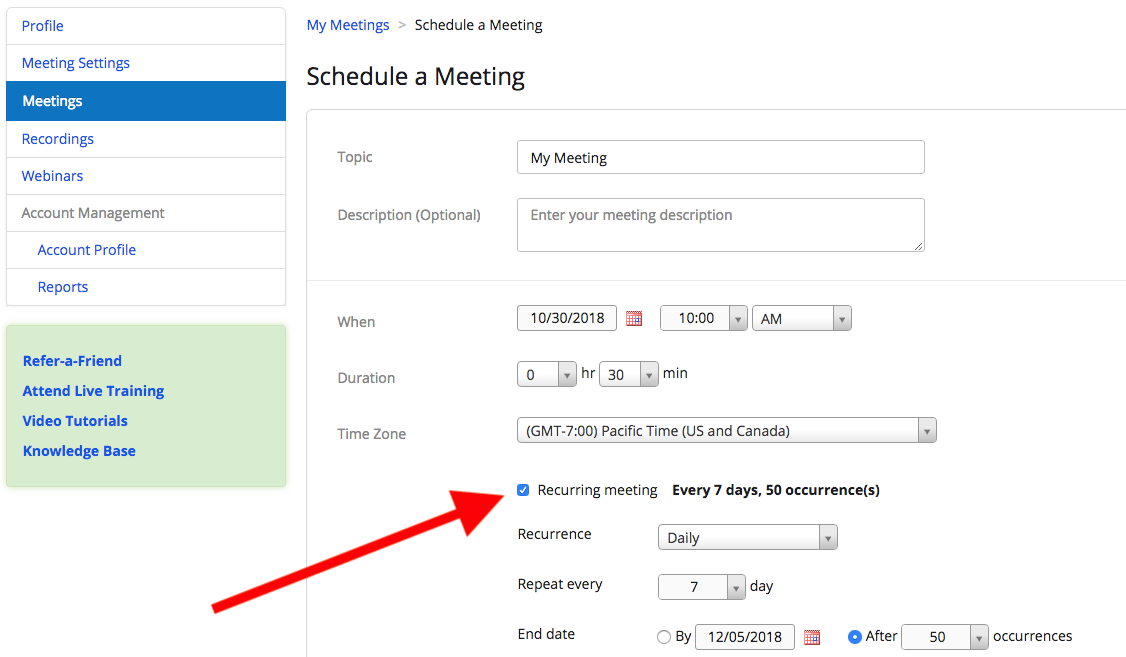
Zoom recurring meeting schedule

For weekly meetings, monthly check-ins, and other regularly-scheduled calls, Zoom lets you create a recurring meeting. There are two benefits to using this setting. First, it lets you lock in all the call settings you want once and have them be in place every time you meet. Second, recurring calls use the same join URL each time, so you never have to send a fresh one to attendees.

Additionally, if you meet with the same group regularly but not on a regular schedule, you can choose an option called No Fixed Time, which lets you use the same settings and meeting ID over and over with the same group, no matter when you get together. This option is popular with educational groups who use Zoom as their virtual classroom.

2. Record the Call as a Video

Zoom lets you record your web conferencing calls as videos, a handy feature for sharing the meeting with people who may have missed it or for reviewing what was said.

When you record, you must choose whether to use to the local or cloud option. Local means you store the video file yourself, whether locally on your computer or in another storage space that you provide. With Cloud, which is for paying members only, Zoom stores the video for you in its cloud storage (paying accounts come with 1GB per person or room for storage, except Education accounts, which get 0.5GB per person). One convenience of the cloud option is that people can stream the video in a web browser once it's ready.

When creating a video from a conference call, it makes a big difference in the final quality to optimize a few settings in advance. For example, some calls might be broadcast-style, where only the host appears on screen. In that case, set Zoom to only record the audio and video of the host. Other calls might be in the style of a collaborative meeting, in which case you want to record everyone. Be sure to explore Zoom's settings at least a few minutes before recording a call.

Requirements: To record videos, you need Zoom on macOS, Windows, or Linux. If you don't see the option to record, check your settings in the web app (under My Meeting Settings) or have your account administrator enable it.

3. Have a Collaborative Annotation Session

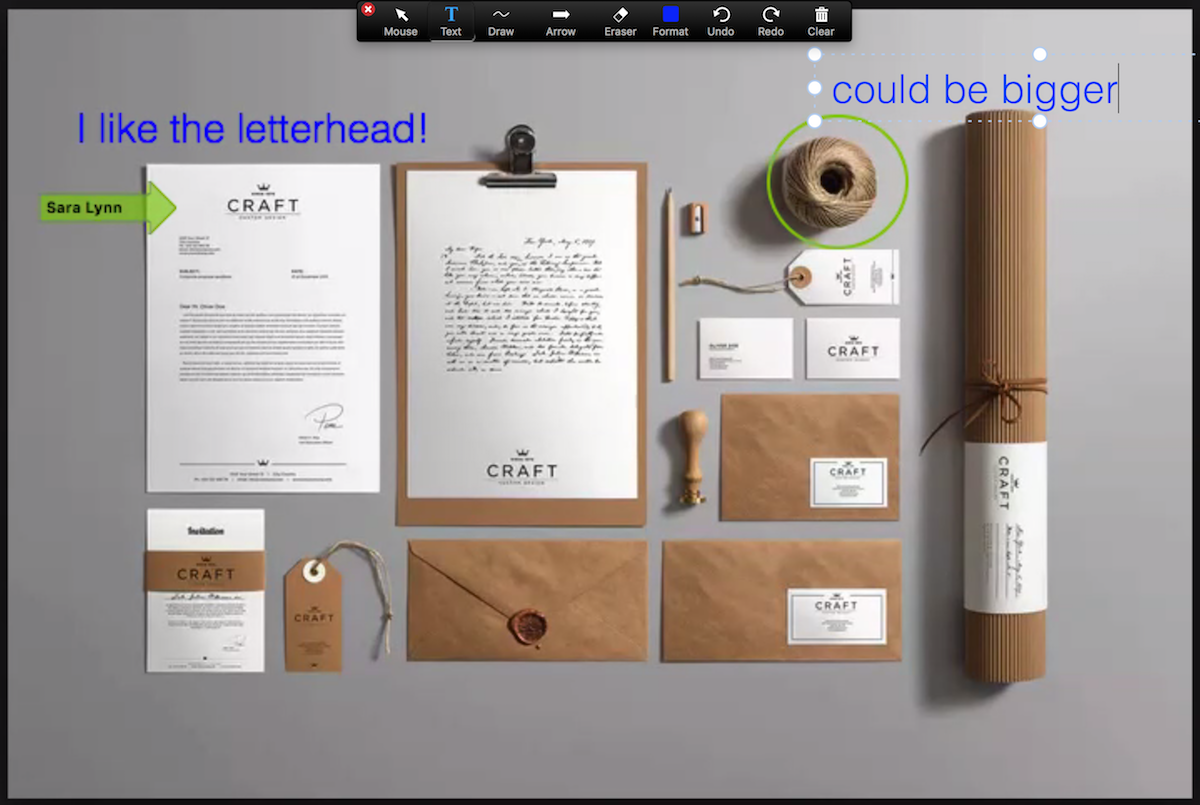
Zoom annotation

Screen sharing allows the host of a call to display whatever's on their screen to everyone else on the call. Annotation tools let all the meeting participants draw and highlight what's on screen, which can be immensely helpful when discussing visual materials, such as mockups, graphic designs, and so forth.

To annotate while viewing someone else's shared screen, select View Options from the top of the Zoom window, and then choose Annotate. A toolbar appears with all your options for annotating, including text, draw, arrow, and so forth. The presenter can use the save button on the toolbar to capture the complete image with annotations as a screenshot. You can also disable attendee annotation altogether.

4. Co-host Calls

Meetings can have more than one person at the helm. A PR rep might want to cooperatively control a meeting alongside an executive, or a team with more than one lead may prefer to let the each co-host rather than choose one person over the other. Whatever your circumstances, you can start a Zoom call and have more than one person be in charge.

To use co-hosting tools, you first must enable it in Zoom's Meeting Settings. Look for the Meeting tab and choose the Co-host option. Then, when you start a meeting, wait for your co-host to join, and add the person by clicking the three dots that appear when you hover over their video box. Alternatively, you can go to the Participants window, choose Manage Participants, hover over the co-host's name, and select More to find the Make Co-Host option.

Requirements: To use co-hosting, you need a Pro, Business, Education or API Partner account with Zoom, and you need to run on macOS, Windows, Android, or iOS (not Linux or web). If the option doesn't appear, ask your account administrator to enable the settings in the Meeting tab for co-hosting privileges.

5. Give Attendees a Waiting Room

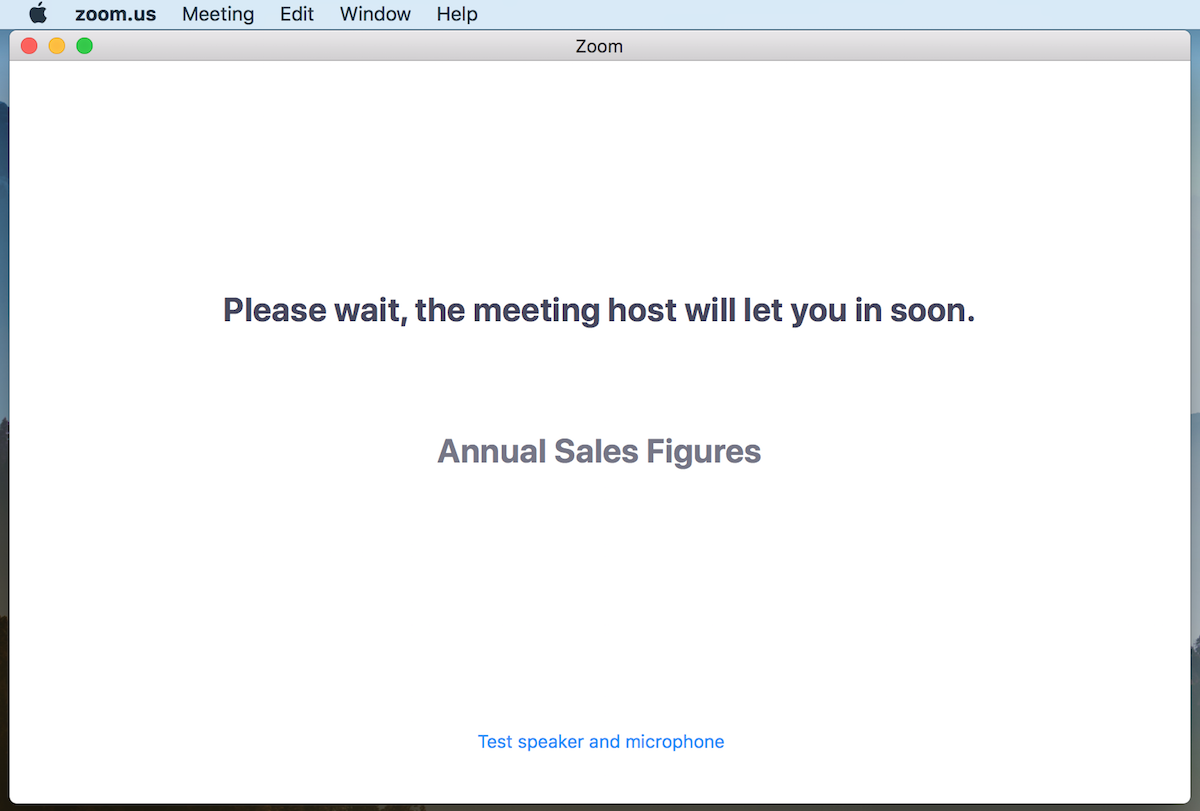
Zoom attendee waiting room

Zoom lets attendees get into a video call with or without the host being present. Small groups sometimes like this option because they can have a few minutes to chit-chat before the meeting officially kicks off. In some situations, however, it could be in poor form to have attendees in a virtual room together, waiting for you to start. A better solution is to create a virtual waiting room, where attendees remain on hold until you let them in all at the same time or one by one.

Precisely how you enable a waiting room depends on the type of account you have. When you set one up, however, you can customize what the attendees see while they await your grand entrance.

6. See Who Attended

Say you're using Zoom to hold a press conference or university lecture. You probably want to know who attends. You can get that information from a report once the meeting is finished.

The attendee list for all meetings lives in the Zoom Meetings tab in the Reports section. You'll see a list of both previous and upcoming meetings, which you can filter by time range or meeting ID. When you find the meeting or meetings you want, click Generate and then select Registration.

Requirements: To generate an attendee list, you need to be the 1) the host of the meeting, 2) in a role with Usage Reports enabled, or 3) an account administrator or owner. You also need a Pro, API Partner, Business or Education plan.

7. Collect Information From Attendees

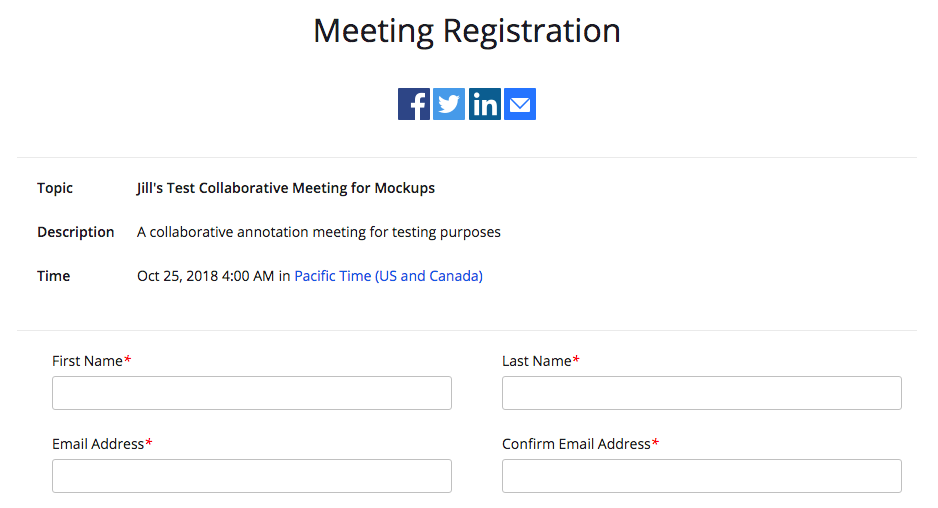
Zoom registration page for attendees

In addition to getting an attendance sheet, you can also gather information from meeting attendees about themselves before they join the call. For example, you might want to require that attendees provide their name, company affiliation, or industry.

To set collect this information, first you need to require Registration, an option found in the My Meetings tab of the Zoom web app. Then, you can set up a form that attendees must fill out before they can join the meeting.

For the registration form, Zoom provides standard fields, such as name and company affiliation, that you add using checkboxes. To add new questions or fields, jump over to the tab called Custom Questions.

Requirements: To require attendee information, the host must have a Pro account. Additionally, the meeting cannot be your Personal Meeting ID.

8. Let Someone Else Schedule Your Meetings

People who work with an assistant will love this option in Zoom that gives scheduling privileges to someone else. Whoever manages your calendar can now schedule Zoom calls for you.

To set up the scheduling assistant privilege, log into Zoom, open Meeting Settings, and look under Other. You'll see a plus sign next to Assign Scheduling Privilege. Add your scheduling assistants by typing their email addresses and finish by clicking Assign.

After you add your scheduling assistants, they must log out of Zoom and log back in for the feature to take effect. From this point on, assistants can create meetings for others by using the Schedule tool. Look for Advanced Options or Meeting Options (depending on which version of Zoom you use), and follow the prompts to create a new meeting.

Requirements: The primary Zoom account holder and everyone who receives scheduling privileges must all have Pro or Corp licenses. And for webinars, both account holder and scheduler must have webinar licenses.

9. Automatically Post Zoom Meeting Links in Slack

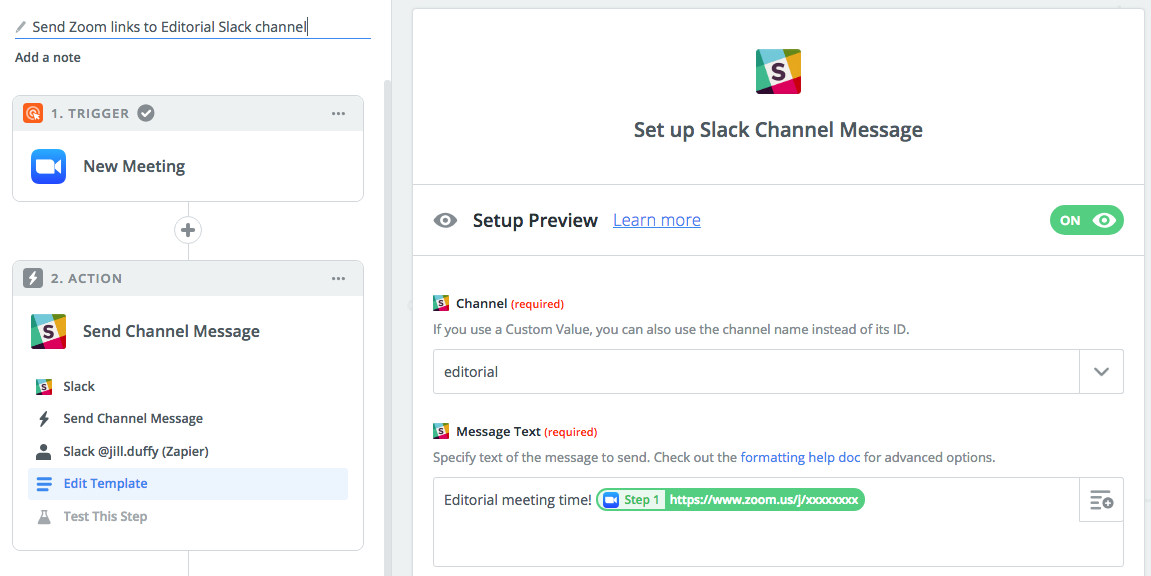
Zoom Slack Zap

Here's a tip we use at Zapier to reduce the amount of work needed for team meetings. We have a Zapier automation (also called a Zap) set up so that any time a new team meeting in Zoom kicks off, the Zoom link gets posted to the appropriate channel in Slack automatically.

Requirements: To set up integrations between Zoom and Zapier, you need a paid Zoom account. Free account holders don't have access to the Zoom API.

10. Learn a Few Essential Keyboard Shortcuts

If you use Zoom more than once a week, there are a couple of keyboard shortcuts worth learning to save you oodles of time.

I is for invite. Press Cmd+I (macOS) or Alt+I (Windows) to jump to the Invite window, where you can grab the link to the meeting or send invitations to others via email.

M is for mute. Press Cmd+Ctrl+M (macOS) or Alt+M (Windows) when you are the meeting host and want to mute everyone else on the line.

S is for share. Press Cmd+Shift+S (macOS) or Alt+Shift+S (Windows) to share your screen.


For more inspiration on how to use Zoom more efficiently, explore more Zaps you can create with Zoom and Zapier.


source https://zapier.com/blog/zoom-tips/
Wednesday, 14 November 2018

A Digital Agency Saves 30 Hours a Week Automating with ManyChat and Zapier

"Our profit increased when we started using Zapier."Mary Kathryn Johnson, Founder & CEO, Messenger Funnels


Once upon a time, analyzing and reporting on data meant big daily exports, importing said data into a new application, and a lot of manual manipulation. It could take hours every single day and if you were analyzing information for clients, you'd be repeating this task for each one.

Messenger Funnels, a digital agency used to spend around 30 hours every week running and analyzing reports on conversion rates, engagement, and more for their clients.

To speed up these reports and remove an immense amount of manual work from the team, Messenger Funnels' founder and CEO, Mary Kathryn Johnson, explored alternative ways to work. She found app automation tool Zapier.

"This was a very time-consuming process that's now automated by Zapier," says founder and CEO, Mary Kathryn Johnson. "Zapier saves my team two hours per client."

About Messenger Funnels

Mary Kathryn founded Messenger Funnels when she recognized the power behind Facebook Messenger, especially in comparison to lower-converting marketing emails. In addition to providing clients with customized chatbots [that do what??], the Messenger Funnels team also provides conversion insights and calculations for their clients' marketing campaigns.

This is a lot of work. To save her team time, Mary Kathryn automates as much of this work as possible, putting the focus back on the customer and fulfilling their needs.

How Automatic Processes and ManyChat Reduces Work

"When ManyChat opened their API to connect with Zapier, it changed our world."Mary Kathryn Johnson, Founder & CEO, Messenger Funnels

Instead of manually building reports, comparing and updating data, and uploading it to the client Mary Kathryn found a way to automatically send that data between the apps they use with clients, like ManyChat, an all-in-one messenger marketing platform—.

"Prior to Zapier, we'd export the data manually, populate Google Sheets, and manually review sales sheets from our customers to change tags and statuses in ManyChat when subscribers make a purchase," she explains.

Mary Kathryn knew this wasn't a sustainable process, especially as their client base grew. Removing the time-intensive data export and review from her team's plates would mean they could get back close to an entire workweek: 30 hours.

Now, with a few Zaps, which are automatic processes, Mary Kathryn has a chatbot to register leads to each client's webinars and another to calculate how much more Messenger can convert customers than email marketing.

"This is our major 'a-ha!' for prospects thinking of using Messenger in their marketing," Mary Kathryn says. "It's our number one marketing tool for growing our business and getting new clients."

Here's how Messenger Funnels does it:

Messenger Funnels's Tools

Icon: App: Used For:
ManyChat ManyChat Messenger marketing platform
Zoom Zoom Video conferences, webinars
Code Code Run custom Javascript or Python

The Workflows

With ManyChat, the Messenger Funnels team creates chatbots for their clients, one of which automatically adds attendees to Zoom meetings. When a lead confirms in Messenger that they want to attend a session—be it a training course, webinar, etc.—Zapier sends the lead's information to Zoom.

Once the registrant is created, Zapier will then send the lead a text message through ManyChat, letting them know that they successfully registered. This all happens within one Zap, but we've broken it up into its components so you can use the parts that fit your workflow:

In order to truly "wow" clients with ManyChat's power to convert, they built a chatbot to show off how many more conversions clients could have—if Messenger was part of their process. The Zap behind the chatbot pulls client information from ManyChat, runs it through Zapier's Code app to refine the results, and, through ManyChat, sends a text message.

The text message has the real prize for clients: hard numbers comparing current email marketing campaigns to campaigns through ManyChat and Messenger.

This Zap could be a bit more technical, since it requires you to write and input code, so we simplified it for you. But if you need to share custom information with your clients, take inspiration from Messenger Funnels' work and check out Code by Zapier:

And if you want to try out some of our most popular ManyChat connections, check out these timesavers:


Now that Zapier saves her team money and time, she says "We get to focus on fulfilling our customer promises."

Want to put your focus back on your customers like Mary Kathryn? Give Zapier a try for free.

All images courtesy of Messenger Funnels.

Our stories explore how Zapier's users solve common problems. From marketers to CEOs, educators to real estate agents, millions use Zapier to automate their most tedious tasks. If you haven't yet, try Zapier for free to see what we're all about.


source https://zapier.com/blog/messenger-funnels/

Tuesday, 13 November 2018

How to Force a Public Wi-Fi Network Login Page to Open

You open your laptop in an airport, at a coffee shop, or perhaps in your hotel or conference room. You sit down to work, select the correct Wi-Fi network, and … nothing. Your Wi-Fi icon may show it's connected, but your browser says You are not connected to the internet no matter how hard you try. That popover login screen just never loads.

We've all been there. As a remote team that often works from coworking spaces and coffee shops, we've wasted far more time than we'd like to admit trying to get online.

There's no magic button to connect to coffee shop, hotel, and airport Wi-Fi, but these tricks get us connected most of the time.

The Best Option: Connect to a Secure Network

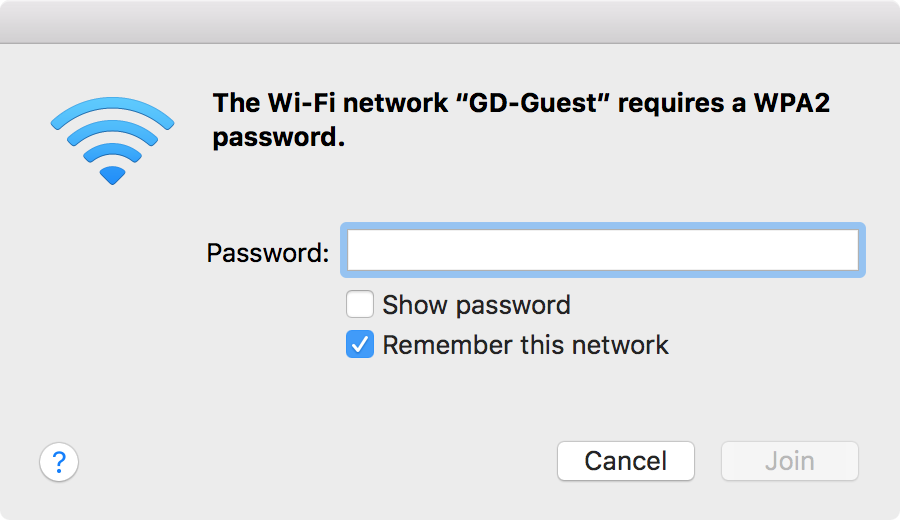
Wi-Fi login
When possible, always opt for a secure network, often shown with a padlock

The typical problem with public Wi-Fi is the login screen not showing up. That's only a problem only with open, public, unsecured Wi-Fi networks.

If you connect to an open network at your friend's house, say, typically you won't need a password and can just start browsing the internet directly. With a coffee shop or airport Wi-Fi, though, often you need to create an account or enter a code from a receipt before browsing the full internet. You have to do that on a custom login screen, and that's what often just won't load.

The best solution is also the most secure one: Opt for only encrypted Wi-Fi connections. Typically shown with a padlock beside their name in your Wi-Fi menu, encrypted networks ask for a password in a standard dialog like the one above. Once you've entered the password, you'll typically never need to do it again on that device as your computer will remember it.

Secure Wi-Fi connections are always easier to log into, but they also add a security benefit. On a public Wi-Fi network, by default anything you enter on an unsecured, non-HTTPS site could be viewed by anyone else on the network. Encrypted networks with WPA2 passwords are far harder to attack and thus your data is likely safer.

Some networks offer both an encrypted and public network option, and you could log into either one. If so, choose the encrypted network.

No encrypted network available? These tips should help you get that pesky open network login screen to load.

1. Turn Off Alternative 3rd Party DNS Servers

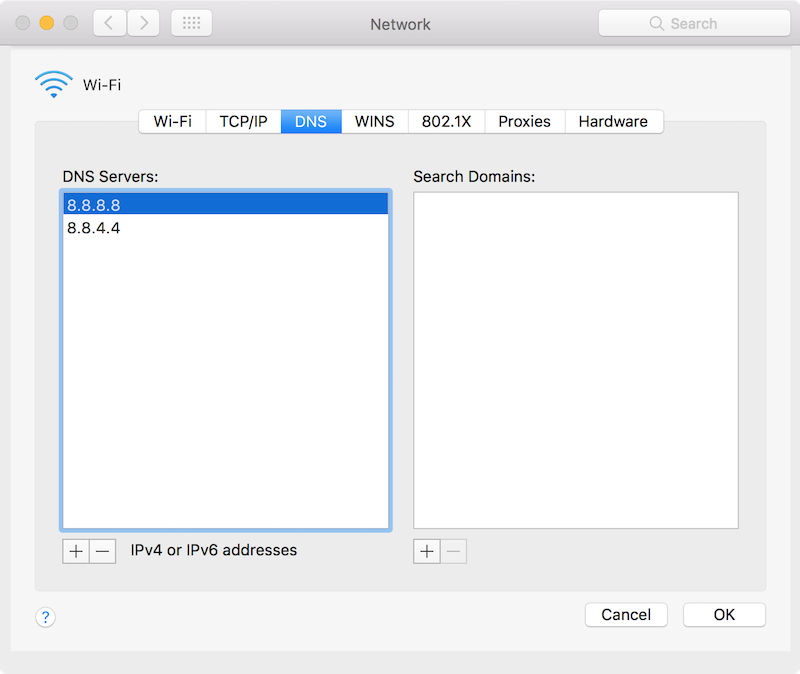
DNS Settings
You might speed up your internet with a different DNS server—but not when connecting

If there's one other tip to remember, it's this—the trick that usually gets login pages to load:

Turn off your alternate DNS server.

DNS servers, or domain name servers, match domain names such as zapier.com to its server's IP address—which makes it much easier to visit websites than typing in 52.0.36.104.

If you don't know where to change your DNS settings, you're likely fine; your computer by default automatically picks up a DNS server from the Wi-Fi router, which is what the public Wi-Fi expects you to use automatically. And that's good, at least with public Wi-Fi: Your login page is more likely to load, and you won't need these tips.

If you've ever added Google DNS, OpenDNS, or any other alternative DNS to your network settings, though, that may be your problem. Many public Wi-Fi networks use their DNS server to tell your computer which login page to open—which doesn't work when you're using an alternative DNS server.

To fix that, just open your DNS settings and remove any alternate DNS servers. Here's how:

  • Mac: Open System Preferences, select Network, Advanced, and then click the DNS tab. Select any DNS servers listed, and then tap the - button to remove them and apply your changes.
  • Windows: Right-click your network icon in the system tray and select Open Network and Sharing Center. Click your connection name (typically Wi-Fi), select Properties, then click Internet Protocol Version 4 and select Properties again. There select Option an IP address automatically to use the default DNS servers.
  • iOS: Open Settings, select Wi-Fi, and tap the i button beside your network name. Tap the DNS field and delete any text there. In iOS 11 or newer, or on an Apple TV, select Configure DNS and tap Automatic to turn off 3rd party DNS quickly.
  • Android: Open Settings, select Wi-Fi, and long-press on your network name then tap Modify Network. There, delete any text in the DNS field.

With that done, turn off your Wi-Fi then turn it back on—and the login screen should open.

If not, you might need to clear the DNS cache on your computer. Here's how:

  • Windows: Open Command Prompt, and enter ipconfig /flushdns
  • Mac: Open Terminal, and enter sudo killall -HUP mDNSResponder

Now re-connect to the Wi-Fi network, and it should work.

2. Try to Open the Router's Default Page

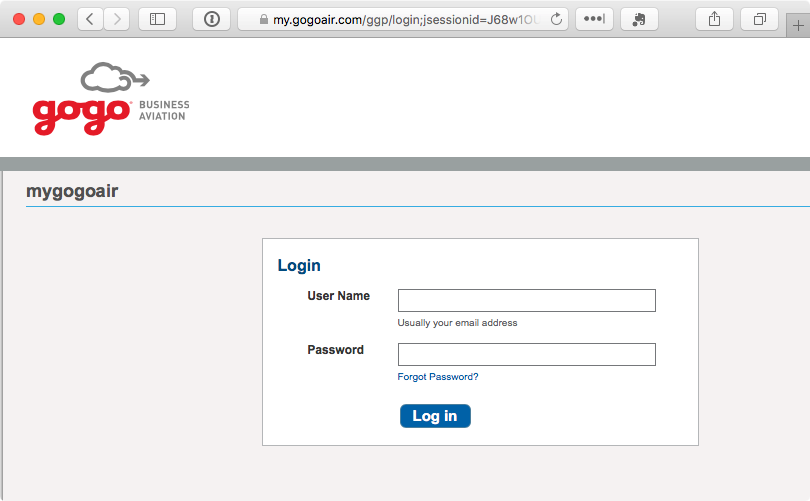
Gogo internet login screen
If you can guess the login page for your Wi-Fi network, sometimes you can get it to open.

Still not connected? It's time to try to force your browser to open the login page.

An easy trick is to load the router's default page. Try entering 192.168.1.1, 127.1.1.1, 1.1.1.1, or http://localhost in your browser address bar, and you might get the default login page to load (or, you might see a router settings login page—in which case, don't try to login unless you're at home).

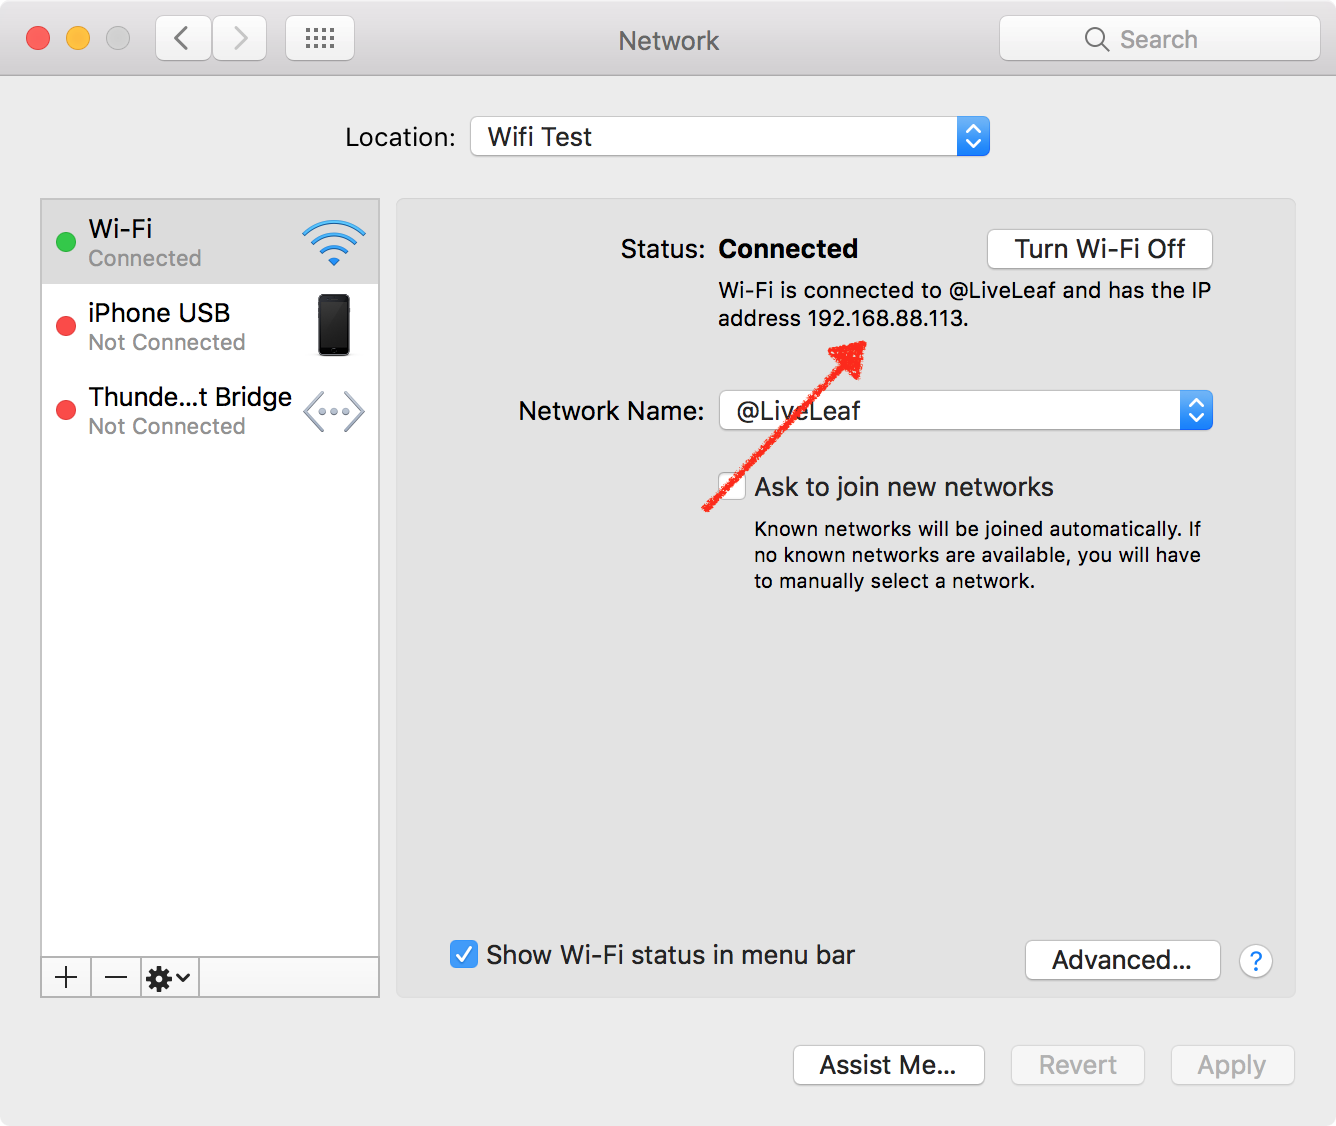
network IP Address
You can find your router's IP address from the Network settings

If that doesn't work, open your network settings again, and note your computer's IP address as in the screenshot above. Try entering that IP address in your browser, replacing the last number with 1. Or, check the TCP/IP tab in your Network settings for the router's IP address if that doesn't work.

Or, if you're trying to connect to a company's public Wi-Fi network—perhaps Gogo internet on a flight or your cell carrier's Wi-Fi network in a mall—try opening that company's website. Most public Wi-Fi networks let you browse their company site without logging in, and they often have a link to their Wi-Fi login page. For instance, on a Delta flight, I opened delta.com and was able to view info about the trip and finally get the Wi-Fi login page to load.

3. Open a Non-HTTPS Site in Incognito

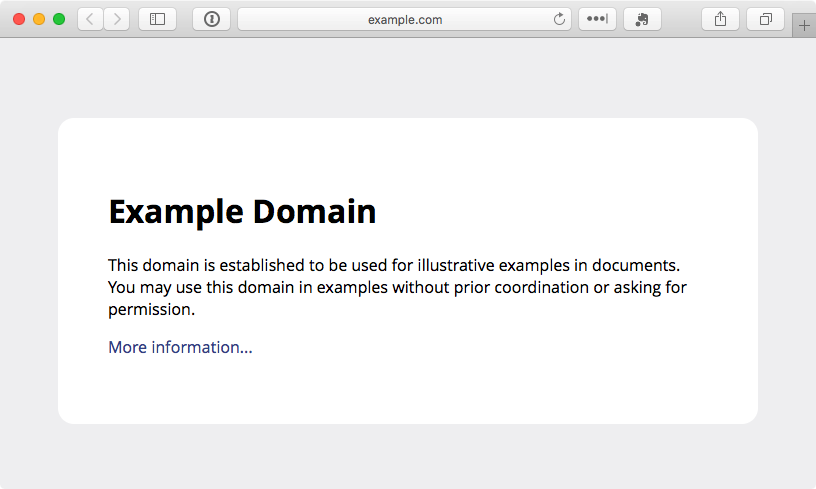
Example.com
Sometimes you just need to try loading a new page

The problem could be that your browser cache is still trying to use the DNS info it knows to access sites, instead of loading the Wi-Fi login page. And sometimes you can break it out of that loop by visiting something new.

You could clear your browser cache, but that's annoying, and you'd have to log back into everything. Instead, open an Incognito window in your browser, which loads with a clean slate. Then try visiting a non-HTTPS site; example.com is a great option as it's non-secured and maintained by ICANN.

Another good option is to manually visit the site your device tries to open in the background when connecting to new Wi-Fi networks. You may have noticed your device loading captive.apple.com when connecting to Wi-Fi; you could go to that site directly to force your browser to test the connection. Here are the default pages, each of which works on any platform:

4. Create a New Network Location

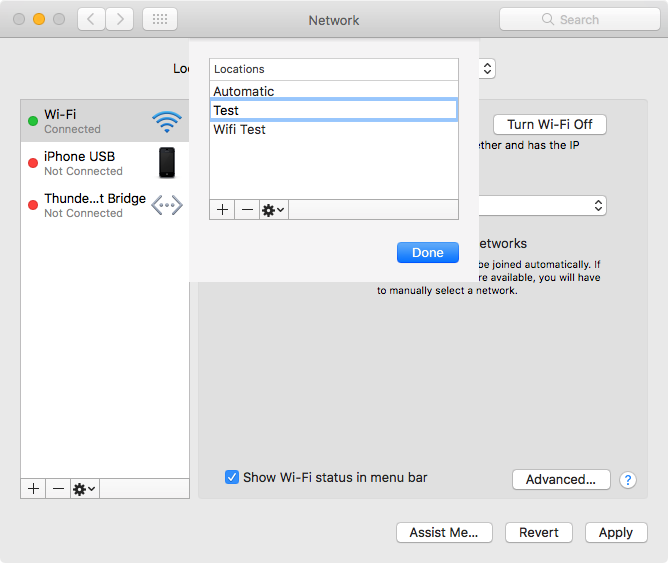
network location
On Macs, a new network location gives you a clean networking start

On a Mac, there's another simple way to clear your network settings and likely get the login screen to load: a new network location. Network Locations store your network settings for different locations, perhaps to make your computer use a different DNS at home than at the office or for an easy way to change which networks you connect to by default.

Open your System Preferences and select Network again. Click the drop-down at the top, select Edit Locations, then click the + icon and add a new location. Select it, and then try to connect to the network you want.

Just remember to switch back to your default network location when you're back at your office or home.

5. Restart

Sometimes nothing works. In that case, do the one thing that typically fixes every electronic device: Restart.

  • Turn off your Wi-Fi, then turn it back on.
  • Didn't work? Try logging out of your account on your computer and then log back in—or just restart your computer.
  • Still stuck? Clear your browser cache.
  • That didn't work? Might be time to ask around and see if anyone else can use the internet. Perhaps that Wi-Fi connection is just down, or the router needs to be restarted.
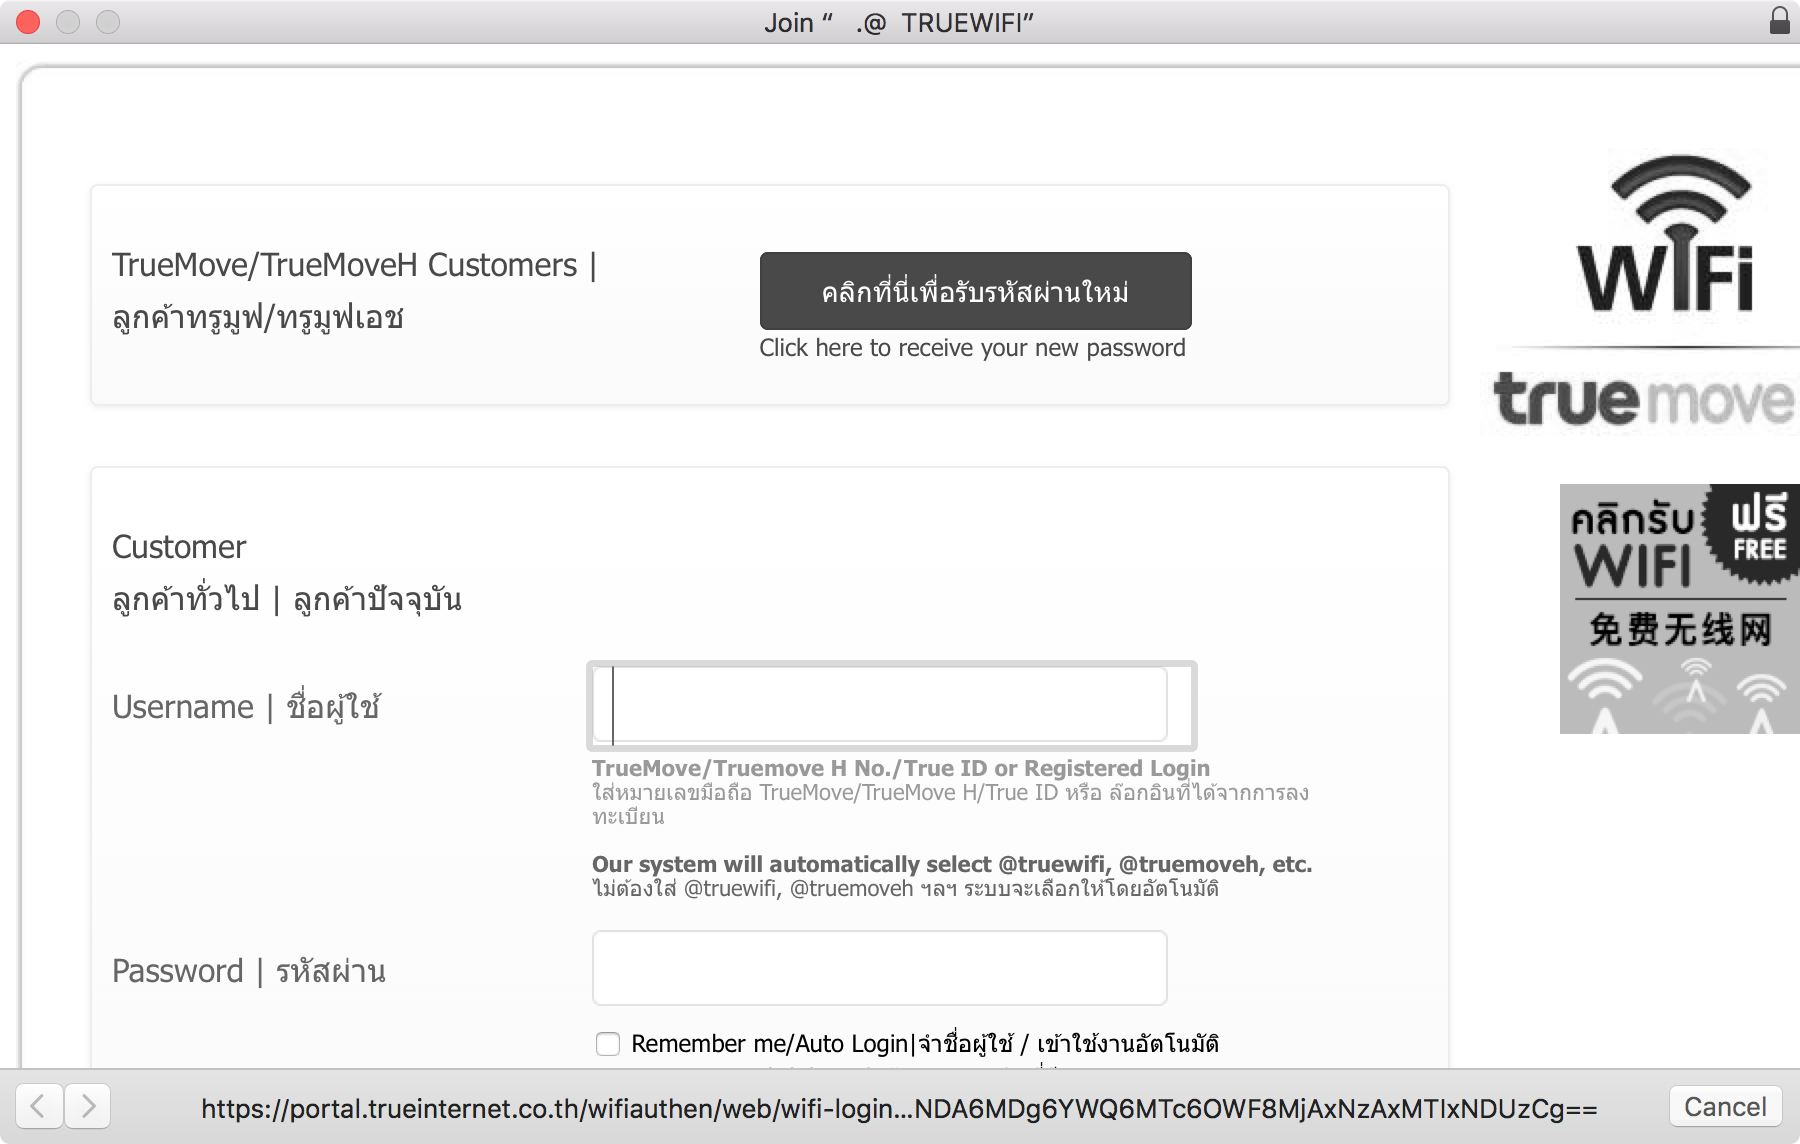
network login screen
That evasive Wi-Fi login screen

With any luck, you should be able to get the Wi-Fi network screen to load and can get back to work—hopefully without trying everything in this list!


Stay Secure on Public Networks

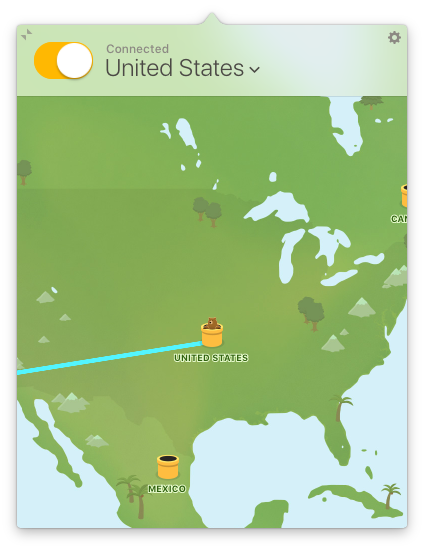
TunnelBear VPN
A VPN (virtual private network) makes any network more secure (TunnelBear pictured)

You've gone to all that trouble to get connected to a Wi-Fi network—but don't stop there. If you're on a public Wi-Fi network, you should also use a VPN to encrypt your data and keep it secure from prying eyes. And, you may need to use a VPN to access your company's internal data and services.

For around $5-10 per month, you can get a VPN connection, typically with apps that make it easy to use on your computer and mobile devices. Services like TunnelBear, NordVPN, ExpressVPN, and others make it easy to use a VPN—and TunnelBear even offers 500MB of free data per month if you only work out of your office or home occasionally. Or you could set up a VPN server on your own hosting account or server using OpenVPN or a similar tool.

Either way, remember to turn on your VPN on whenever you're on public Wi-Fi—as soon as you've gotten past the login screen, at least. Free Wi-Fi is not worth losing your data.

Share Your Mobile Data

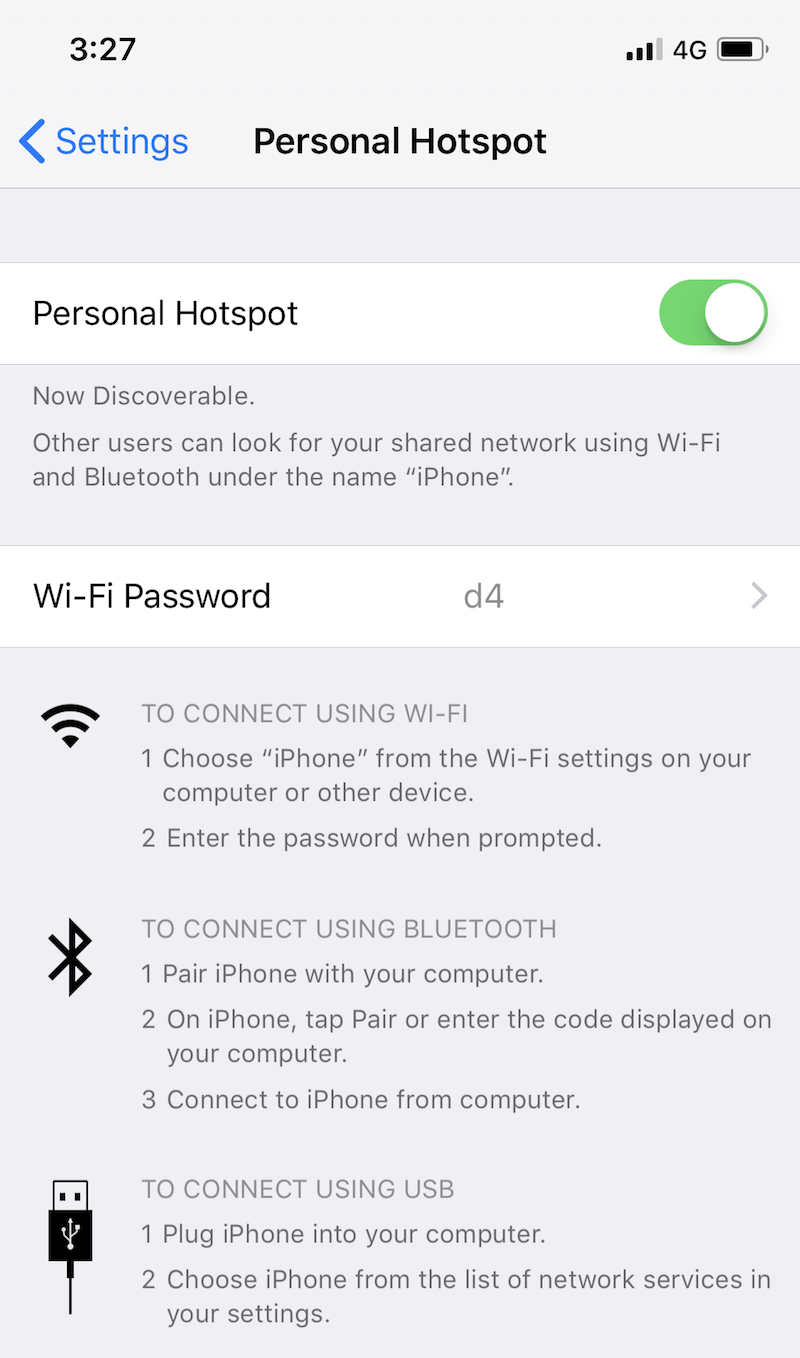
Share personal hotspot

There's another way to get online if public Wi-Fi isn't working: Your cell connection. If you have a data plan that supports it, all newer iOS and Android devices let you share your 4G or LTE connection over Wi-Fi. That way, you can make a private Wi-Fi network to connect any of your other devices. You can often do the same over Bluetooth or a USB cable if you only need to get your laptop online.

Here's how to make a personal hotspot from your smartphone with iOS and Android.

Bonus: Download a Wi-Fi Login Cheat Sheet

How to connect to airport wifi

Odds are you'll need these tips when you're offline and can't connect to the internet—which means you won't be able to re-open this page and refresh your memory about how to get your Wi-Fi to connect.

So, we made a free PDF cheat sheet for you. It includes all of this article's core tips in a quick PDF that you can save and share with your friends and colleagues.

Make sure to keep a copy of this How to Connect to Public Wi-Fi When You Can't PDF saved on your computer and phone so you'll have these tips the next time you need them.

Free Wi-Fi sign photo by Clarice Barbato-Dunn via Flickr.

Originally published January 16, 2017; updated September 21, 2017 and November 13, 2018 with a few extra tips.


source https://zapier.com/blog/open-wifi-login-page/

Cloud Storage Showdown: Dropbox vs. Google Drive

Between your personal laptop, your work computer, your phone, and any other device you might use, keeping your files in order can be a doozy. Cloud storage software offers a convenient way to access all your files from anywhere—and be sure they're all up to date. Among the best cloud storage apps are Dropbox and Google Drive, so let's see how they stack up.

Common Features and What We Looked For

Here's the basic gist of what Dropbox and Google Drive offer:

  • They back up your files to the cloud. Dropbox and Google Drive allow you to create a folder on your device. Any files that go in that folder will immediately be uploaded to the company's servers, giving you a backup in case anything happens to your machine. Keep in mind, though, that your should always have a separate backup source as well, whether it's an external hard drive or a dedicated backup service like Backblaze. If you accidentally delete a file or folder from your computer, it'll be deleted from Dropbox and Google Drive as well.
  • They sync files across your devices. If you have multiple devices, Dropbox and Google Drive make sure that you have copies of all your files on each of them.
  • They let you share your files with other people. Both services have robust tools to give other people access to files and folders so you can collaborate on your work. If you run an organization, they also give you tools to manage or revoke that access, so everyone has access to the files they need, and only the files they need, at any given time.

Here, we'll examine a few key areas that relate to syncing, backing up, organizing, and sharing your files. Click on the section that's most important to you and your business, or jump to the end to see our complete comparison table.

Pricing

Google gives you more space for your money

Both Google and Dropbox offer you a small amount of free file storage, but Google is far more generous. Dropbox's free plan includes 2GB of storage, while Google Drive's comes with 15GB. Of course, there's a catch: That 15GB is shared across your entire Google account and includes things like email attachments and photo backups, so it's easier to burn through that space.

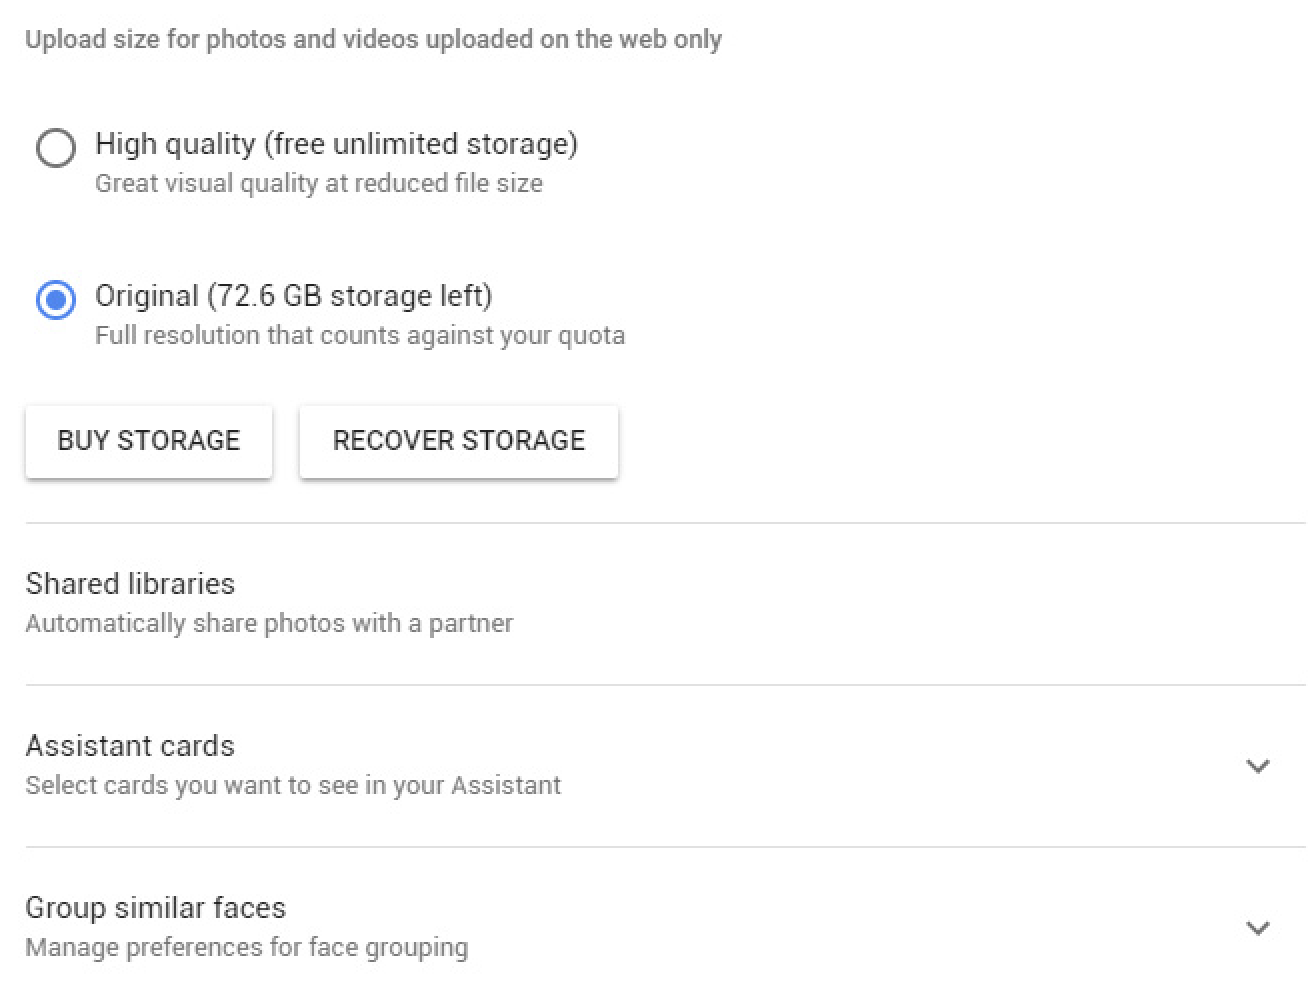
If you want more space, Dropbox provides a number of ways to get more without paying for it. For example, you get an extra 500MB for every new user you sign up. This is harder to do now than when Dropbox first came out, since many people already have Dropbox accounts, but every bit helps. You can also go through Dropbox's Getting Started guide for another 250MB. Google Drive doesn't offer a similar referral program, but if you happen to use Google phones, you can get extra storage for things like original-quality photos and videos.

Alternatively, you can pay for extra storage. Dropbox's plans start at $10 per month—or $100 per year, if you pay annually—for 1TB of storage. With Google Drive, you sign up for a separate service called Google One, which adds storage space to your Google account. Using Google One, you can get 2TB of storage for the same price as Dropbox's 1TB plan. Google also offers smaller, cheaper plans: You can get 100GB for $2 per month (or $20 per year), or 200GB for $3 per month (or $30 per year).

No matter how you slice it, Google gives you more options to get more storage for less money. Sharing storage with your entire Google account is a little inconvenient, but if email attachments and photo backups push you over your limit, Google at least provides bargain bin plans to get more space.

For complete details, see Dropbox's and Google One's pricing pages.

Speed

Dropbox syncs faster and supports local sync

Part of what made Dropbox so popular in the first place was the innovative technique it uses for file sync: block-level file copying. To put it simply, when Dropbox syncs a file, it only copies the bits that have changed. The first time you sync a file will take the longest, but every time you change it after that, the updated version should be available on all your devices almost immediately. Google doesn't use block-level file copying, but it does run some of the fastest cloud servers in the world, so the speed difference might not be noticeable unless you're dealing with very large files.

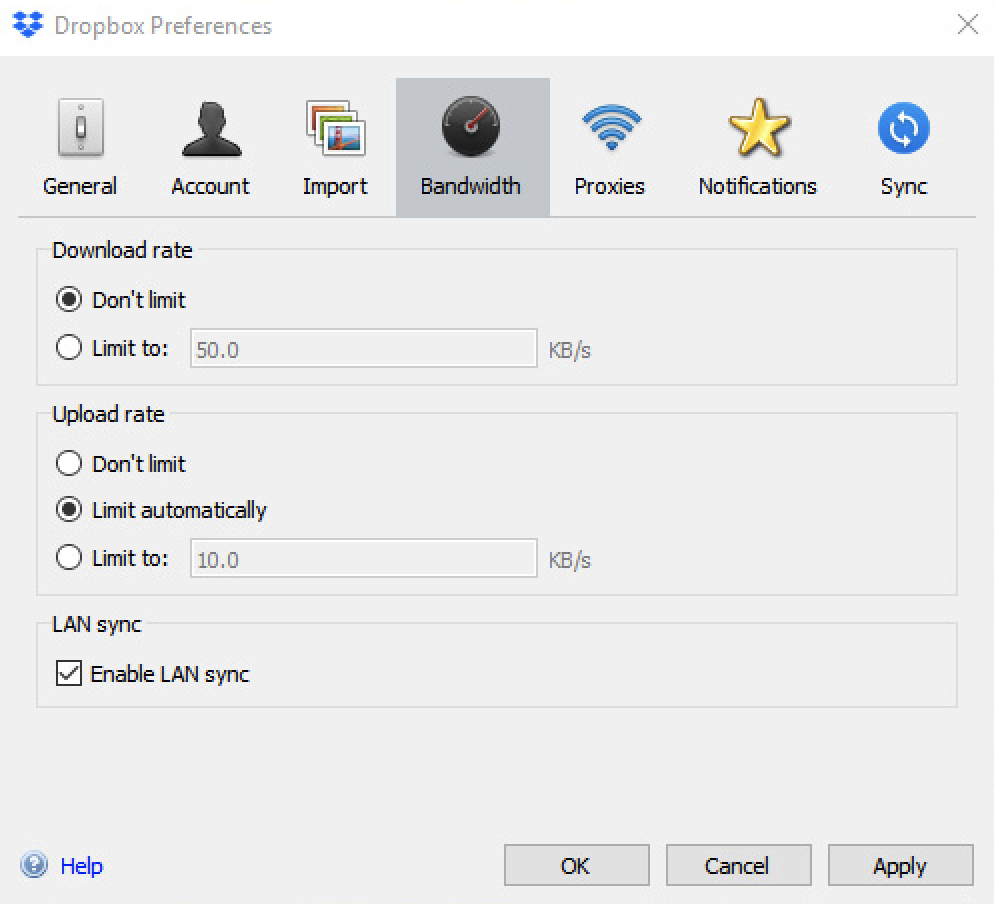
Dropbox also has a unique advantage with LAN sync. If you have multiple computers connected to a single network, Dropbox will sync files directly between them. It will still back up files to the cloud, but transferring large files to computers on the same network will happen a lot faster. With Google Drive, a file on Computer A will have to upload to the web, then download to Computer B, which can take longer for larger files.

LAN sync option on Dropbox
That little LAN sync checkbox can mean a huge performance difference for small businesses on a local network.

The lack of block-level file sync and LAN sync makes Google Drive slower (though you might not even notice for small files), but it also means that Google Drive uses more data. If you have a data cap on your internet, as many home internet providers do, and you're transferring large files, Google has a higher chance of using up your monthly data.

Security

Google is slightly more secure, but Dropbox is also safe

The only surefire way to keep your files safe from attackers is to avoid storing them in the cloud to begin with. But the files you do upload to the cloud still need protection. In this area, Google has the edge.

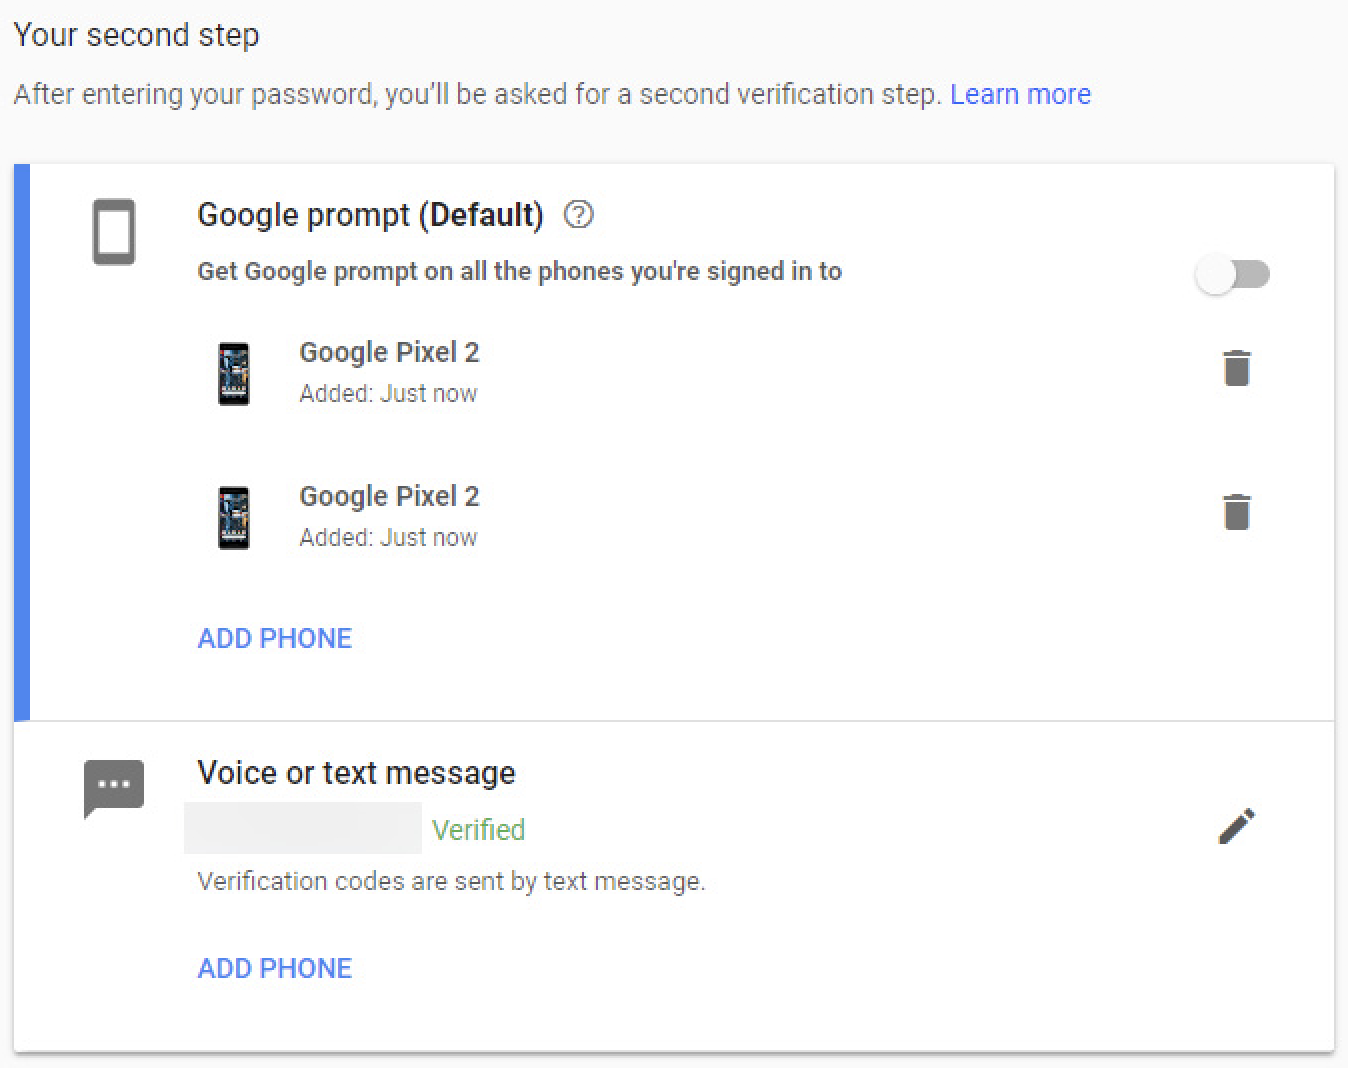
Google has been an industry leader in two-factor authentication support, allowing you to secure your account by requiring your choice of SMS, an authenticator app, one-tap sign-in on your phone, a phone call with a code, or even a physical key like the one Google requires all of its employees to use. Dropbox, meanwhile, only supports SMS- and app-based authentication tokens. These are better than nothing, but Google gives you more options to protect your account from unauthorized logins.

Google security measures

Google is also a bit better at securing your data while it's on their servers. Both Google and Dropbox encrypt your data while it's traveling from your computer to their servers. Once it's in the cloud, both generate a key that's used to decrypt it when you need to access it. Google takes an extra step by encrypting that key using a second, rotating master key. This essentially means anyone who could steal data from Google's servers would need two keys to read your data, not just the one they'd need if they wanted data from Dropbox's servers. Google also encrypts data when it's in transit between its own servers. This was an extra step the company started taking to protect data from NSA snooping.

File Browsing and Search

Browsing is easy on both, but Google's search is leagues smarter

Dropbox and Google Drive both have a desktop app that creates a folder on your computer to sync between your devices. You can browse this folder using Windows Explorer or Finder on a Mac—just like you would any other folder—or you can browse on the web, sorting by file type, who owns the files, or when the files were last modified.

In the web version, Google Drive displays a Quick Access bar along the top of the page with suggestions of files you might need, e.g., recent files or files that are relevant to your meetings in Google Calendar. You can also star items as important, but those end up tucked away in a separate tab. Dropbox, on the other hand, shows you the files you've uploaded most recently, as well as a row of items you've starred. In this way, Dropbox gives you more control over which files you see first, while Google Drive relies more on algorithms to guess your needs. Depending on what you prefer, one might be better, but they both get the job done.

Where Google excels is in searching your files. In Dropbox, you can search for a specific term or limit your search to subfolders—but that's about it. If you pay for Dropbox Professional or Business, you can also search for text in images. Google Drive, on the other hand, supports search parameters similar to the ones you see in Gmail: You can search by the type of file, who owns the files, who they're shared with, or when they were last modified.

When it comes to searching photos, Google's lead gets even more dramatic. If you use Google Photos to back up pictures with your Google storage, then the company's powerful AI can detect faces of people and animals and automatically sort them into albums.

Google photo search
Google can identify faces in photos, including those of specific animals.

If you take pictures of receipts or business cards, Google Lens will read and copy text, phone numbers, or email addresses right from your photos and allow you to search on that information. Better yet, if you search for things like "receipt" or "business card," Google Photos can identify pictures of those items. Some of these features (like Lens) are only available on mobile, but they're massively convenient.

Photo and Video Backup

Google Photos is a powerful add-on that Dropbox can't match

Dropbox and Google can both automatically back up all your photos and videos to the cloud. Dropbox will complete the back up from your computer, and if you pay for the Dropbox Plus plan or higher, you can upload them straight from your phone. Photos and videos take up huge chunks of space, so if you're planning to use Dropbox for either one, you'll probably want to pay for a higher tier plan anyway.

Google Photos, on the other hand, backs up photos and videos straight from your phone for free. Better yet, any photos smaller than 16MP or videos at 1080p or smaller won't count against your storage limit, and you can automatically scale down your media if you don't want to use up your space. So even though videos and email attachments share the same storage limit, Google's flexible and more generous plans are still more affordable than Dropbox.

Google Photos settings

Google also beats Dropbox for editing and sharing media. Dropbox has a Camera Uploads folder: You can add comments to pictures or videos, and that's about it. To share a group of photos, you create a folder and share it, but there's no longer a way to create and share a photo album. Meanwhile, in addition to regular photo albums, Google Photos lets you create Live Albums that automatically fill themselves with pictures of people you tag, using Google's uncanny facial recognition software. For example, you could create a Live Album of your spouse and children; then, every photo you take of them will conveniently show up in the same album.

Google Photos also includes a basic photo editor that lets you tweak light and color, apply Instagram-style filters, or crop and rotate images. The latter is most useful for businesses, allowing you to rotate photos of receipts or business cards to a readable orientation. The Dropbox mobile app can do this, but it's currently not possible on the web. But for photographers or media professionals who already use apps like Lightroom to manage their media, Dropbox works great for storage.

File Sharing

Dropbox edges out Google Drive with some advanced features

Dropbox and Google both offer robust options to manage who on your team can access your files. Both apps let you share individual files or entire folders by sending an email or by sharing a link. If you choose the former, you can specify who should have access and revoke or change those permissions later on. If you share a link, you can let anyone with the link view or edit files, but if you ever want to revoke access, you'll need to disable link sharing entirely.

For the most part, Dropbox and Google Drive are identical on this front, but Dropbox has a couple advantages. On Dropbox, when you create a shareable link, you can also add a password, so only people who know the password can access the files. You can also set an expiration date, after which the link to your files will stop working. The expiration date can only be set to a certain day—so, for example, you can't create a link that expires after an hour—but it's more than Google offers.

Dropbox file sharing

You can also share files directly from Explorer or Finder with both apps, but it's slightly easier with Dropbox. If you right-click a file or folder on your computer, both services add a shortcut in the context menu to the Share dialog, where you can invite someone to access a file with an email. But Dropbox also adds an option that reads "Copy Dropbox link." This will immediately create a shareable link to the file or folder and copy it to your clipboard. It only saves you a couple of clicks, but if you're sharing files a lot, those clicks can add up.

What about when someone leaves your team? Dropbox handles this much better than Google. The owner of a file or folder in both apps can promote anyone to owner status, allowing them to take over control. The new owner can then remove the previous owner entirely. However, Google can't promote someone outside your organization to owner status. So, for example, if you create a file on your personal Gmail account, you can't make someone who uses a company Gmail account the owner, or vice versa.

Also, unlike Dropbox, Google Drive doesn't have a method to transfer ownership of all files in an account to someone else. You can make someone else in your domain the new owner of several folders at once, but any files within those folders will retain their original ownership. You have to go into each folder level and select everything, which can be quite tedious. Additionally, Dropbox gives you the option to allow users to keep a copy of the files you're revoking access to, while Google Drive doesn't. Overall, Dropbox and Google are both good at sharing files, but Dropbox handles the transition more smoothly when someone leaves your team.

File Recovery and Change History

Google Drive stores more deleted files and has more detailed change trackers

When multiple people are editing, copying, and transferring files, you need a way to keep track of who's changing what. Dropbox and Google Drive both give you tools to restore previous versions of files, but Google's broader suite of services gives you more robust options.

With Dropbox, if a file is ever deleted, you can go into the Deleted Files section of the app or site and restore it with the click of a button. You can even filter deleted files by which folder they were in, when they were deleted, or who deleted them. The downside: Dropbox only saves deleted files for up to 30 days for Basic or Plus users (that limit goes up to 120 days if you subscribe to Dropbox Professional or Business). Meanwhile, Google puts any "deleted" files in a Trash folder. Even if you've permanently deleted a file from your computer, Google will store a version in the Trash online. It will stay there forever until you empty Drive's Trash, after which point a G Suite administrator can still restore it for up to 25 days. It's a handy series of fail-safes to prevent unwanted data deletion.

If you need to restore an older version of a file, both Dropbox and Google will let you go back through up to 30 days worth of older versions of a file. That means if you edit a document, create a new version of a video, or overwrite a PDF, Google and Dropbox will save the previous version for a month. Once again, though, Dropbox will raise that cutoff to 120 days for Professional and Business subscribers. With Google, no matter how much storage you buy with Google One, you'll still be stuck with 30 days of version history.

Dropbox version history

But Google has one advantage in this area. Version history in Google Docs, Sheets, and Slides is top notch. If your team uses Google Docs, you can not only restore previous versions of files, but also see who made which changes, restore specific versions from the middle of an editing session (since Google automatically saves documents regularly), and even name older revisions to save them for later, separate from the main version you're editing.

This is technically a feature of Google's office software, not Google Drive itself, but it illustrates an important point. Google doesn't just offer a cloud storage folder. Drive is tightly integrated with a broader collection of apps that work better in tandem. Dropbox offers shortcuts to create documents in Microsoft Word Online, but after that, you're on your own. Version history is a paid feature of Microsoft Office, and while Dropbox can restore older versions of a Word document, it can't track changes the same way Word can.

Which Cloud Storage App Should I Use?

If you just want to sync files and folders between multiple devices, Dropbox is hard to beat. It's fast, it's reliable, and it works invisibly in the background. Dropbox doesn't come with a lot of extra features, but by focusing on its core product, the company still manages to have one of the best products around.

If you're looking for a total solution for your business and you're not married to other office software or photo management tools, Google Drive offers a compelling case. Its tight integration with Google Photos and G Suite offers a lot of perks that Dropbox simply can't match. And it doesn't hurt that it's a lot cheaper to increase your storage allowance.

Finally, here's an at-a-glance feature comparison.

Dropbox Google Drive
Pricing Starts at $10/mo for 1TB Starts at $2/mo for 100GB, $10/mo for 2TB
Speed Block-level sync, LAN sync No block-level/LAN, fast servers
Security Encrypts data in transit and at rest, SMS and app-based 2FA only Encrypts data in transit, at rest, and encrypts keys, 2FA via SMS, app, phone call, or physical key
File Browsing and Search Basic file search, can manually star items for easy access "Smart" Quick Access bar automatically pins common files to the top. Supports advanced search parameters, and machine learning in Photos search.
Photo and Video Backup Back up photos and videos from desktop, upload from phone with Plus or higher subscription. Limited by storage available. Unlimited 16MP or 1080p video uploads, higher-quality limited by storage available. Can upload from any device. Google Photos offers advanced sharing and editing capabilities.
File Sharing Basic permission management. Shareable links support password protection and expiration dates. One-click shareable links from desktop. Basic permission and ownership management when sharing files. Difficult to offboard team members.
File Recovery and Change History Can recover files deleted or changed within past 30 days. Limit raised to 120 days with Professional or Business. Trash folder stores deleted files forever until emptied. Recover older versions of files within 30 days.

Automate Dropbox and Google Drive

Once you've selected a cloud storage app, you can start automating your file backups and notifications.

  • Save new email attachments to your cloud storage:
  • Get notified whenever certain files are added to your cloud storage:
  • Or, if you use both apps, you can automatically copy files between the two:

Don't see the workflow you're looking for? Browse other Dropbox and Google Drive Zaps, or create your own using the Zap editor.


source https://zapier.com/blog/dropbox-vs-google-drive/