
Building a new website seems like an impossibly hard task, something that'd take a few hours at best and a few weeks or months at worst. You'd never make a new website just to share a couple reports or write about a project you're working on.
You could, however. With the newly redesigned Google Sites—one of Google's best yet least known apps—you can build a full website for free in minutes. Here's how.
What Is Google Sites?
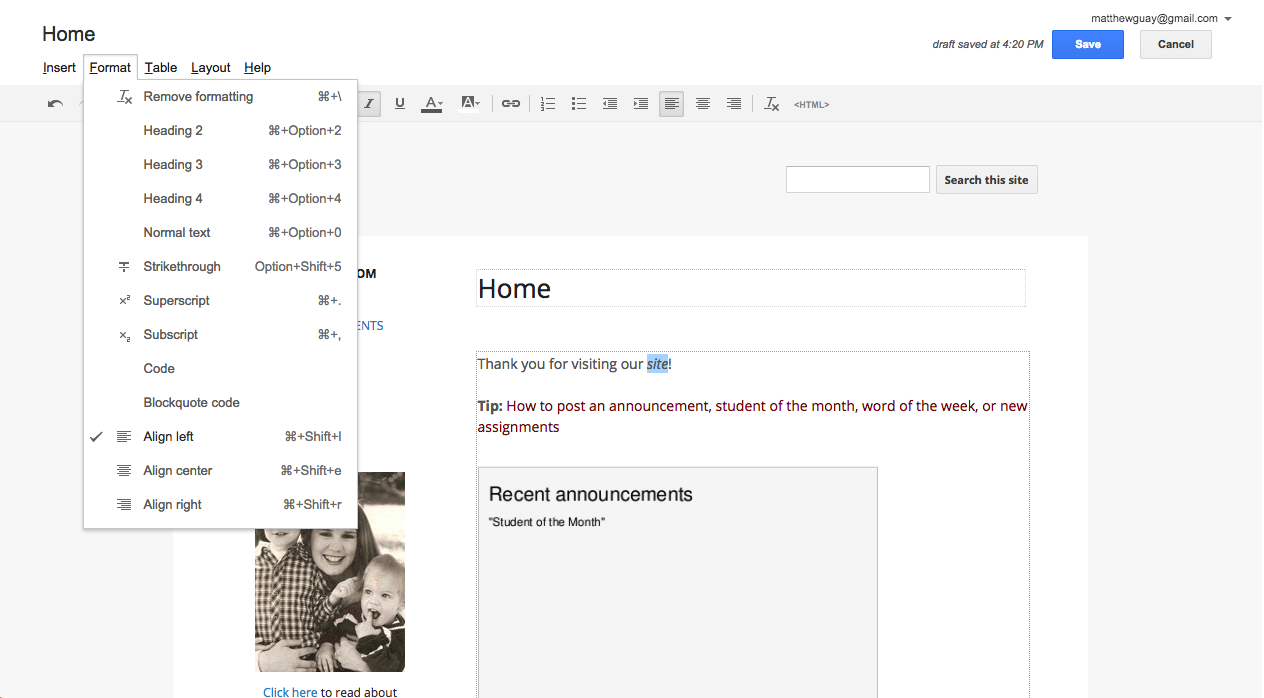
Google Sites has been part of Google's suite of apps since 2008, when it was launched as a simple website builder. The original version looked very similar to Google Docs—and the resulting websites looked a bit like documents with a search bar at the top.
You could format text, embed images, documents, or videos, and even insert your own HTML code if you wanted to add more features. Everything was laid out in tables, so you could have a single or multiple-column layout for your content.
Then, in late 2016, Google revamped Google Sites, giving it a design quite similar to the new Google Forms. It uses a one-column design like many modern websites, and it makes it easier than ever to lay out your site, with all the tools organized into a sidebar or a popover menu that appears when you select text on your site.
Both app versions are still available—you can choose which editor you'd like to use when creating a new site. The newer one includes a cleaner design, and is easier to use, while the older version lets you use a custom domain with a G Suite account and tracks changes to the page so you can go back to a previous version. Either way, they're a great way to quickly build a website or intranet for your team.
What Can You Do with Google Sites?
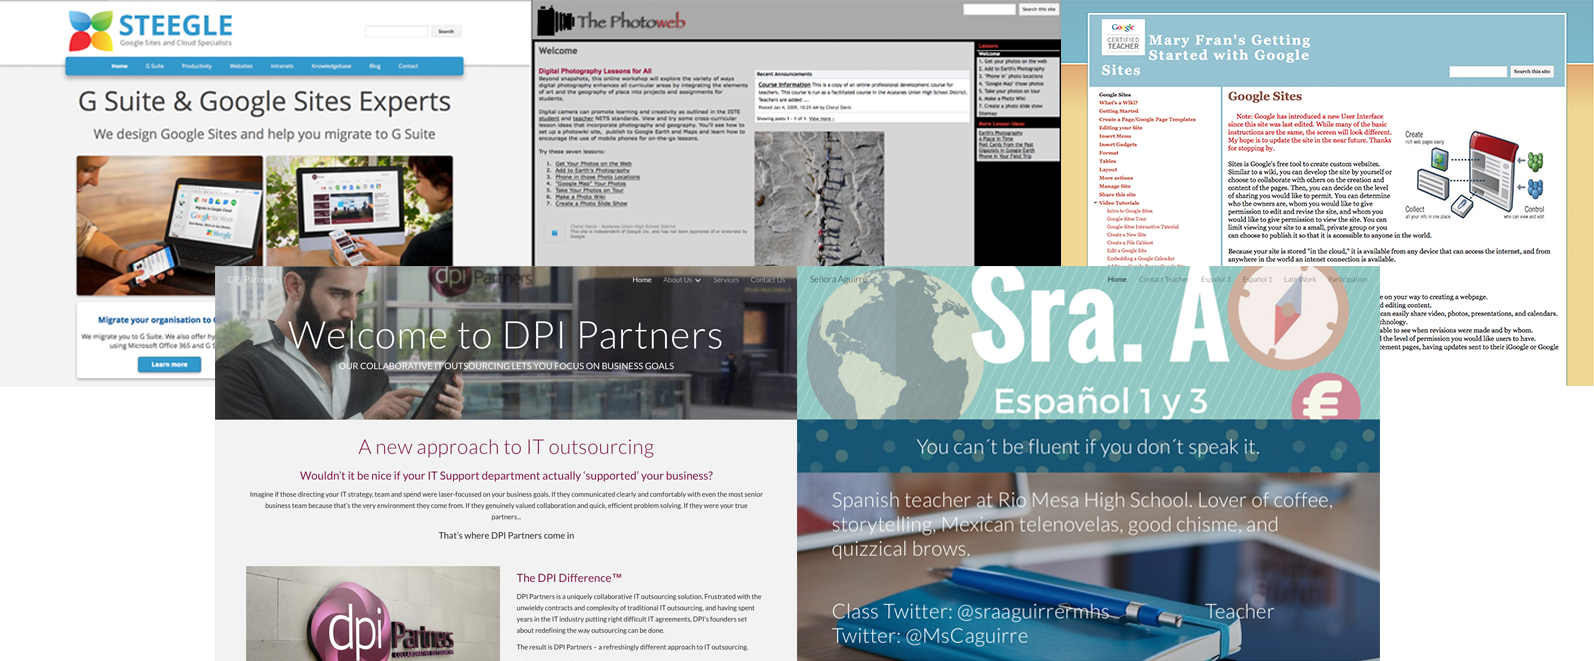
Maybe you want to make a detailed site with pages and pages of info, as Mary Fran did with details about Google apps. Perhaps you've built an online course, and would like to share it with the world as Photoweb did with the older Google Sites. You might need a site for your brand, as Steegle and DPI Partners built with the older and newer Google Sites, respectively. Or, you could want a way to share contact info and calendars with your class, as Señora Aguirre did in the new Google Sites.
You can build all of those and more in Google Sites.
And, it's free. With just a standard Google account, you can make as many Google Sites as you want for free. The new Google Sites uses your Google Drive account to store images and files you share on your site, so you can even store up to 15GB of files for your sites for free, shared with your other Google apps.
The only catch is that your site will be on Google's domain, with an address like sites.google.com/view/yoursite.
Want a site on your own domain? Just create a G Suite account for your domain for $5/month per person on your team, and you can link your domain to Google Sites from your G Suite Sites admin. There's only one catch: The new Google Sites doesn't work with custom domains yet, so you'll need to use the old Google Sites for that right now.
Build Your First Google Sites Website
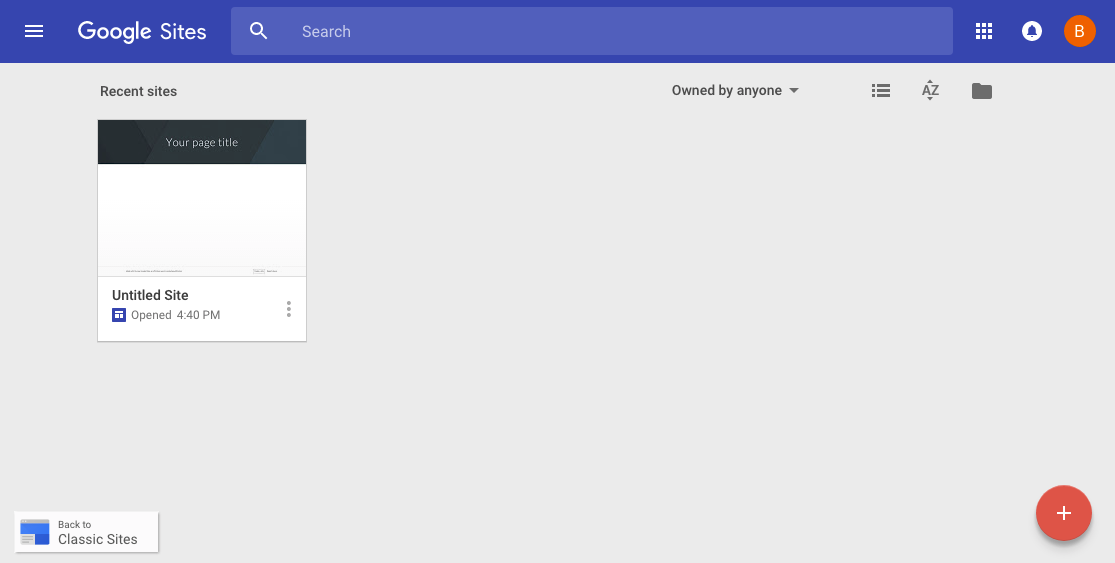
Ready to build your first site? Just go to sites.google.com/new to start building a new website. That'll drop you directly into the site editor. Or, if you'd rather use the older Google Sites for a custom domain, click the Back to Classic Sites button to switch to the older version.
Now it's time to build your site. We'll try re-creating part of Zapier's About page in Google Sites as an example—you can follow along, or start building your own site.
Add a Welcome Banner
First, add a title in the top left corner of the editor—that's the name you'll see inside the Google Sites app when you go to edit your site. Google will copy that to the top corner of your website too, but you can edit that if you'd like to give your site a different public and private name.
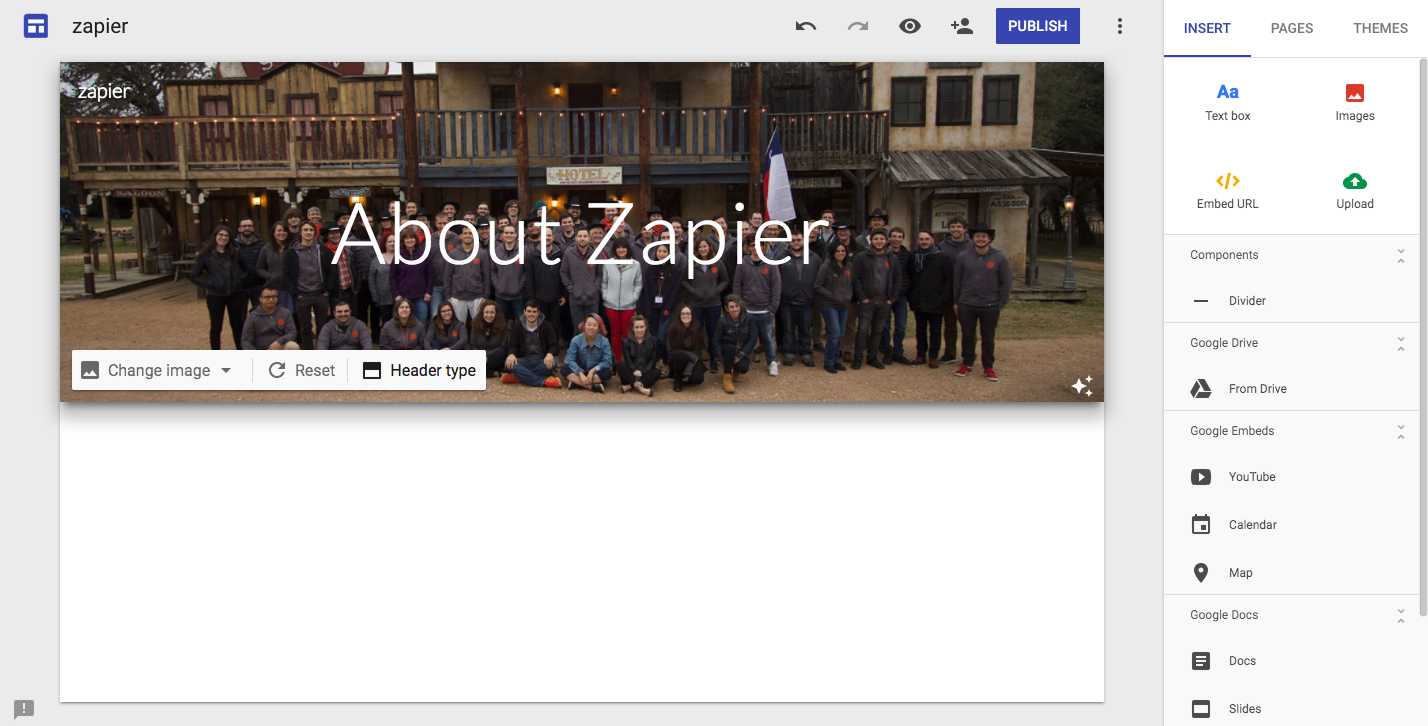
Then, add a welcome message to the top banner—or delete the text if you don't want to include any text. Click the banner, and you can select a new image for the background or upload your own. You can also choose a larger banner or just a page title.
Here I've added Zapier's team photo as the header background, and written About Zapier as the page name.
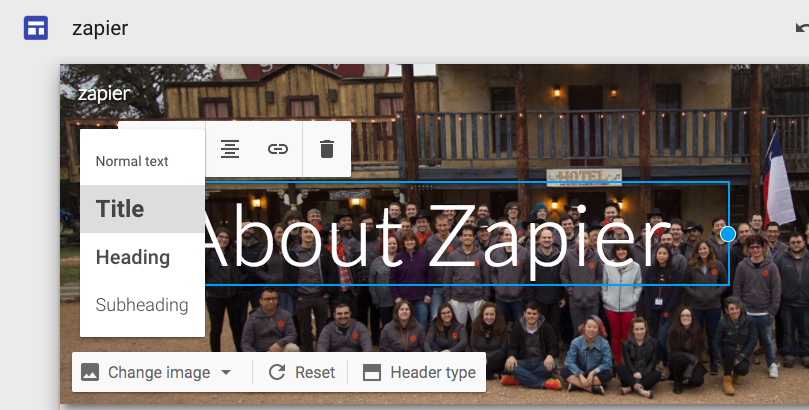
Want to change how the title looks? Just select the text or click the edge of the text box, and you can change the heading type or text alignment, or add a link to another site. Hover your mouse near the top of the box, and you can drag the header to the right or left sides of your banner, too—though the text will always stay centered between the top and bottom of your page.
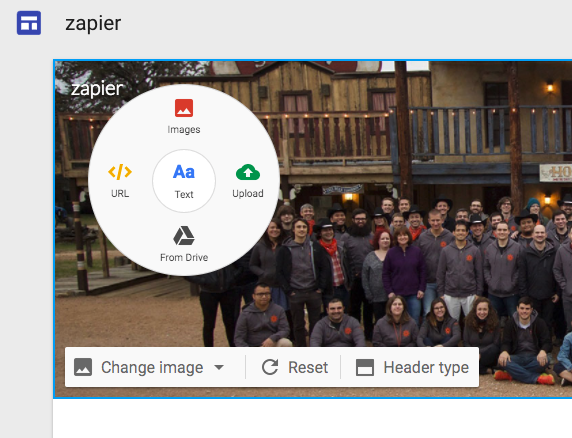
Or, you can add another image to your banner, such as a company logo. Just double-click anywhere in the banner, and a hidden circle menu will open. Select what you want to add: Text lets you add the text back to the banner if you removed it, Images lets you add a photo from your Google Drive, and Upload lets you upload a new photo.
There's only one catch: Each element in the header is still centered, so you can't drag the logo to the top left corner or add text to the bottom of the banner.
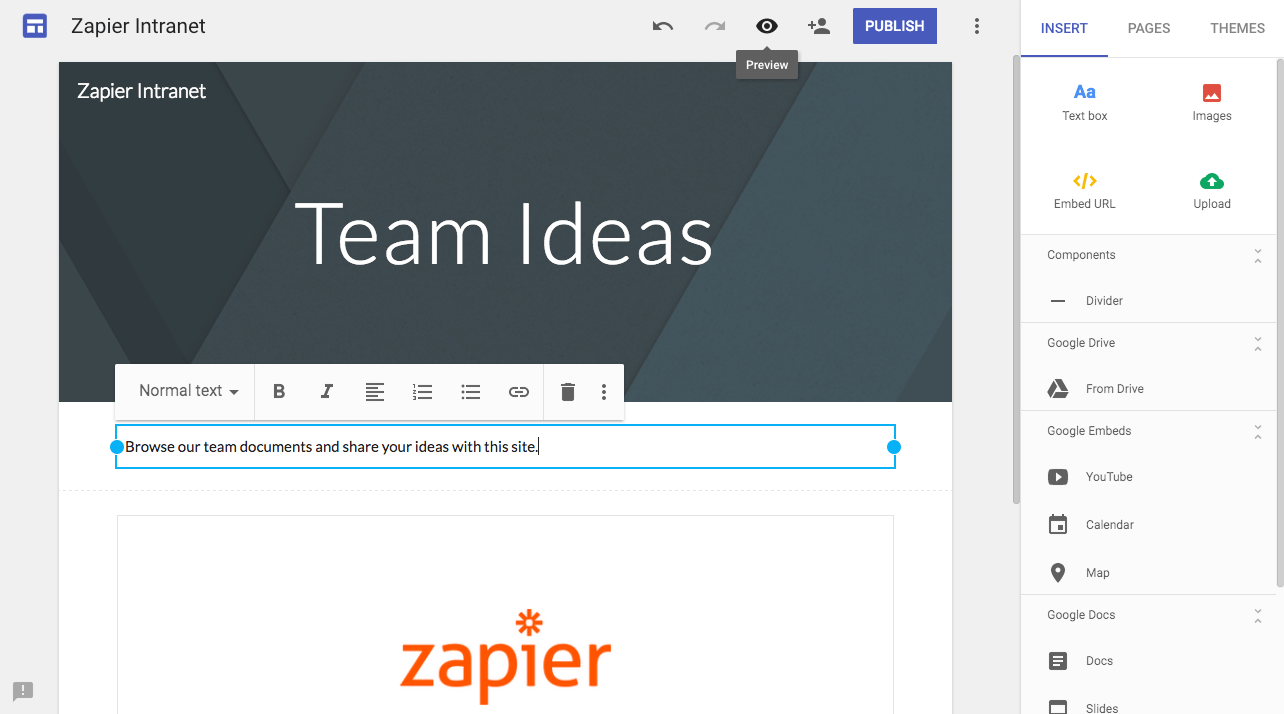
Add Text and Other Media to Your Page
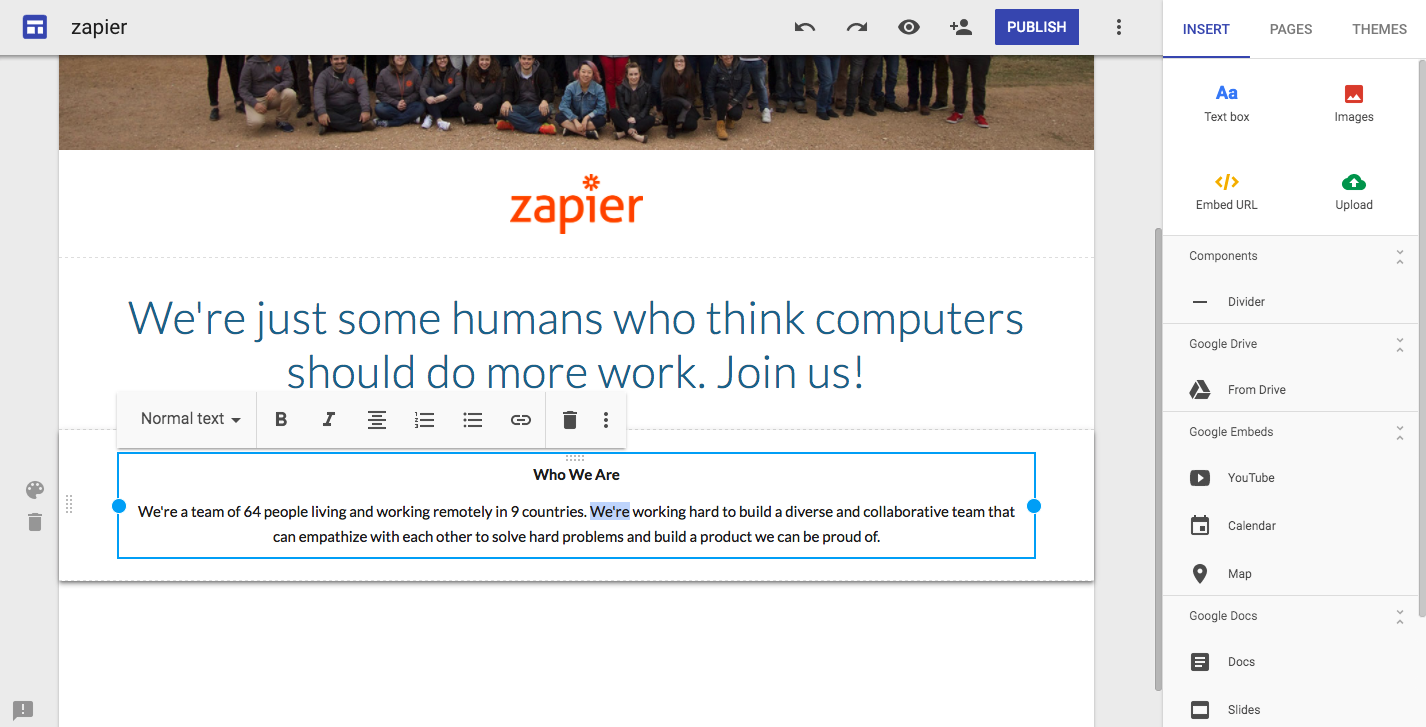
Now you can add the content you want to your page. From the Insert menu on the right, you can add text or images, or embed a link from another site. Google Sites lets you resize and crop images, and its text editor lets you quickly format text with standard keyboard shortcuts or the menu that pops up when you select text. Add titles and subheadings from the editor's menu, or if you want to share code (perhaps in a tutorial about writing HTML), click the 3-dot button on the right to add code-style monospaced formatting.
Since we can't add a logo to the top corner of our site, I've added Zapier's logo as an image—and resized it to look nice on the page. I've then added a Text box with sub-heading formatting for some larger text, followed by a second text box with normally formatted text.
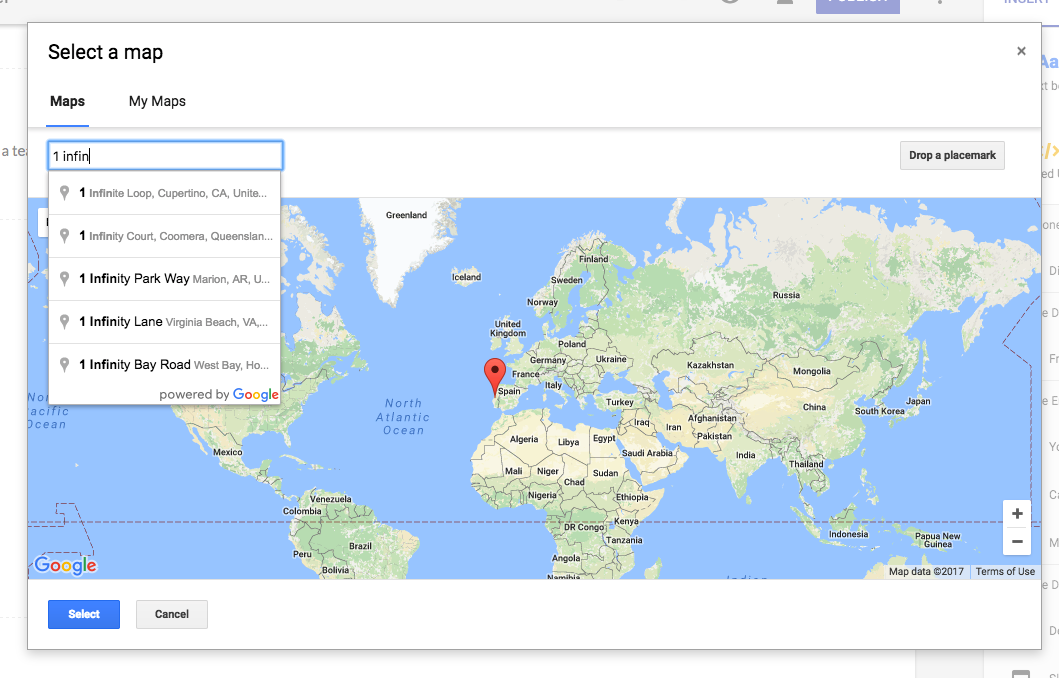
You can also add extra elements to your page: YouTube videos, Google Maps, Google Calendar events, Google Forms forms, charts from Sheets' spreadsheets, or full files from Docs, Slides, and Sheets. Select the type of item you want to insert, and you'll see a Docs-style popover where you can search for the item you want and then Select it to insert it in a new section in your page. It's a simple way to build a landing page or make a live report with an embedded presentation and spreadsheet. You can use it use it to create a website for a team project, for example, or to plan meetings and activities in one easily accessible place.
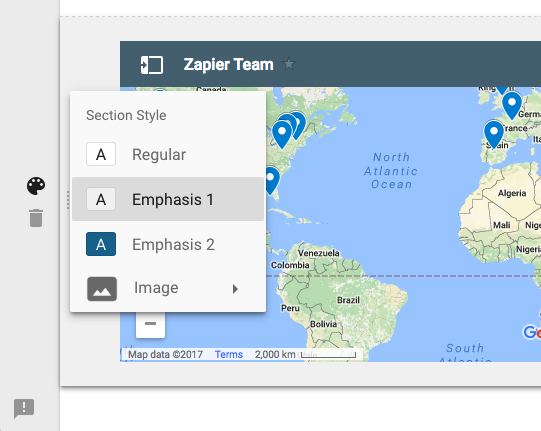
On the left of each section of your site, you'll see a 3-dot button that you can drag to rearrange the section on your page. Tap the color palette to select a different background style for that section, or click the trashcan to delete it.
I've added a darker color to accent our map, for instance—a great way to break up longer pages visually.
Make a Multi-Column Layout

Want to add multiple columns to your layout, perhaps to have a group of pictures together, or to add several of your product's top features in one spot?
Just double-click any blank space on your page, and Google Sites' magical circle menu will open again. Select what you'd like to add, and it'll show up in a new column right under where you clicked. Only that one section will have multiple columns, so you could have say a full-width site description, then 3 columns in the next section with details about your site, followed by a full-width video section.
Or, double-click on the 3-dot button to open a hidden circle menu, where you can again insert text, images, or Google Drive files. That inserts the new item beside your existing element, for a quick way to make that section of your site multi-column.
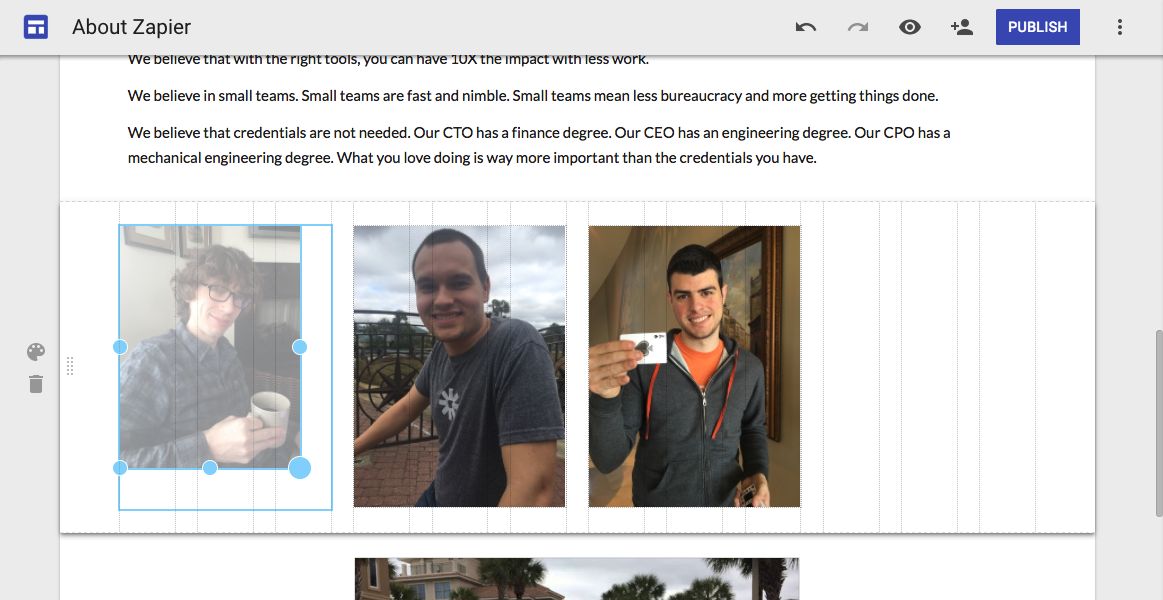
You can then resize elements in each section, with gridlines to make sure everything's aligned nicely. It's one of the simplest ways to make a multi-column page layout—and it's nearly hidden in Google Sites.
Add Pages to Your Google Site Website
If you only need one page on your site, you're all done—as is our example About Zapier page. Or, you can keep building your site with extra pages.
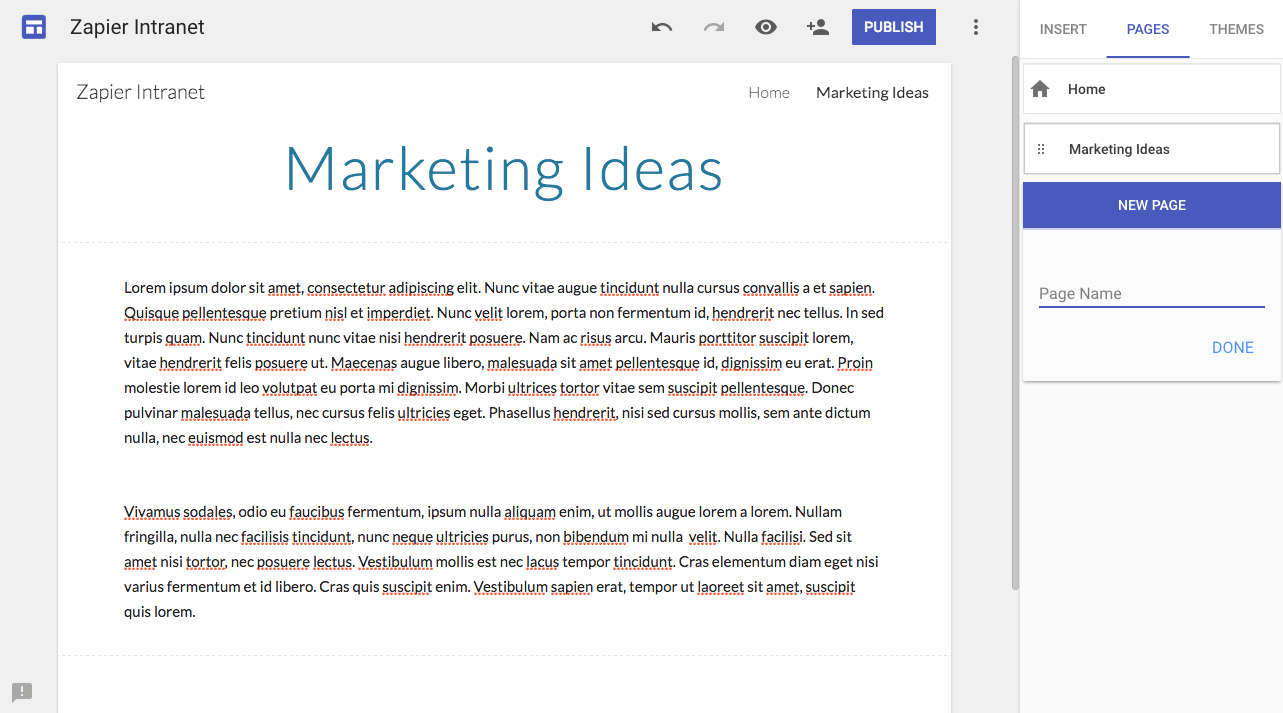
Add extra pages from the second tab in the right toolbar. Just add a title for your page, and it'll automatically be added to the menu in your site's header. You can add the same sections to any page—and if you want to copy something from one page to another, just select that section of your site, press CMD + C or Ctrl + C, then paste it on the new page.
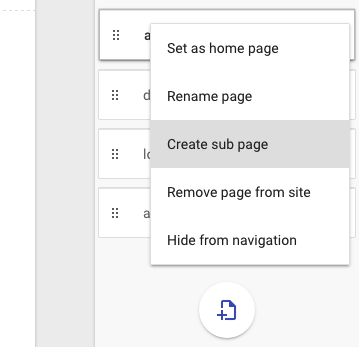
You can drag-and-drop pages to the order you want with their 3-dot button. Or, drag a page under another page to turn it into a subpage, something you can also do from the menu on the right of each page.
Customize your Google Site's Design
There's one more thing you can tweak: Your site's design. The new Google Sites' themes are driven by your content, with large image-based headers and full-width text blocks. But there are still a number of ways you can create a unique look.
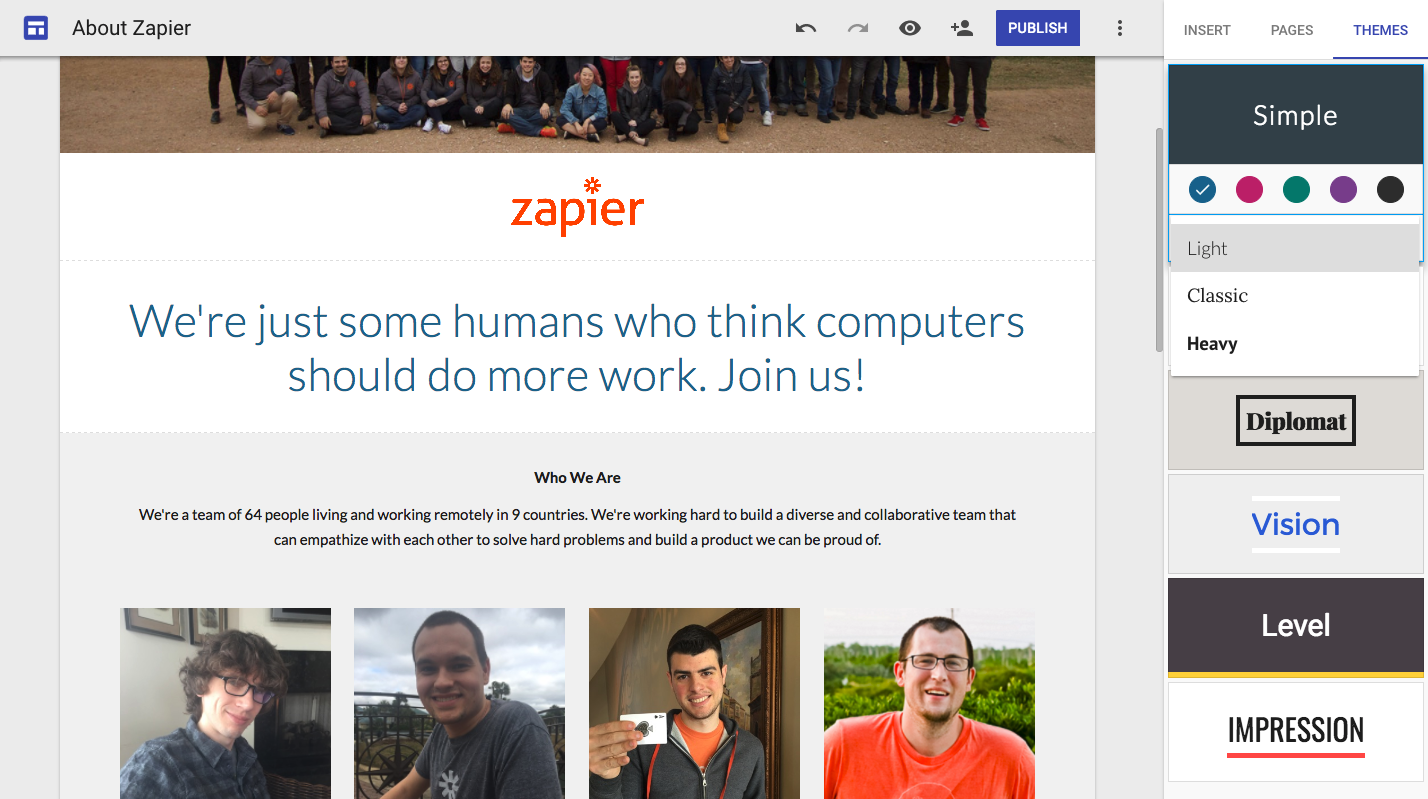
Just tap the Themes tab on the right sidebar, and select from one of the 6 available themes. Each one includes 3 different font styles, along with 5 color schemes, to give your site a slight different look and feel.
Combine that with your own graphics and a customized multi-column layout, and you can make Google Sites fit your branding and feel like a unique, custom-built site. The default Simple style fits Zapier's branding well, though the default blue color doesn't quite fit—so a quick change to black and our page is done.
Publish and Share Your Google Site
One of Google Sites' best features is its sharing settings, which work the same as Google Drive. You can share your site with anyone, and let them help edit it.
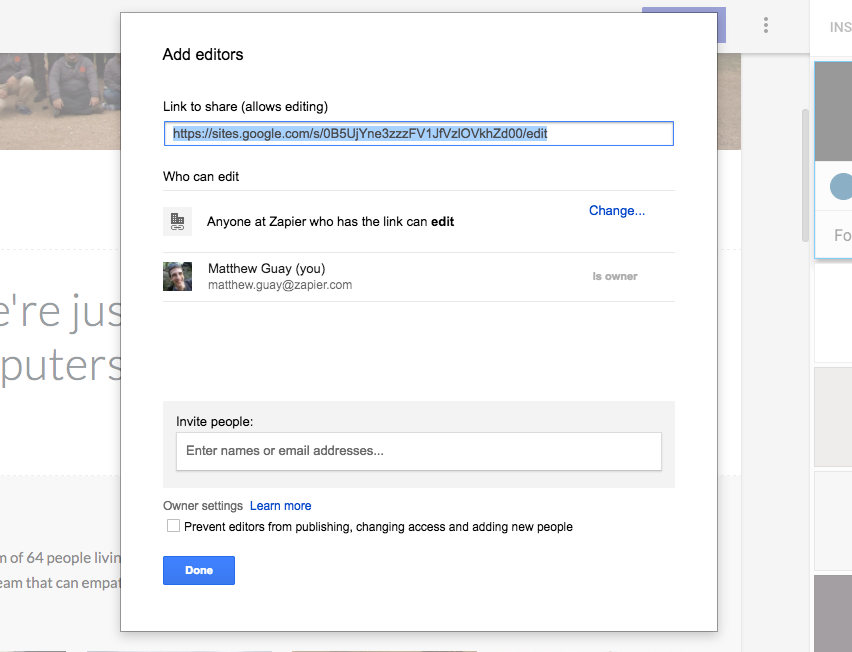
Just tap the person icon in the editor, and you can share the site you're working on with your entire team. With individual accounts, you can add specific people to let them edit the site; in a company G Suite account, your website will be visible to everyone in your company, but they won't be able to edit it. Enable editing, and your site turns into a wiki of sorts (without version control or edit history, though) where everyone can tap the pencil icon on the site and edit anything on it.
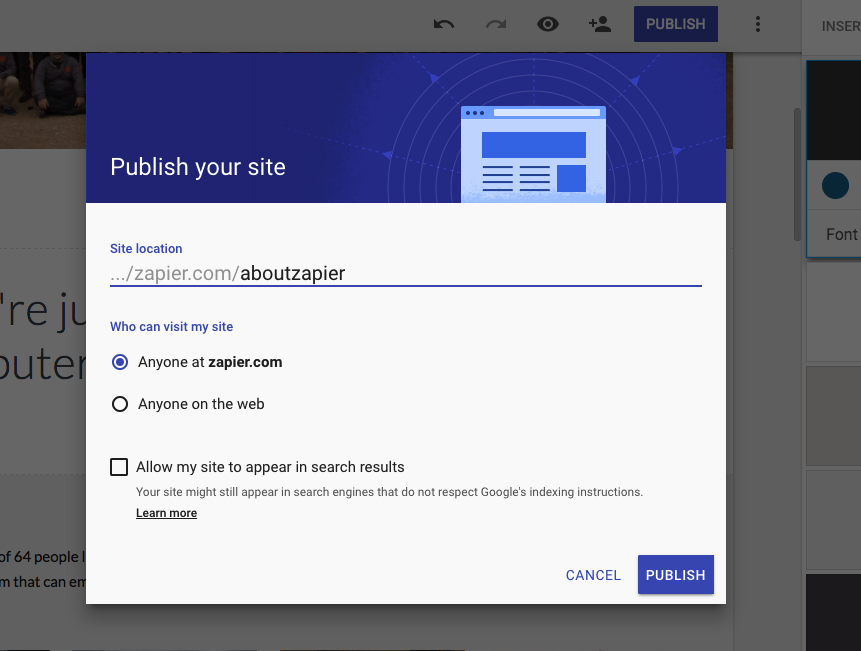
Then, it's time to publish your site. Give it a unique URL, so you can then open your site at sites.google.com/view/YourSiteName, or at sites.google.com/YourDomain.com/YourSiteName if you have a G Suite account. And choose whether you want this site to be shared only with your team—the default choice, best for most company internal sites—or with the web to make a quick site for a new public-facing project. You can then select to let your site show up in Google search results if you've made it public.
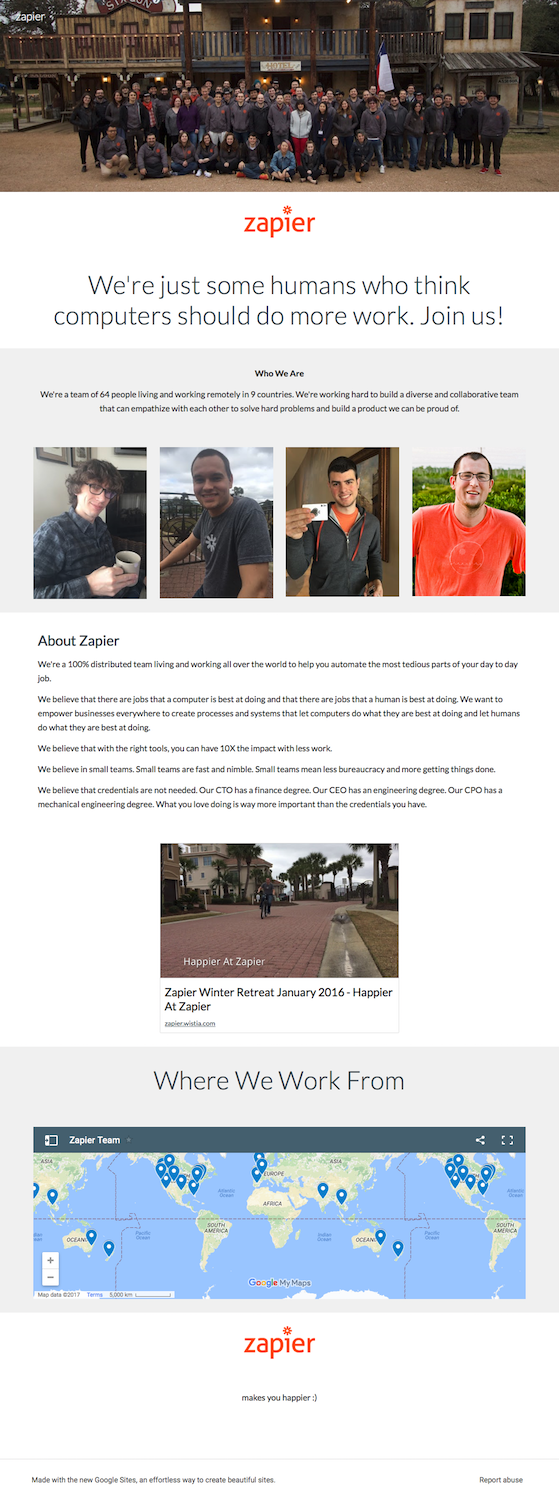
Our test site turned out pretty similar to our real About page, with images, text, and even embedded videos and maps. You can check our test Google Site out—and we'd love to see what you make in the comments below!
And that's it. Anytime you need to share something new with your team, you can spin up a new site for it in minutes. It might even be the best way to share documents and presentations, since you can add some extra context with the site's description and content.
Keep Reading:
- Want to use Google's apps with your team and company's domain? Check out our guide to setting up G Suite to get your own customized Google account.
- G Suite is great for teamwork, in Google Sites and other Google apps. Here's the best ways to share contacts, calendars, document templates, and more in G Suite.
- Learn more about the rest of Google's business tools with our Ultimate Guide to Google Sheets which teaches you everything you need to know about spreadsheets and Google Sheet's form sidekick, Google Forms.
source https://zapier.com/blog/google-sites-tutorial/
No comments:
Post a Comment