
One of the small yet time consuming tasks of marketers, writers, designers, and others who publish images online is optimizing those images for SEO. You have to remember the ideal image size, resize the images, and compress them again before uploading to your site—something that takes time and attention from your more important work.
But if you don’t optimize your images, your page will take longer to load which can hurt search engine ranking, increase bounce rate as visitors quickly leaving your site without interacting with it when images take too long to load, and potentially increase your hosting bills.
Automation to the rescue! Why not focus on your priorities and let your computer do the work for you?
Keep reading to learn simple ways to outsource image optimization to your computer (and keep your SEO team happy in the process).
What are Web Optimized Images?
First, a quick review on what it means to optimize your images. While the term "optimized" may mean different things to different companies (based on specific goals for site aesthetic and server capacity), image optimization always boils down to two necessary steps:
Scaling Images
The most time consuming step in the process of optimizing images is scaling them appropriately. While you want your images to look high-quality, high-resolution photos can wreck your page load times. Shrinking images on the actual page doesn’t help this. If the original file is 2000 x 2000 pixels, it doesn’t matter if you display it at 200 x 200 pixels—your browser will still load the original file and still slow down your page load.
To avoid this problem, you’ll need to scale your image before uploading them. For some sites and blogs, you’ll be able to pick standard dimensions for images and go from there. For others, you may want to define a few different scale guidelines for different page positions and image types.
For example, on the Zapier Blog, we try to keep inline blog images at 660 pixels wide (with some exceptions made for tutorial GIFs). However, for our blog header images, we scale images to 1500 x 500 px.
Compressing Images
You’ll also want to compress your images before uploading them to your site. Image compression is often associated with blurry, poor-quality images (and who wants that on their website?), but the truth is that good image compression is nearly lossless—it doesn’t reduce the visible quality of the image.
Image compression merely makes your image more efficient by stripping out irrelevant and redundant data within the image. With a good image compression tool, you’ll hardly even notice the difference in quality between your original and your optimized image.
With that in mind, you need a workflow to optimize your images. Here's how to both scale and compress your images on macOS and Windows.
Image Optimization Workflows for Mac
For this workflow, you’ll only need two free tools, one of which comes with your Mac. Automator is a built-in tool on your Macs that can—you guessed it—automate tasks on your computer. You'll use Automator to resize images. Then, you’ll need to download ImageOptim, a free drag-and-drop tool that quickly compresses your images without degrading their quality.
To use ImageOptim, just drag and drop files into the app, or add an image via its menu. ImageOptim will do the rest, compressing your image as much as possible without degrading their quality. Your images will remain in the same folder once the tool has compressed them, so make copies in advance if you want to save the originals.
Once you’ve got ImageOptim downloaded and ready to go, there are many ways you could build an image optimization workflow. Here are two of the best:
Workflow: Images Added to Specified Folders are Automatically Optimized
To start building your image optimization workflow, open Automator and select the Folder Action workflow. This will ensure that your Automator workflow runs whenever a folder is updated. Select the folder that you want to serve as your trigger folder.
Next, you’ll add a series of three steps.
Step 1: Add a Copy Finder Items step. This will ensure your original images are preserved in a folder you choose, in case you don’t like the results of the workflow. (You can skip this step if you don’t care about saving copies of your images.)
Step 2: Decide what you want to be done with your image. With a standard workflow, you’ll want to choose either the Scale Images option or the Crop Images option. What’s the difference?
Scale Image is a simple scale, either by size or by percentage. This step is simple, but you need to be aware: The "to size" scaling option scales the longest side of the image to the size you specify. Within the scale image step, there’s no way to specify exact dimensions.
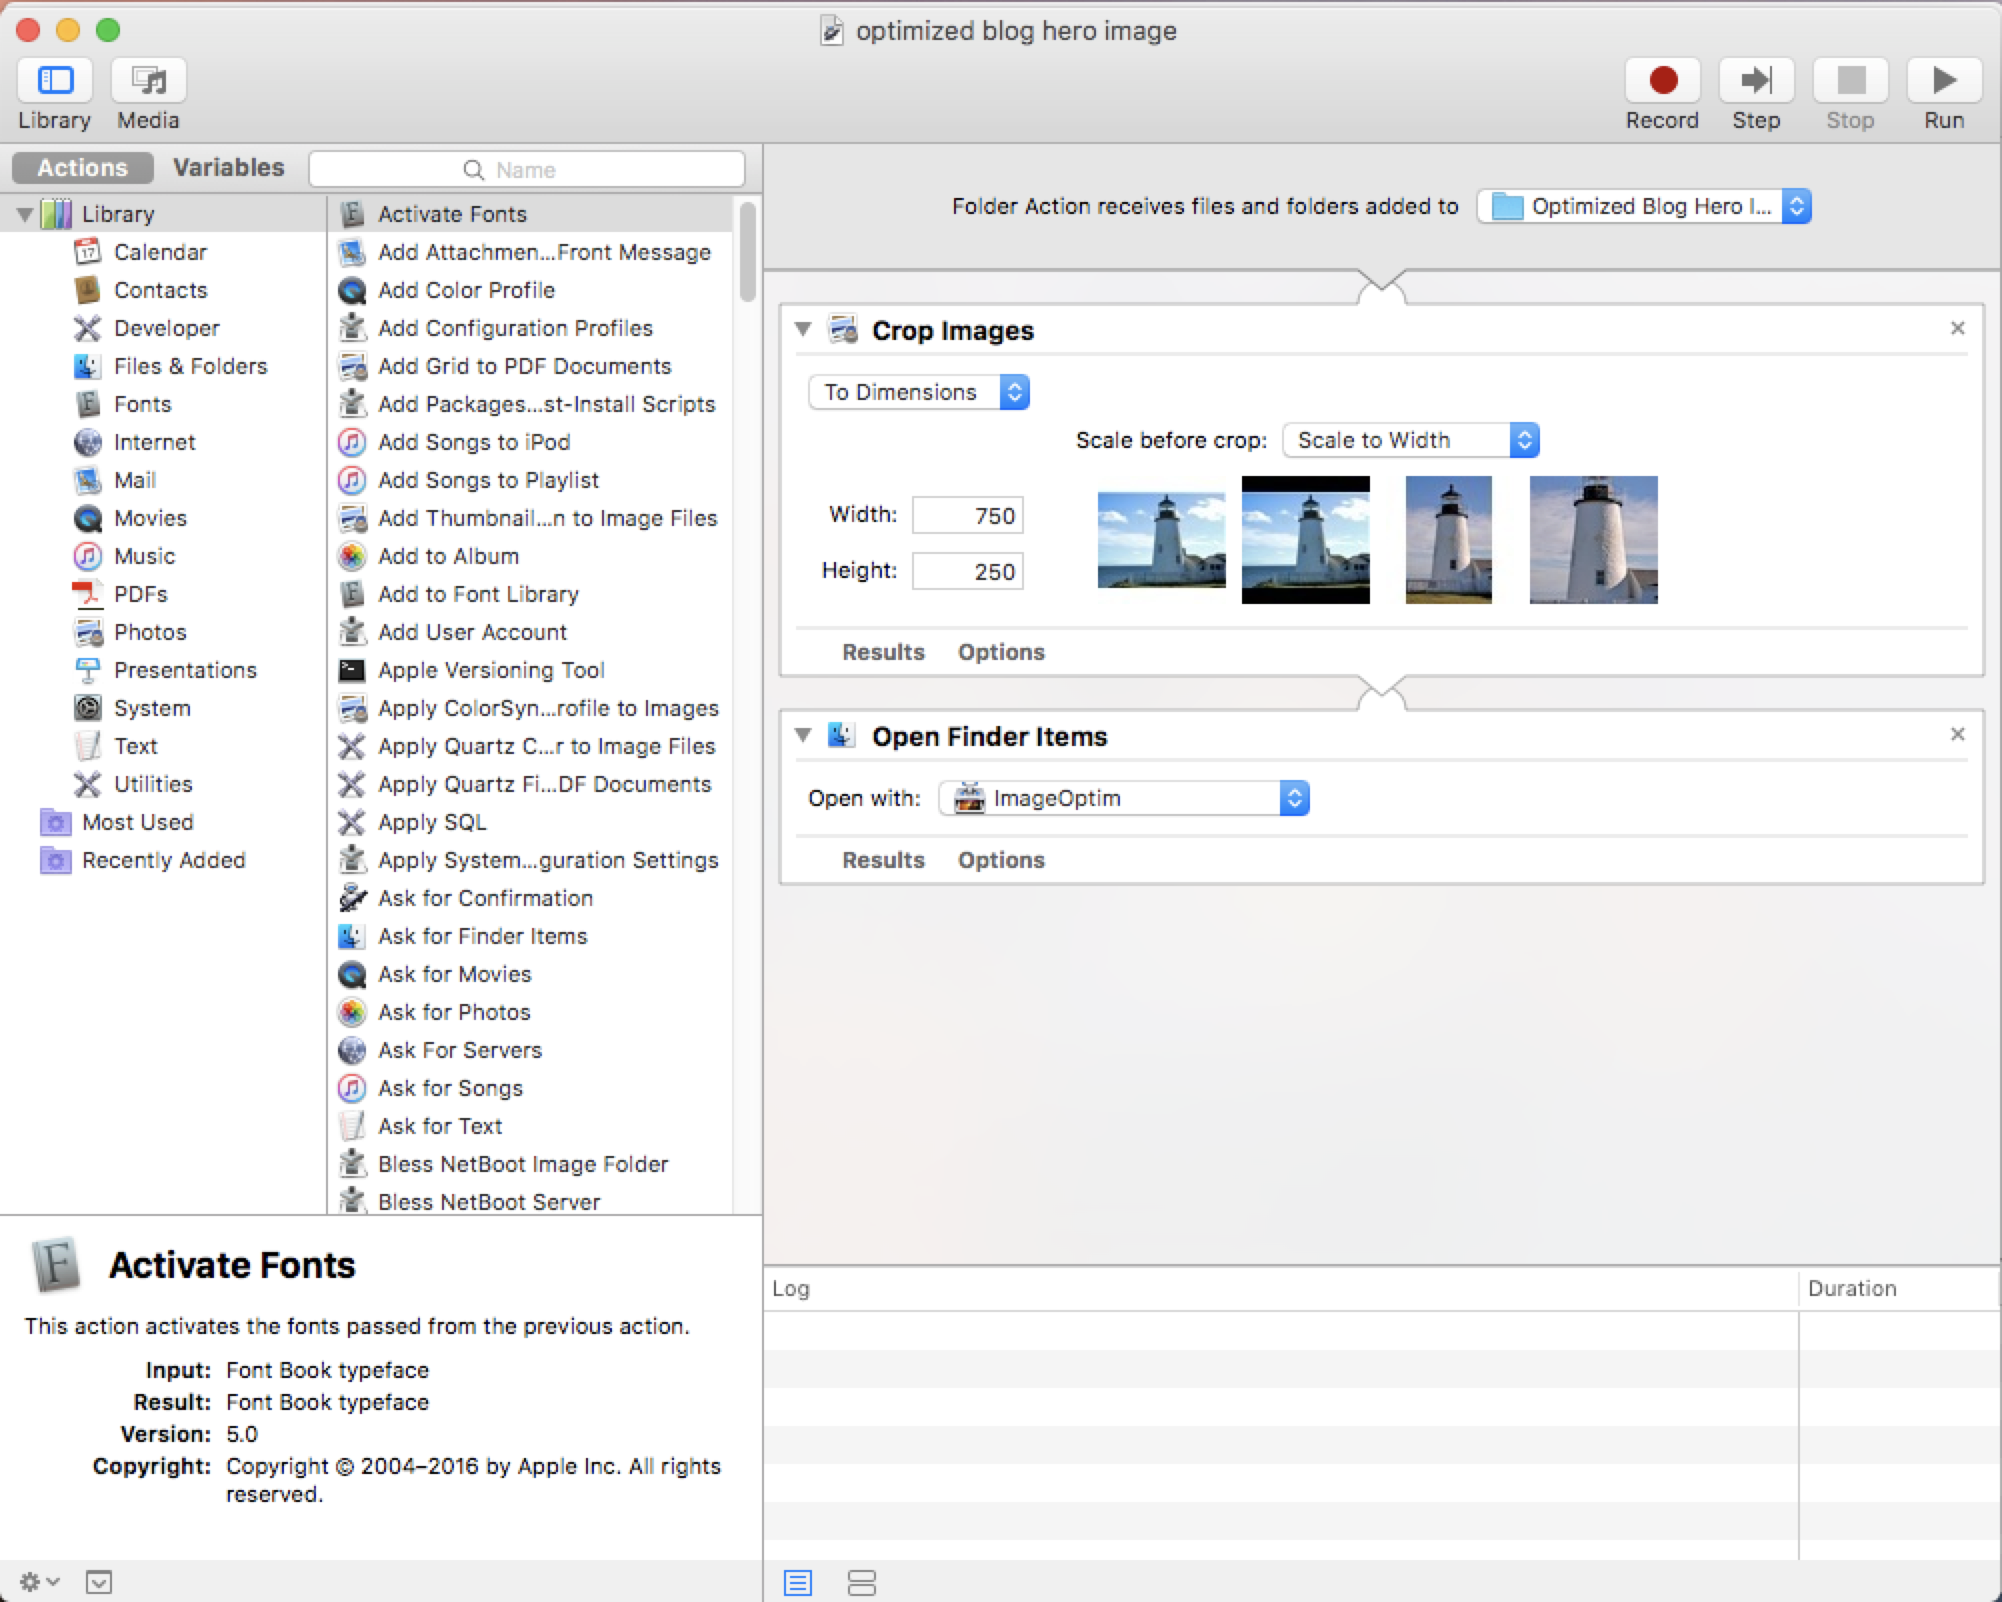
Crop Image is the step you’ll likely want if you need images to conform to specific dimensions. Here, you can choose to scale the image by width, height, long side, or short side before cropping. So if, like me, you want images for your blog that are 1500 x 500 pixels, you’d want to scale to width, then set the dimensions at 1500 x 500. When this step runs, it will first scale your width to 1500, and then crop the image until the height hits 500px.
Step 3: Add an Open Finder Items step. Once you select this action, you can select what application Automator will use to open your images. Scroll down the list until you find ImageOptim. Since ImageOptim automatically optimizes images that are opened in it, this step will finalize the optimization process by stripping unnecessary data and compressing the image.
Step 4: It's time to test your workflow. To test a step within Automator, you’ll have to add a "Get Specified Finder Item" step to the beginning of your workflow. From here, select an image you want to test, then hit "Run" in the upper right corner of the app. This will run your workflow on the specified image. Once that’s done, double check the image—how it looks, its dimensions, its file size—and make sure that it was optimized as you expected.
Step 5: Remove the "Get Specified Finder Item" step, and save. Now you’re ready to go! When you add a new image to the specified folder, this process will run automatically.
Workflow: Right-Click on Any Image to Select Scale Option
If you prefer to have a little more control over which images you optimize and don’t mind a little extra manual work, you can instead use Automator to create a service. What this will do is create a workflow on standby, waiting for you to select it from the right-click menu.
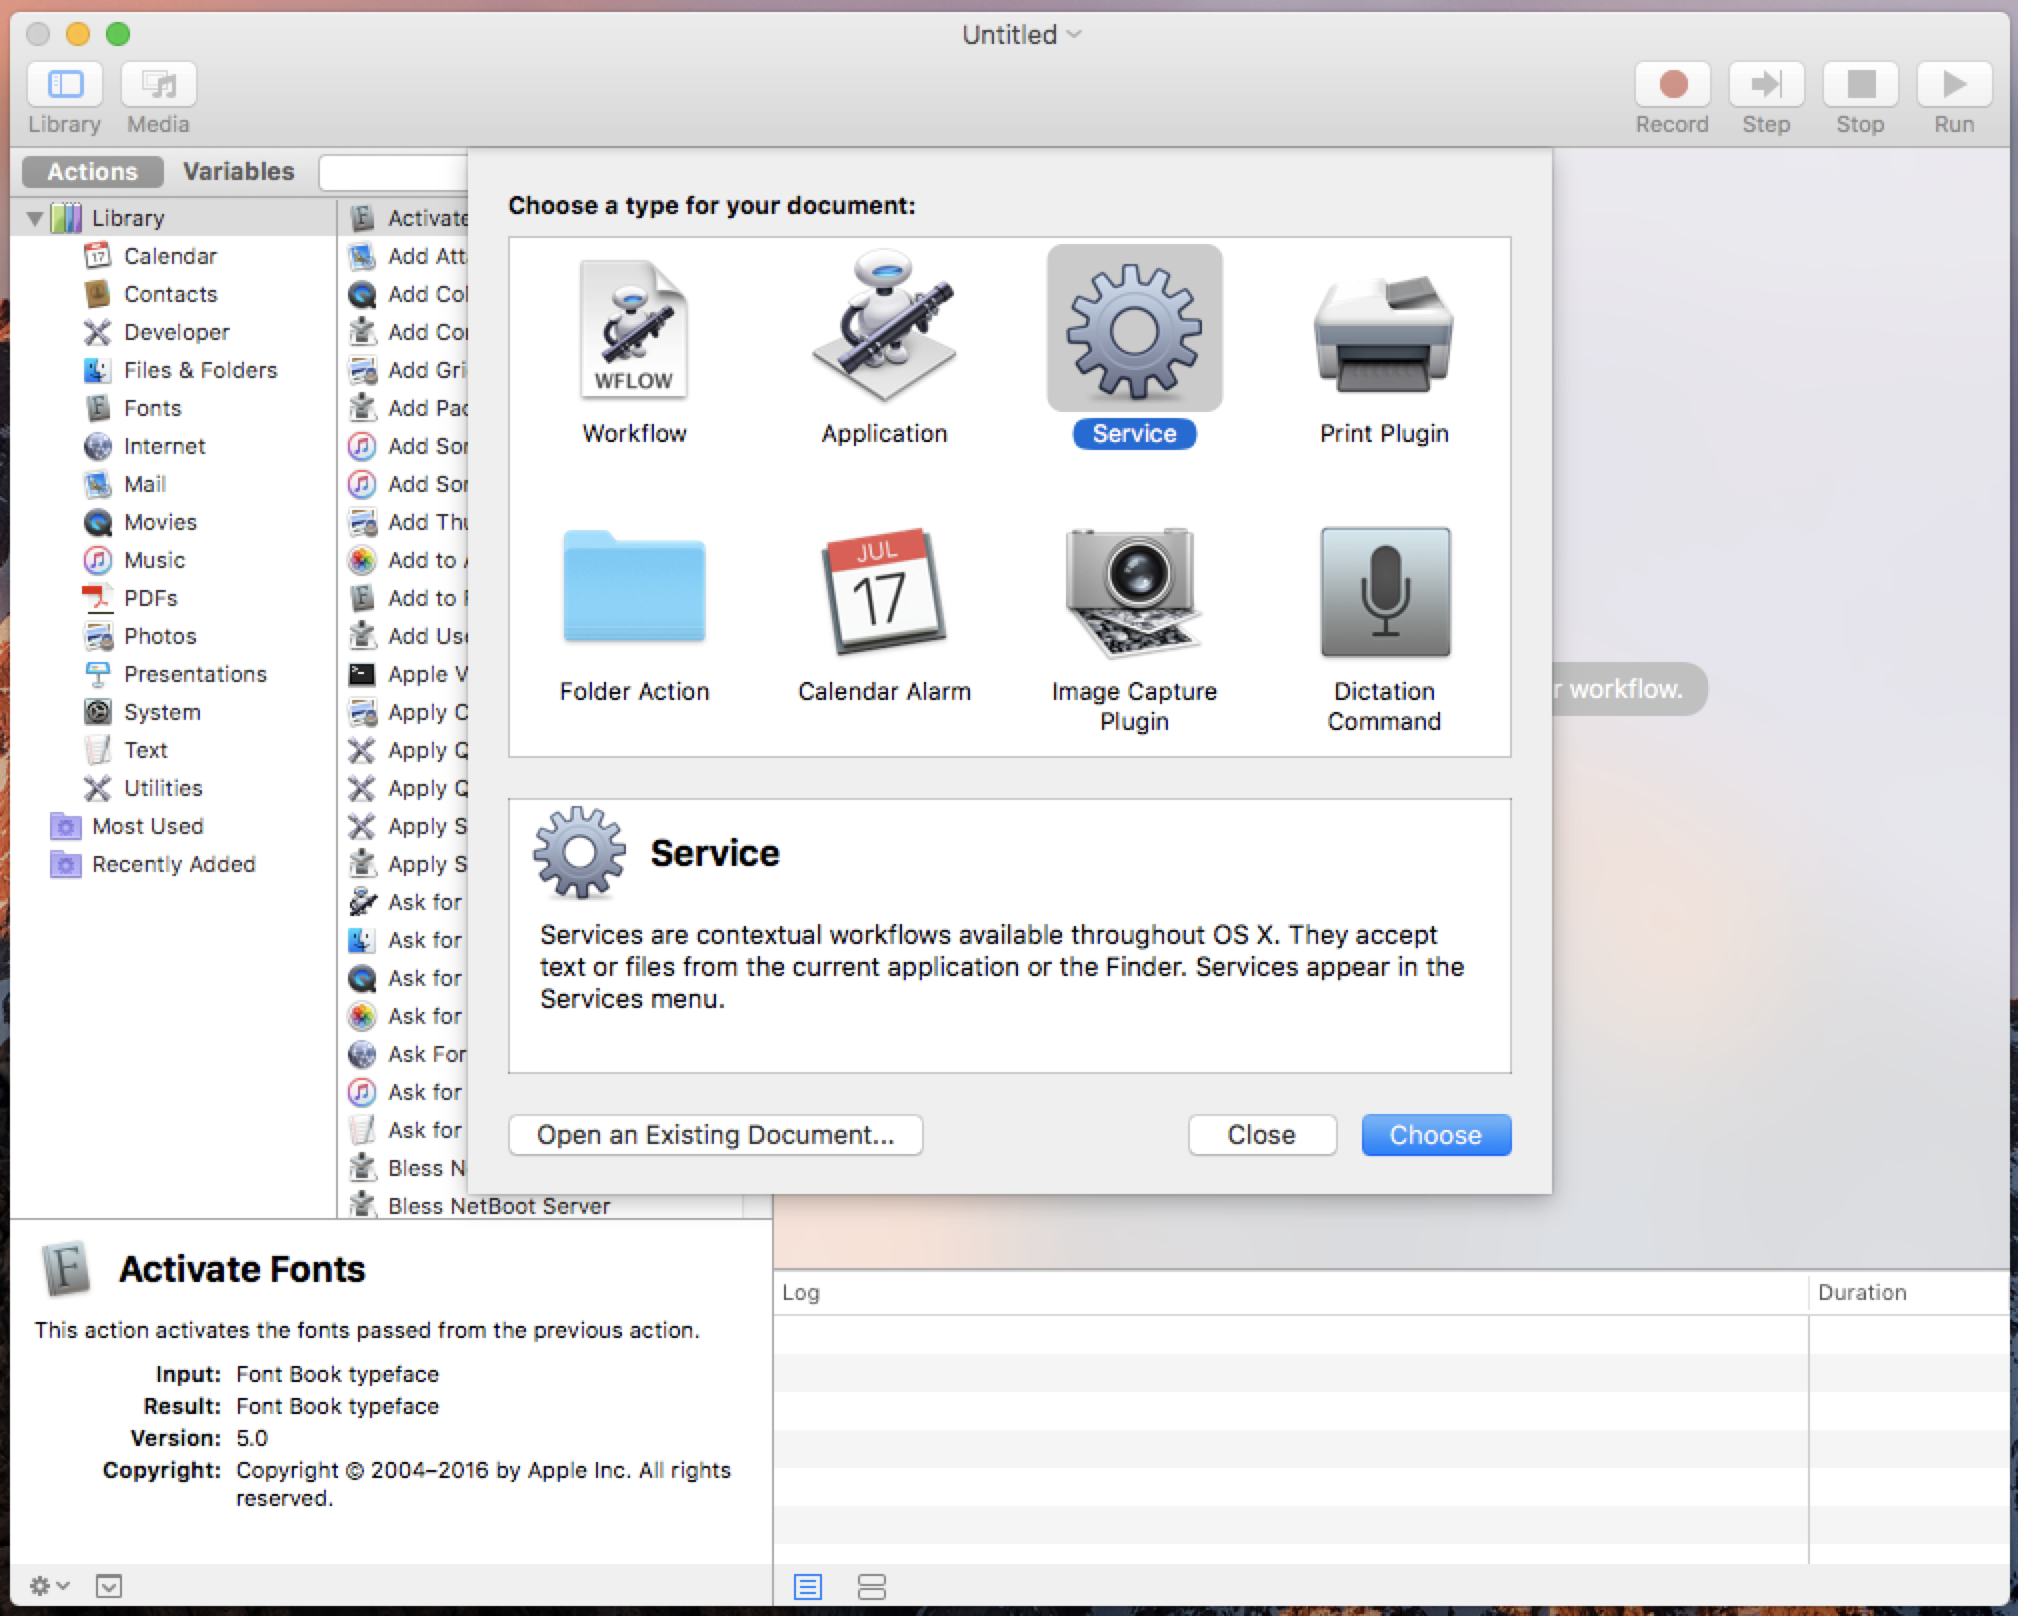
To get started, select "Service" when creating a new Automator file. Then follow the exact same steps as above.
The only major difference is how you activate this workflow. Instead of the workflow running by itself whenever you update a folder, you will instead have the option to run this service on any file when you right-click the file and select your custom-named service.
Image Optimization for Windows
If you’re a Windows user, you won’t have the same options as a Mac user, since there’s still no perfect Automator equivalent for Windows (although AlternativeTo has some ideas). However, there are still a few tricks and tools we’ve used that will help you scale and compress images faster.
Use Wappwolf to Automatically Scale Images
When used in tandem with Dropbox, Wappwolf lets you automatically scale images that are placed in a specified folder. This folder must be a Dropbox folder, however, so make sure you have first installed Dropbox on your PC.
Step 1: Set up a folder in your Dropbox where you will place the images you want optimized. This can be a main folder or a subfolder.
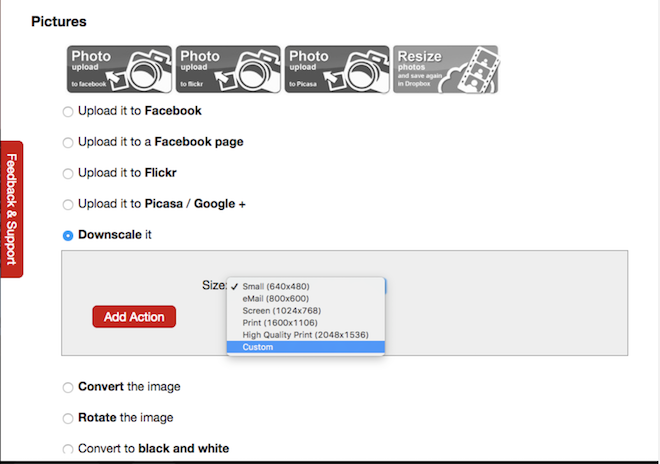
Step 2: Within Wappwolf, set up an image automation that Downscales your images whenever you add a picture to the specified folder. You can set a custom size or pick from several popular size options:
- Small (640x480)
- Email (800x600)
- Screen (1024x768)
- Print (1600x1106)
- High Quality Print (2048x1536)
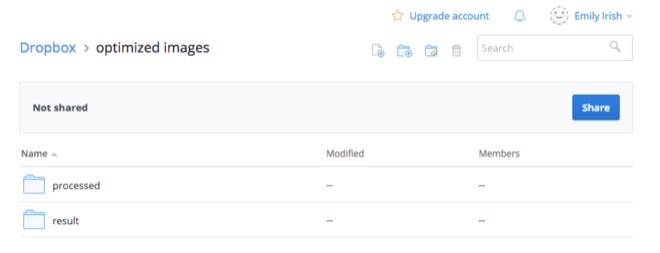
Step 3: You’re done! To use, simply drag images from your PC into your specified Dropbox folder and let Wappwolf do the rest! Once the automations run, you'll see additional subfolders in your Dropbox that look like this:
Use FileOptimizer to Compress Images
Much like ImageOptim, FileOptimizer is free, has a simple interface, and makes it easy for you to optimize images simply by dragging and dropping files.

To use this tool, simply drag and drop files into the queue. The images will remain in the same file location once the tool has compressed them, so you may want to make copies in advance. If you don’t make copies, FileOptimizer’s default is to send a copy of the original image to the Recycle Bin, where you can restore it if need be.
Now you’re happy, your SEO team is happy, and your readers and customers are happy when your pages load quickly. Have any other image optimization tools or workflows that you love? Let me know in the comments!
Continue Reading:
- How to Get Any App to Work with Zapier
- Screenshot Tools, Tips and Shortcuts: How to Capture Anything on Your Screen
Image by Alexandru Stavrica .
source https://zapier.com/blog/quickly-optimize-images/
No comments:
Post a Comment