
What would your marketing team do with an extra 16 man hours per week? This was a fortunate discovery that a previous employer of mine came across after discovering how to automate their lead research process, how they found potential new customers.
We had very specific criteria for which leads were “qualified”—in other words, which leads were worth the sales team’s time. (For example, perhaps your product or service is expensive, so you've discovered that the leads most worth your time are companies with an annual revenue of $10+ million. These would be your "qualified" leads.)
The task of qualifying or “scrubbing” the leads fell to the company's sole marketing assistant. Although these qualifications made sales outreach more efficient, one person can manually process hundreds of leads only so quickly. This caused a bottleneck that would sometimes end up in hot leads going lukewarm before sales had a chance to reach out.
Then our team discovered two tools that overhauled the way we did lead research: Zapier and Clearbit.
Clearbit scours the web and other data sources for information on people and companies that is publicly available, which businesses can use for their marketing and sales efforts. Unlike other data vendors, Clearbit keeps their database dynamic so data never is older than 30 days, and they make it a point to integrate their data with the tools businesses use every day. The result is a business intelligence tool that’s powerful and easy to use.
We used Clearbit’s integration with app automation tool Zapier to create a custom workflow that automatically researched our leads and updated our customer relationship management (CRM) tool. This integration completed 98% of the lead research process for us and saved our marketing assistant roughly 16 hours/week.
In this article, I’ll show you how you can set up and use this workflow for your own sales and marketing teams.

How to Use This Workflow
If you aren’t sure where to begin, here are a few different ways you can use this Lead Research Workflow to get you started:
Eliminate Lead Research
This workflow can save your salespeople and/or marketing assistant a lot of time by eliminating the need to do lead research manually. With all the data that Clearbit provides, it’s easy to instantly get a lot of information on your new leads. And the less time your salespeople spend researching leads, the more time they can spend building relationships with leads.
Make It Easier for People to Respond to You
If your form has more than a few fields to fill out, many people will will think your form isn’t worth their time. One series of A/B tests by Vital Design discovered that a phone number field alone decreased conversions by 48%! The good news is, you can still get the data you need without overwhelming everyone: Keep your forms short and use Clearbit to supplement that data automatically.
Target Campaigns to Specific Criteria
You can also use this Zap to hyper-target specific criteria for a marketing campaign. Maybe you want to send an email campaign to companies with a certain annual revenue or in a certain industry. Maybe you want to send an eBook that’s targeted to VPs or middle managers.
Adjust your Filter steps within this Zap—or create a new Zap—to focus on sorting leads that meet this specific criteria. In the step where you add leads to your CRM, you can label that lead with a specific tag, group, or project, so that you can target them with your marketing materials.
Set Up a Lead Research Workflow
To set up a workflow that takes incoming leads, scrubs them against Clearbit’s database, and updates your CRM, you’ll need to set up a Multi-Step Zap—what we call a workflow that connects apps in multiple steps. Don’t worry—it’s not as complicated as it sounds, and it'll only take about 15 minutes.
For this to work, you'll also need to be a subscriber to Clearbit's Enrichment subscription plan, which runs anywhere from $99/month to $499/month, depending on how many information requests you plan to make in a given month.
Step 1: Trigger a Lead Research Workflow for New Leads
Your first step will be to set up a Trigger step within Zapier for whenever a new lead or contact is added to your CRM of choice. This will ensure that whenever a new lead is added to your CRM, you can have Zapier automatically complete a lead research process. In this example, we'll be using Hubspot's CRM, but the steps will be similar for other CRM apps.
First, log into your Zapier account and click the "Make a Zap!" button at the top right of the page. That will take you to the Zap editor.
Next, choose the CRM app that will start the workflow. Then choose what the Zap will monitor, such as "New Contact." Walk through the wizard to connect your CRM account to Zapier and test this step.

Step 2: Connect Your CRM App to Clearbit
Next, you’ll connect Clearbit with Zapier so you can automatically gather information for that new lead. This step will ping Clearbit instantly every time a new email address comes through your CRM. Clearbit will run the email address through their database, and return data back through your Zap.
Clearbit provides a wealth of information through their API, including (as available for any given lead) company name and address, lead title, company revenue, company industry, lead and company phone numbers, lead and company social media profiles.
To set up this step, select Clearbit as your Action app. Choose "Find Person and Company Information," then connect your Clearbit account. After you complete this step, you'll be prompted to enter an email address.
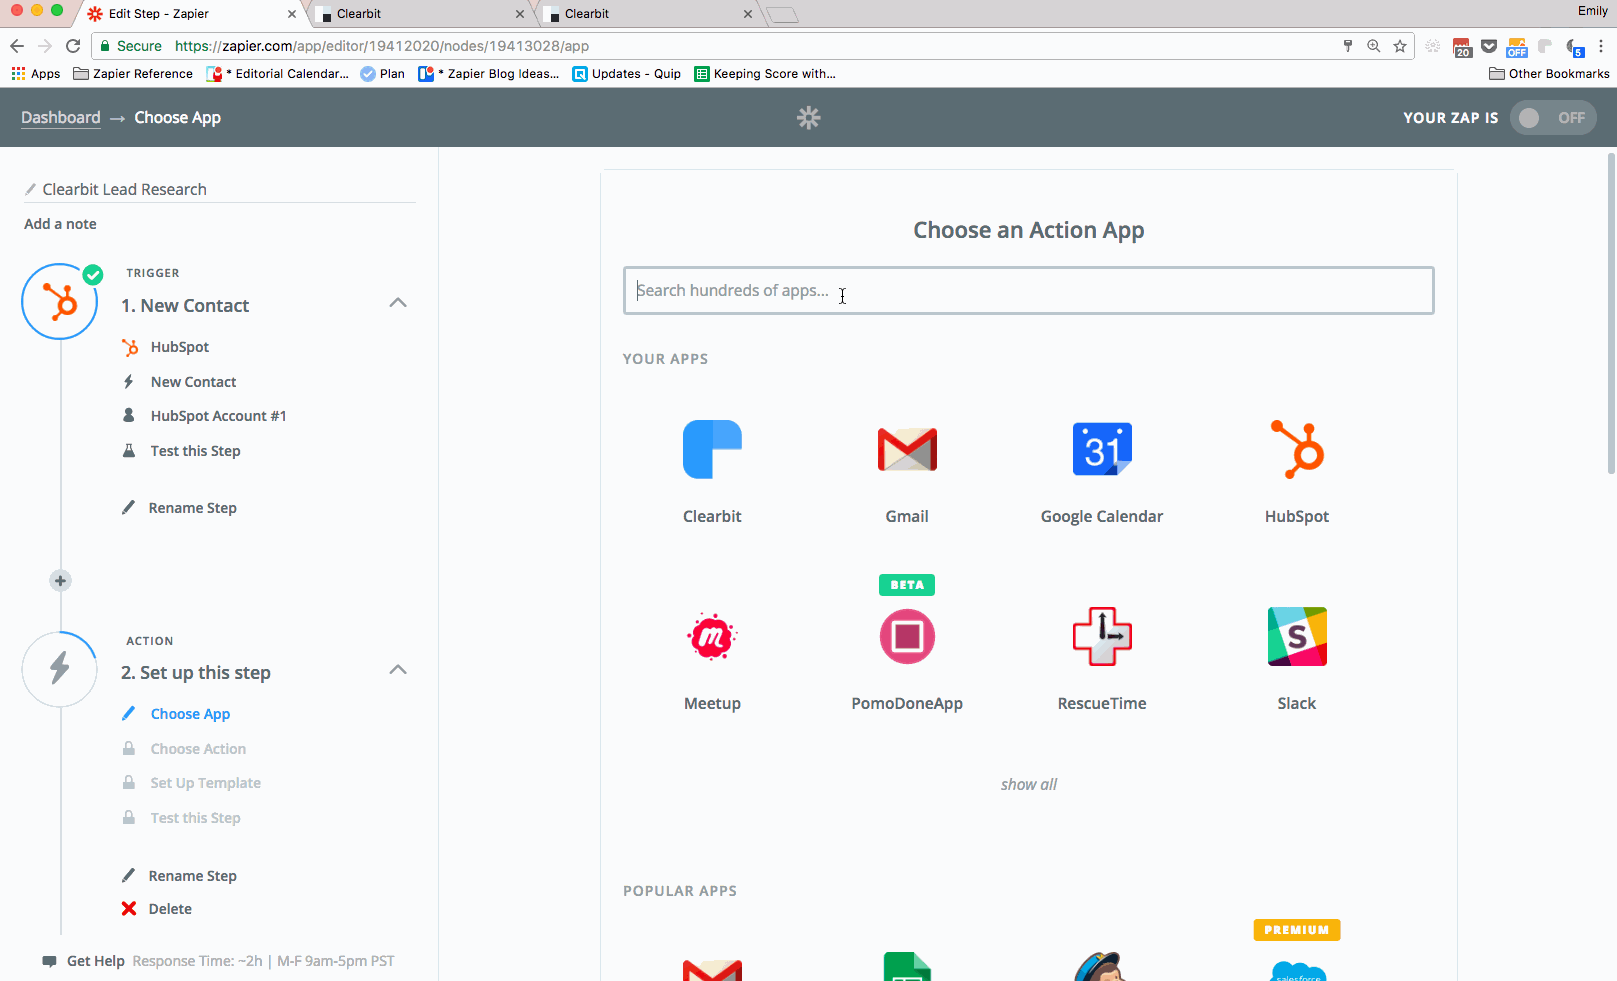
Your lead's email address is what Clearbit will use to find additional information, so you'll want to make sure to click on the "+" icon at the right of the field. From the dropdown, select the email field from your Hubspot New Contact step, and you're good to go!
Step 3: Filter the Data
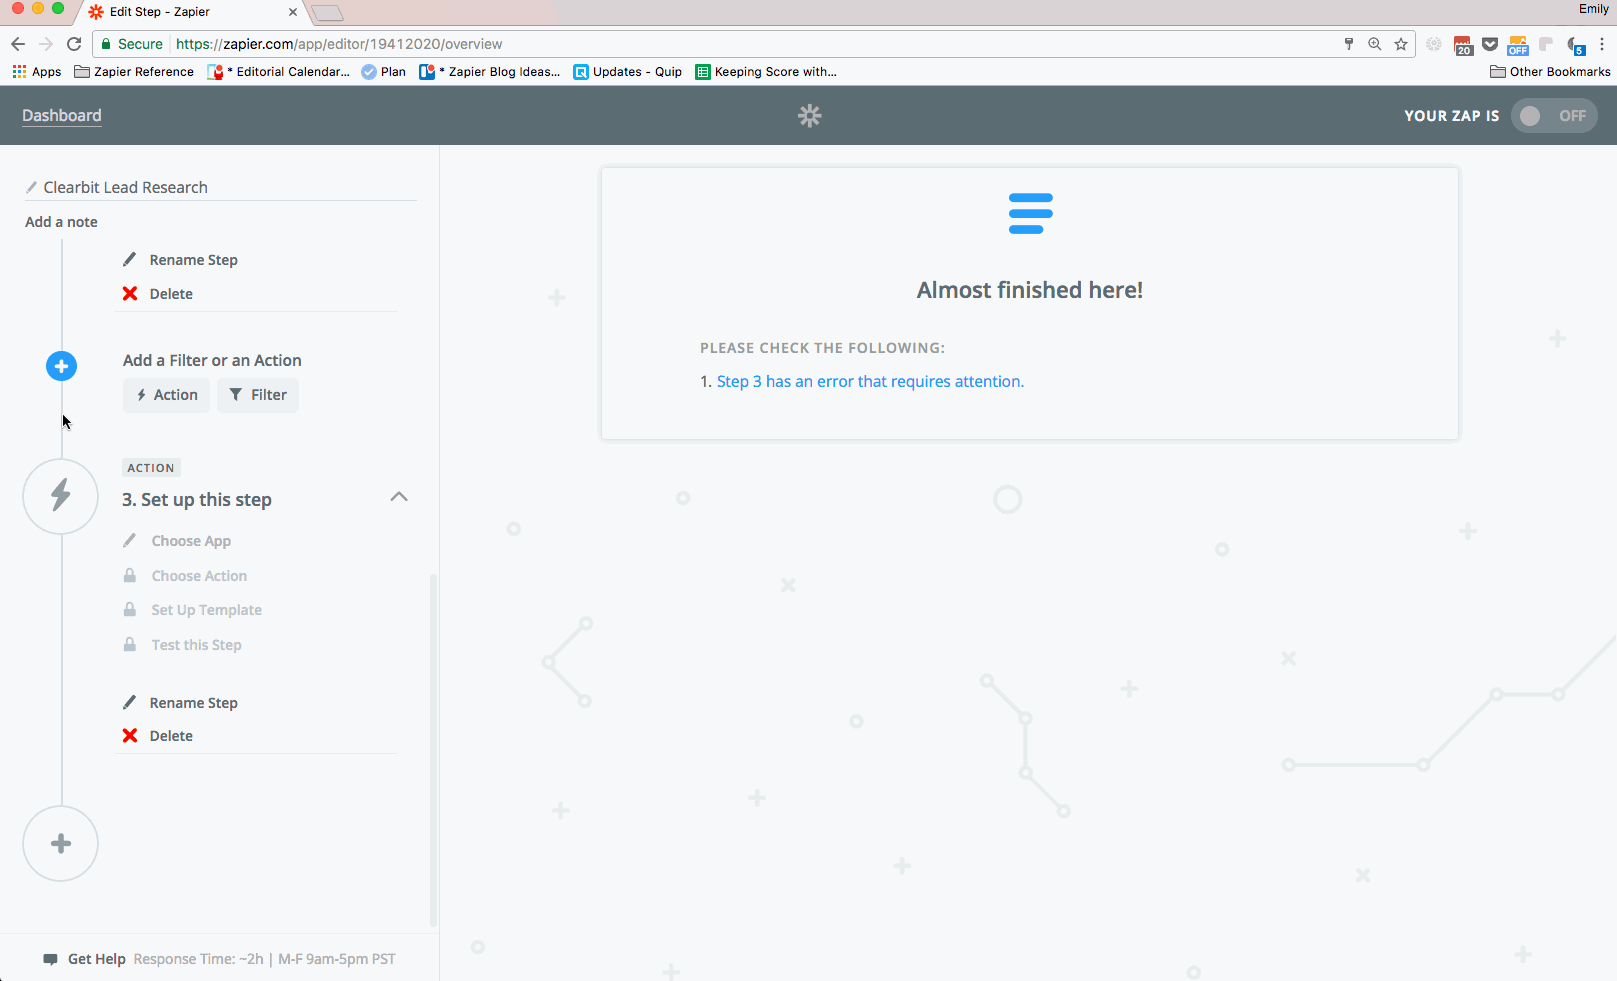
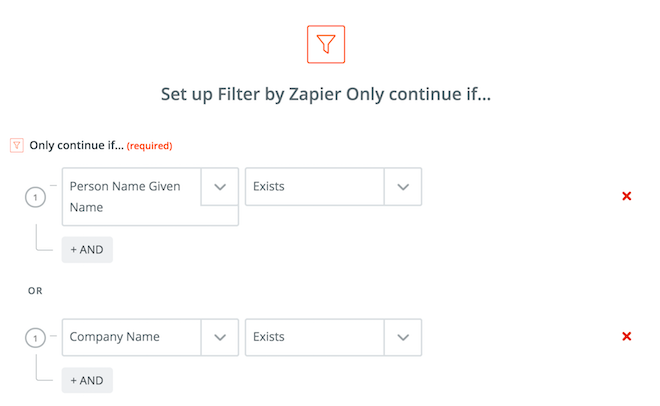
Next, you’ll need to set up at least one Filter step, to ensure that this Zap only runs if Clearbit does indeed have the right person and company in their database.
To set up this step, add a Filter step to your Zap by click on the grey '+' on the left side of the screen. Select the "Filter" step, then select the "Only Continue If…" option on the following screen. Then, you'll choose the criteria you want to use for your filter.
To make sure both the person and the company exist in Clearbit's database, you'll want to use the following criteria:
Once you're comfortable with this workflow, you can follow the same steps to set up more advanced filters, such as a Filter step that looks for a specific criteria, such as a VP title.
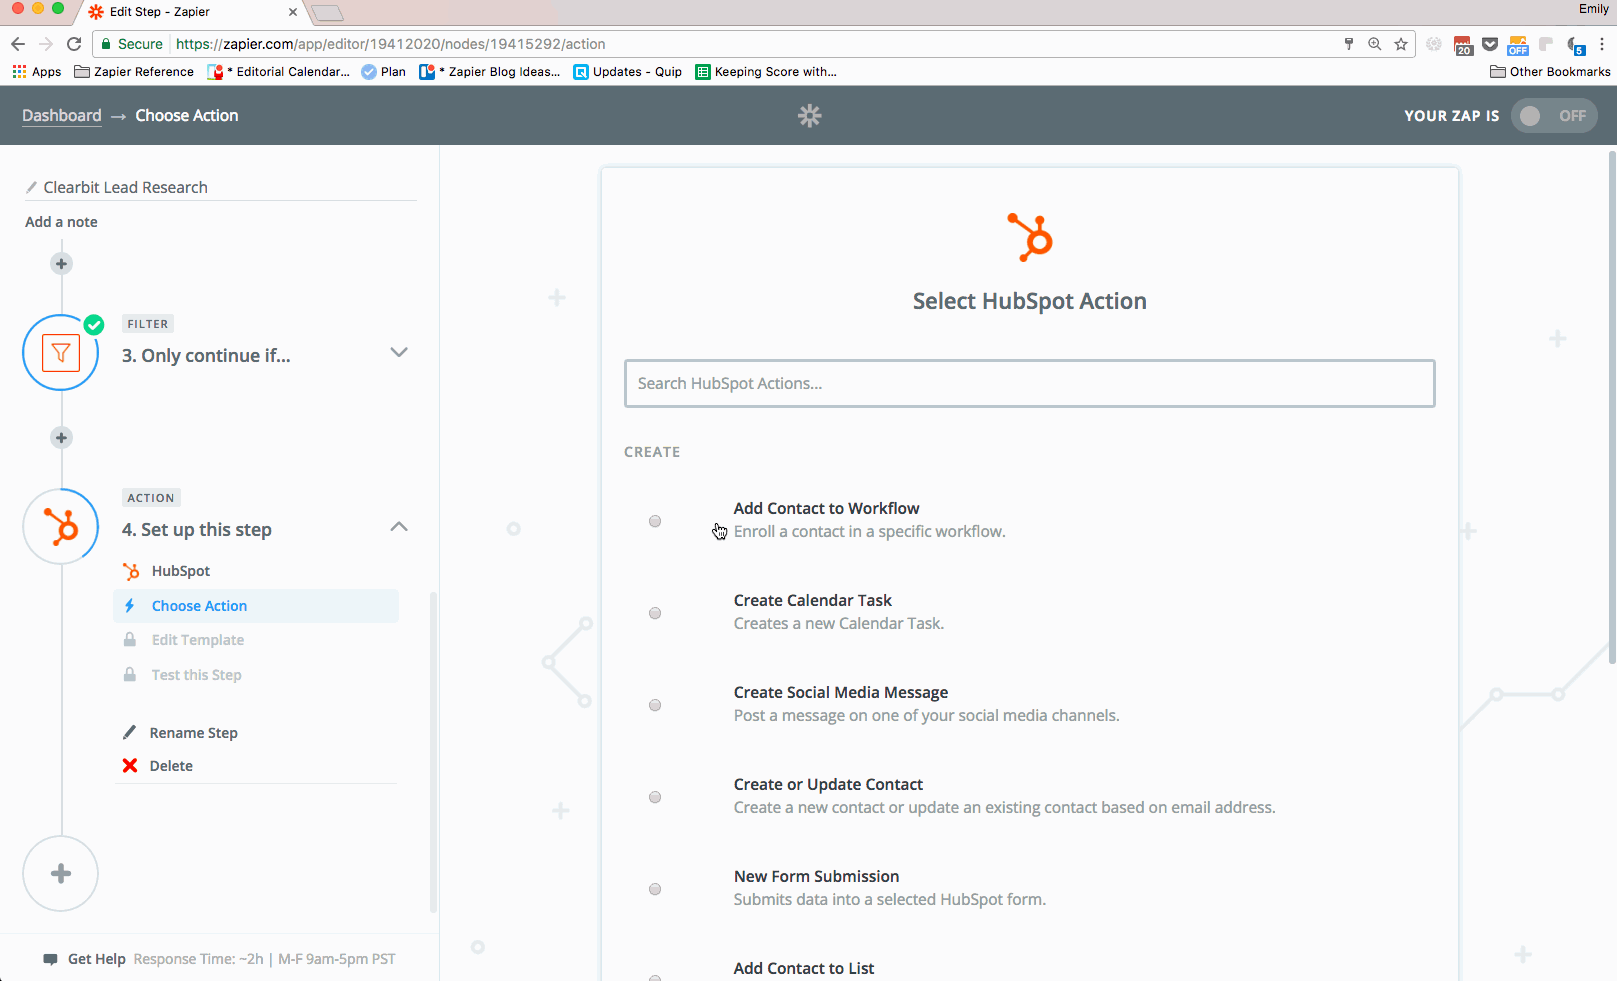
Step 4: Create or Update the Contact in Your CRM
For the last step, choose the CRM you added in the first step. . Then use the “Create or Update Contact” action. The “Update” part is important, since it will prevent your CRM from writing a duplicate contact or lead if there’s already a lead with that email address in your CRM.
In the template for this action, you can choose what information to import from Clearbit, and where in your Contact Record you want this information to appear.
Voila! You've set up your first lead research workflow! Use this basic workflow or play with the settings to customize the workflow for your specific lead criteria. In the meantime, start thinking about what your team will do with all the time it's about to save.
Have other tips for researching or qualifying leads? We'd love to hear them in the comments.
source https://zapier.com/blog/lead-research/
No comments:
Post a Comment