On the surface, Pinterest is just a place to find inspiration for home improvement and craft projects—not necessarily a channel for promoting a business. But the act of looking for inspiration often leads to a click or a purchase, and that's why businesses of all types—brands like Lowe's, Bank of America, BuzzFeed, and Burberry—use the channel to drive traffic and sales.
With nearly a third of American adults using Pinterest, it's is a great place to promote your business and your content. And with the right techniques, it doesn't require too much effort to achieve success on the platform.
Getting Started with Pinterest
To use Pinterest for your business, you need a Pinterest account. To create an account, go to Pinterest's website and enter an email address and password to create a new account.
Once you have a personal account, it's time to switch to a business account. A business account gives you access to several useful metrics:
- See how many users view your Pins.
- See how many users click through to your website.
- Determine which Pins generate the most engagement.
- Analyze the demographics of your followers.
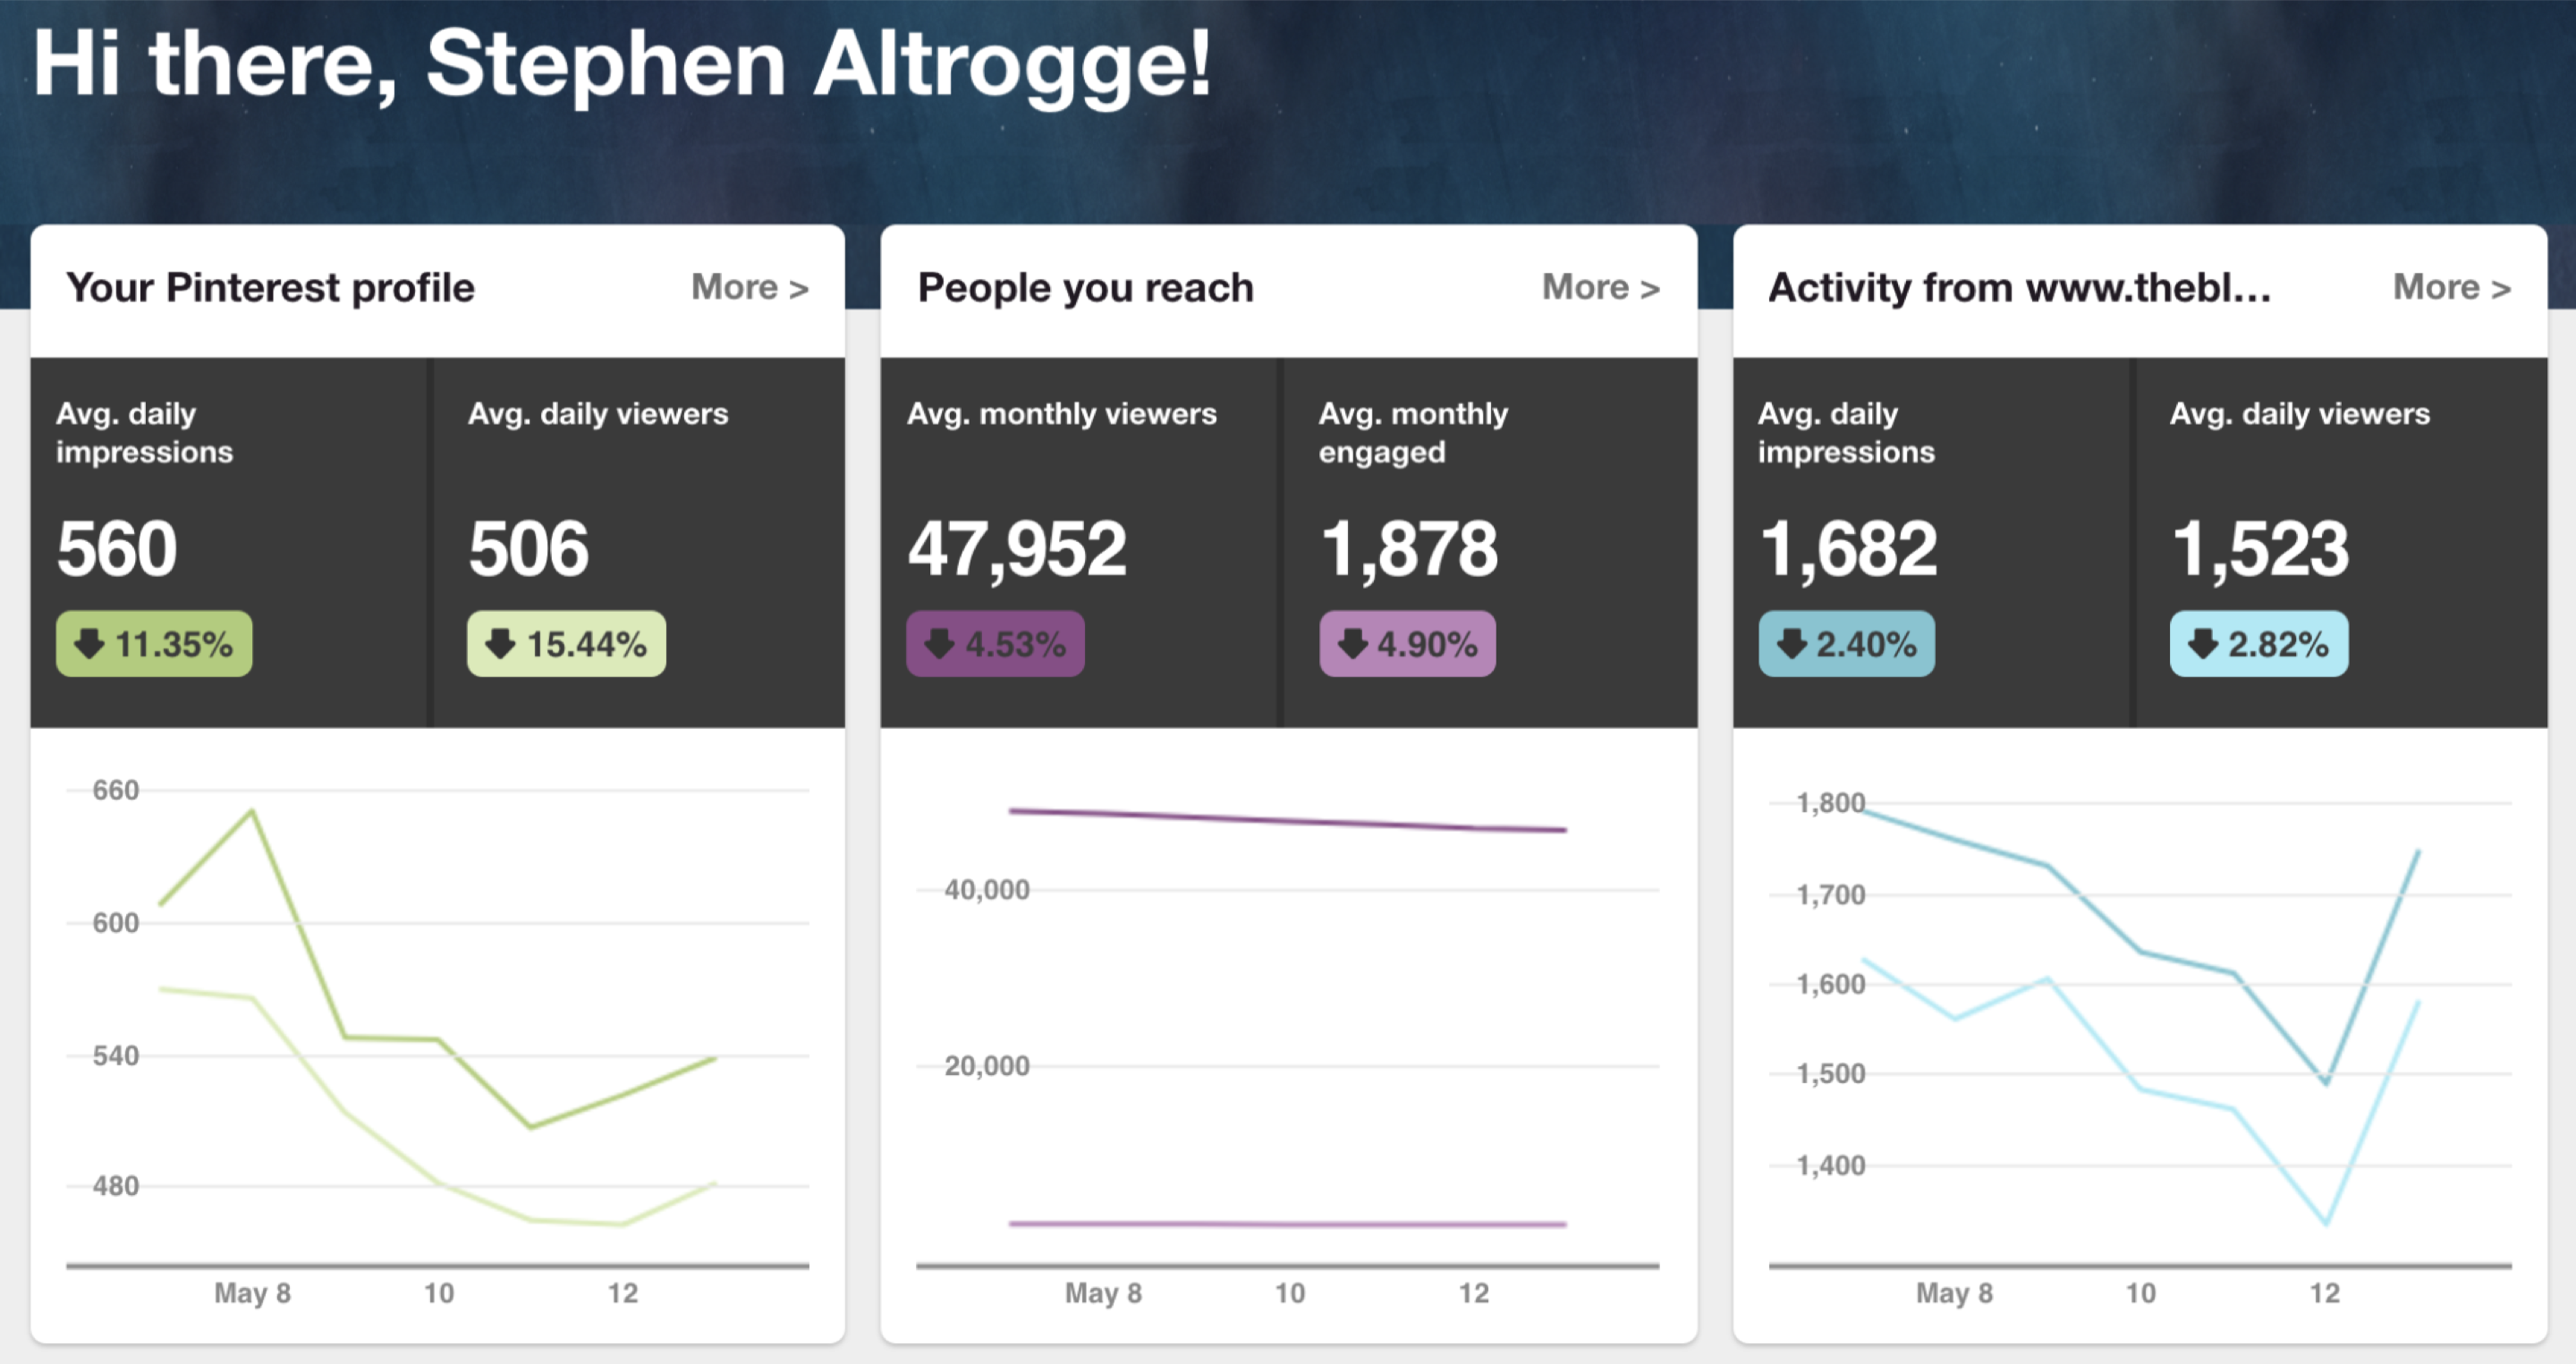
This information lets you optimize your content for what works most effectively.
To switch to a business account, click the menu icon, then click the "Upgrade Now" button.
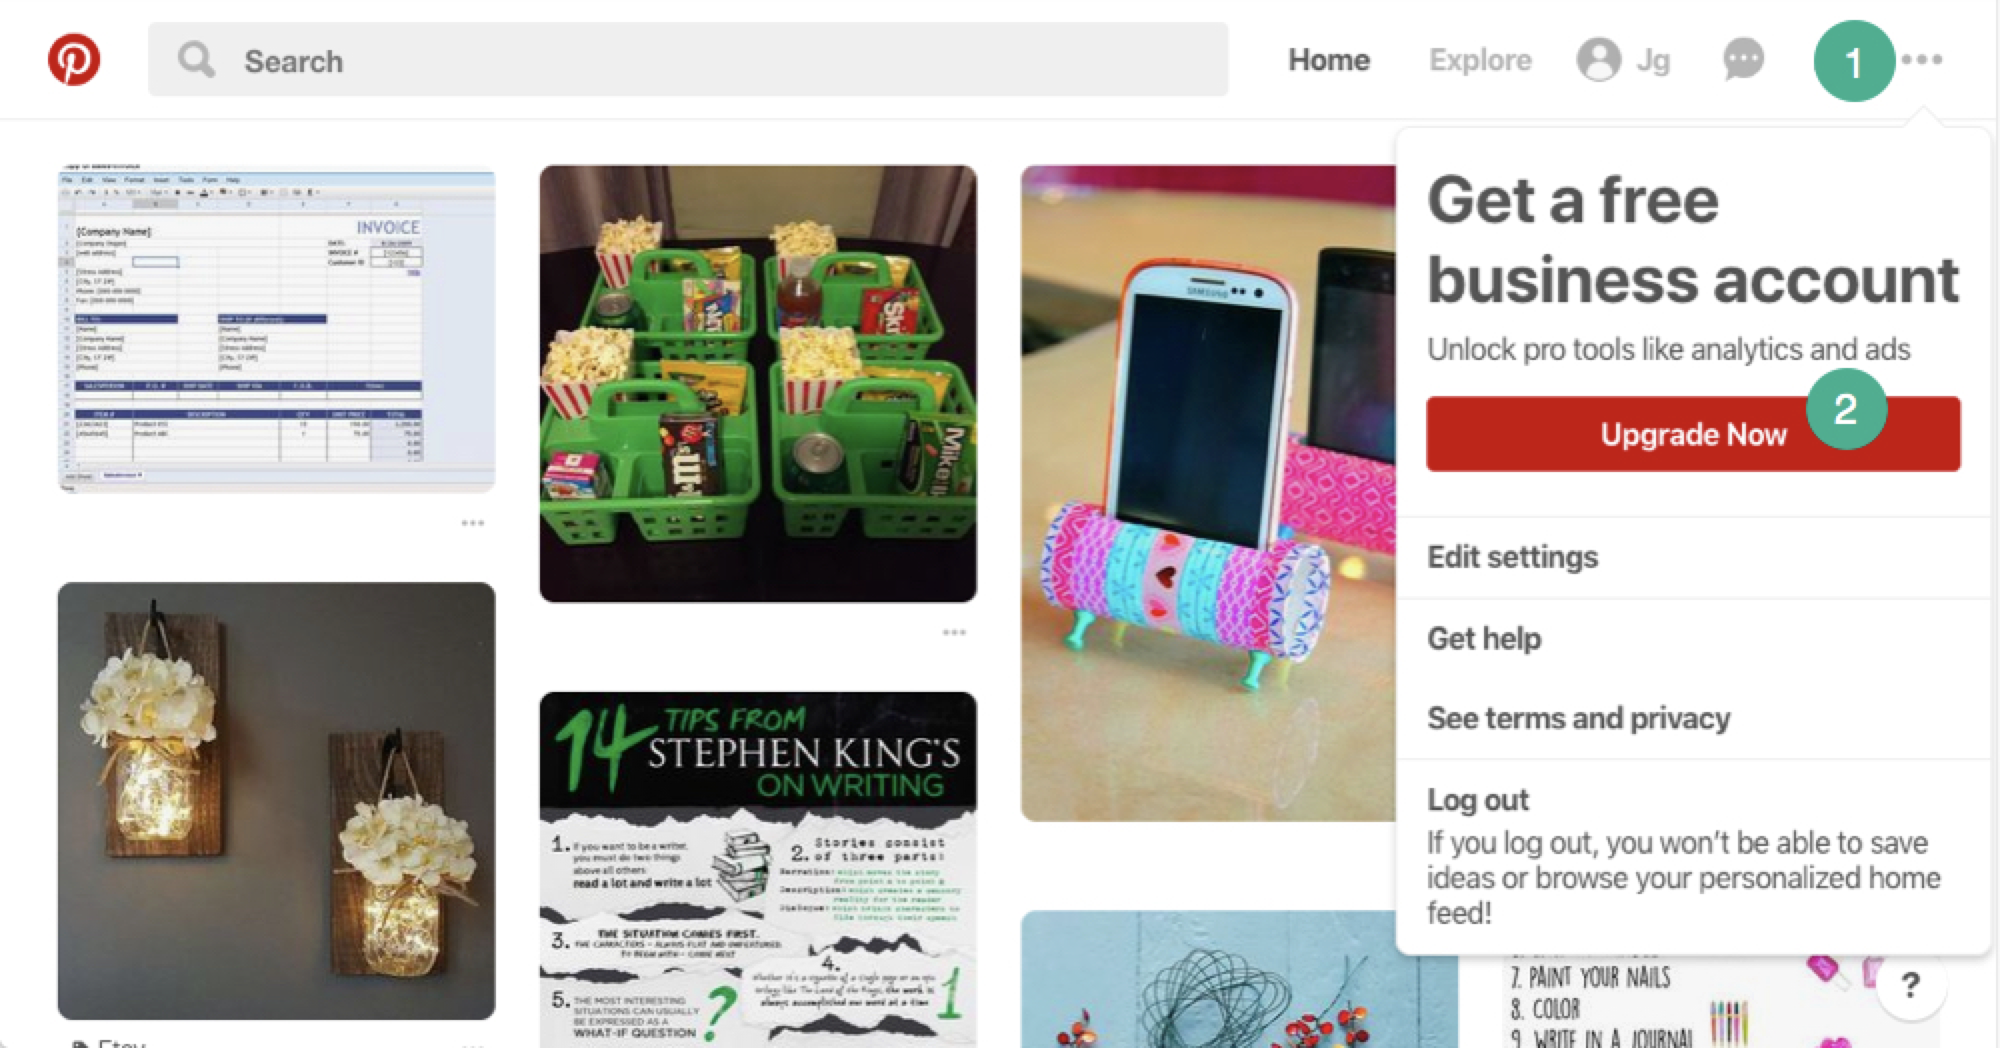
You'll need to enter a few details next: your business name, website address, and business type. Your account switches to a business profile instantly.
Once you're finished, you're ready to start implementing these five marketing techniques.
1. Drive More Traffic to Your Store or Website with Rich Pins
Normally, when you post a link on Pinterest, only the title and a small portion of your caption is shown.
Rich Pins, on the other hand, let you display more information:
- Article Pins add a headline, author, and story description.
- Product Pins add pricing, availability, and where to buy details.
- Recipe Pins include ingredients, cooking times, and serving sizes.
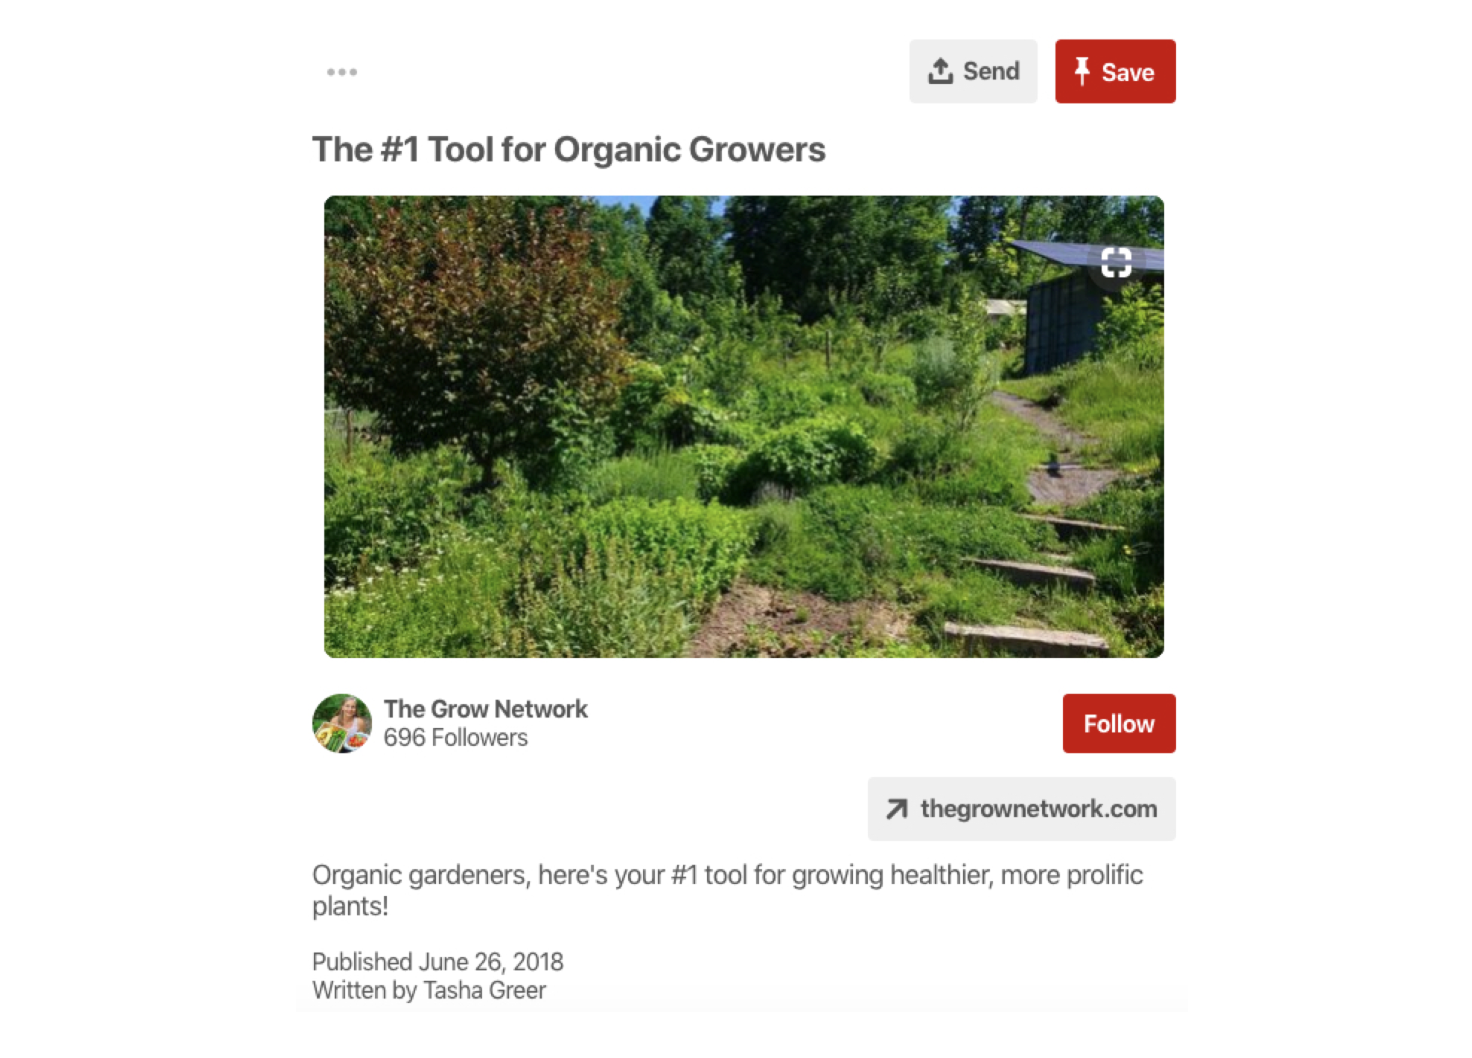
Because they let you display more information than general Pins, Rich Pins serve as a teaser that entices clicks and drives more traffic to your website.
How to use Rich Pins
There are several steps you need to take to get your Pins to display as Rich Pins.
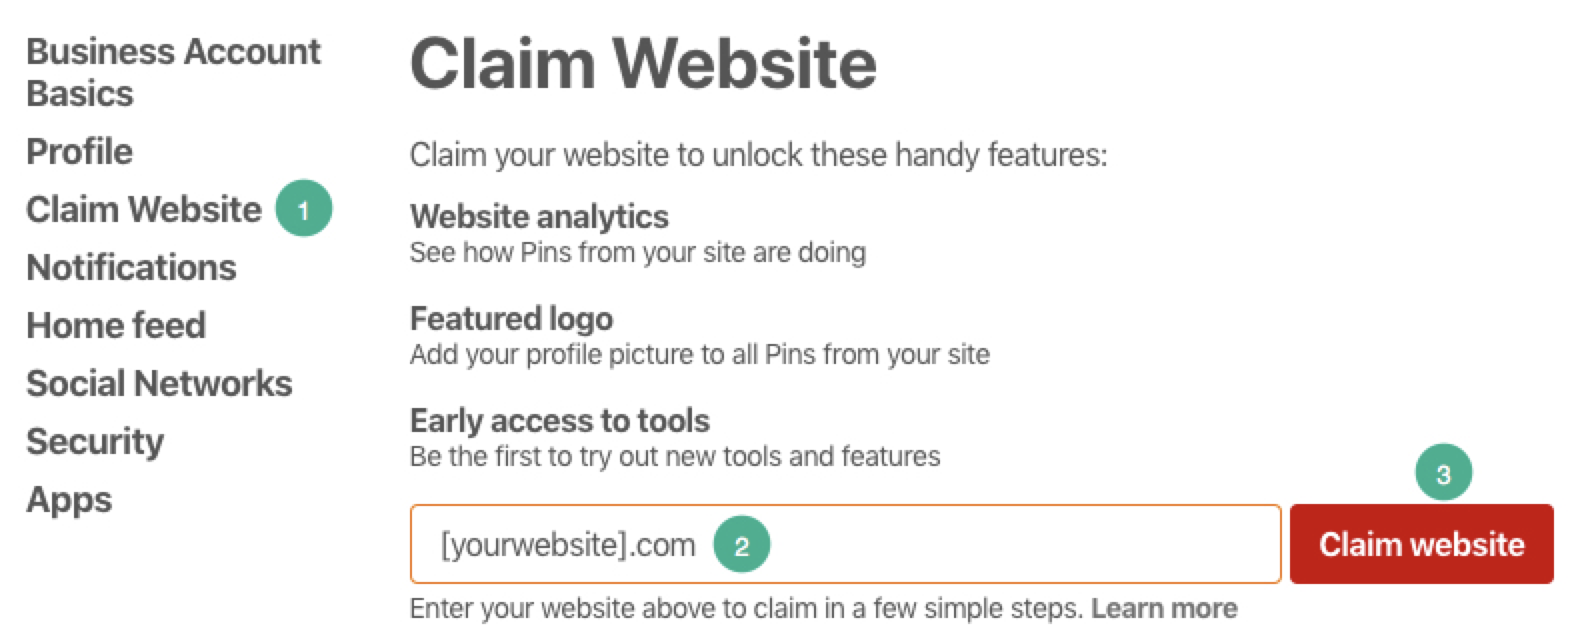
First, you need to claim your website on Pinterest:
Step 1: Open the settings menu in Pinterest.
Step 2: Click the "Claim Website" navigation link.
Step 3: Enter your website address in the empty field, then click "Claim website."
Step 4: Choose the method you want to use to claim your website. You can either add an HTML tag within the <head> section of your website, or upload an HTML file provided by Pinterest to your website's root directory. If you're not sure how to do this, enlist help from your development team.
Step 5: Once you've completed step four and have the Pinterest code on your site, submit your site for review. Pinterest will send you a confirmation email if all went well.
Next, you must mark up at least one piece of content on your site with structured data, a specific markup that helps sites like Pinterest—and Google—grab and display certain details from your content.
To add structured data to your content:
Step 1: Go to Google's Structured Data Markup Helper.
Step 2: Select a content type from the list (article, product, etc.), enter the URL of the page on your website that you want to mark up, and click "Start Tagging."
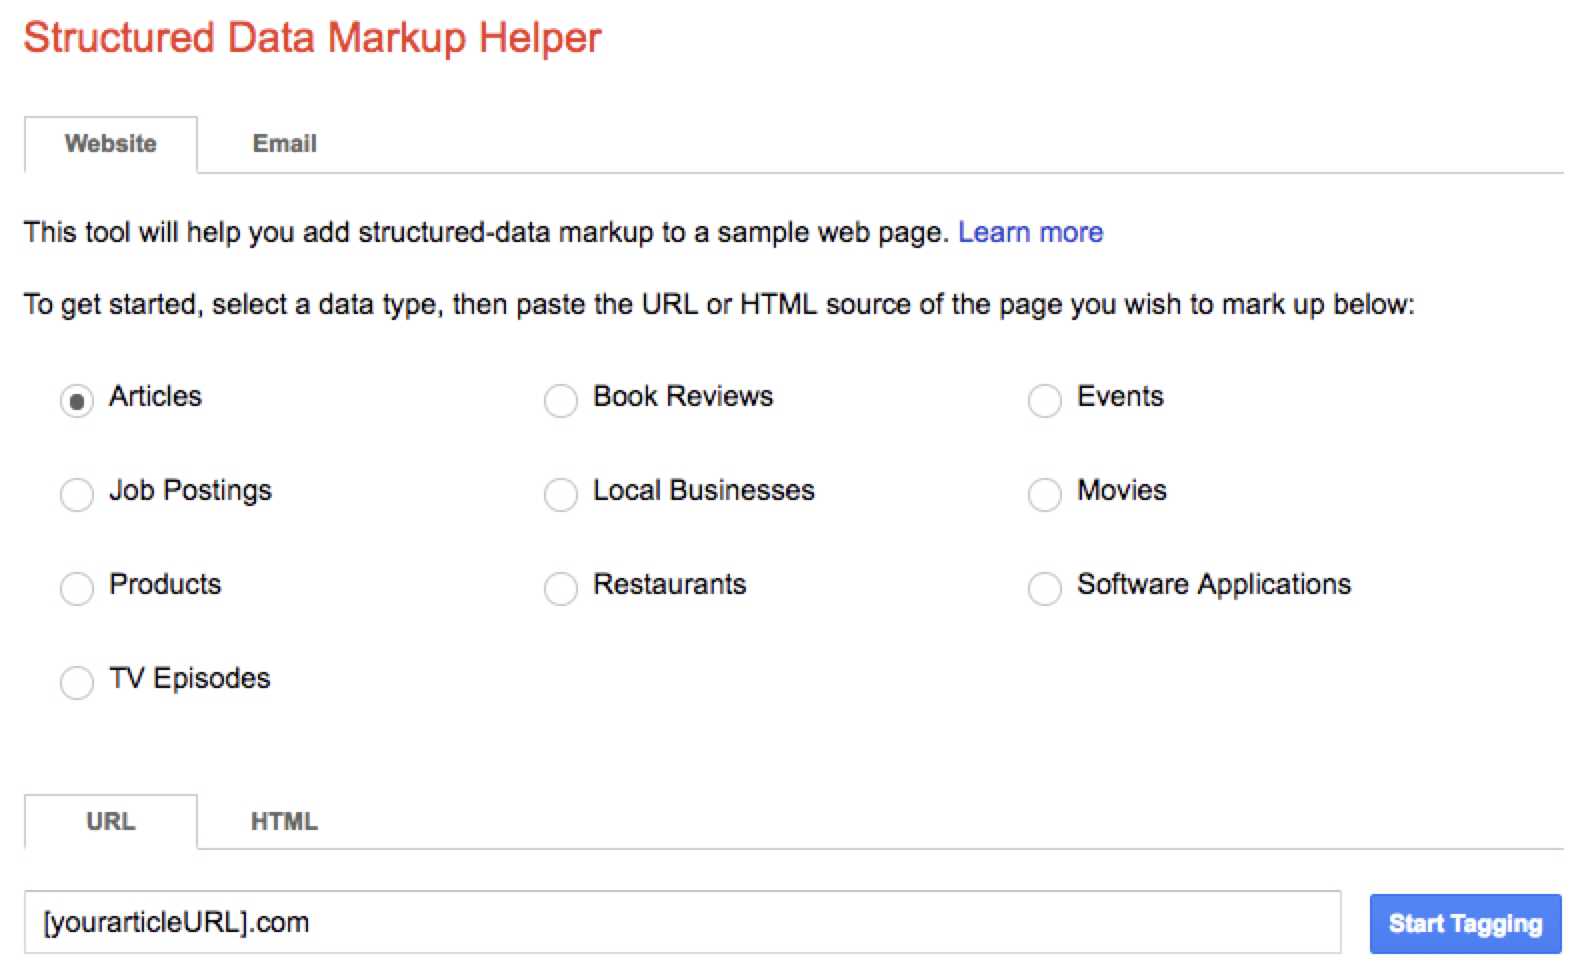
Step 3: Highlight content on the page, then select the appropriate tag for that content. At a minimum, add all of the tags Pinterest requires for each content type: required article tags, required product tags, required recipe tags. Follow the guidelines for Schema.org tagging.

Step 4: Once you've finished adding all of the necessary tags, click the "Create HTML" button to build the structured data markup for your content.
Step 5: Copy the structured data markup populated by the tool, and paste it into the <head> section of that page on your website.
The final step toward getting Rich Pins is applying for the feature on Pinterest:
Step 1: Visit Pinterest's Rich Pins Validator tool, enter the URL for the page you just marked up with structured data, and click "Validate."
Step 2: If you've marked up everything correctly, click the "Apply Now" button to apply to use Rich Pins for all Pinterest posts for your site. If you get an error, fix the issue with your markup, edit the page on your site, and then try to validate again.

Helpful tools for adding structured data to your content
After your application is approved, you can use Pinterest Rich Pins for any content on your website. However, all pages must be marked up with structured data to display as Rich Pins. The following tools make it simpler to add structured data to your content:
-
Google's Structured Data Markup Helper – Use the Structured Data Markup Helper (free) to generate Schema.org tags for article, product, and app Rich Pins.
-
Merkle's Schema Markup Generator – Use the Schema Markup Generator (free) to generate Schema.org tags for article, product, and recipe Rich Pins.
-
Schema App – Use Schema App (from $30/mo.) to add Schema.org markup to your content without leaving WordPress.
2. Get More Views by Optimizing for Pinterest Search
Pinterest users rely heavily on search. While the default feed is fun for browsing, users often search for ideas related to specific topics. When interested in a particular style of clothing or a new kitchen gadget, they turn to search to seek inspiration.
While Pinterest's search engine relies mostly on engagement metrics to rank its results, there are still a few general ways to optimize your profile, boards, and Pins to improve your search rankings on Pinterest.
How to optimize your profile, boards, and Pins for search
To improve the chances of your business profile showing up in Pinterest search, make sure to fill out your Pinterest profile. Open Pinterest's menu, and click "Settings." Then, click the "Profile" menu link.
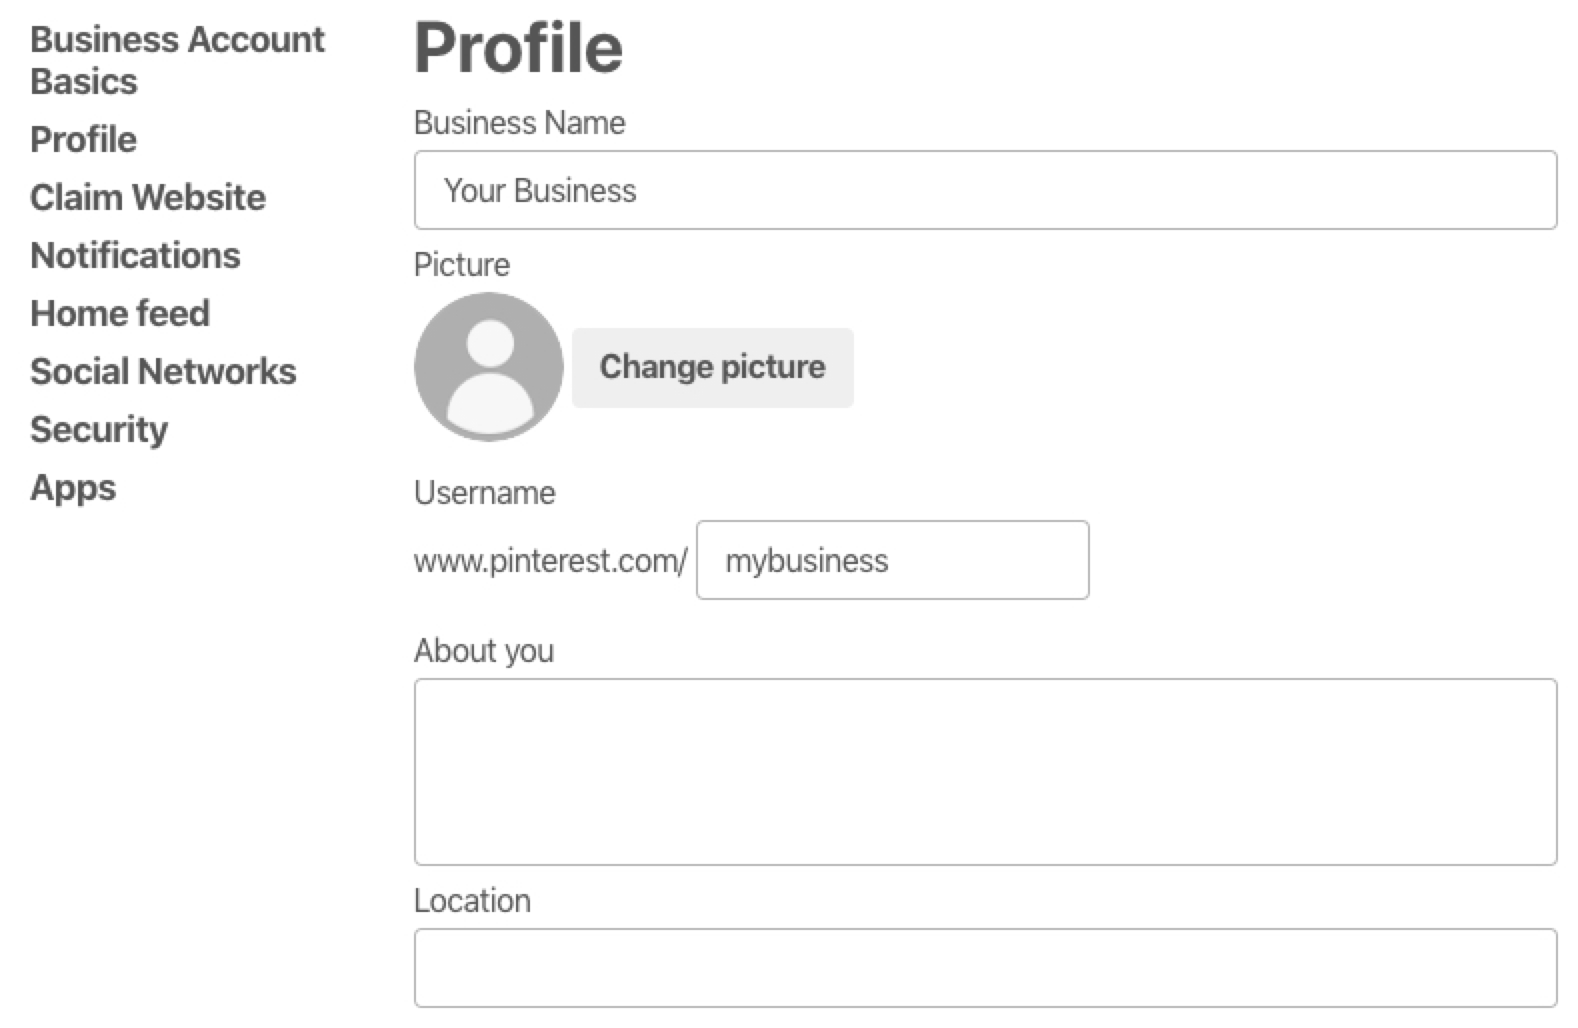
Fill out each section of your profile, using these tips to optimize it for search:
-
Upload a high-resolution photo of your business' logo or another recognizable image, such as a picture of your storefront.
-
Choose an easy-to-remember username. Ideally, use the name of your business. It's also helpful if you keep your usernames consistent across all of your social platforms.
-
In the "About you" section, consider what terms your customers might be searching for on Pinterest. Do you sell leather goods? Include that. Do you specialize in helping entrepreneurs? Make that clear. You only have 160 characters, so keep it concise.
-
Add your business' location, if applicable.
-
Select a few of your favorite or most important boards to feature at the top of your profile page.
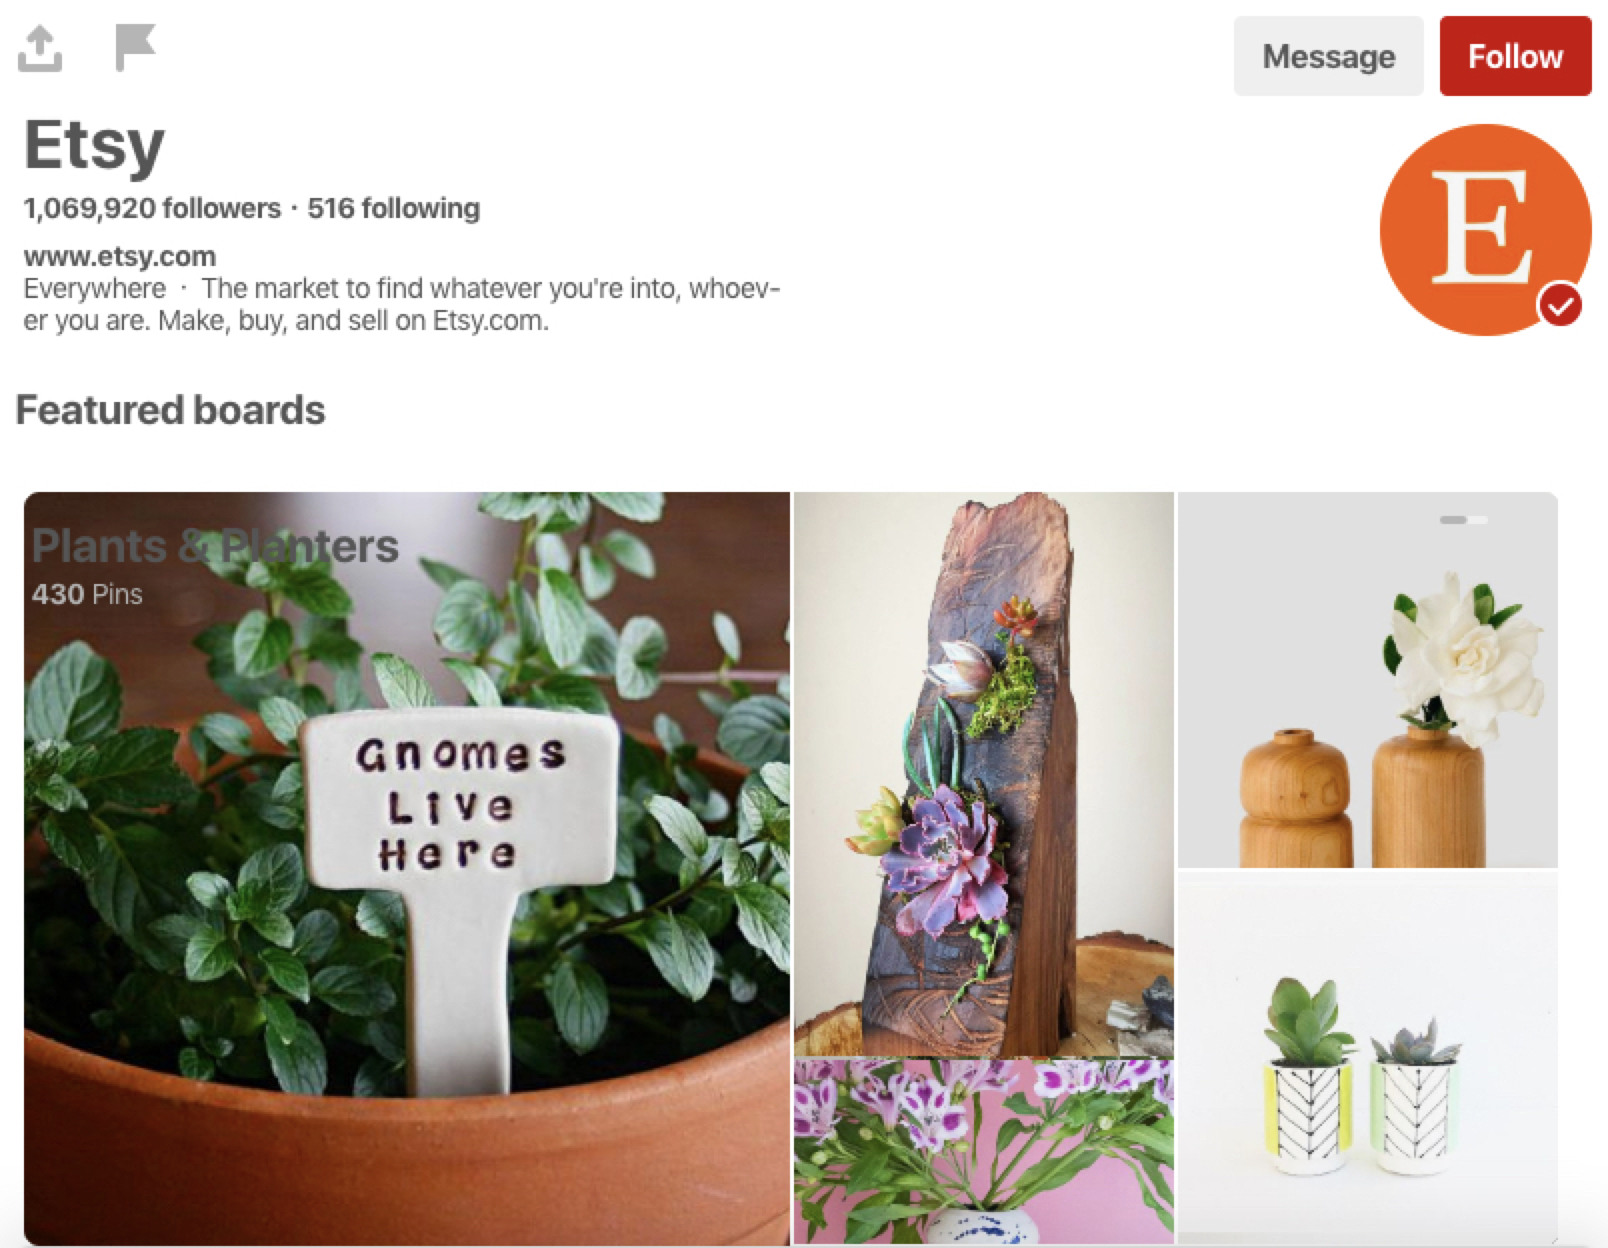
When creating a board, make sure to give it a descriptive name and—if possible—include relevant keywords.
The same rules apply when adding Pins to your board. Don't skimp on your Pin descriptions. Take time to do keyword research, and include the appropriate keywords throughout your descriptions. This will help Pinterest identify your Pins and show them to the relevant audience.
How to find keywords for your boards and Pins
Here are three easy ways to find keywords for your boards and Pins:
-
Use an SEO keyword tool. Although Google and Pinterest use completely different search engines, you can still get a good sense of what people are interested in by looking at Google search volumes. Use a tool like Ahrefs or Google Keyword Planner to find relevant keywords and their search volumes.
-
Use Pinterest's auto suggest feature. Just like most search engines, Pinterest auto suggests popular search phrases, people, and boards. For example, type "minimalist wallet" into the Pinterest search bar, and you'll see more keywords.
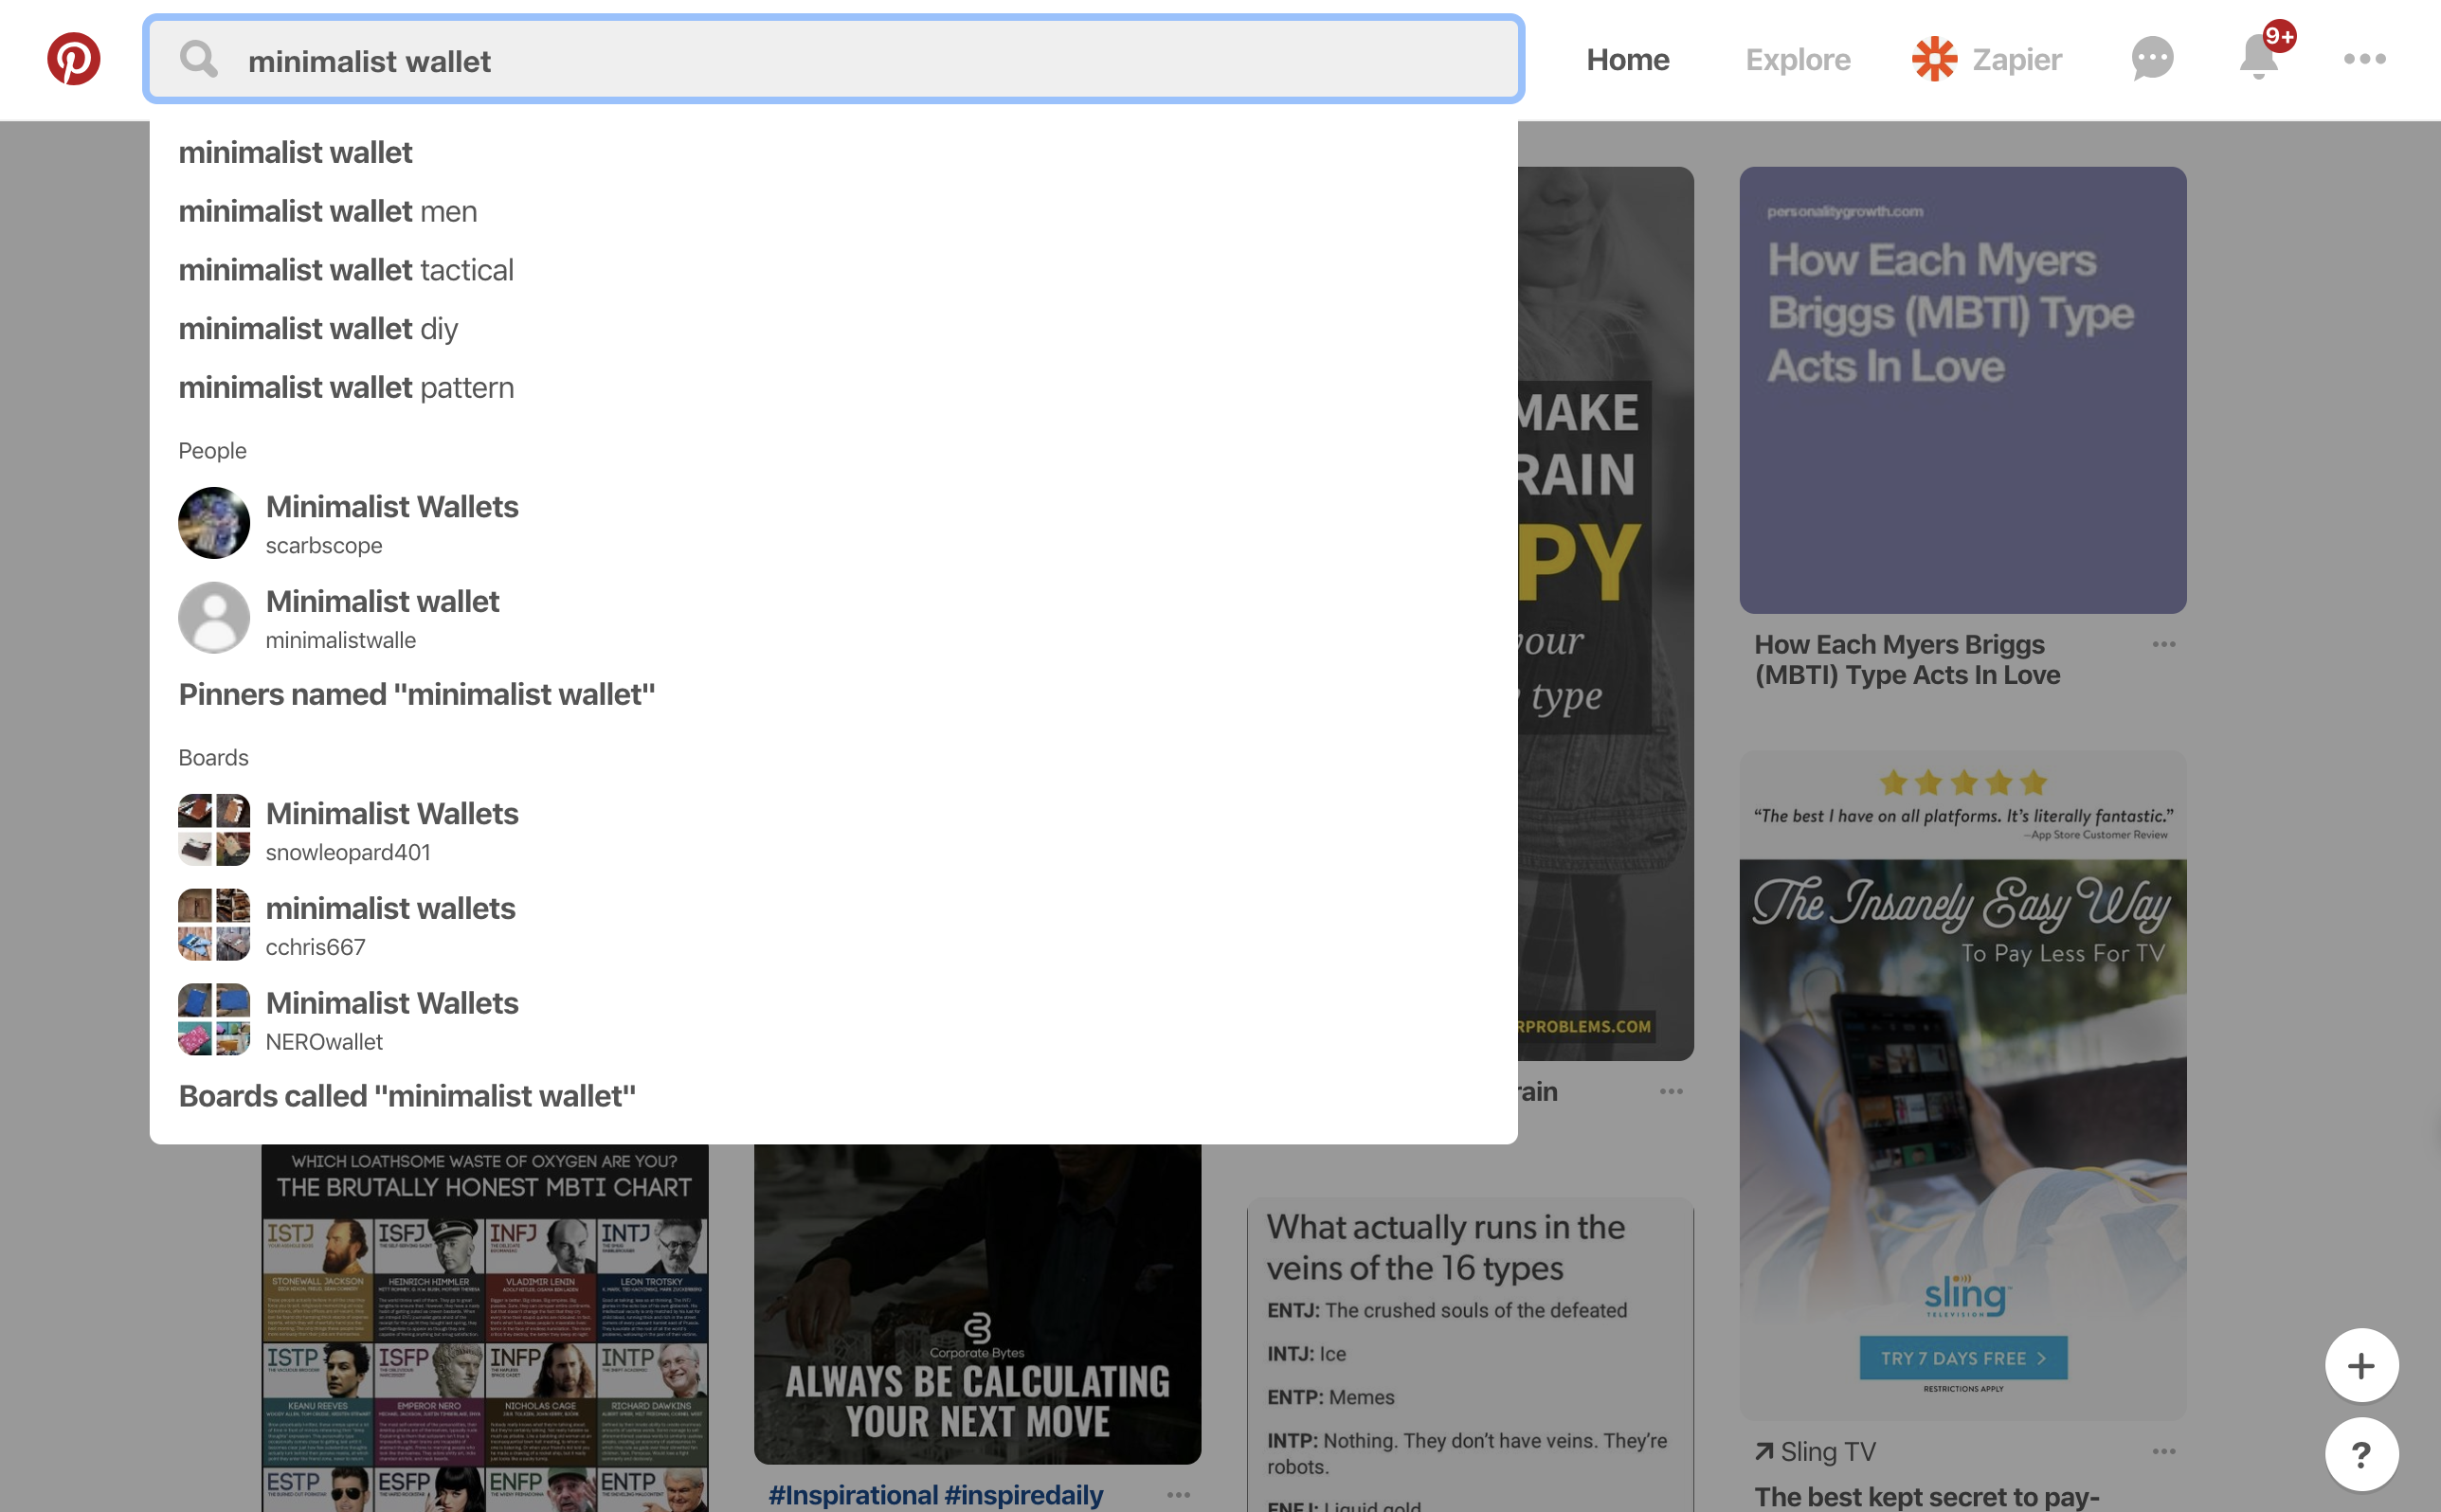
- Mimic your competitors. Piggybacking on the autosuggest feature, click on any of the board names that appear in your search to see what kinds of keywords those boards are using. It never hurts to see what your successful competitors are doing to get featured in important searches.
3. Boost Pinner Quality with Scheduling and Cross-Posting
One of the factors in the Pinterest "smart feed" algorithm is "Pinner quality." Essentially, Pinterest wants to know that 1) you're an active user and 2) you post content that's relevant and interesting to other users.
The higher your Pinner quality, the more the algorithm favors your content.
There are a couple of ways to boost your Pinner quality:
-
Pin regularly. Schedule Pins to automatically post to Pinterest using a social media management tool, or use a Zap to automatically post new website content to Pinterest. This ensures you're posting Pins regularly and shows Pinterest that you're an active user.
-
Repin. Consider posting content that's not your own but that will resonate with your audience. It shows that you're there to provide value to your customers—not just to market your product or service. Plus, relevant content increases engagement, such as likes and repins, signaling to Pinterest that it should pay attention to your content.
4. Engage and Interact with Customers on Group Boards
Pinterest lets you create group boards—boards that accept Pins from multiple users. Inviting colleagues/customers/industry influencers to post to a group board is an easy way to engage and interact with your followers and get some user-generated content for your Pinterest account.
One excellent example of a group board is Whole Foods' #WhyAustin. The company created the board and then invited other Austin-based businesses to pin to it. It fostered a sense of community within Austin and, of course, generated interest in Whole Foods as a brand.
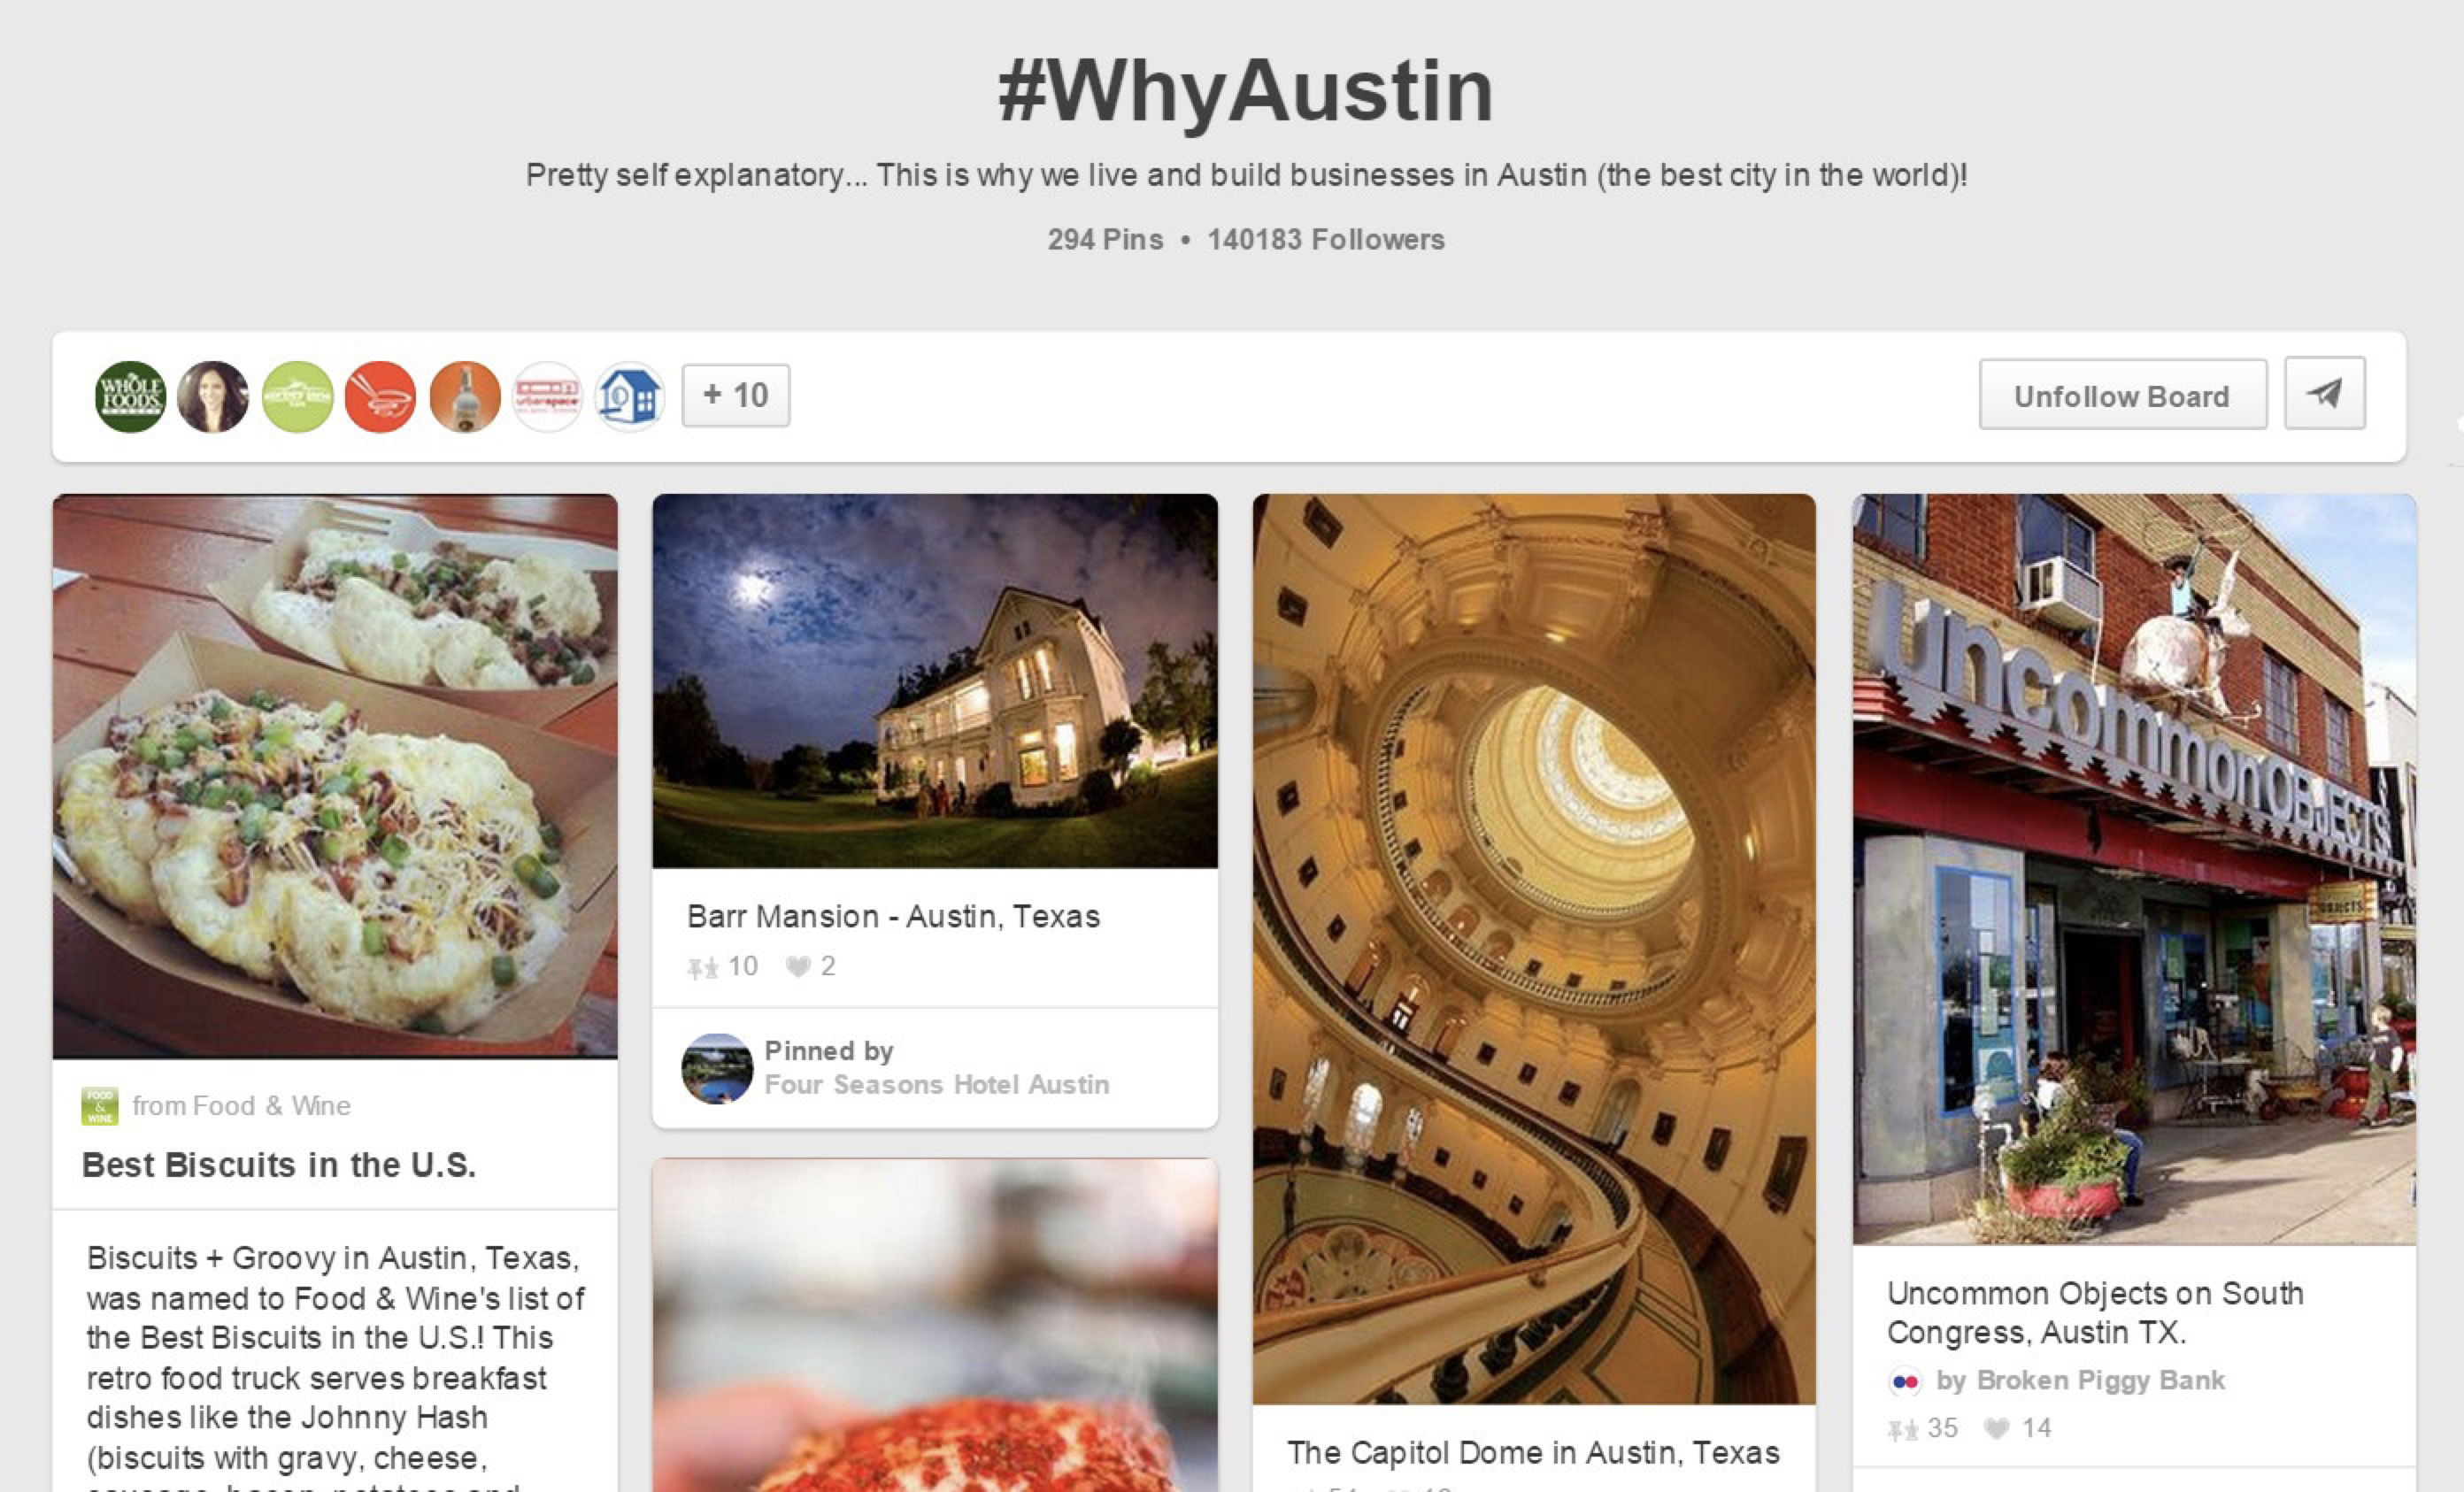
Notice the number of followers on that board? Hundreds of thousands—and growing. By creating a collaborative board, Whole Foods connected with a large audience that was actively interested in what they had to offer.
How to create a group board
Here's how to create a group board on Pinterest:
Step 1: Click the "Boards" tab on your profile page, then click "Create board."
Step 2: Give your board a title and make sure it's not set to secret, then click "Create."
Step 3: Next, click the pencil icon at the top of your board to edit it. Here, add the names or email addresses of any contributors you want to allow to post to the board, and click "Invite." Pinterest will send an invitation email to those contributors.
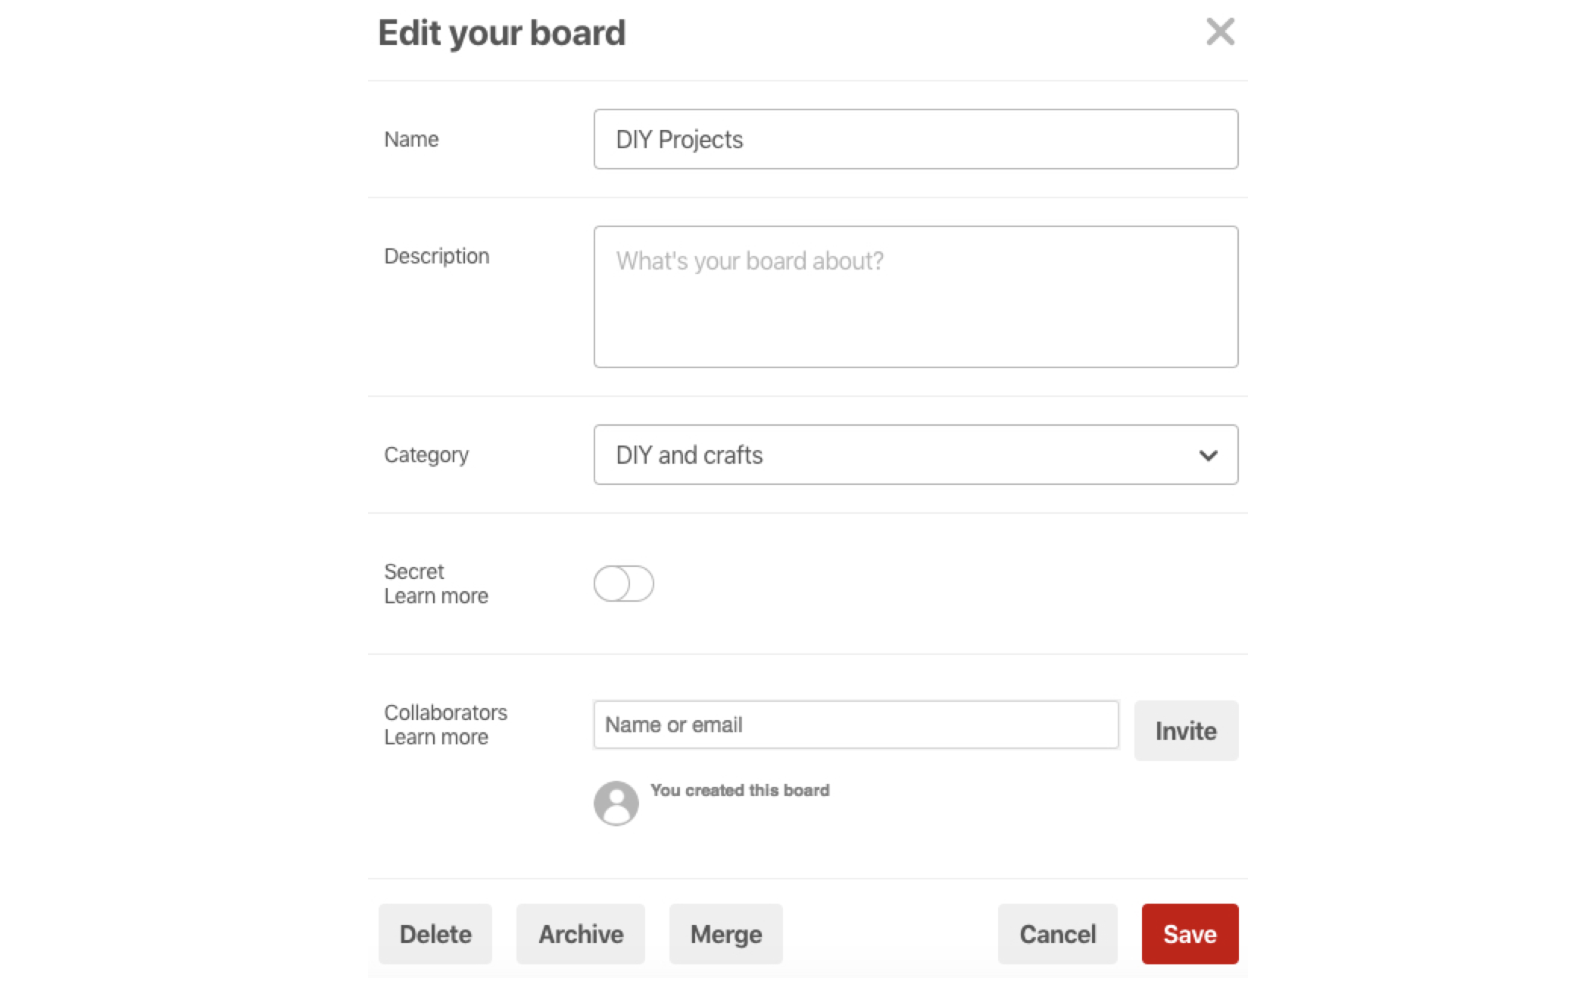
Step 4: Save your changes.
Now, any user who accepted your invitation will be able to post Pins to your board.
Group board ideas for businesses
Here's how other businesses use group boards and user-generated content on Pinterest to grow their followers and market their brands:
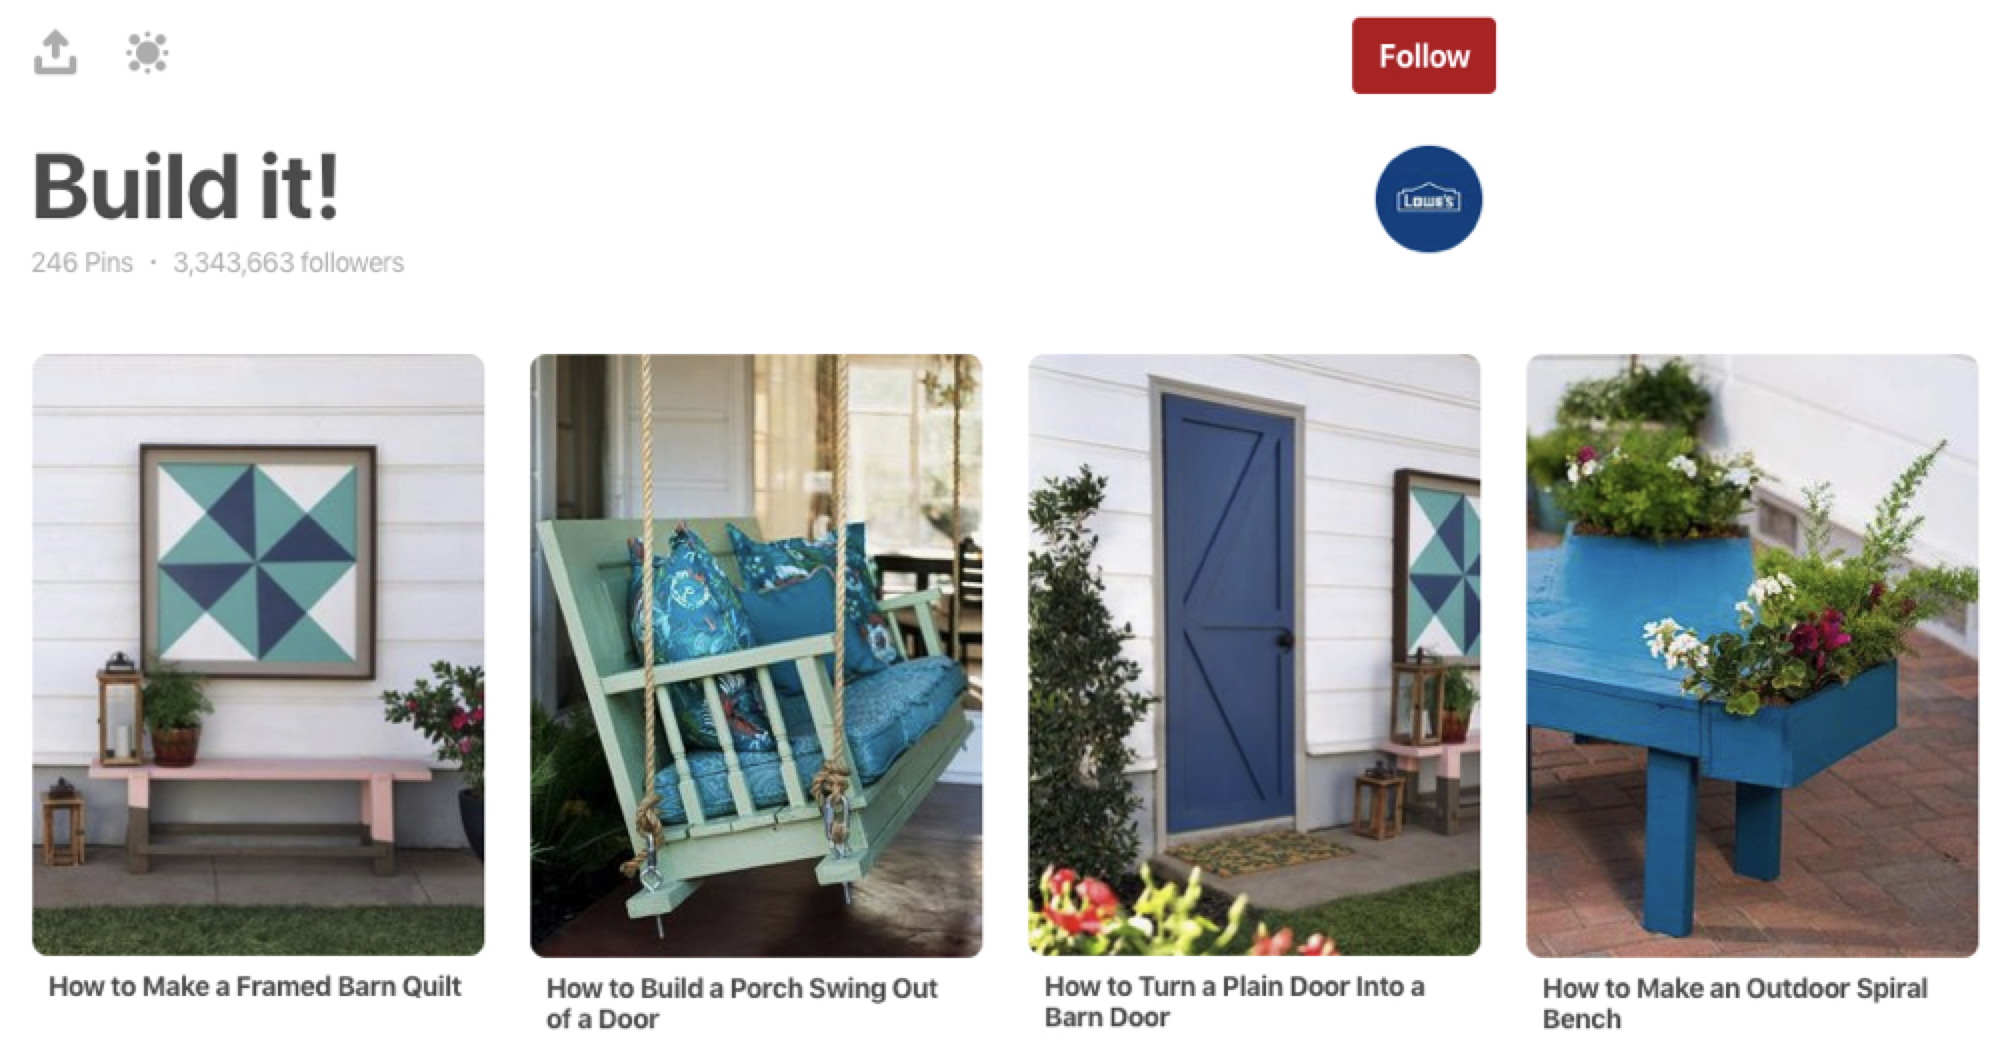
- Build It! by Lowe's – One of the most popular reasons to use Pinterest is to find awesome DIY project ideas. Lowe's capitalizes on that with its Build It! board. It gives DIY bloggers a way to promote their posts to a huge audience of followers, and each post features projects that can be built using supplies purchased at Lowe's.
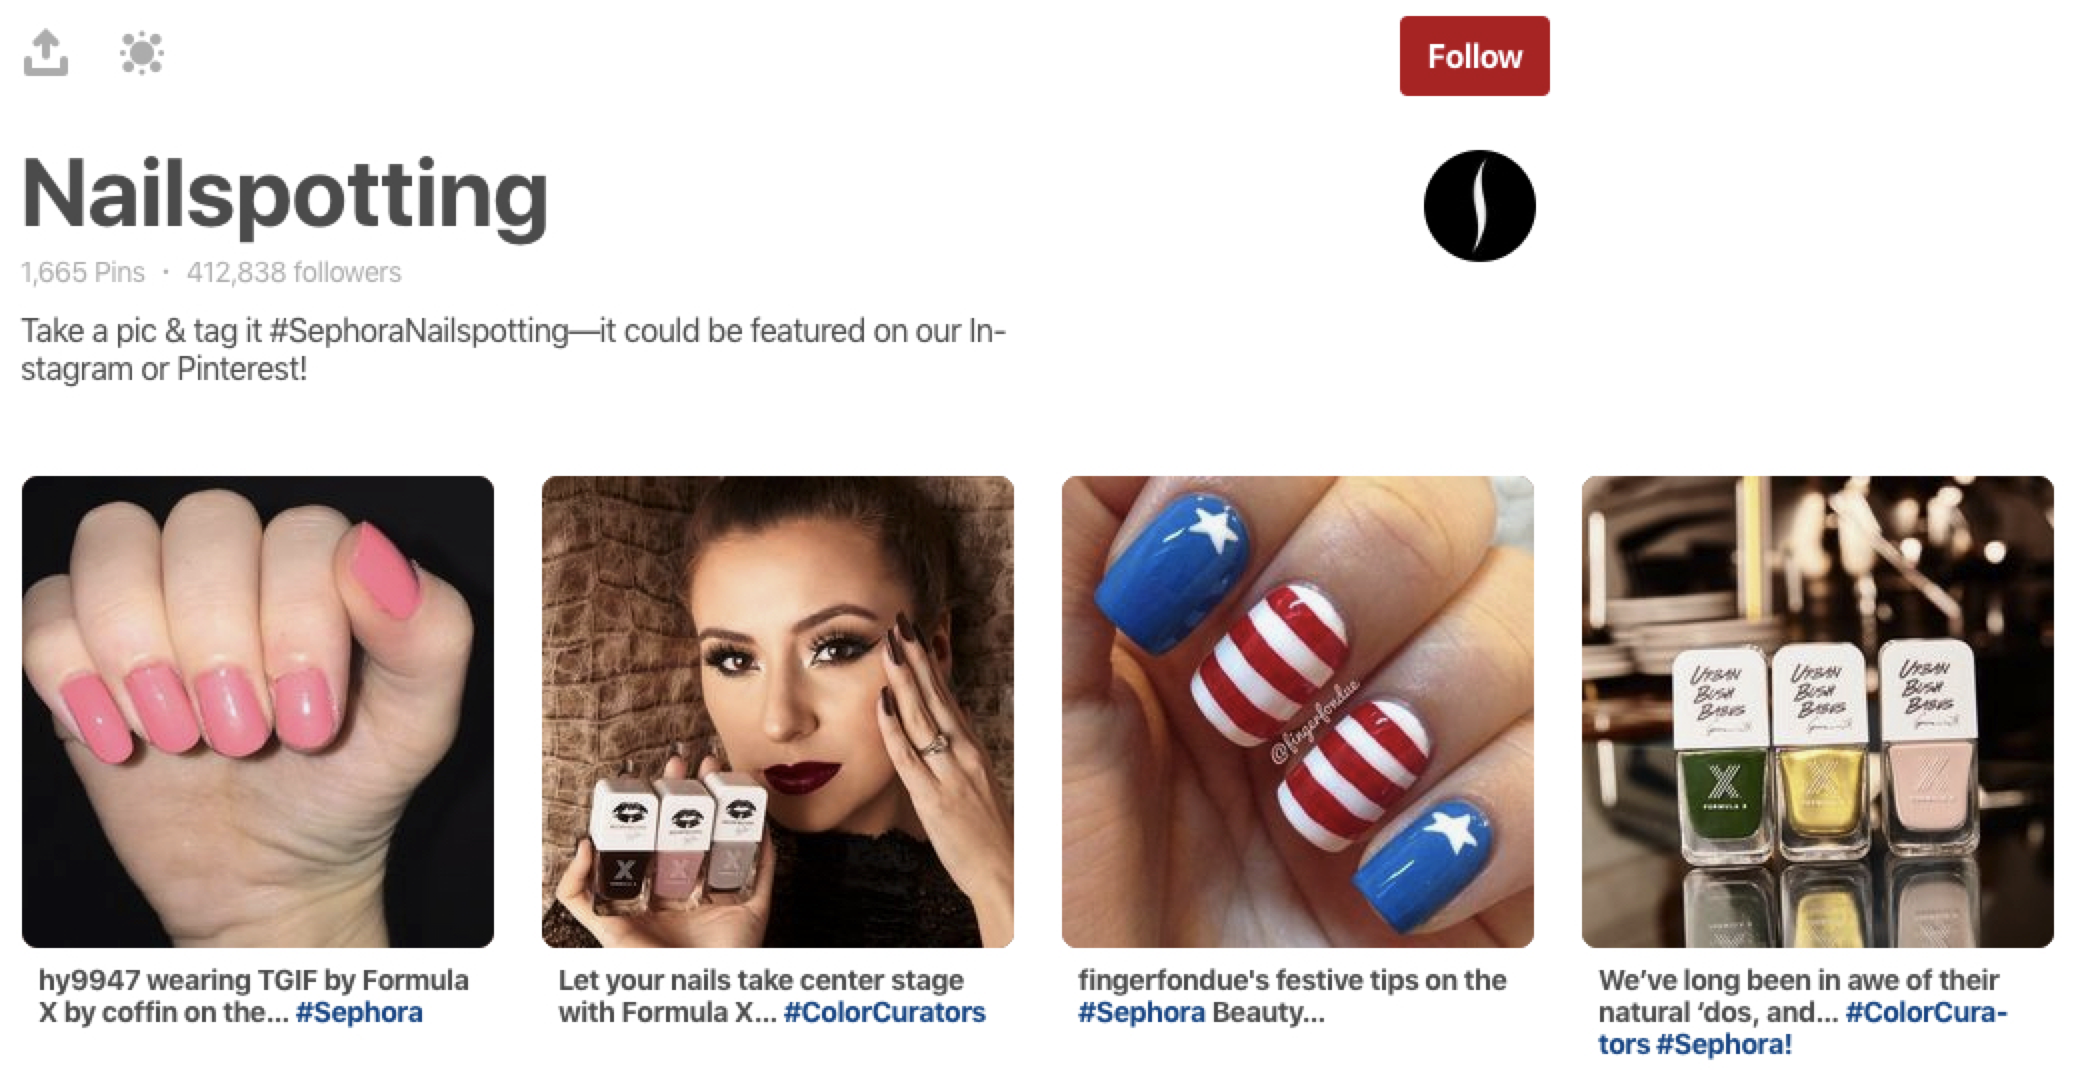
- Nailspotting by Sephora – Sephora encourages its followers to take pictures of the creative ways they've painted their nails using Sephora products, upload them to Pinterest, and tag them with the hashtag #SephoraNailspotting. The company features the best pictures on its Nailspotting board, along with links to the Sephora product used.
- Blogger Recipes We Love by Better Homes and Gardens – Curators selected by Better Homes and Gardens share their favorite food bloggers' recipes on its Blogger Recipes We Love board. While there's no direct connection to the brand's product, this group blog offers a great example of using cross-posting to boost Better Homes and Gardens' Pinner quality.
5. Use Pinnable Images on Your Website
Unless you want to spend hours creating images just for Pinterest, you'll want to be sure your website already uses pinnable images. That way, it's a one-click journey to pinning.
What makes a pinnable image? It's something people want to either click (driving traffic to your website) or repin (which would eventually drive traffic to your website).
Here are some tips:
-
Make sure the image pops. It might stand out on your website's solid gray background, but will it stand out among a sea of other images? Once you—or a customer—pins the image, you want it to shine on Pinterest as well.
-
Think like a teacher. If someone learns something from your image, they're more likely to want to share it, so try to be informative.
-
Don't put all your cards on the table. You want people to click through to your website from Pinterest, so don't give everything away in your image.
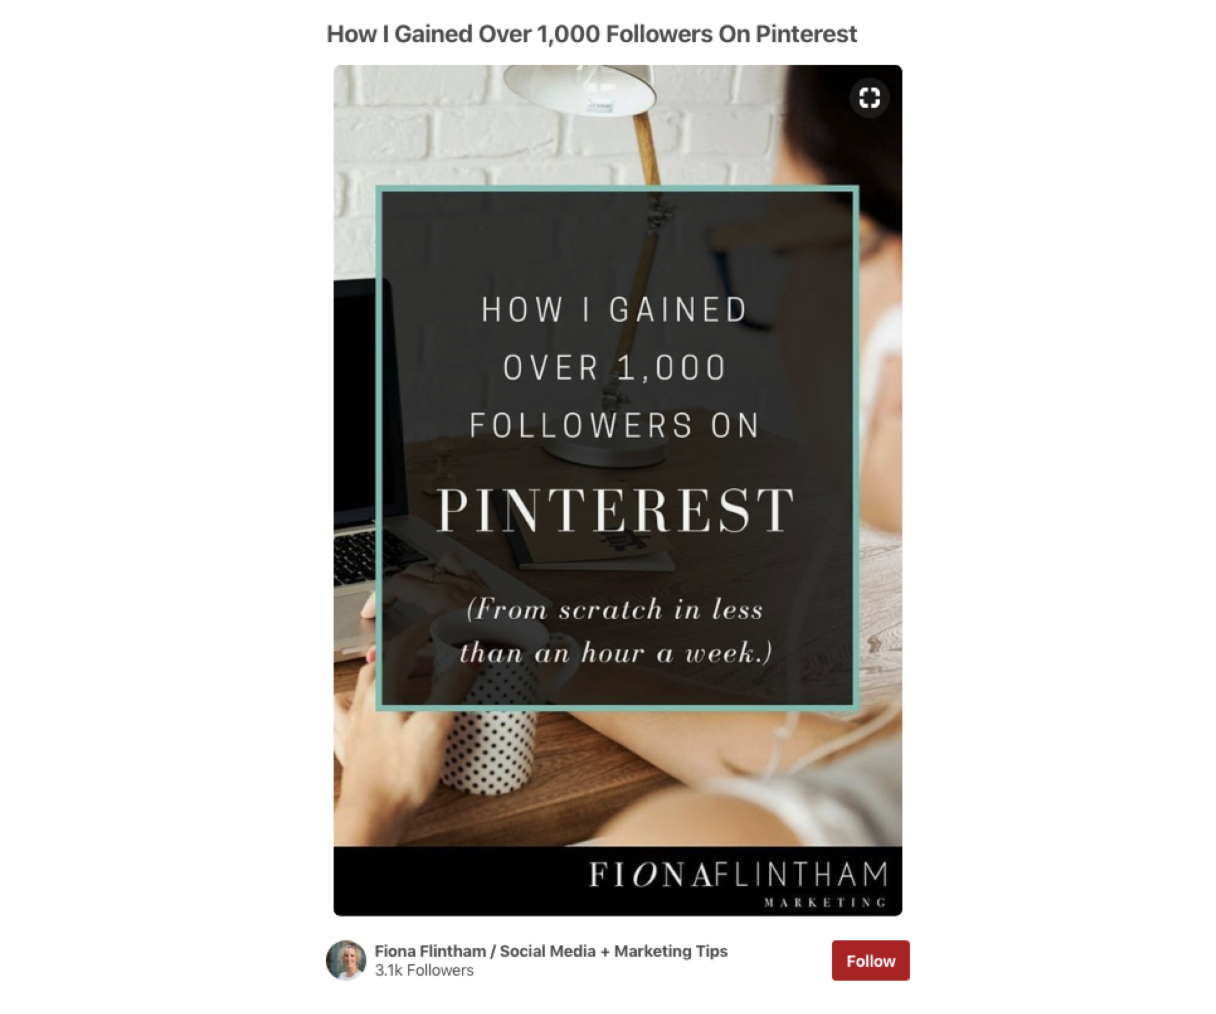
- Follow general size guidelines. The standard Pinterest image has a width:height ratio of 2:3. Your image doesn't have to be precisely that ratio, but you want to be sure it displays well when pinned.
How to automatically pin images from your website
Depending on the platform you use for your website, you'll have different options for how to get your images pinned.
For example, there's a WordPress plugin called Pinterest Pin It Button On Image Hover and Post (free). How it works is pretty self-explanatory. When you hover over an image, a button appears that allows you to pin the image straight to Pinterest. It makes pinning easier for you—and for people visiting your site.
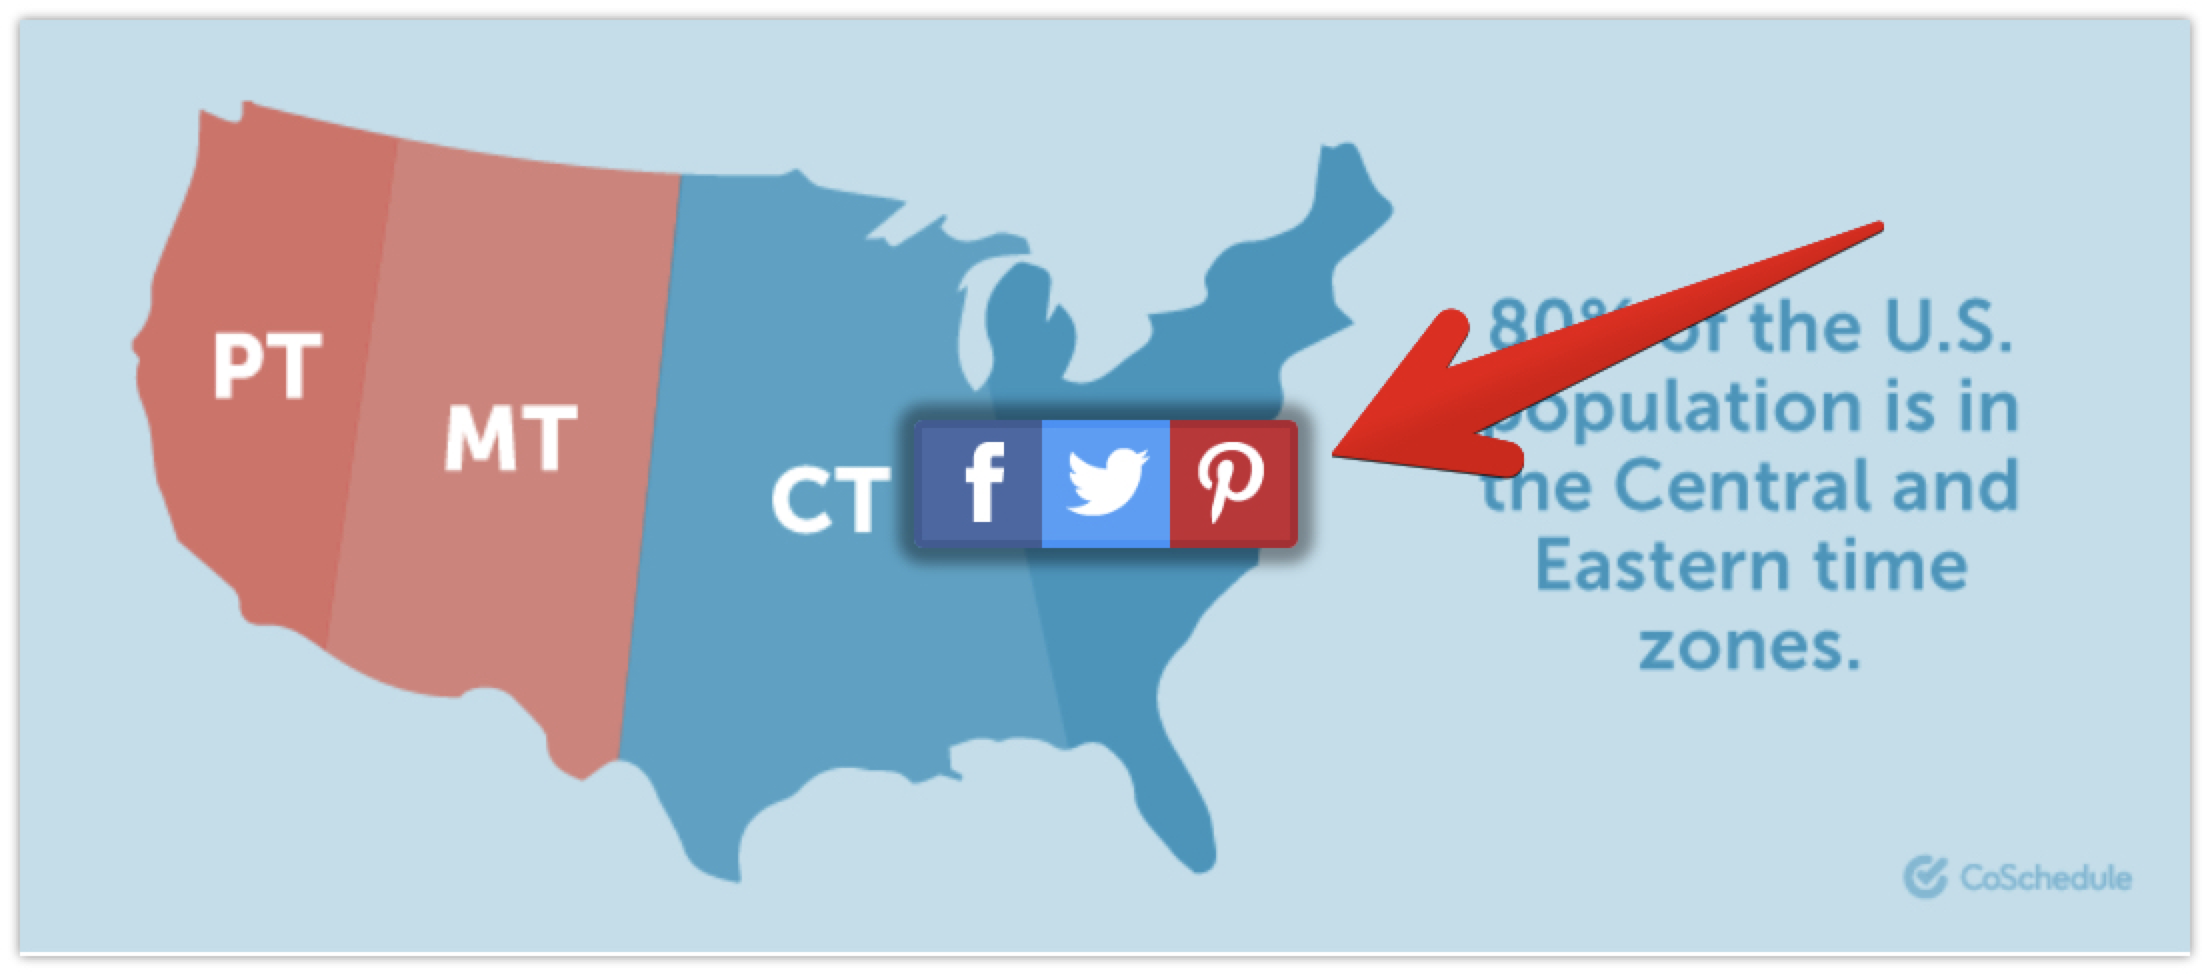
If there's no simple plugin for your website's CMS, you can always pin images from your website to Pinterest manually by creating a new Pin, clicking the "Save from site" option, and entering the URL of the content you want to pin.
Finally, you can use the Zaps in the next section to automatically post your images and content to Pinterest as soon as you hit the publish button on your website.
Automate Your Pinterest Account
Petra Veikkola, a solopreneur, uses Zapier to automate her Pinterest account.
"I can really recommend [Zapier] to anyone who wants to automate their Pinterest workflow, and spend more time creating amazing content [rather] than just pinning or sharing manually the content online."
Once you've come up with a social media content strategy for Pinterest, you too can automate the process with Zapier.
Click "Use this Zap" on your desired workflow below to get started.
-
Automatically pin images to Pinterest any time you add a new product:
-
Automatically share new blog posts or photos on Pinterest:
- Automatically get notified when you have new followers or mentions:
- Cross-post your Pins on other social media channels:
Don't see the workflow you're looking for? Browse more Pinterest Zaps here, or create your own custom workflow using thousands of apps.
Pinterest isn't your traditional social networking site. Unlike other social platforms—Facebook, Instagram, and Twitter—that are geared toward helping people connect, Pinterest caters much more to people looking for ideas and inspiration.
Often, that inspiration leads to a purchase. Take advantage of the power of inspiring others—find creative ways to share your products and services on Pinterest—and harness the power of inspiration to increase awareness and sales for your business.
Title image by Joe the Goat Farmer via Flickr.
source https://zapier.com/blog/pinterest-strategies-for-business/

No comments:
Post a Comment