If you have tons of issues in your Jira projects, it's easy for tasks to slip through the cracks. Jira filters help you sort your issues to quickly find your most important tasks. In this tutorial, we'll show you how to create a filter in Jira.
What Are Jira Filters?
Filters in Jira are used to sort and segment issues by criteria you set. For example, you can use filters to narrow a list of issues down to see only those that are assigned to you, only those of a certain issue type (story, bug, epic, etc.), only those assigned a specific priority, only open issues, and more.
There are more than two dozen criteria you can use to filter your Jira issues, and you can also filter by multiple criteria to view only issues that match very specific conditions.
How to Create a Filter in Jira
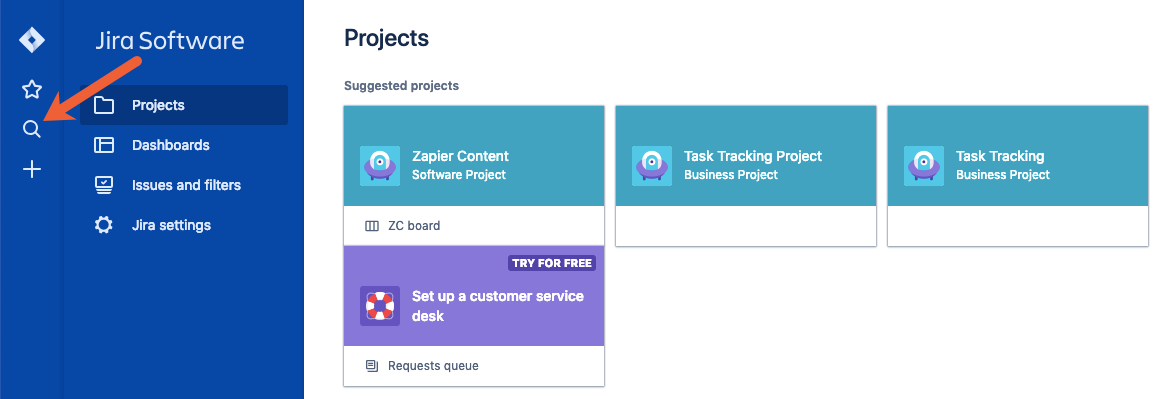
Creating a filter in Jira starts by conducting a search. Click the magnifying glass icon in Jira's left navigation menu.
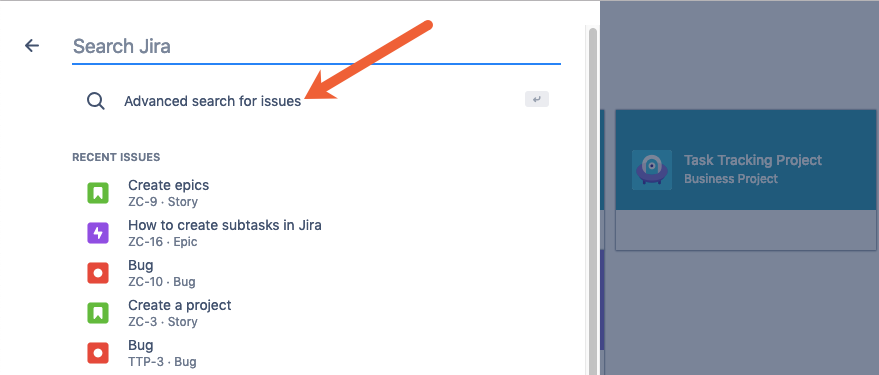
In the panel that opens, click Advanced search for issues just below the search bar.
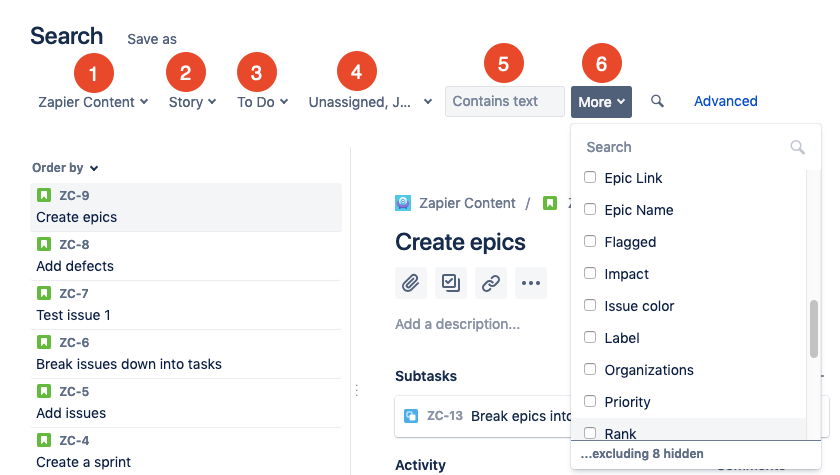
Use the dropdown fields to sort your issues by project (1), issue type (2), status (3), and/or assignee (4). Use the text field (5) to search for issues that contain specific words or phrases. Or click the More dropdown (6) to sort by more than two dozen other criteria like epic name, due date, sprint, or priority. Then, click the measuring glass icon to conduct your search.
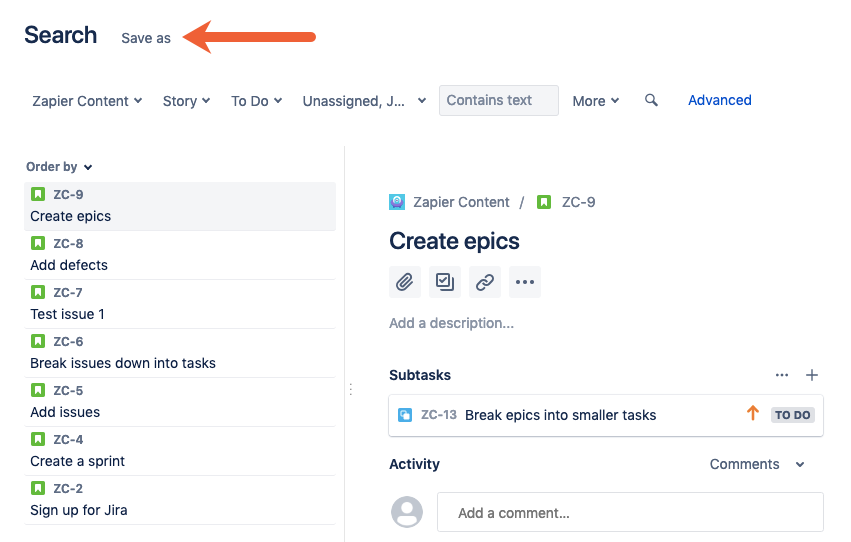
Check your search results to make sure the issues that display are the issues you want to filter for. Then, click the Save as to convert your search criteria into a filter.
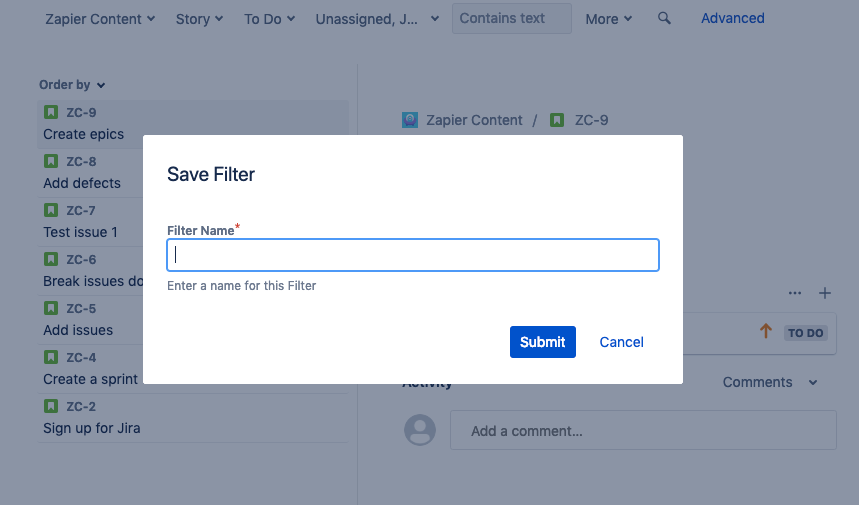
Give your filter a name and click Submit. You've now created your first filter in Jira.
How to Access Your Filters in Jira
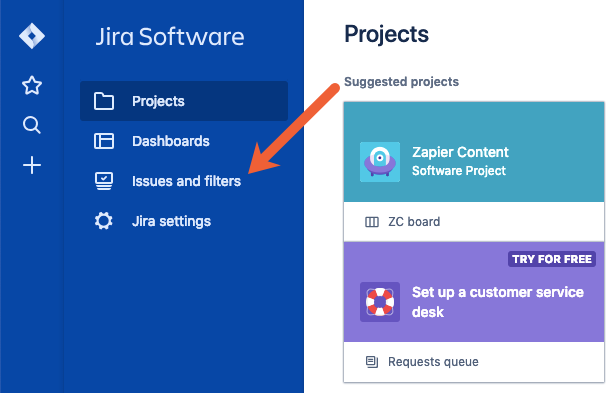
After you've created the filters you need, you can access them by clicking the Issues and filters tab in the left navigation menu.
Filters you've created appear under the STARRED section of the left navigation menu.
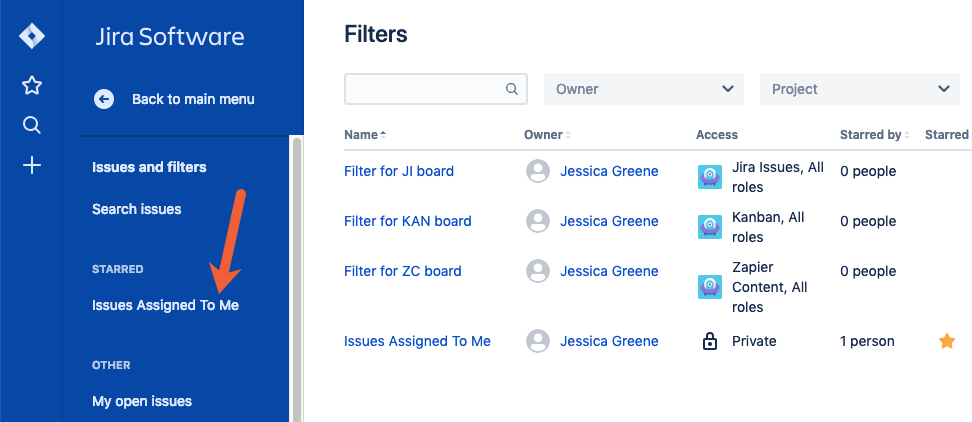
Just click on any filter to display all issues that match that filter's criteria.
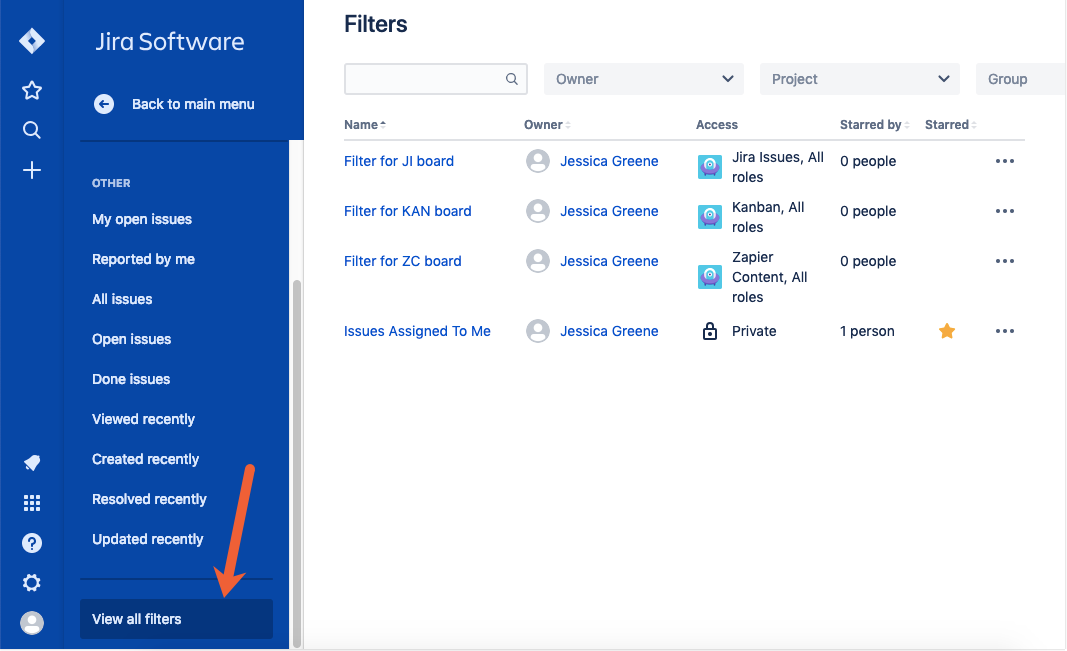
Or you can click View all filters at the bottom of the left navigation menu to open a list of all of the filters you've created.
How to Edit Your Jira Filters
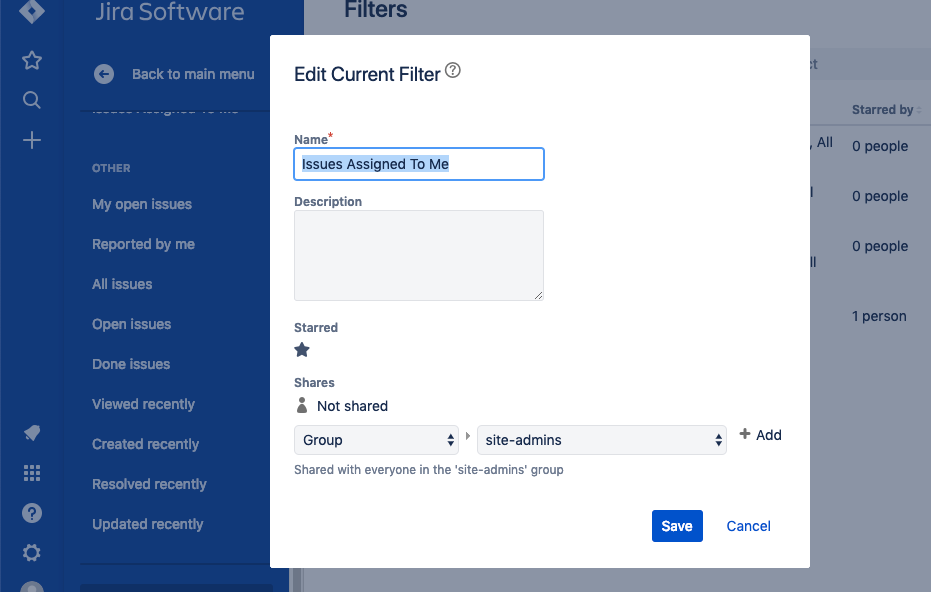
If you want to share your filters with others, favorite (star) or unfavorite (de-star) them, or make changes to your filters' names, you can do so from the View all filters screen.
Like you did above, click Issues and filters in the left navigation menu, scroll down, and click View all filters.
Next, click the three horizontal dots icon next to the filter you want to edit, then click Edit filter details. From this menu, you can also make copies of your filters or delete them if you no longer need them.
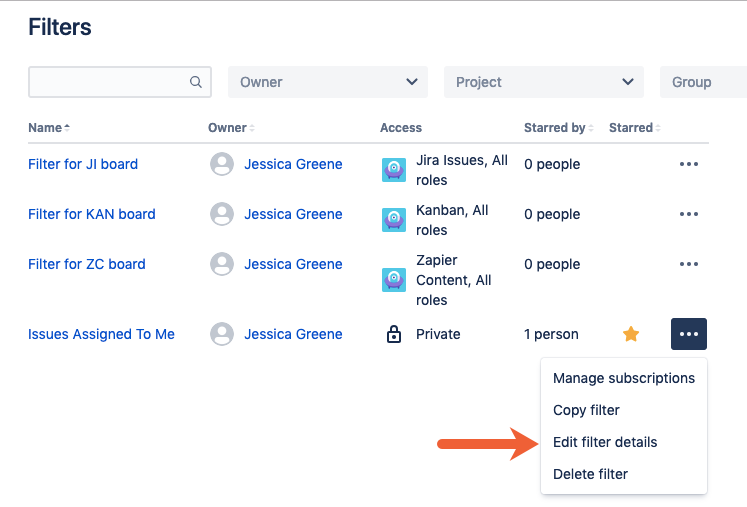
Make the necessary changes in the Edit Current Filter screen, then click Save to apply your changes.
How to Subscribe to a Filter in Jira
Subscribing to a filter in Jira lets you get periodic email updates of issues that match your filter criteria. To subscribe to a filter:
As above, click Issues and filters in the left navigation menu, and then scroll down and click View all filters. Next, click the three horizontal dots icon next to the filter you want to edit, then click Manage subscriptions.
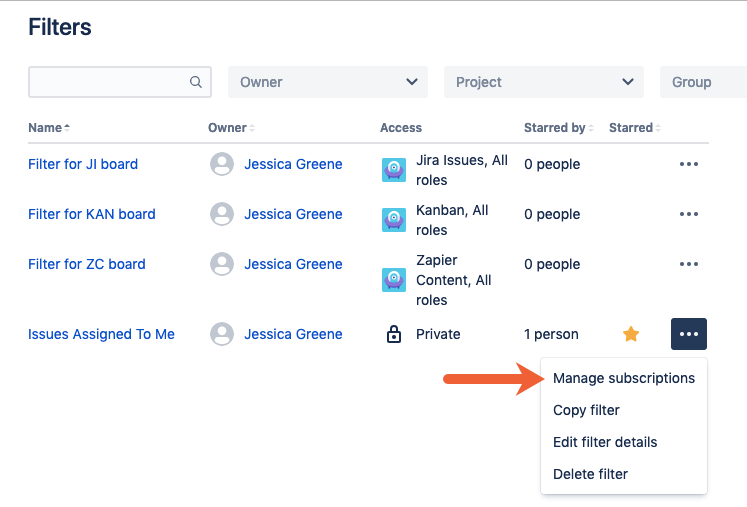
Click the Add subscription button.

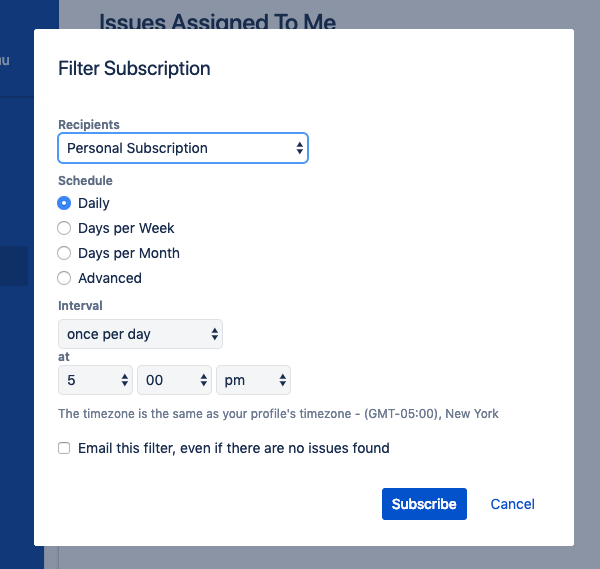
Fill out the overlay form to select email recipients, choose how often recipients receive email updates, and select the time the emails are sent. Then, click Subscribe to create the subscription.
You can also use these Zaps (automated workflows by Zapier) to get notifications of new Jira issues in Gmail, Outlook, or Slack:
Or if your team works in Jira but you use a different to-do app, use these Zaps to send Jira issues to your preferred project management app:
Browse all of our Jira integrations to connect Jira to 1,000+ apps.
Jira provides teams with a great way to collect and centralize all of their tasks, but a long list of everything everyone needs to do gets unruly quickly. With filters, you can create more customized lists of issues that help you stay on top of the tasks that are important for you.
source https://zapier.com/blog/jira-create-filter/

used to sort and segment issues by criteria you set. For example, you can use filters to narrow a list of issues down to see only those that are assigned love language test to you, only those of a certain issue type (story, bug, epic, etc.), only those assigned a specific priority, only open issues, and more. There are more than two dozen criteria you can use to filter your Jira issues, and you can also filter by multiple criteria to view only issues that match very specific
ReplyDelete