
With more than a quarter of the world's population as users, Facebook has one of the largest online audiences in the world—and an advertising platform to match.
Facebook's ad platform lets advertisers integrate hyper-targeted ads into users' daily news feed experience. Facebook Lead Ads, launched in late 2015, takes it a step further. While the initial ad looks like any other ad, it is combined with a form that's pre-filled with information the user has shared with Facebook, allowing a business to seamlessly capture high quality information from users.
Most ads require viewers to see your ad, click on it, and then fill out a form on your site to send info to your company. Facebook Lead Ads reduces this friction down to one simple click, making it much more likely for users to exchange their information for a coupon, free download, or more information.
In this article, we’ll cover when you should use Facebook Lead Ads, walk you through your first Facebook Lead Ads campaign, and show you how to quickly make the most efficient use of your new Facebook leads.
What is a Facebook Lead Ad?
Facebook offers many different ad types and targets based on your goals as an advertiser. If you’re not sure which one is right for you, consider the objectives for your business' ad campaign.
Each objective has its own goals and best practices. That's why ads are not one-size-fits-all. Several different ad types might be useful for your company, and you can always mix and match different campaigns to find out which work best for you.
Lead generation ads, however, are specifically useful when your goal is to prompt users to apply for something, download something, get a quote, request more information, sign up for a promotion or course, or subscribe to a newsletter.
Perhaps one of the best parts of Facebook Lead Ads is that you do not need a landing page for your ad. Instead, interested viewers will fill in their information directly on Facebook, and you will get their data without ever needing to send them to your website. You can then send them emails, share downloadables, and get in touch any time later.
If this sounds like what your business needs, keep reading and learn how to create your first Facebook Lead Ads campaign.
How to Set Up Facebook Lead Ads
Facebook Lead Ads may seem more daunting to set up than a traditional image or link-based Facebook ad, but they're actually pretty simple to set up once you know how they work.
Your first step is simple: Select your campaign objective and give your campaign a name. To make a Facebook Lead Ad, you’ll want to choose "Lead Generation" as the campaign objective.
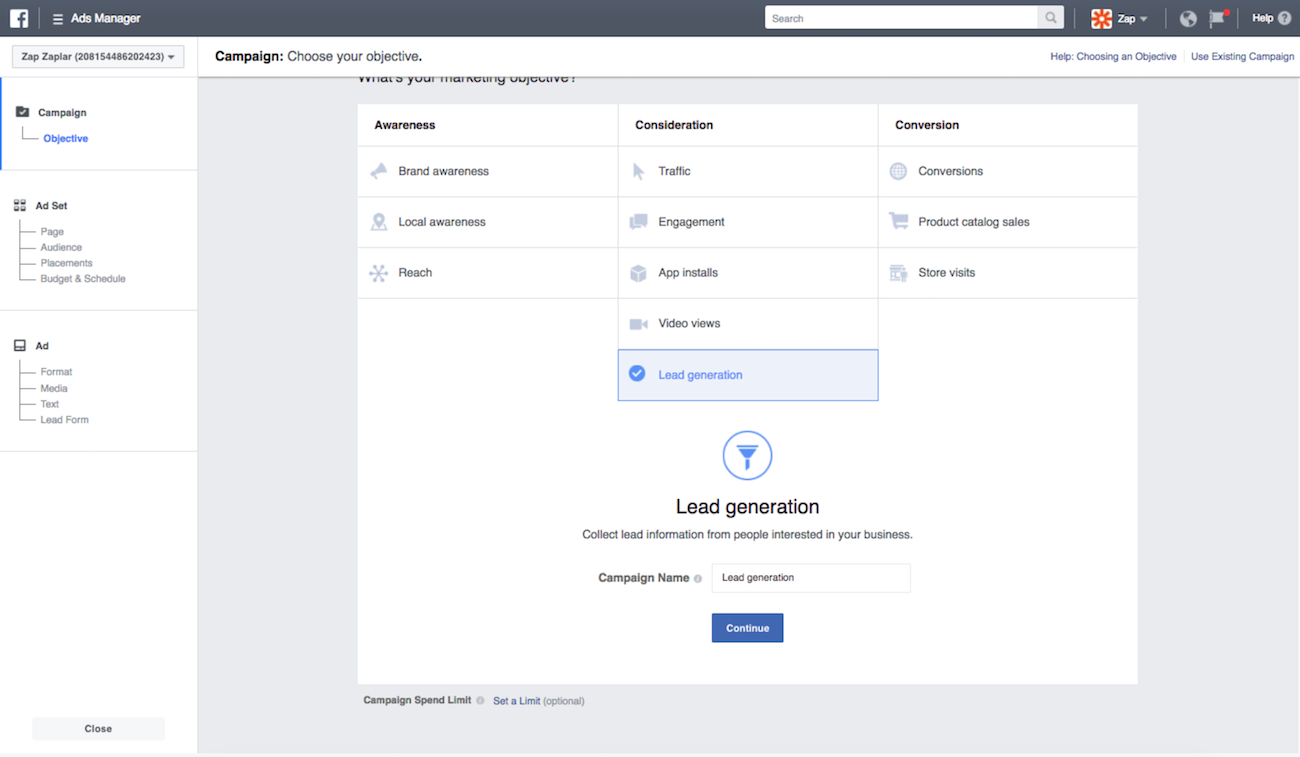
At the bottom of the Objective page, you’ll find an option to set a Campaign Spend Limit. This limit sets a budget for your entire campaign. If your campaign meets the budget, your ads will turn off until you raise the budget.
This spend limit can be very useful, especially for beginners, as it adds an extra layer of protection against expensive mistakes. It’s also a useful setting for campaigns with a limited lifespan. However, if you’re running a longer-term campaign, you may want to set a daily spend limit rather than a campaign limit.
Once you’ve completed this step, you’ll move on to the "Ad Set" section of your campaign, where you’ll set up the overall settings for your ads.
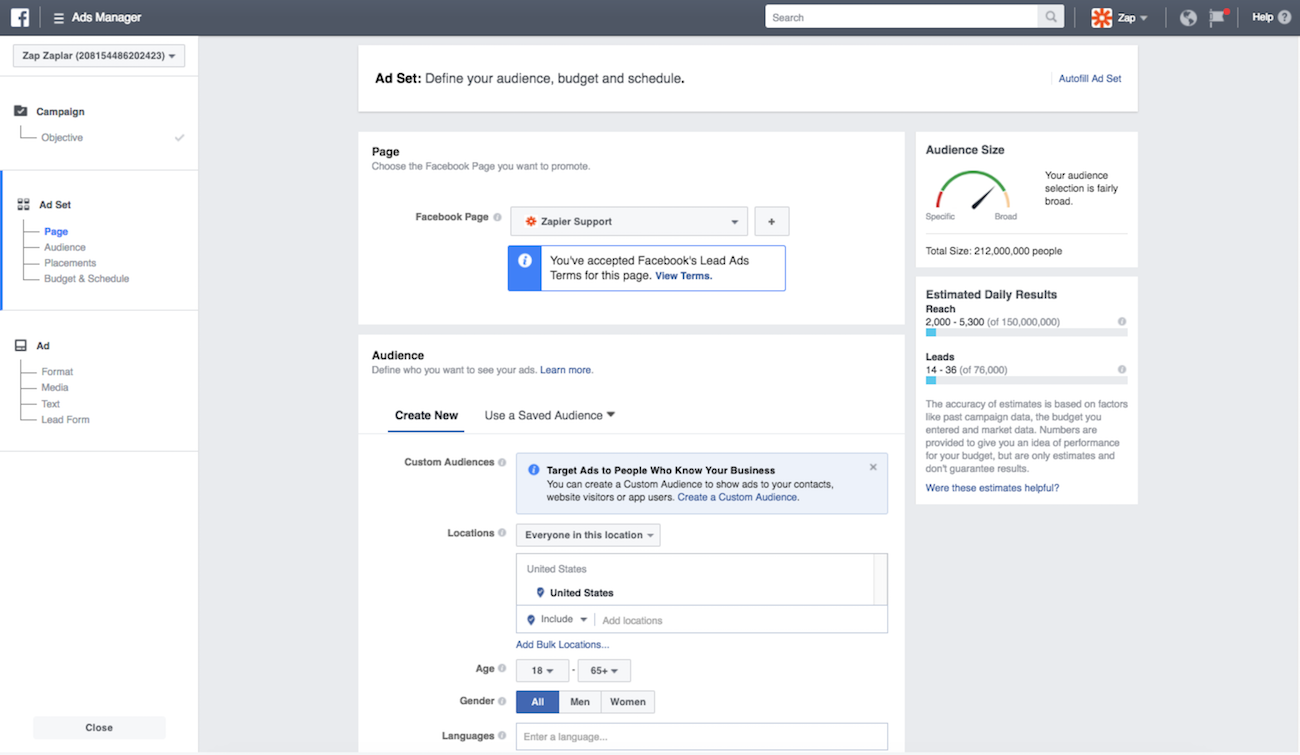
First, select the Facebook page you want to promote. When your audience sees your ad in their timeline, this page will appear as the person who "posted" the ad. Make sure your company's Facebook page follows best practices to make your Facebook page engaging and professional, then select it here.
Audience
Facebook’s biggest draw for advertiser’s is the size of their audience (1.8 billion users!) and the ability for advertisers to target these users based on specific criteria like demographics, location, interests, and behaviors. Here are some of the items your ad can target:
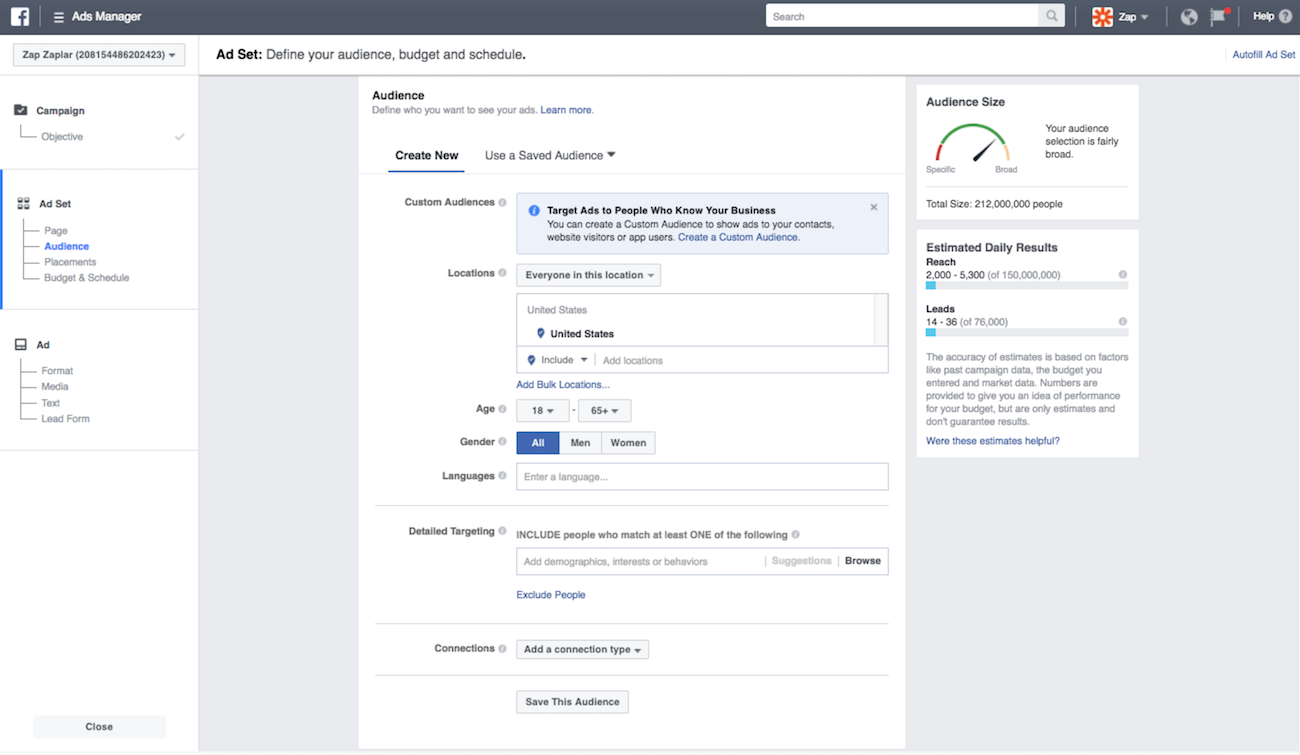
Create a Custom Audience. One of the first options you’ll see is the option to create a "custom audience." This is an audience that is created from data you already have. You can use any of the following sources to populate your custom audience: Existing Customer File, Website Traffic, App Activity, and Engagement on Facebook (users who have interacted with your page).
Age & Gender. Chances are you have a good idea of your target audience, including their age and gender. This setting gives you the ability to reach or exclude age & gender demographics specifically.
Location. You can get creative with how you use location, but you also want to be careful. If you’re running a national campaign, for instance, it’s fine to set up one ad set for the entire United States. But say you’re holding a coding bootcamp in several different cities. Even though your branding is consistent across bootcamps, you’ll get better results if you create multiple campaigns for each city. This way, you can more specifically target your audience with local messaging and ad creative (such as a venue address or images of their city skyline featured in the ad).
Detailed Targeting. This is where Facebook’s power features really come into play. This section of the Ad Set enables you to set special parameters on your audience—either by including or excluding people that match a very specific set of criteria. These targeting criteria are broken down into three different categories, and their child-categories:
- Demographics: Education, Financial, Generation, Home, Life Event.
- Interests: Business & Industry, Entertainment, Family & Relationships, Fitness & Wellness, Food & Drink, Hobbies & Activities, Shopping & Fashion, Sports & Outdoors, Technology.
- Behaviors: Anniversary, Automotive, B2B, Charitable Donations, Consumer Classification, Digital Activities, Expats, Financial, Job Role, Media, Mobile Device User, Purchase Behavior, Residential Profiles, Seasonal & Events, Travel.
Connections. This last audience option enables you to target (or exclude) people who are already connected to your page, event, or app in some way.
The amount of data Facebook has is incredible, so definitely take your time to think through the targeting options that best fit your personas and goals. It’s also well worth your time to run ad split tests with different targeting combinations to see which perform better. The insights you gain from these experiments will be invaluable for future advertising.
Placement
Once you’ve created your Audience, you’ll move on to Placement. Here, you will decide where you want Facebook to show your ads. You have two major options:
Automatic Placement. If you select this option, Facebook will place your ads wherever their algorithms determine it will perform the best. This option may return great results, but you’ll want to monitor them to make sure you don’t end up with unprofitable placements.
Edit Placements. Selecting this option will give you the opportunity to manually pick the places you want your ads to appear. For lead ads, you only have the choice of Facebook Feeds (Mobile & Desktop) and Instagram. You can also choose to target Android or iOS devices only.
Budget
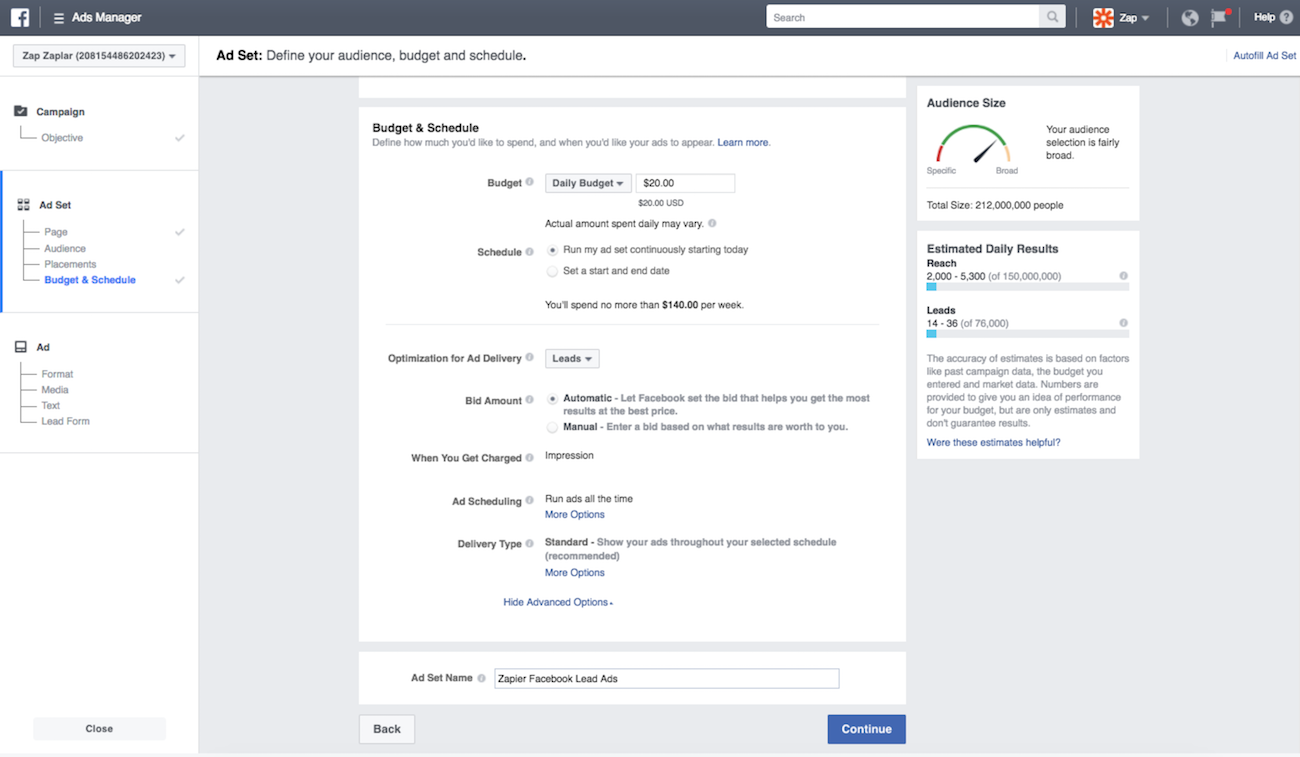
When you go to set the budget for your ads, it’s important to understand what you’re actually paying for. For Facebook Lead Ads, you will pay for every ad that is delivered and viewed—charged per "impression," in other words, with delivery prioritized to users who will fill out the form.
You have two options when it comes to setting your bid. The "Automatic" setting lets Facebook set the bid that will get you the most results at the best price. This setting will take into account your daily (or lifetime) budget and set bids accordingly. The "Manual" setting, on the other hand, allows you to choose how much you’re willing to pay for each impression.
Your bid will then compete in an instant auction with other advertisers who are targeting the same audience. As in a physical auction, your bid will be evaluated against others, and the highest bidder will win the most impressions. However, unlike a regular auction, with Facebook, you will only pay the minimum needed to win the auction. (For example, if your max bid is $0.50 and your closest competitor's max bid is $0.25, you will only pay $0.26.)
You’ll also need to decide whether you want to set a Daily Budget or a Lifetime Budget (in addition to any campaign budget you set). A Daily Budget is the spending cap on your ads. When this cap is hit, your ads will stop being shown on Facebook. Facebook does add a caveat, however: If their algorithms see more opportunities to get results on a given day, your campaign may spend more than its daily budget. For example, you may spend up to $25.00 on some days, and less on others to maintain an average daily budget of $20.00.
A Lifetime Budget, on the other hand, is an overall budget—the absolute amount you’re willing to pay for the entire lifetime of the ad. The decision to set this budget should be closely tied to your scheduling decisions.
Schedule
Facebook gives you a choice between simply turning on your ad set and letting it run continuously or scheduling a start and end date. It’s usually advisable to set a start and end date for your ads, especially when you’re starting a new campaign, so that you can review performance and make any needed changes to hone your campaign. This also keeps outdated ads from running indefinitely, should the ad account change hands.
You can customize this schedule further by selecting Delivery Type in Advanced Options, which gives you two options: Standard and Accelerated. "Standard" means that your ads are spaced throughout the day (or, with a "Lifetime" budget, throughout your scheduled date range) to spend your budget evenly. This is the recommended setting for most advertisers, as it enables you to reach your interested audience without spending your budget too quickly.
The "Accelerated" setting, on the other hand, will deliver your ads as quickly as possible. This setting is typically used for time-sensitive promotions or those needing to quickly reach their audience.
Ads
Now comes the fun part: Designing your actual ad! Facebook offers many different ad design options for you to choose, so play around with your options and decide which format works best for you. There’s not really a hard and fast rule when picking between single-image, multi-image, and video options—to make that decision, rely on your knowledge of your message and your target audience. (Facebook also has some great guidelines on how to use text in ad images.)
In this last step of the process, you can select pictures or videos and play around with your headlines and text to create the message you want.
To finish off your ad message, choose from six different Call to Action (CTA) buttons:
- Apply Now
- Download
- Get Quote
- Learn More
- Sign Up
- Subscribe
You can specify your tracking parameters for this ad, either through UTM parameters for tracking with Google Analytics or with a Facebook Pixel.
Create Your Lead Form
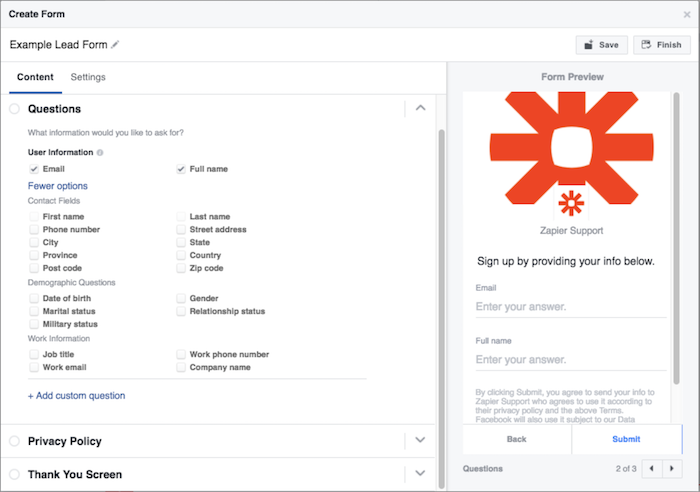
Last, but not least, you need to create your Lead Form. This is the screen sequence that your audience will see when they click your CTA button. Facebook provides four options for your lead form—three of which are required.
The Welcome Screen is optional, but provides an opportunity for you to add more details about your offer through a headline, image (your ad image or a new image), body text (bullet or paragraph layout), and a customizable CTA button.
Then we get to the meat of the Lead Ad: Questions. Here, you can create or choose the questions you want your leads to answer. Facebook gives you a lot of flexibility when it comes to creating your lead form, but remember that too many requests for information will be off-putting to your prospective lead. Stick to the information you really need. Maybe it’s only name and email (which are auto-filled by Facebook based on profile data). Maybe you need to know a job title and company name for the lead to be valuable. Whatever your unique needs are, just be sure that you keep the process as simple as possible.
Your Privacy Policy is required by Facebook. You will need to provide a link to your privacy policy in order to publish your lead form. You also have the option to add an extra screen—a Custom Disclaimer—that will allow you to add extra Terms & Conditions or disclaimers, beyond a standard Privacy Policy.
Lastly, the Thank You Screen allows you to direct users to your website. Choose a link that’s consistent with the promotion you offered—perhaps a download page or a page with more information on the content in your ad.
Lead Retrieval
So now you’ve set up your campaign, you’ve made your ad, and you’re quite ready for the leads to just pour in. But don’t pour yourself a glass of pinot just yet. You still have one very important question facing you:
What do I do with my Facebook leads?
Up until very recently, if your customer relationship management (CRM) tool wasn’t one of the big systems that provide native integration with Facebook Leads, then your only choice would be to bulk-download your leads into a CSV file or go to Zapier and set up an integration.
Now you can set up Zaps to transfer those new leads to your CRM or email service provider from inside the Facebook Ad Manager. That means you can instantly retrieve your Facebook leads and use the data collected to trigger automated workflows in 750+ apps using Zapier.
After you set up your Lead Form, you’ll see the option to set up your leads to be instantly updated with your CRM. Start by searching for your provider of choice.
Once you select your CRM provider, just click "Connect." The window will prompt you to log into your Zapier account or to create a new account, if you don’t have an account yet.
Your Zapier account will enable you to automatically retrieve your leads and use them to trigger things like autoresponders, welcome sequences, coupon or download delivery, and registrations—and the best part is, you won’t need any coding knowledge to make it work.
Once you’ve connected your accounts, you’re good to go! Your leads will now be automatically imported into your CRM as new leads. From there, you can easily set up workflows that will nurture your relationship with these hot leads.
Really, the best advice we can offer is: Keep testing. Test new audiences, test new copy and images, test new CTAs and shorter forms. Test new Zapier workflows, and test new autoresponder messaging. Facebook Lead Ads offers you a powerful tool to reach your best audience.
source https://zapier.com/blog/zapier-guide-facebook-lead-ads/
No comments:
Post a Comment