
Macs come with screenshot tools to capture precisely what you want—your full screen, a specific window with or without its shadow, or just a small section of your screen.
The only problem is, Macs hide their screenshot tools behind keyboard shortcuts. Your Mac doesn't come with a built-in screen capture button—unless you have a newer MacBook Pro with a Touch Bar, and even then the screenshot button is hidden by default.
Here's how to use all of your Mac's screenshot tools to capture anything on your screen.

To take screenshots on any Mac, you'll need to memorize a few keyboard shortcuts. Fortunately, they're all quite similar—and each saves a screenshot image to your Mac's desktop by default. Here are the default Mac screenshot keyboard shortcuts:
- Save fullscreen screenshot:
Command+Shift+3 - Save screenshot of single window:
Command+Shift+4, press theSpacekey, then click on the window you want to capture - Save screenshot of single window without shadow:
Command+Shift+4, press theSpacekey, then hold theAltkey and click on the window you want to capture - Save screenshot of selection:
Command+Shift+4, then select the area you want to capture with your mouse cursor. - Save screenshot of Touch Bar:
Command+Shift+6
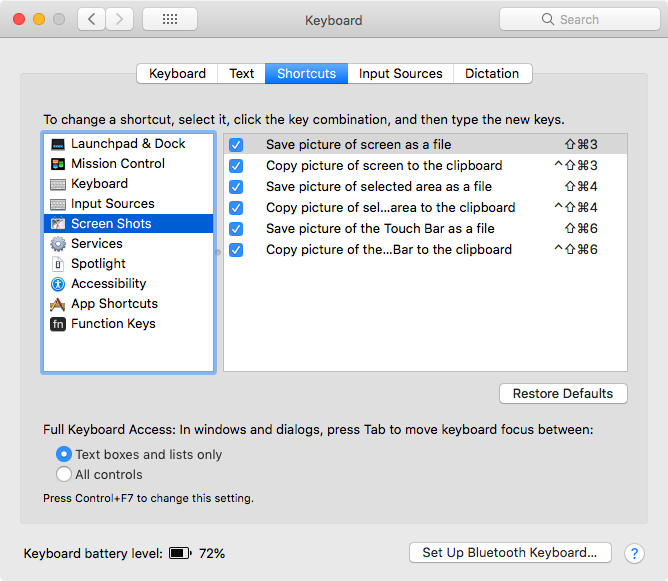
You can customize the screenshot keyboard shortcuts if you'd like from your Mac's keyboard preferences. Open your System Preferences, select Keyboard, then click the Shortcuts tab and select Screen Shots on the left side. There you can customize any of the default shortcuts for screenshots.
How to Capture a Timed Screenshot on Your Mac
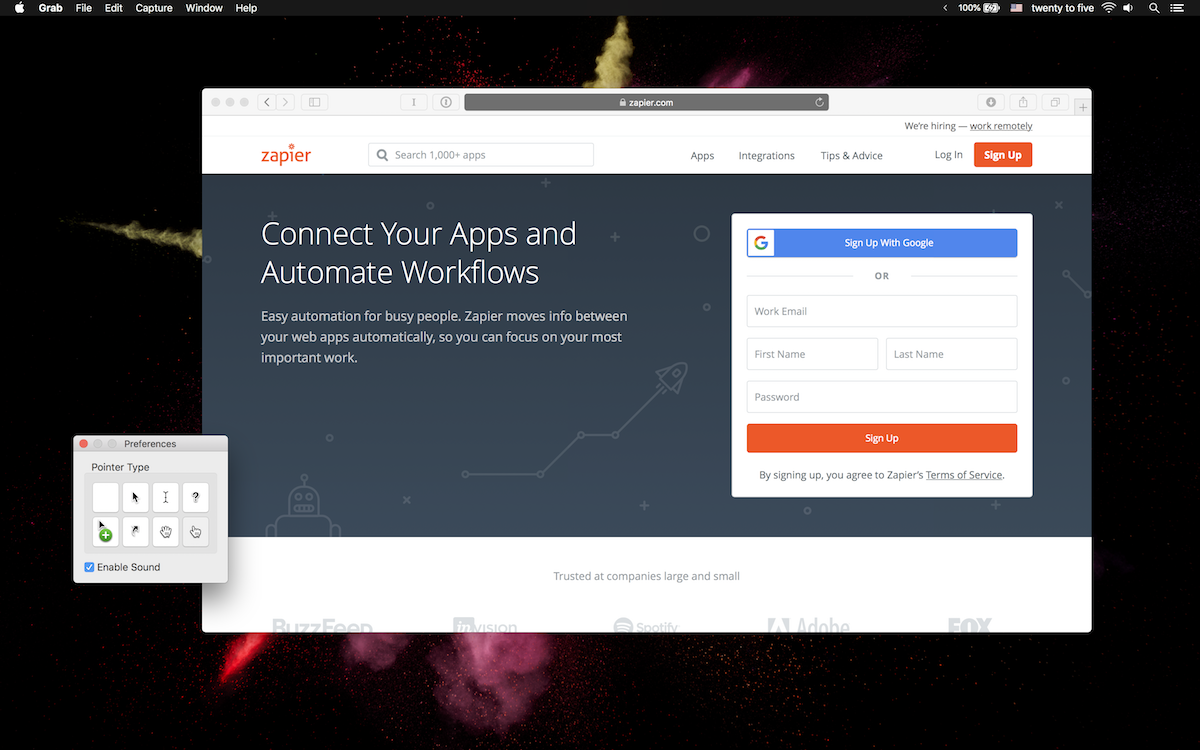
Want to capture your mouse with your screenshots—or to capture a screenshot after a delay? The built-in Grab app is for that, and you'll find it in the Other folder in Launchpad. Open Grab, then open its preferences to select the mouse cursor you want. Finally, open the Capture menu, and choose a screen, window, selection, or timed screenshot. The latter option will give you a 10-second countdown before capturing the screenshot, so you can open a menu or click anything you want in time to show up in the screenshot.
To add annotations, open your screenshots in Preview, then click the toolbox icon to show the extra tools. You can add arrows, shapes, text and more to screenshots before sharing them.
How to Capture a Video of Your Mac

macOS also includes a screencast tool in QuickTime. Just open QuickTime, then click File -> New Screen Recording and press the red record button to start recording your screen. Then, you can save the screencast as a video, or trim it to show just the section you want if needed.
How to Take Screenshots With the MacBook Pro Touch Bar

If you have a newer MacBook Pro with a Touch Bar instead of traditional function keys, you won't have to remember keyboard shortcuts each time you take screenshots. There's a camera icon in your Touch Bar to save anything as a screenshot with a couple taps.
Your Touch Bar will only show the volume, brightness, and several other buttons by default. Tap the arrow on the left to expand and see all the other options—then tap the camera to take a screenshot.

As soon as you tap the camera, your mouse cursor will switch to crosshairs to select any part of your screen to save as a screenshot. Press the space bar on your keyboard then click a window to save a full window screenshot. Or, select any of the other screenshot options that show on the Touch Bar while taking a screenshot to take a full-screen screenshot, copy the image instead of saving it as a file, and more.
CMD+Shift+3 to screenshot your full screen. CMD+Shift+4 for just a section—or tap space to capture a window. Remember that, and next time you want to screenshot something on your Mac, you'll know exactly how to do it.
Continue Reading:
- Want other screenshot apps and tips, perhaps to screenshot your phone or work PC? Check our full screenshot guide for the details.
- Or, get the most out of your Mac with our roundup of the 25 best productivity apps for the Mac.
- Also check out Apple's Mac keyboard shortcuts documentation to find more shortcuts to speed up your work.
source https://zapier.com/blog/screenshot-mac/
No comments:
Post a Comment