Over the past thirty years, PowerPoint has become synonymous with presentations. Give a speech, present a new product, share finances in a board meeting—all are typically done with a PowerPoint presentation. That’s easy enough if you’re presenting from your laptop and have Microsoft Office installed.
Or it can be far more difficult. You might need to email your slide deck to the event organizer—and hope they have the same version of PowerPoint installed. Or you may carry your PowerPoint file around on a flash drive to open it on the presentation computer. Neither are great solutions, especially for all the times you need to make a last-minute change to your slides or if you don’t typically use Microsoft Office.
PowerPoint Online is the alternative you need. Here’s everything you need to use PowerPoint for free online, where you can edit and present your slides from anywhere.
A Quick Guide to Office Online
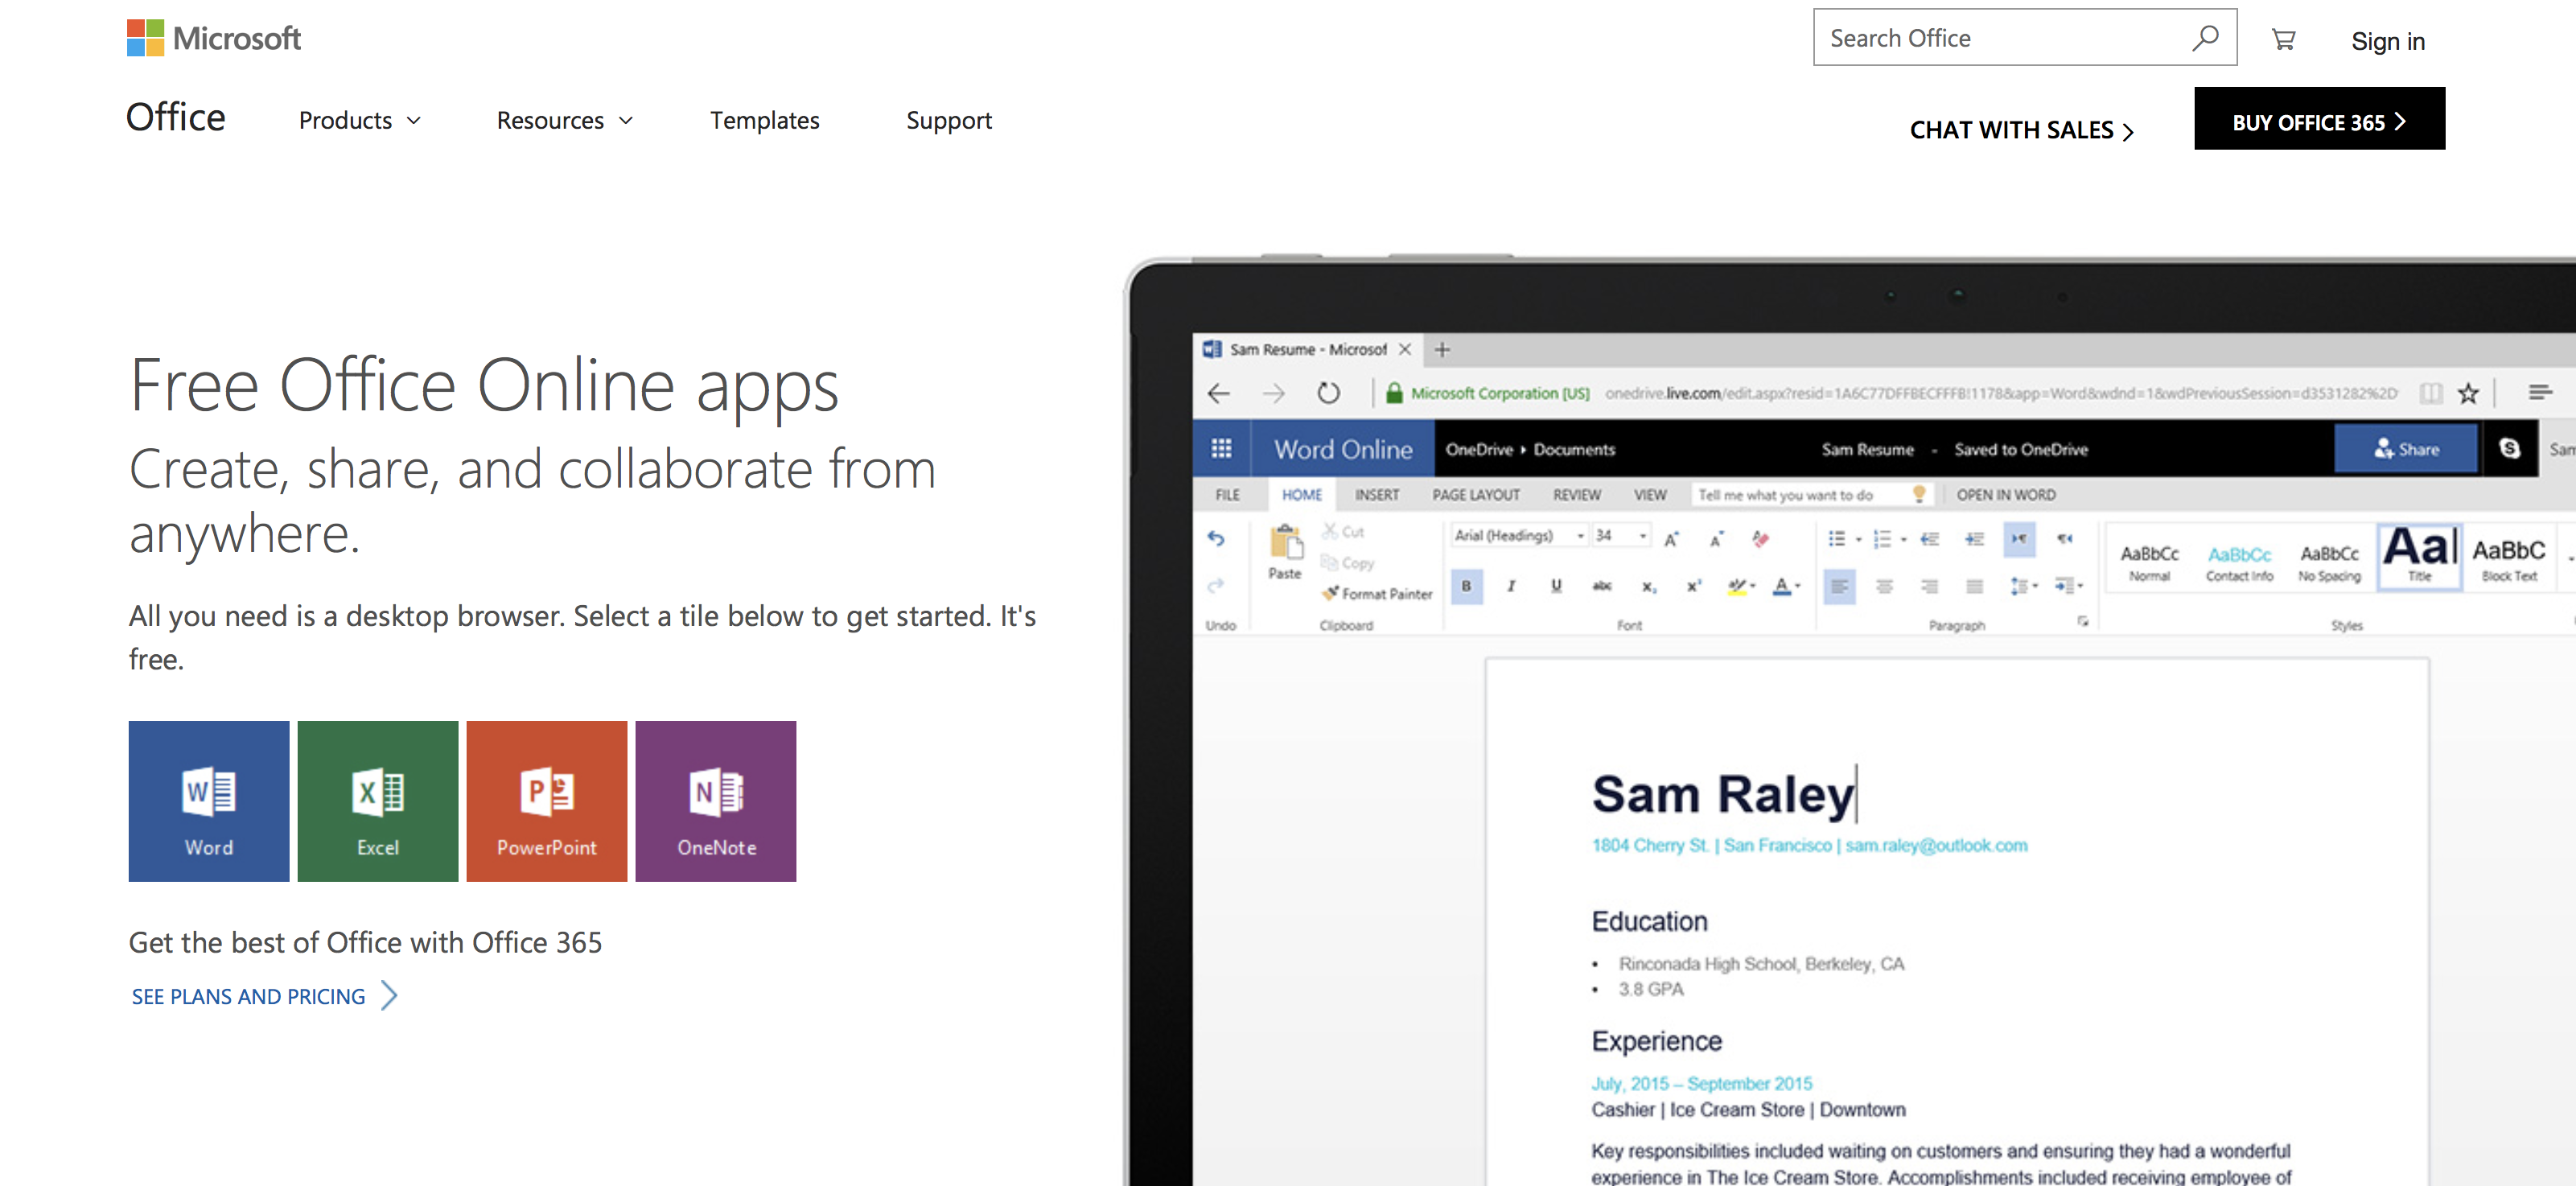
It starts with Office Online. Launched in 2010 as Office Web Apps, Office Online today includes simplified, free versions of Microsoft Office’s most popular apps: Word, Excel, PowerPoint, and OneNote.
If you’ve ever used the iPad or Android tablet versions of Office, Office Online will feel instantly familiar. The basics are the same. Each Office Online app includes an Office-style toolbar with Home, Insert, Design, and other tabs to organize core editing tools. Office Online apps don’t include all of their Windows features. They include instead a focused set of editing tools that, for most documents, spreadsheets, and presentations, are all you need.
The big difference is that the apps are online. Instead of emailing files back and forth, or syncing changes via OneDrive or Dropbox then sending messages to colleagues when something’s finished, changes happen automatically in Office Online. Your team can open files at the same time, make changes or add comments, and Office will save and sync it to all your OneDrive accounts automatically. Office Online apps also work everywhere. Open any browser, go to Office.com, and your work is ready to pick up where you left off.
Office Online is free for personal use—log into Office.com with a Microsoft account and fill up OneDrive’s free 5GB of storage with all your Office files. A business version is included with Office 365 for business and enterprise accounts as well.
The basics are the same. If you’ve used PowerPoint before, you’ll feel at home in PowerPoint online. Here are the things to keep in mind, the tips to help you work efficiently in your browser, and ways to work around Office Online’s limitations.
A Quick PowerPoint Online Tour
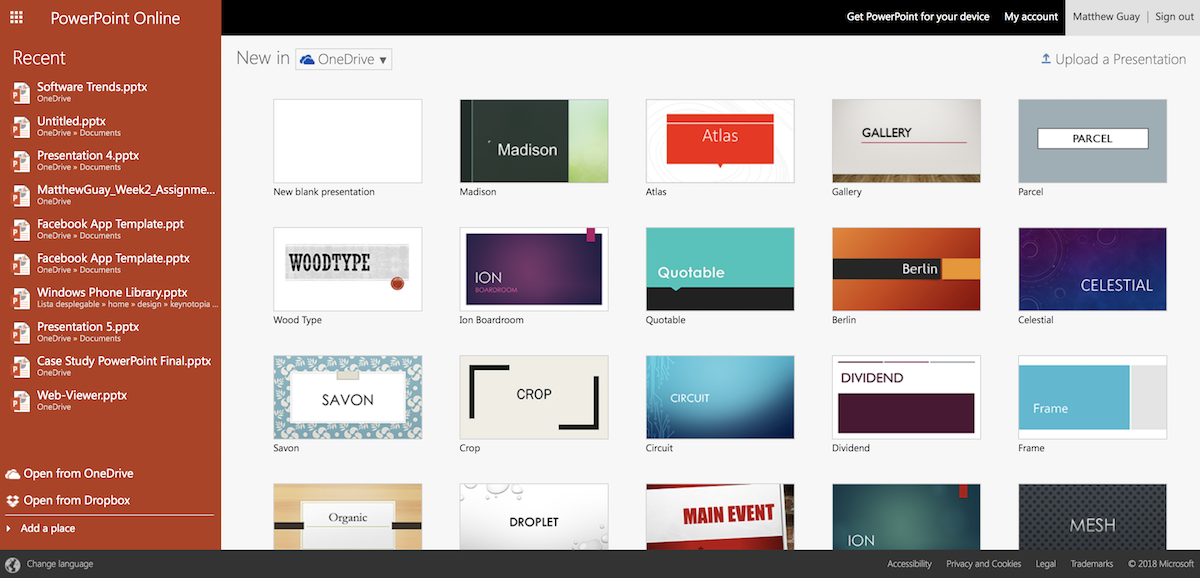
Ready to make a new presentation? Open PowerPoint Online at office.live.com/start/PowerPoint.aspx, and sign in with your Microsoft account (including Outlook.com, Xbox Live, and Office 365 accounts). You’ll then see the Office template picker with many of the presentation templates from desktop PowerPoint—with your recently opened presentations on the left sidebar.

Select a template or open an existing presentation to open it in PowerPoint Online. With a similar design to recent versions of PowerPoint for Mac and Windows, you’ll find the core text and design tools on the main Home tab, options to add images and embedded videos and tables in the Insert tab, slide and template options in the Design tab, animations in the Transitions and Animations tab, and so on. If you can’t find the feature you need, type what you need in the Tell me what you want to do box to search through PowerPoint’s features and documentation.
Need to edit a picture or tweak a SmartArt graph? Select it, and a new Format tab will appear with additional tools as in desktop PowerPoint.
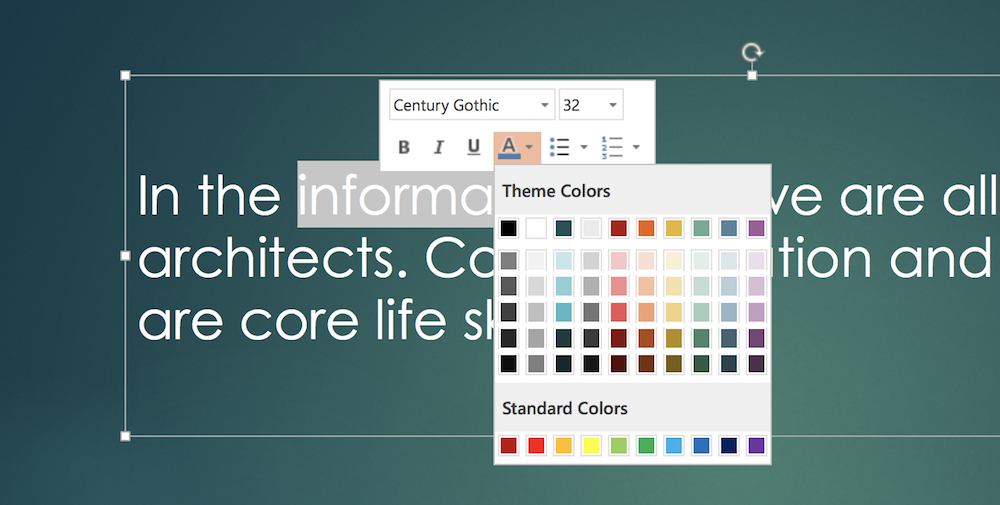
You may not need to look through the toolbars for tools, though. Select text in a slide and PowerPoint shows quick formatting options in a pop-over to change the font, color, and more. Or right-click on most other elements to find their quick editing options. You can then double-click on the toolbar to hide it and increase your workspace, if you’d like, relying on the popover tools to work faster.
You can also speed up your work with keyboard shortcuts. Standard formatting shortcuts—including Ctrl+B or CMD+B for bold text, or Ctrl+I or CMD+I for italics—work in PowerPoint Online. There are also some other handy PowerPoint Online keyboard shortcuts to speed up editing:
- Add a new slide:
Ctrl+MorCMD+M - Move slides up or down:
Ctrl+arroworCMD+arrow - Add a comment:
Alt+N - Go to next slide in Slideshow view:
N - Go to previous slide in Slideshow view:
P - Go to a specific slide in Slideshow view:
G, then type slide number - Exit Slideshow view:
Esc
How to Add Presentations to PowerPoint Online
PowerPoint Online is part of Microsoft’s OneDrive file storage. Open a PowerPoint file in OneDrive, and it’ll first show a preview with the option to edit it online.
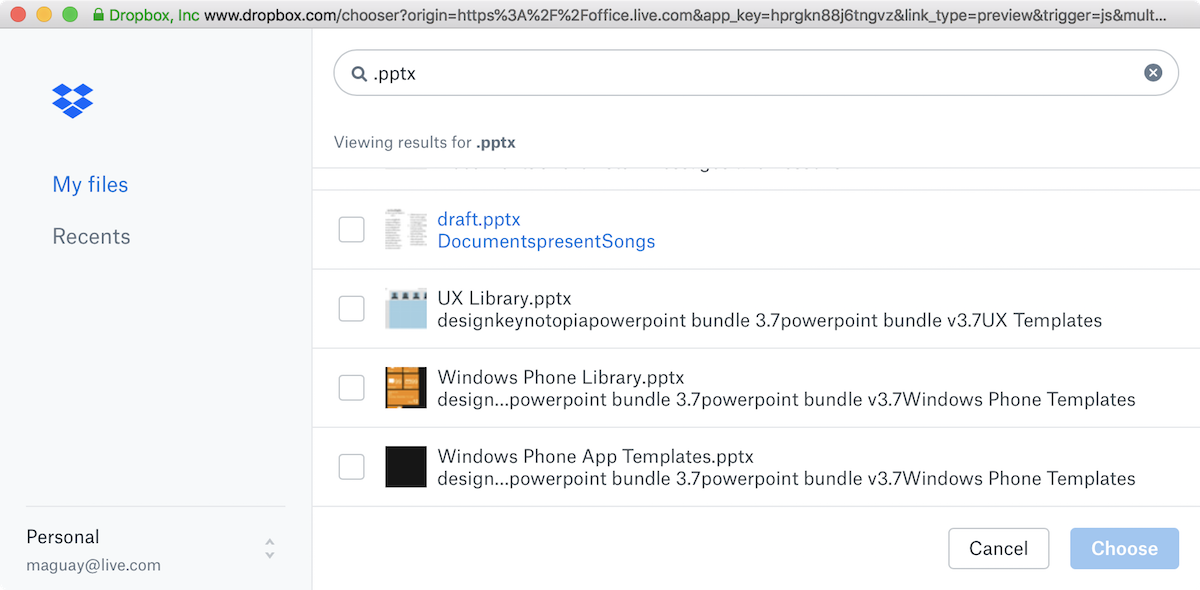
But surprisingly, PowerPoint Online also works with Dropbox. That gives you another way to open your presentations online. You can save your presentations to either OneDrive or Dropbox, and then when you open PowerPoint Online, you can search through your presentations from both services. Either way, any change you make will automatically be saved to the original file.
The Dropbox integration only works for newer .pptx files. To open .ppt files, download them first, then upload them to PowerPoint Online or OneDrive. When you open them there, PowerPoint will automatically make a copy then convert the presentation to the new format so you can edit it online.
Or, if you have a PowerPoint file on your computer, open PowerPoint Online first, click the Upload a Presentation button, then select your presentation to upload it to OneDrive and open it for editing in PowerPoint Online at the same time.
How to Collaborate on PowerPoint Presentations
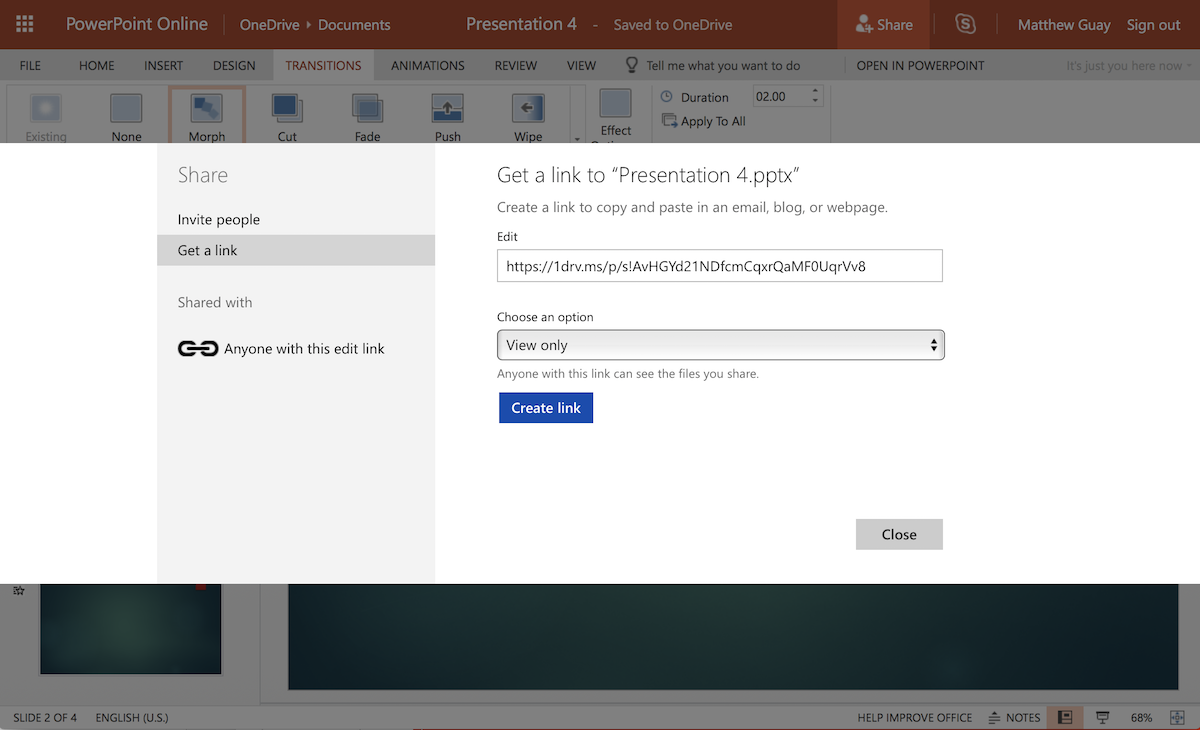
Want someone else to proofread your slides, or add their research to a team presentation? That’s easy in PowerPoint Online. From your presentation, click the Share button in the top right toolbar.
The default option is to email an invite link along with a message to your collaborators. You can choose to make the presentation editable or view only and can require a Microsoft account or not.
Or, you can copy a share link to send to anyone or share publicly online if you’d like. Select the Get a link tab to copy a link to your presentation—again, as a view-only presentation or with permission to edit. Here, if you make an editing link, anyone can tweak the presentation without signing into an account.
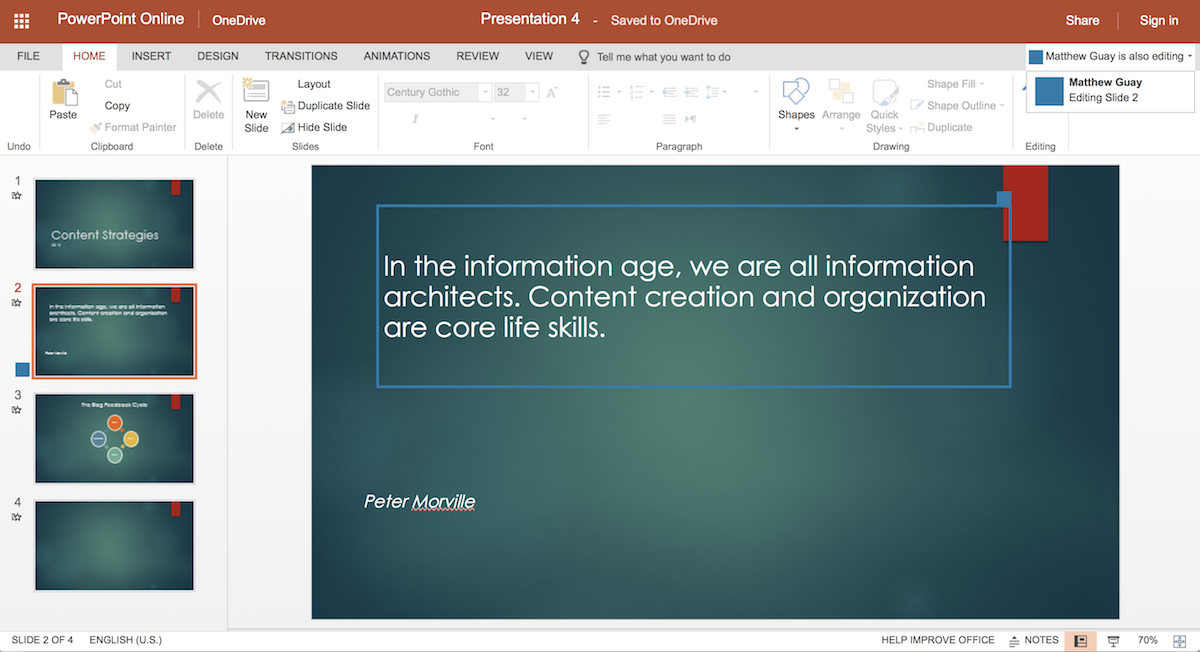
PowerPoint Online will show an icon beside the slide your collaborator is currently editing and will mark the section they’re working on in the same color. You can’t see the exact changes they make while they’re editing—changes take a few seconds to sync—so it’s best not to edit the same slide others are editing at the same time.
Want to chat with your collaborators? As long as everyone has a Skype account, you can open a Skype sidebar and talk with them in your PowerPoint presentation.
What’s Not In PowerPoint Online?
The core editing features are all here. You can add and edit text, photos, shapes, and SmartArt in PowerPoint online, add core transitions and animations to slides and elements, and present your presentation all from PowerPoint Online.
One of the main differences from PowerPoint’s desktop apps are the embedding options. In desktop versions of PowerPoint, you can embed video and audio from your computer, along with data from other Office apps and macros. In PowerPoint Online, you can embed online videos from YouTube—along with graphs and data from PowerBI and other add-ins in the Office Add-ins pane.
Animations are also more limited in PowerPoint Online. It includes only eight transitions, including Fade and Push, with animations that don’t require graphics acceleration. If you add a presentation that uses other animations from PowerPoint for Windows or Mac, you’ll need to select others or present without animations.
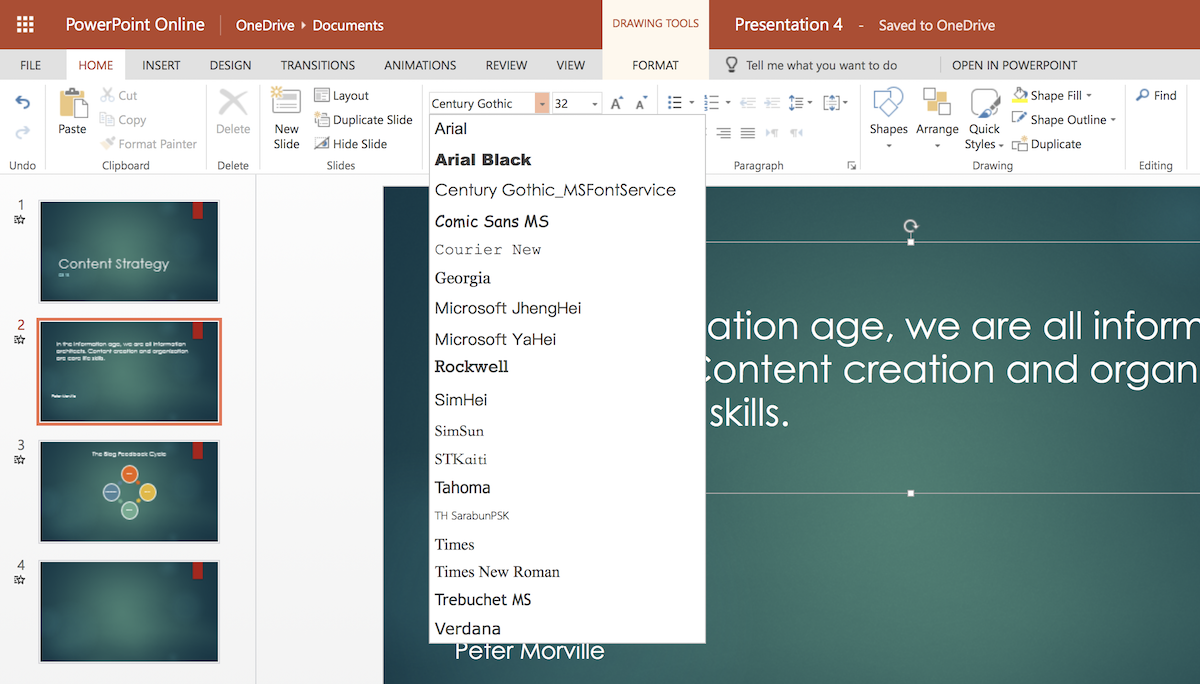
Fonts are another core difference. PowerPoint Online includes 18 fonts, including Arial, Comic Sans, Courier New, Garamond, Georgia, Rockwell, Tahoma, Times New Roman, and Verdana. You can’t install 3rd party fonts or choose fonts you have installed on your computer.
So, to make sure your PowerPoint presentations look great everywhere, stick with the fonts included with PowerPoint Online. That’s easy as they’re the only options in PowerPoint Online, but if you use another PowerPoint app, try using the Web fonts as they’re mainly fonts that work everywhere.
If you upload a presentation that uses a font not included in PowerPoint Online, you can still view the text in the correct font in PowerPoint Online on your computer or another computer with that font installed. If you don’t have the font installed, PowerPoint Online will replace that font with another similar font.
Beyond that, though, PowerPoint Online is surprisingly full-featured. It includes everything you need for making and showing presentations online—as long as you don’t need to use custom fonts, embed non-YouTube videos, or build advanced animations.
How to Present PowerPoint Presentations From Your Browser
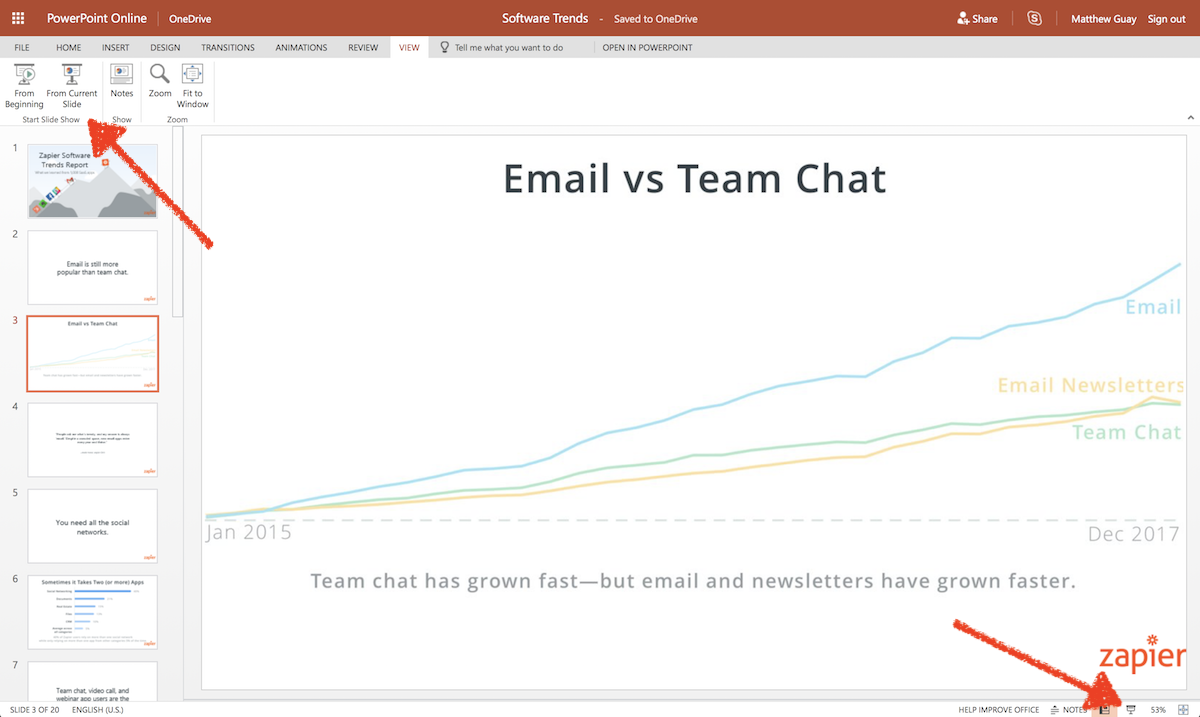
Once you’ve finished creating your presentation, it’s time to present it. That’s as easy in PowerPoint Online as in the desktop apps. You can start the slideshow from the slide you’re currently editing via the Slide View button in the lower right-hand corner. Or, click the View tab and select to start the slideshow from the beginning or current slide.
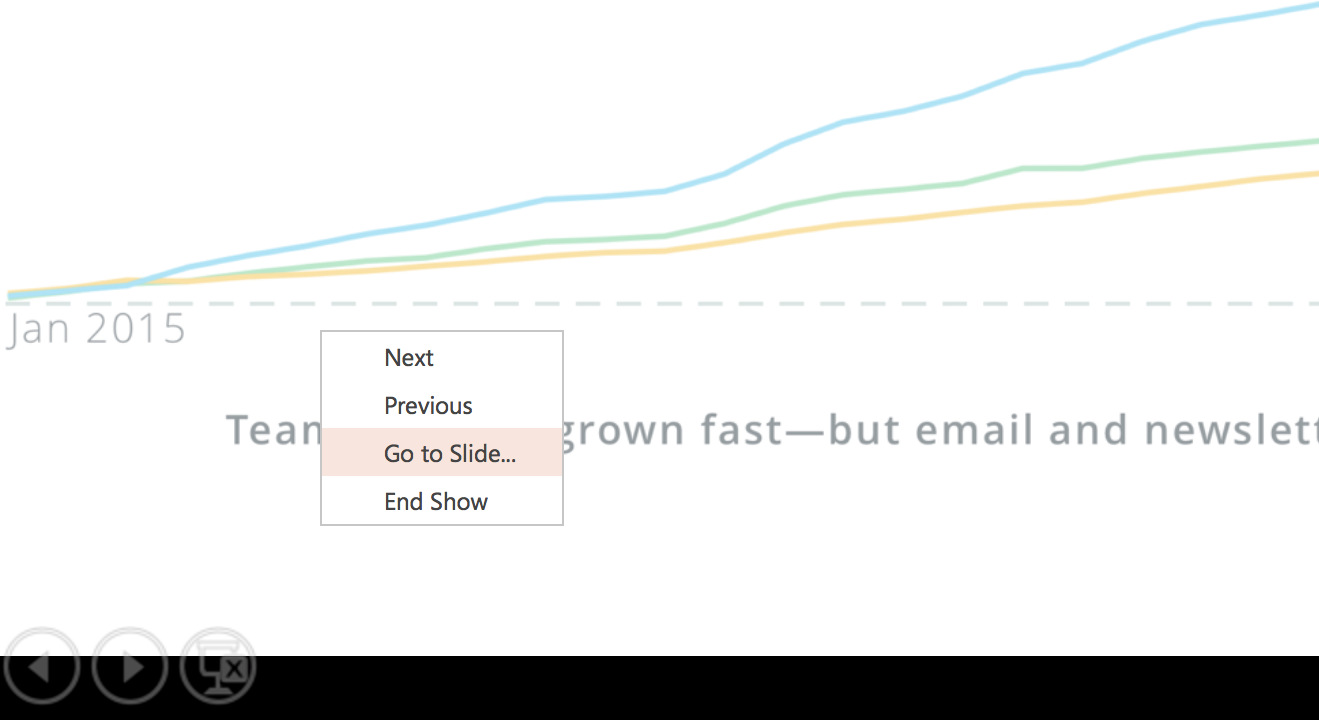
PowerPoint Online will switch your browser to a full-screen preview mode. Click anywhere on the screen to go to the next slide, or tap your right and left arrows on your keyboard to navigate between slides. When finished, click again at the end of the presentation or press the Esc key to exit the slideshow and switch back to the windowed editor mode.
PowerPoint also includes controls on the lower left of the slideshow view, along with options in the right-click menu to switch slides or jump to a specific slide.
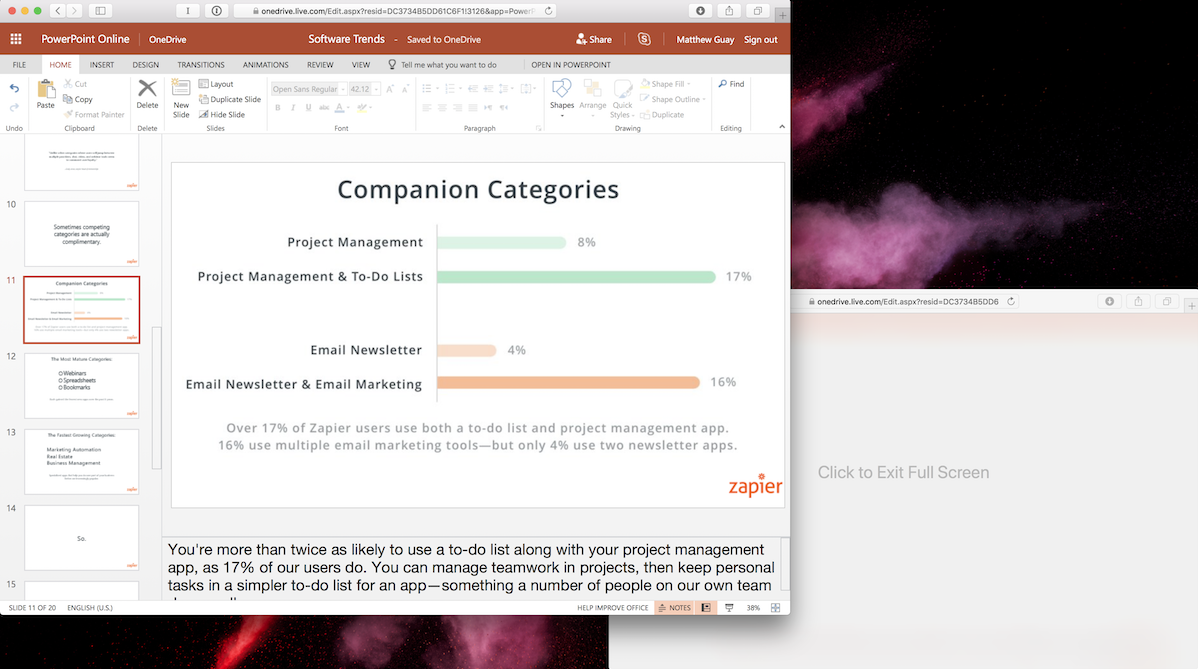
PowerPoint Online doesn’t include presenter view to show lecture notes on one screen while presenting your presentation on another—but there’s a workaround. While you’re giving your presentation full-screen, your browser with the original PowerPoint Online tab won’t show your slide content (Chrome hides the original window; Safari shows a Exit Full Screen placeholder). Instead, you can open a new tab or window and open your presentation there as well.
When you switch slides, move your mouse to your projection screen and click to advance—then move your mouse back to your laptop’s screen and select the next slide in your other PowerPoint Online window. Another option is to open your presentation in PowerPoint’s mobile apps and use your phone or tablet to view lecture notes while presenting from your laptop.
How to Convert PowerPoint Presentations Online
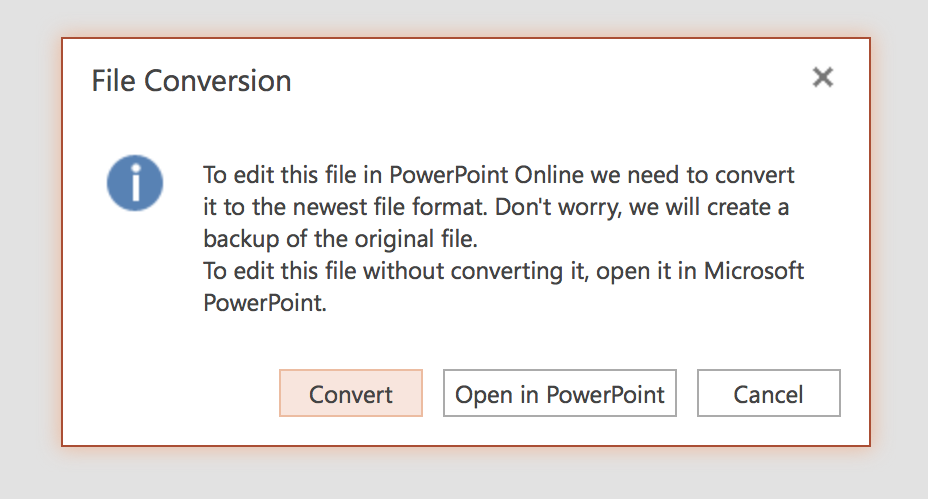
PowerPoint Online—unlike PowerPoint for Windows or Mac—can only open .pptx presentation files made with a newer version of PowerPoint. If you open an older .ppt file or a .odp presentation from another app, PowerPoint Online can convert the file to .pptx on the fly so you can edit the presentation.
But once you’ve opened the presentation, you can export it in 3 formats: PowerPoint, ODP (used with OpenOffice), or PDF. Click the File tab in the toolbar to open the core PowerPoint menu, select Download As, then choose the file format you want. PowerPoint Online will convert your presentation and save it to your computer so that you can share the original file with others.
The best option is to share the PowerPoint presentation directly in PowerPoint Online—but when you need a traditional presentation file, that’s a handy way to get it.
How to Save All Your Presentations to PowerPoint Online
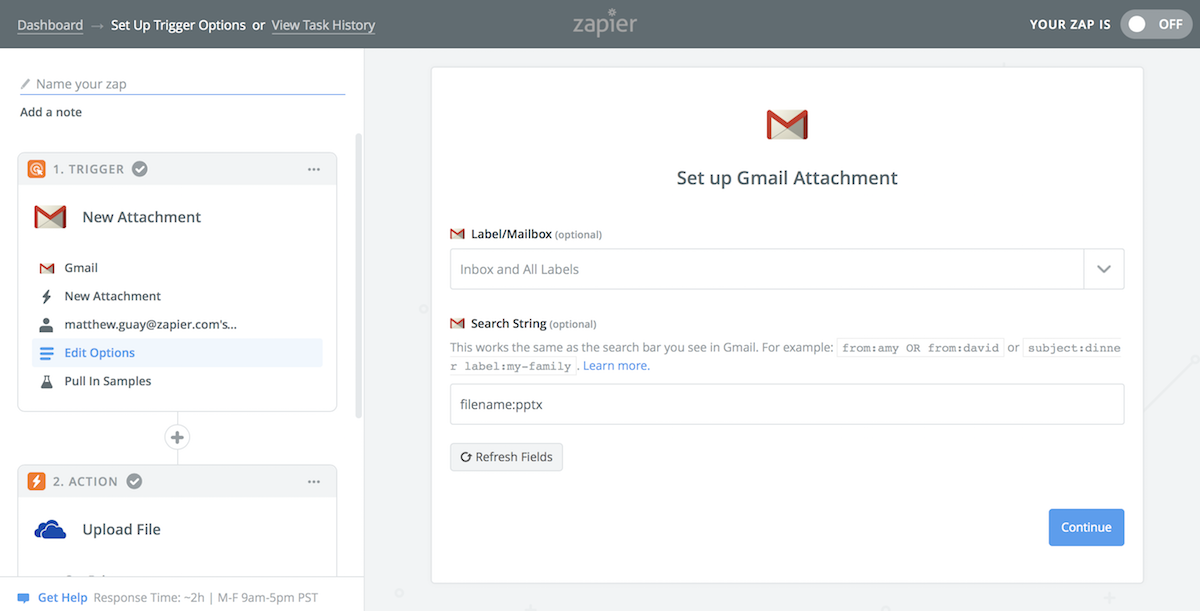
There’s one trick to make PowerPoint Online the presentation app that’s always ready when you need it is: Save all your presentations to OneDrive or Dropbox. That way, whenever you need to present something, it’ll be a few clicks away inside PowerPoint Online.
If you already use OneDrive or Dropbox to sync your files, you’re halfway there. Save every new presentation there, every time. Whenever someone sends you a presentation, save it there also.
App automation tool Zapier can do that for you automatically. One of the most common ways to share presentations is through email—so Zapier can watch your Gmail or IMAP-powered email account for new presentation files. With Gmail, you can include a search to watch for presentation files. Use has:presentation to watch for any presentation—though note that this will also include Google Slides presentations which won’t work with PowerPoint Online. Or, use filename:pptx OR filename:ppt to watch for all PowerPoint attachments.
With IMAP email—or any other app where colleagues may send you presentations—add a Filter step to your Zap to watch the filename for .pptx or .ppt extensions.
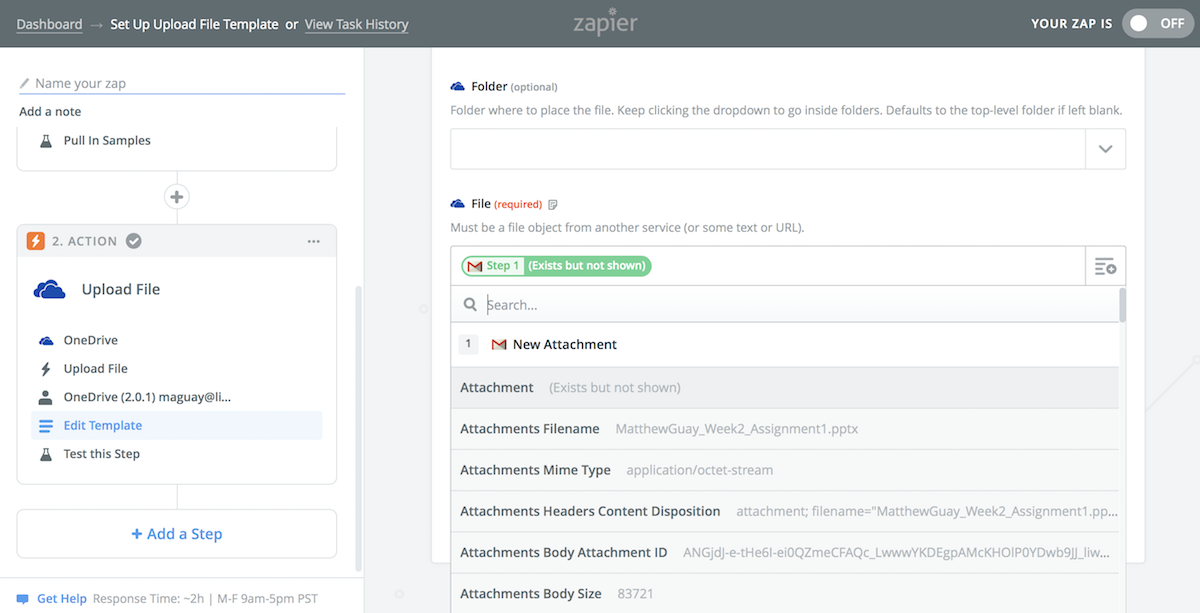
Then, Zapier can save the presentation file to online storage to open and edit it in PowerPoint Online. The simplest is OneDrive since it’s PowerPoint Online’s core storage, though you could use Dropbox instead as it only takes a few extra clicks to open your presentations there.
You can save the presentation in any folder, and add a customized file name if you’d like. Then select the attachment from Gmail or your IMAP email and have Zapier copy that file to OneDrive or Dropbox. Next time you need to present something someone emailed you, don’t open your email app—instead, open PowerPoint Online and open the presentation there directly.
Ready to save any presentation you get emailed to PowerPoint Online? These Zaps will help you get started in a few clicks—remember to set up your search or filter to watch only for PowerPoint files:
That’s PowerPoint Online. It’s a handy way to tweak and present your presentation, even if you don’t have a copy of PowerPoint installed. And it just might be the new presentation app you need for a more focused, free way to make presentations anywhere.
Need more presentation tips and tools? Check out these other Zapier guides:
- Want a different presentation app? Check out our roundup of the best PowerPoint alternatives for a dozen new ways to present your ideas.
- Can’t figure out what to say? Here are tips to make every word count and nail your next presentation.
- Once you’ve made a slide deck, here are the best ways to share your presentation online.
- Then, get ready to present it with these 5 tips to overcome the fear of public speaking.
Auditorium photo by Nathan Dumlao via Unsplash.
source https://zapier.com/blog/powerpoint-online-guide/

No comments:
Post a Comment