
Respond to your emails. Go take your lunch break. Fill out your daily timesheet. These are just a few of the things you have to do on a daily basis. And if you're reading this, chances are you spend a large portion of your waking hours in the team chat app Slack (at Zapier, we sure do). So what better place to send yourself reminders for your daily tasks?
With the workflow below, you can simply schedule the time of day you’d like a reminder to be sent and the Slack channel to which you’d like to send the message. Then, like your own personal assistant, Zapier will take care of the rest.
In this post, we'll show you how to automatically send daily reminders to Slack using Zapier. You can use our pre-made automated workflow (called a Zap) and use the steps below to guide you:
Step 1: Log in to Zapier
Click on the orange "Use this Zap" button above. Log in to your Zapier account or create one for free if you don't already have one. Once you're logged in, you're ready to create your daily Slack reminder.
Step 2: View Your Zap's Trigger
Now you are within the Zap editor, where you can create and customize your own automated workflows. First, the Zap editor shows you the Trigger for your Zap. The Trigger is the event that will kick off your Zap, so in this case the Trigger is "Every Day" in Schedule by Zapier. Click "Continue."

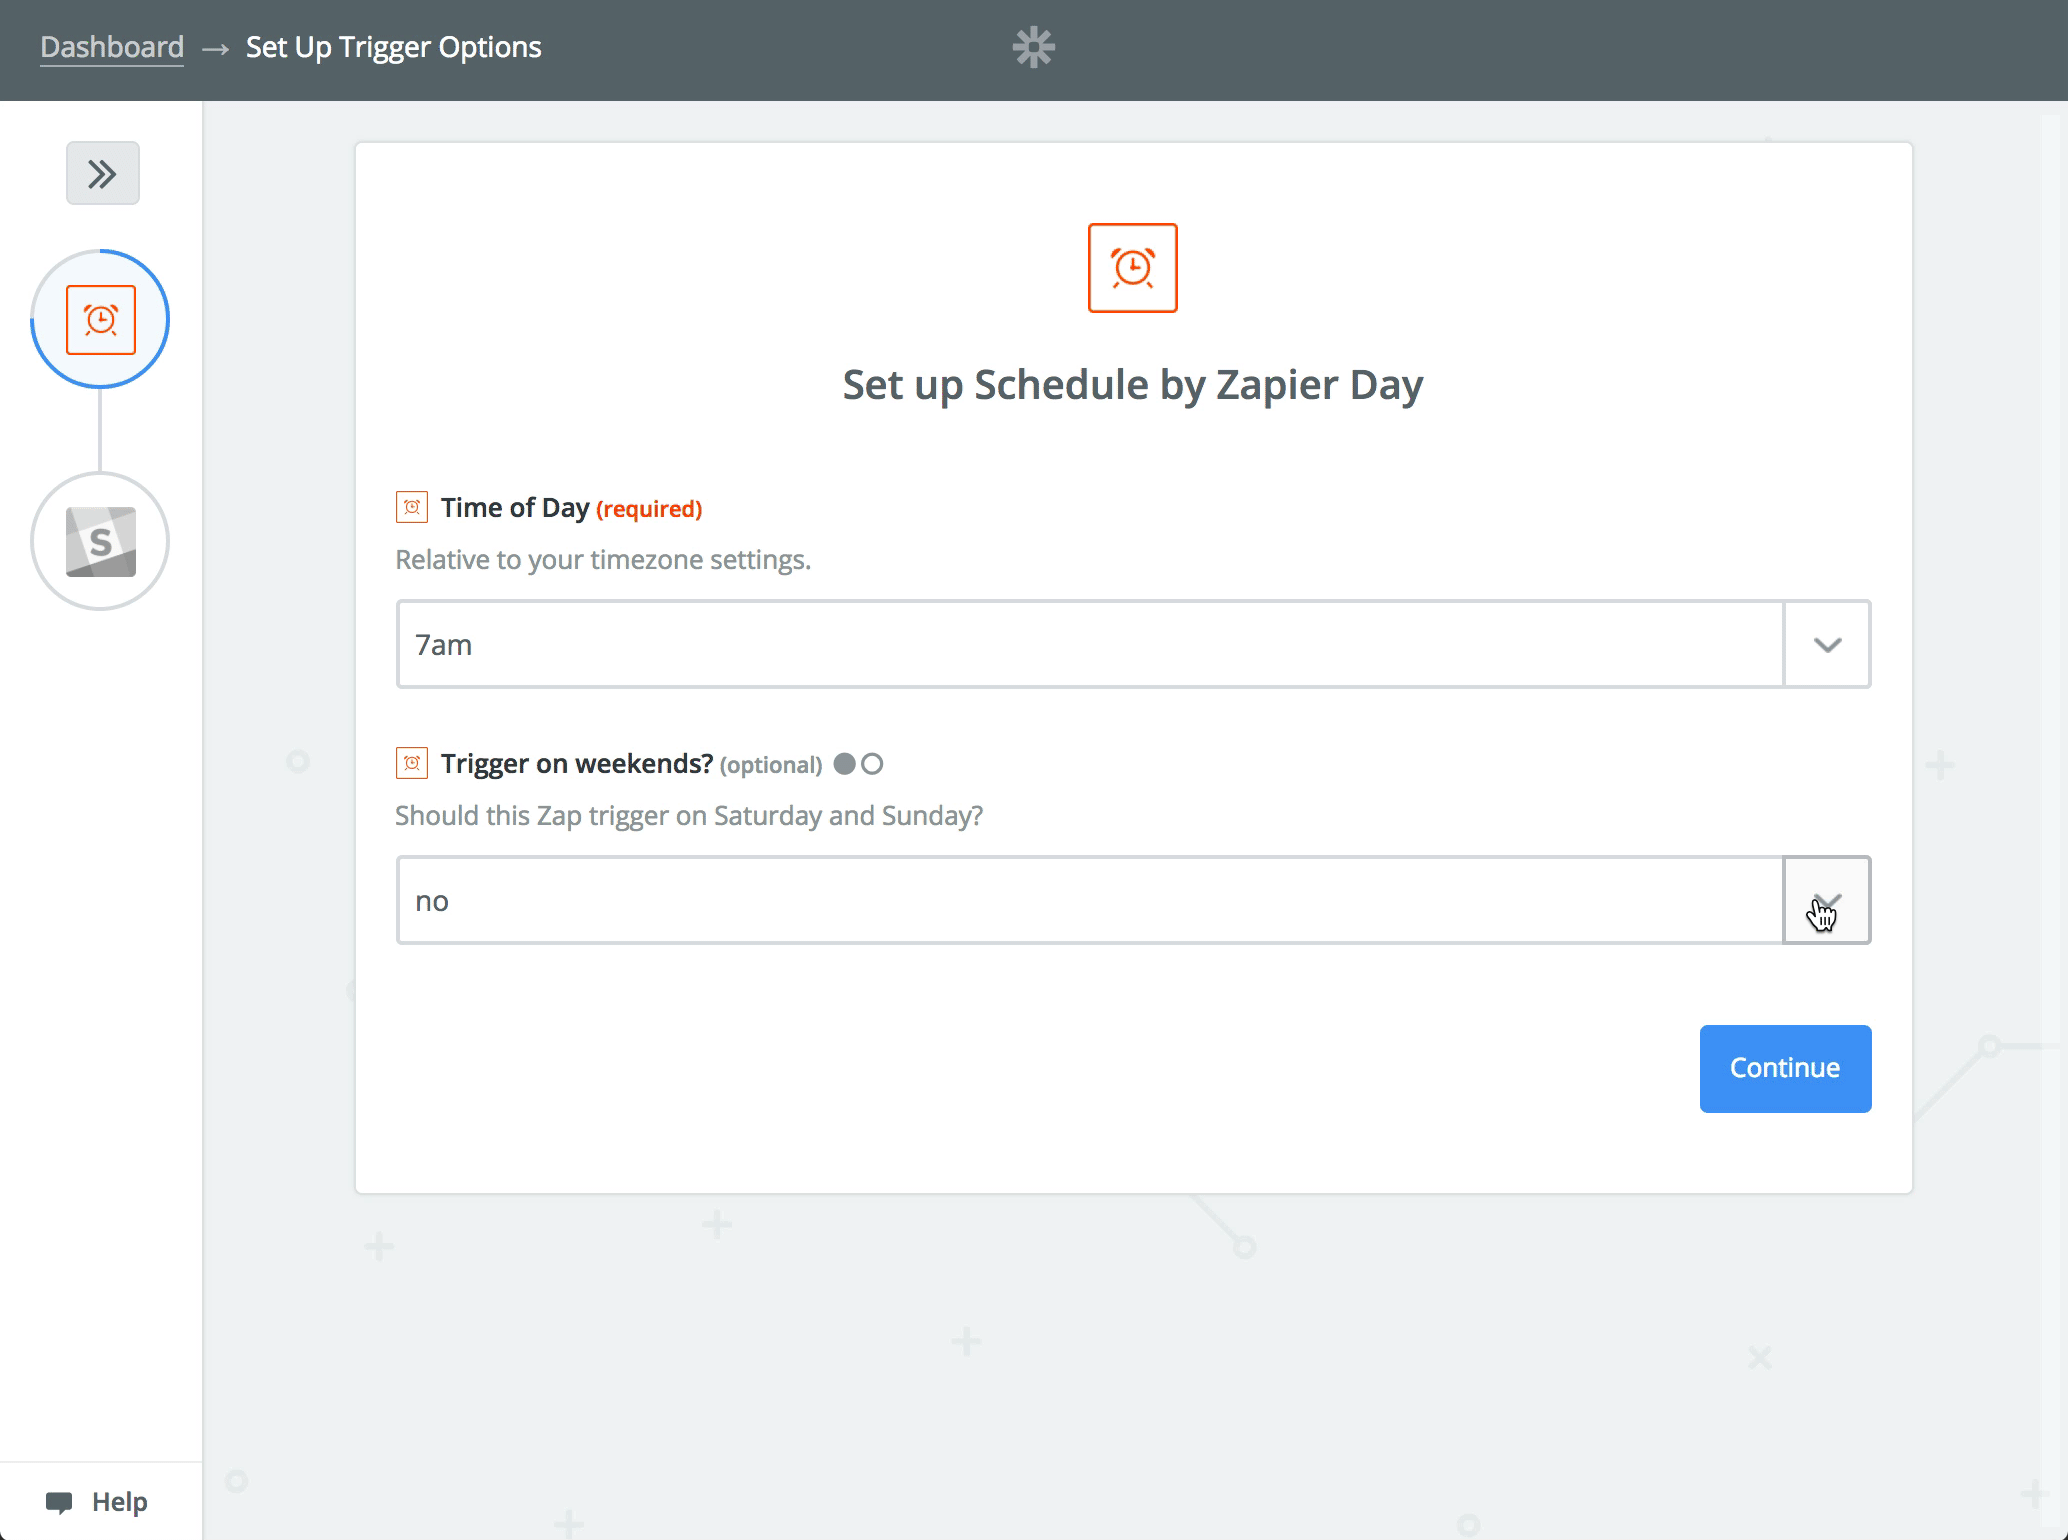
Step 3: Customize Your Zap: Choose the Time of Day and Whether to Trigger on Weekends
The Time of Day field is required, so you need to pick the time from the dropdown list. This is the time at which your Zap will trigger every day, kicking off your workflow.
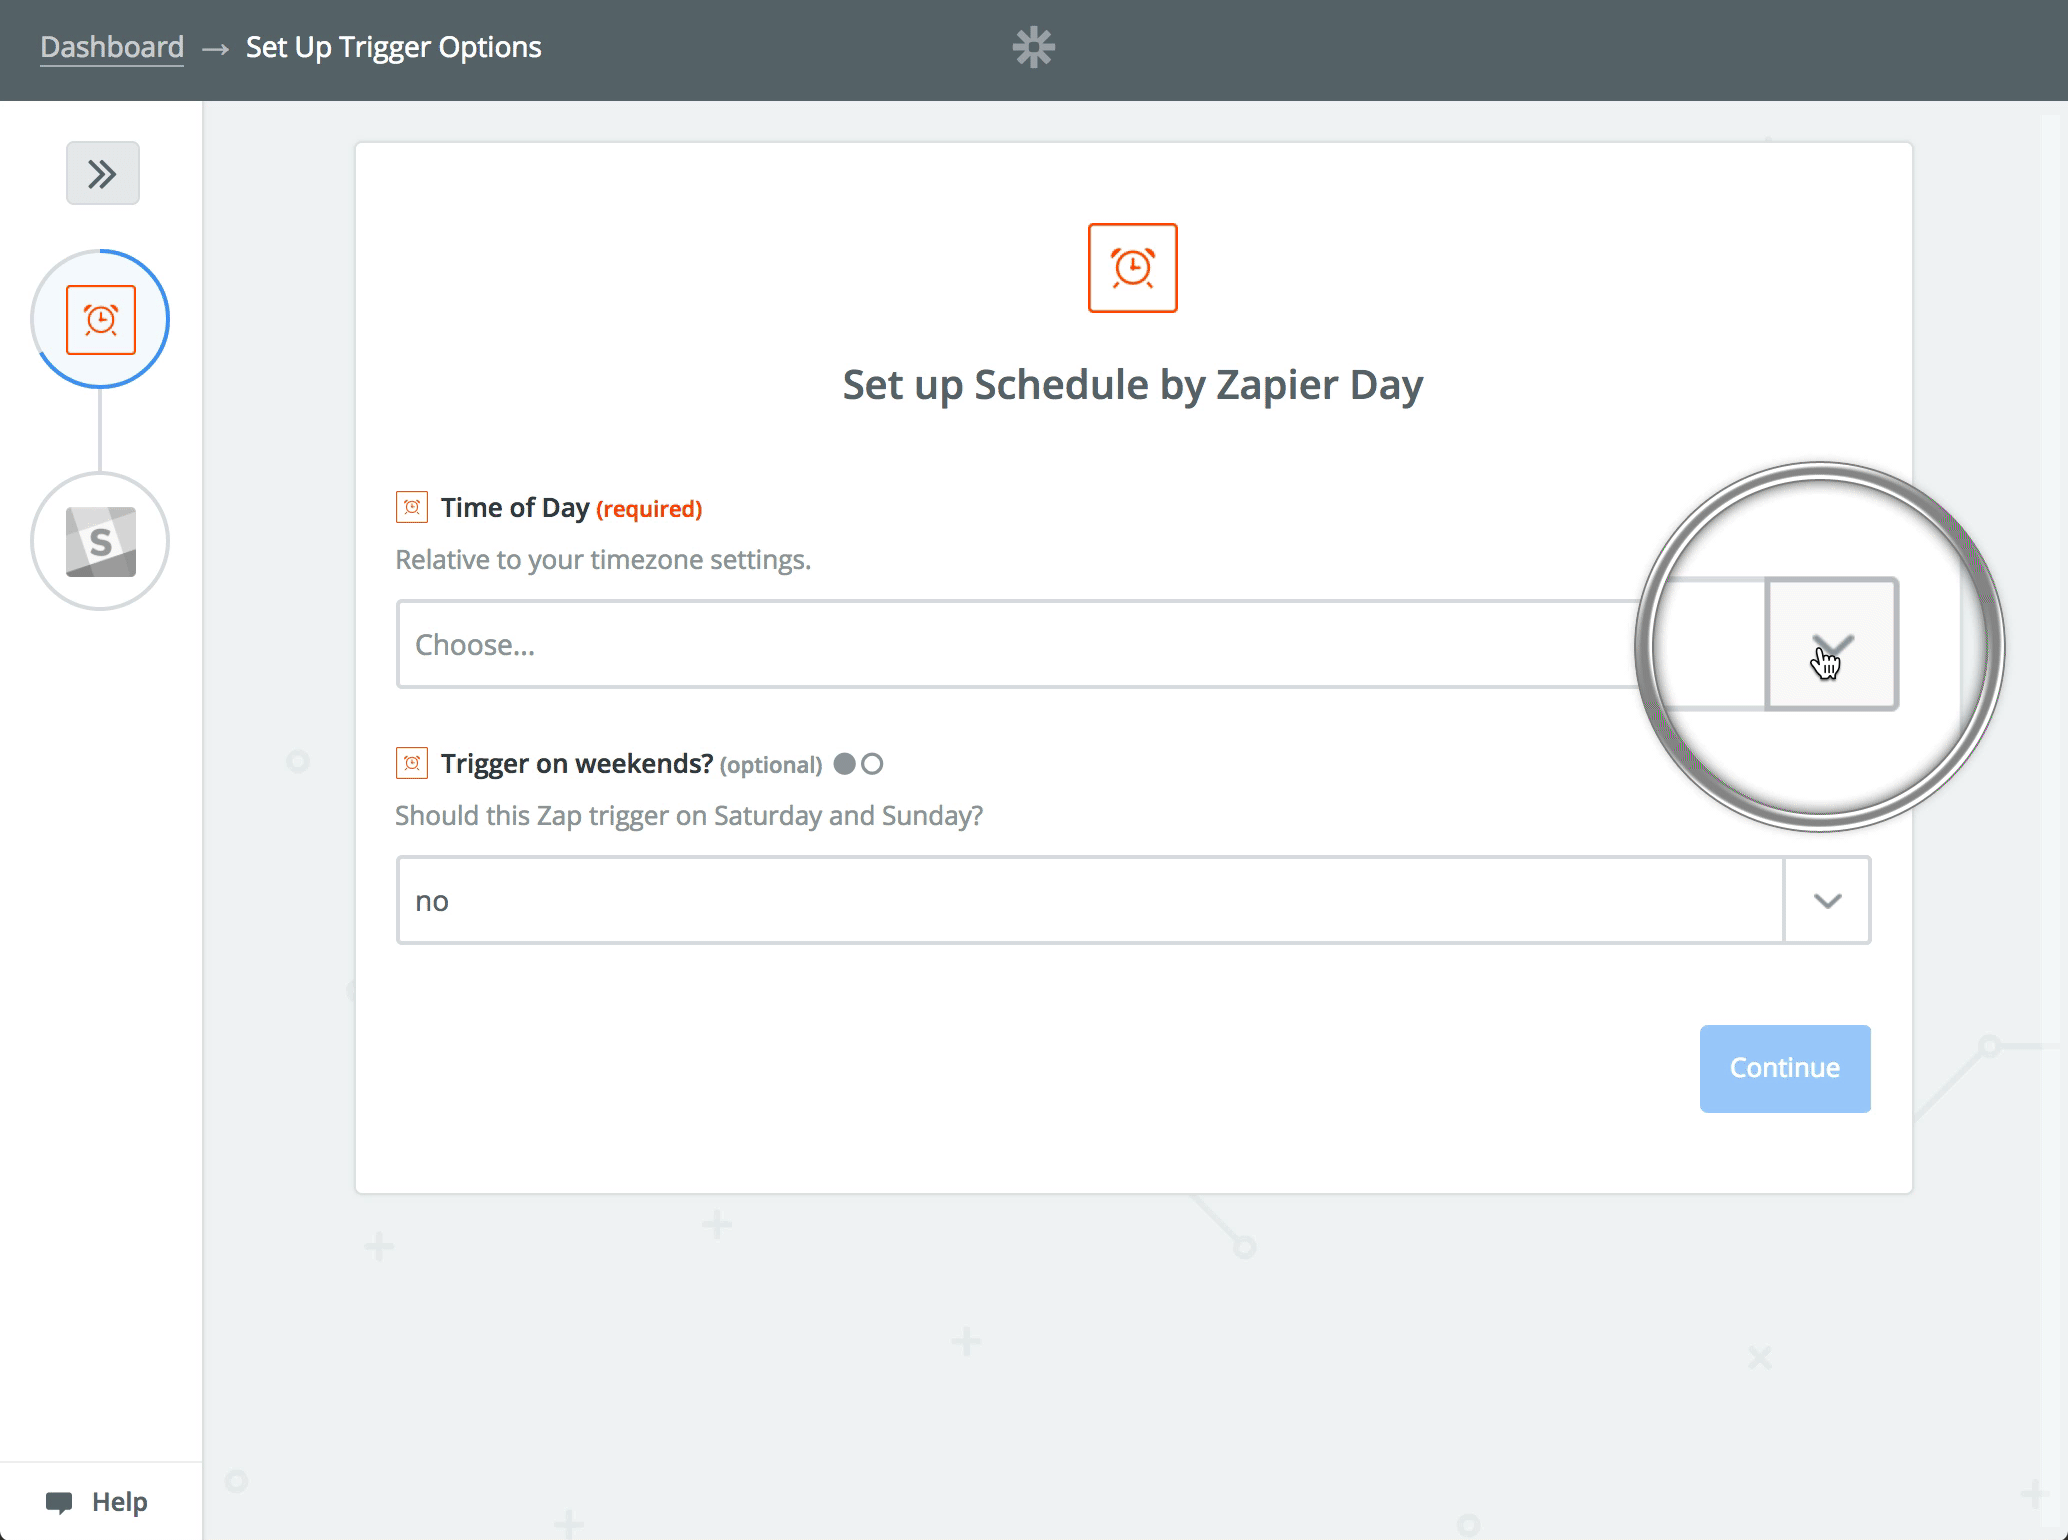
By default, the Zap won't trigger on weekends. You can change this if you like. In the image above we chose 7am as the time of day. If that was a reminder to brush your teeth, you would likely (and your dentist certainly would) want that reminder on weekends as well.
If you do want the Zap triggering on the weekend, click on the dropdown and choose "Yes".
Once you've chosen your options click "Continue".
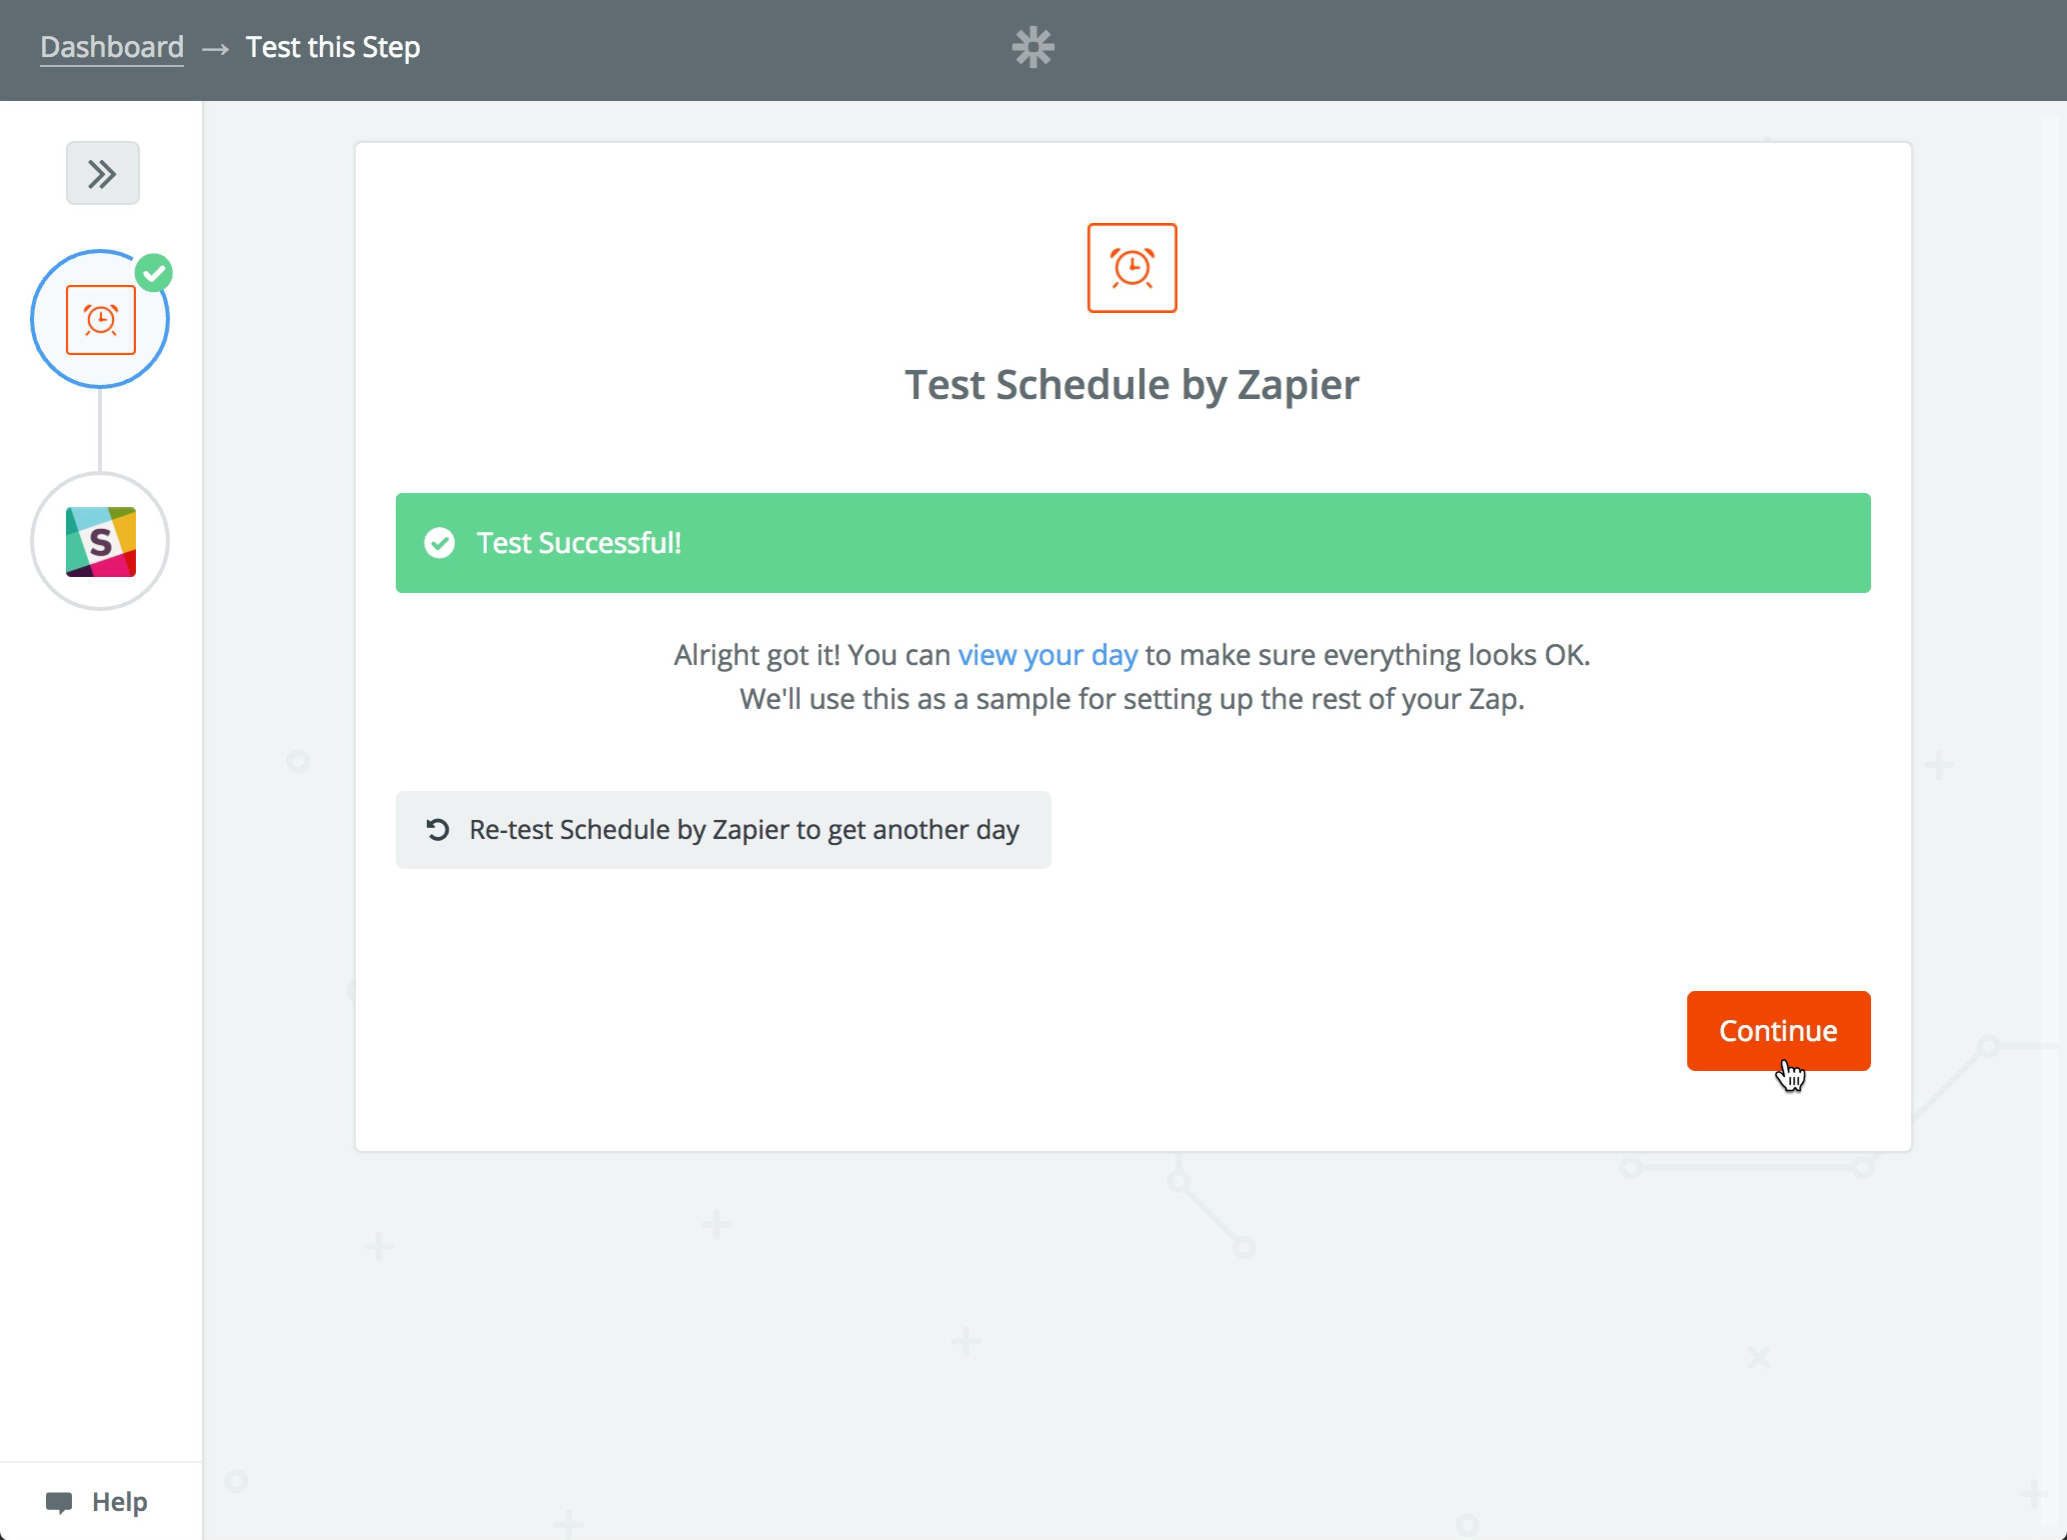
Now Zapier will pull the current day as a test. You can view the sample data that you will use to set up the rest of your Zap then push "Continue."
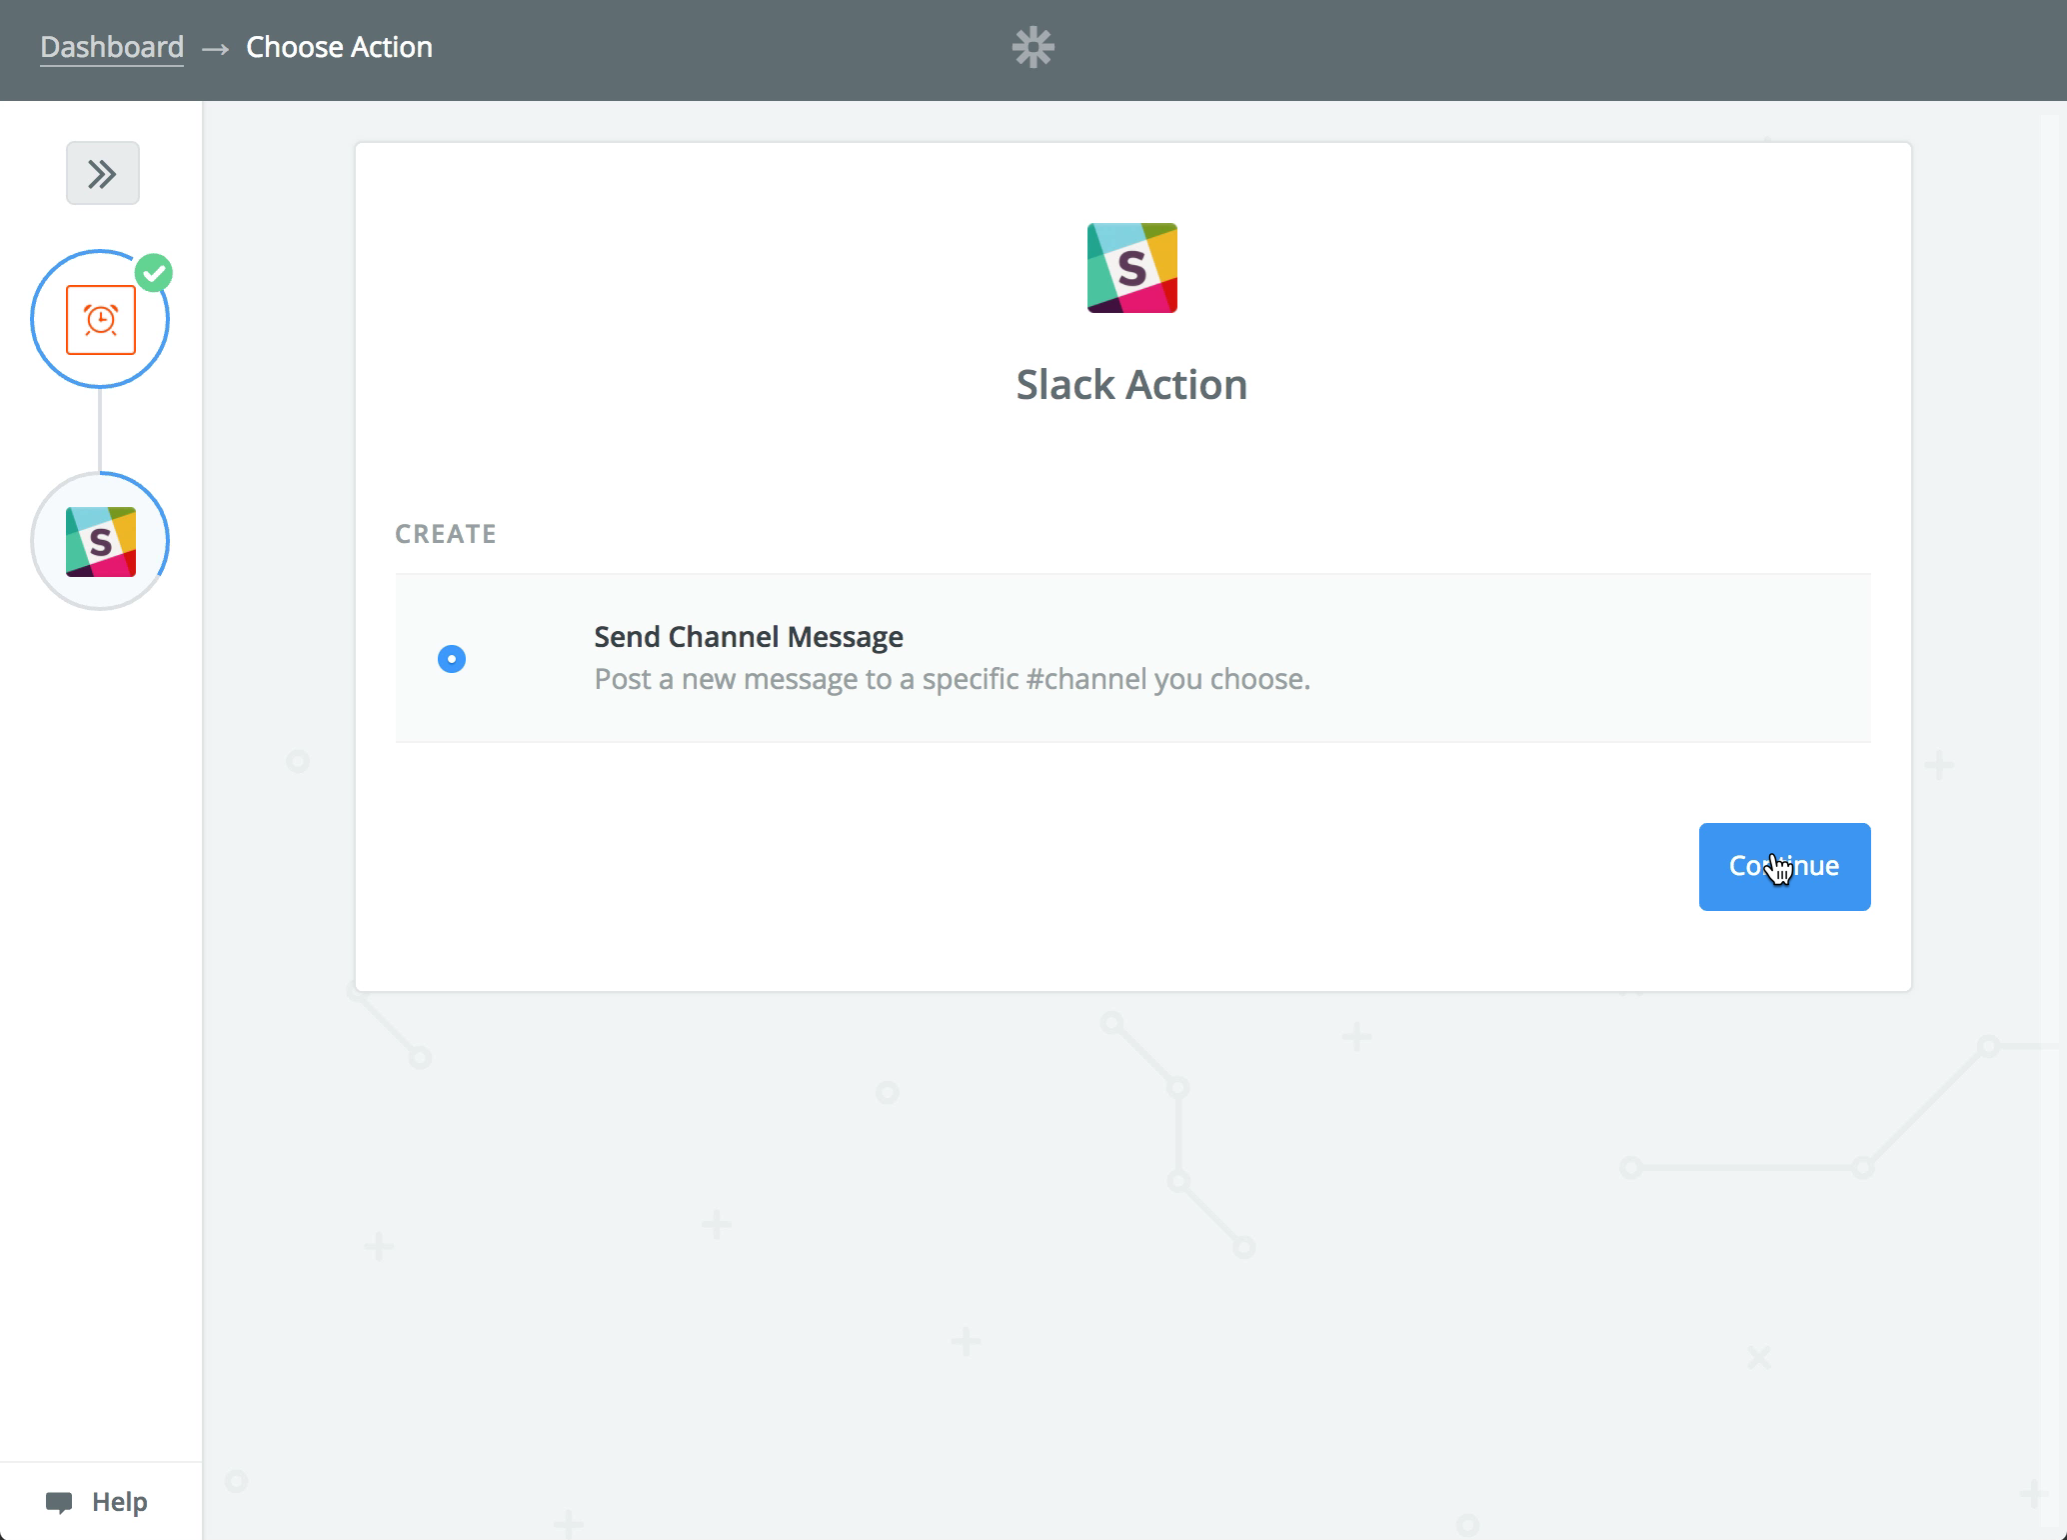
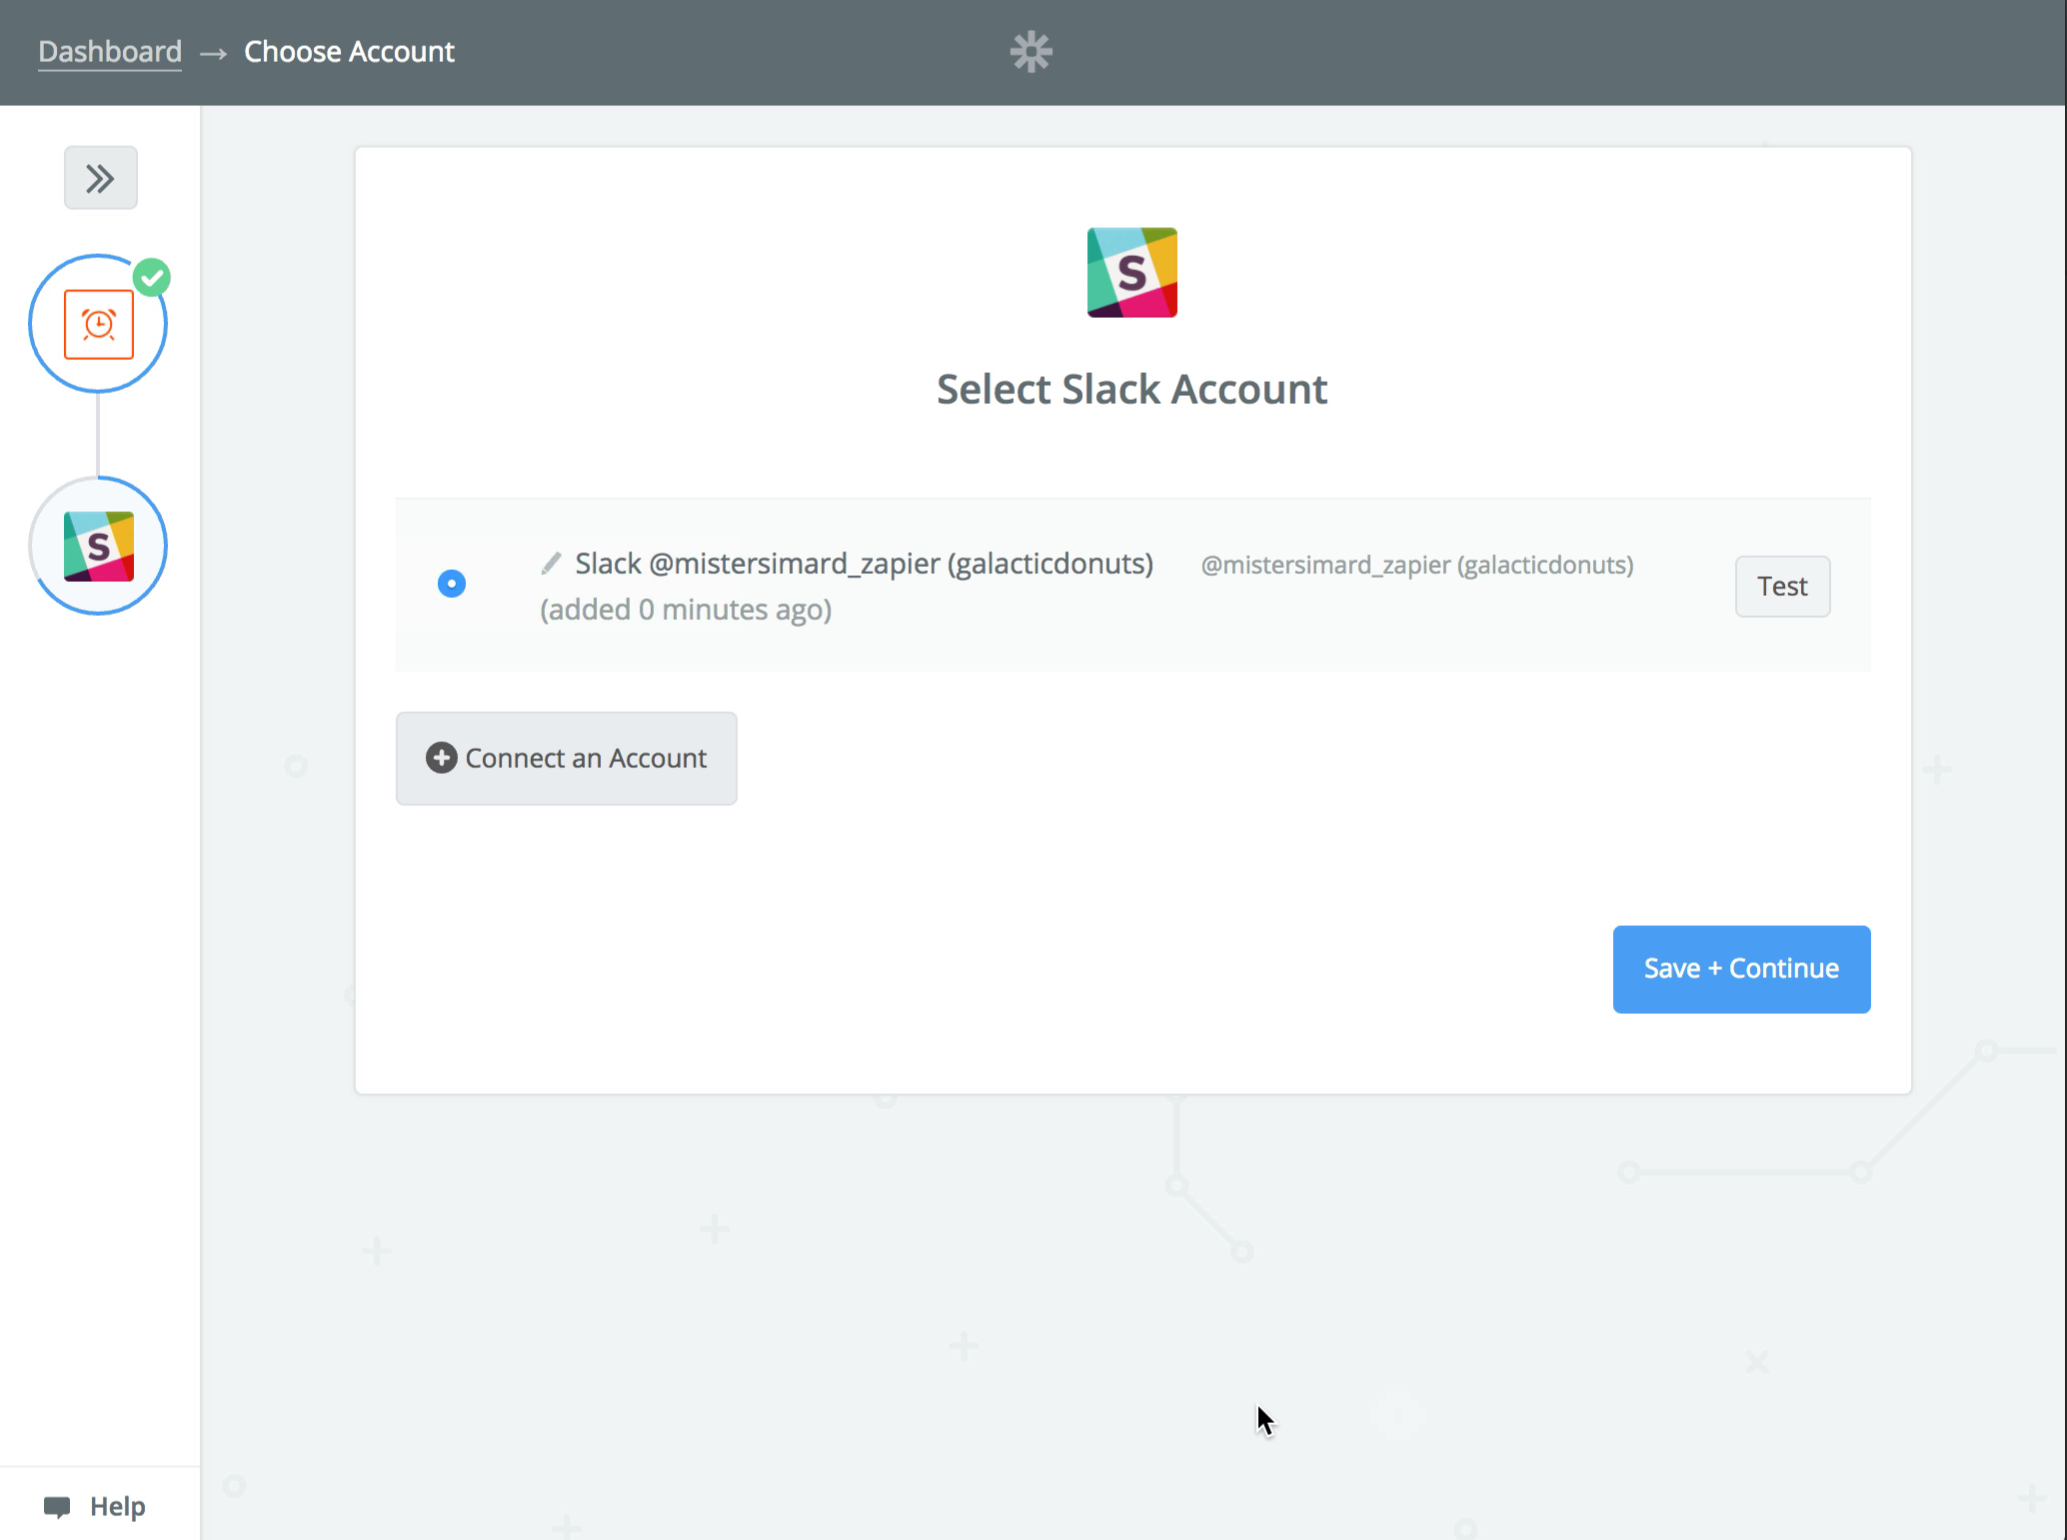
Step 3: Connect Slack to Zapier
In this next step, you'll set up the Action that will follow your Trigger.. In this case, your Zap will automatically send a channel message" to a Slack channel of your choosing. Click "Continue".
The next step is to connect your Slack account to Zapier by clicking the "Connect an Account" button. You will then see a pop-up window, where you will scroll to the bottom and then click "Authorize." (Note: You may have to first log in to Slack if you are not already logged in.)
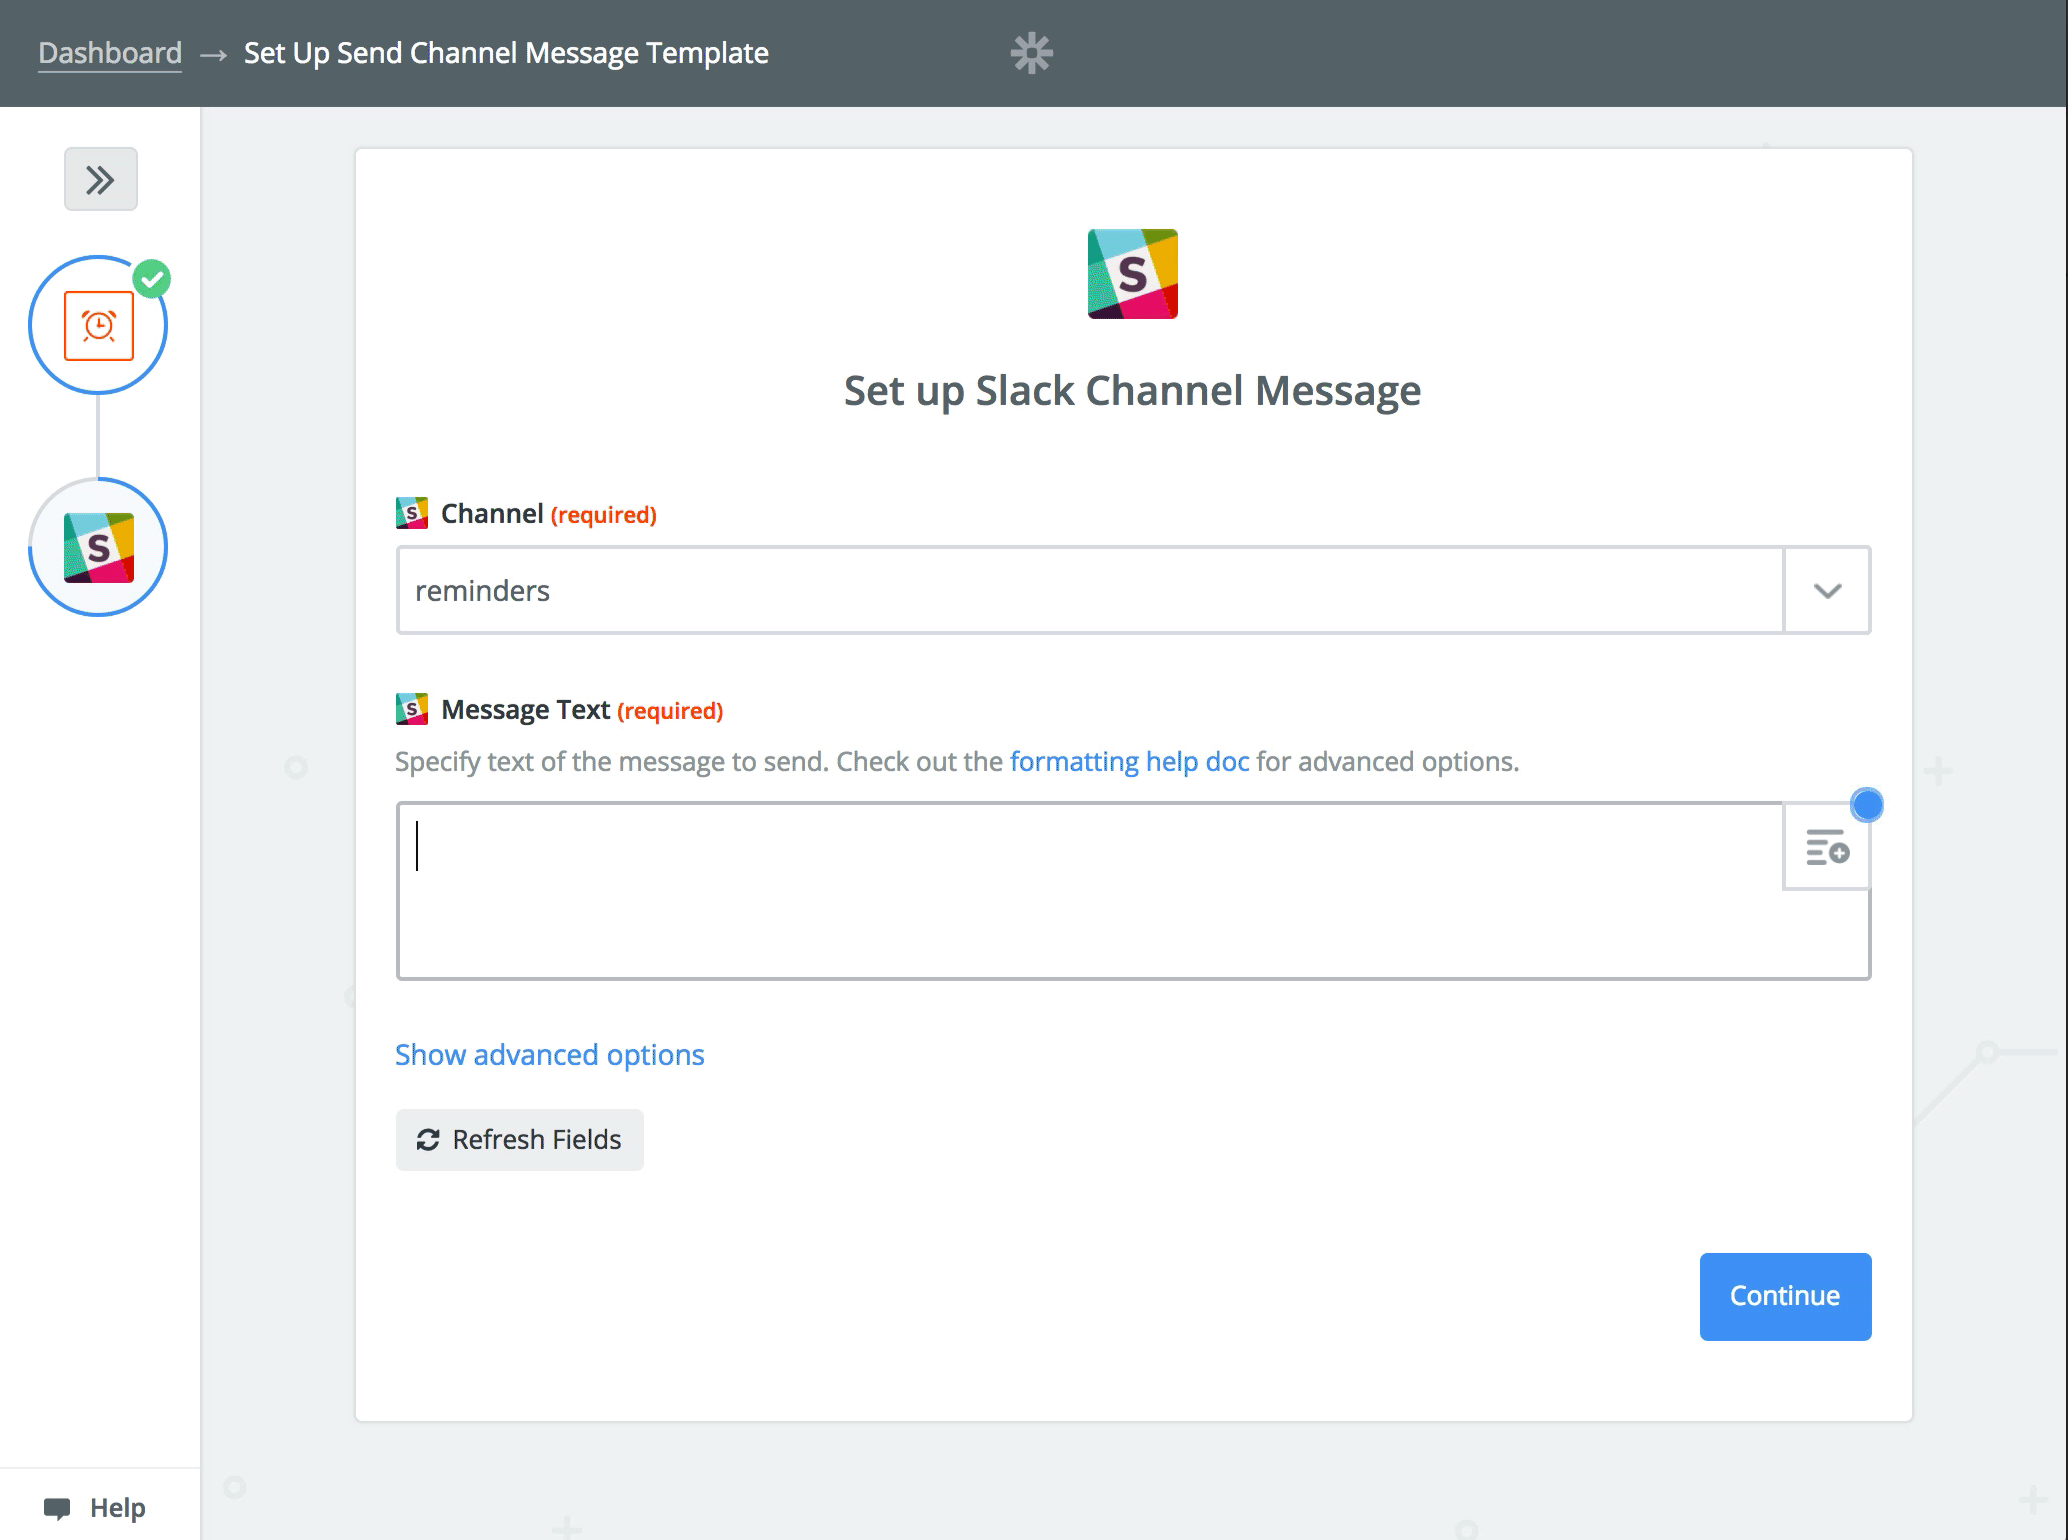
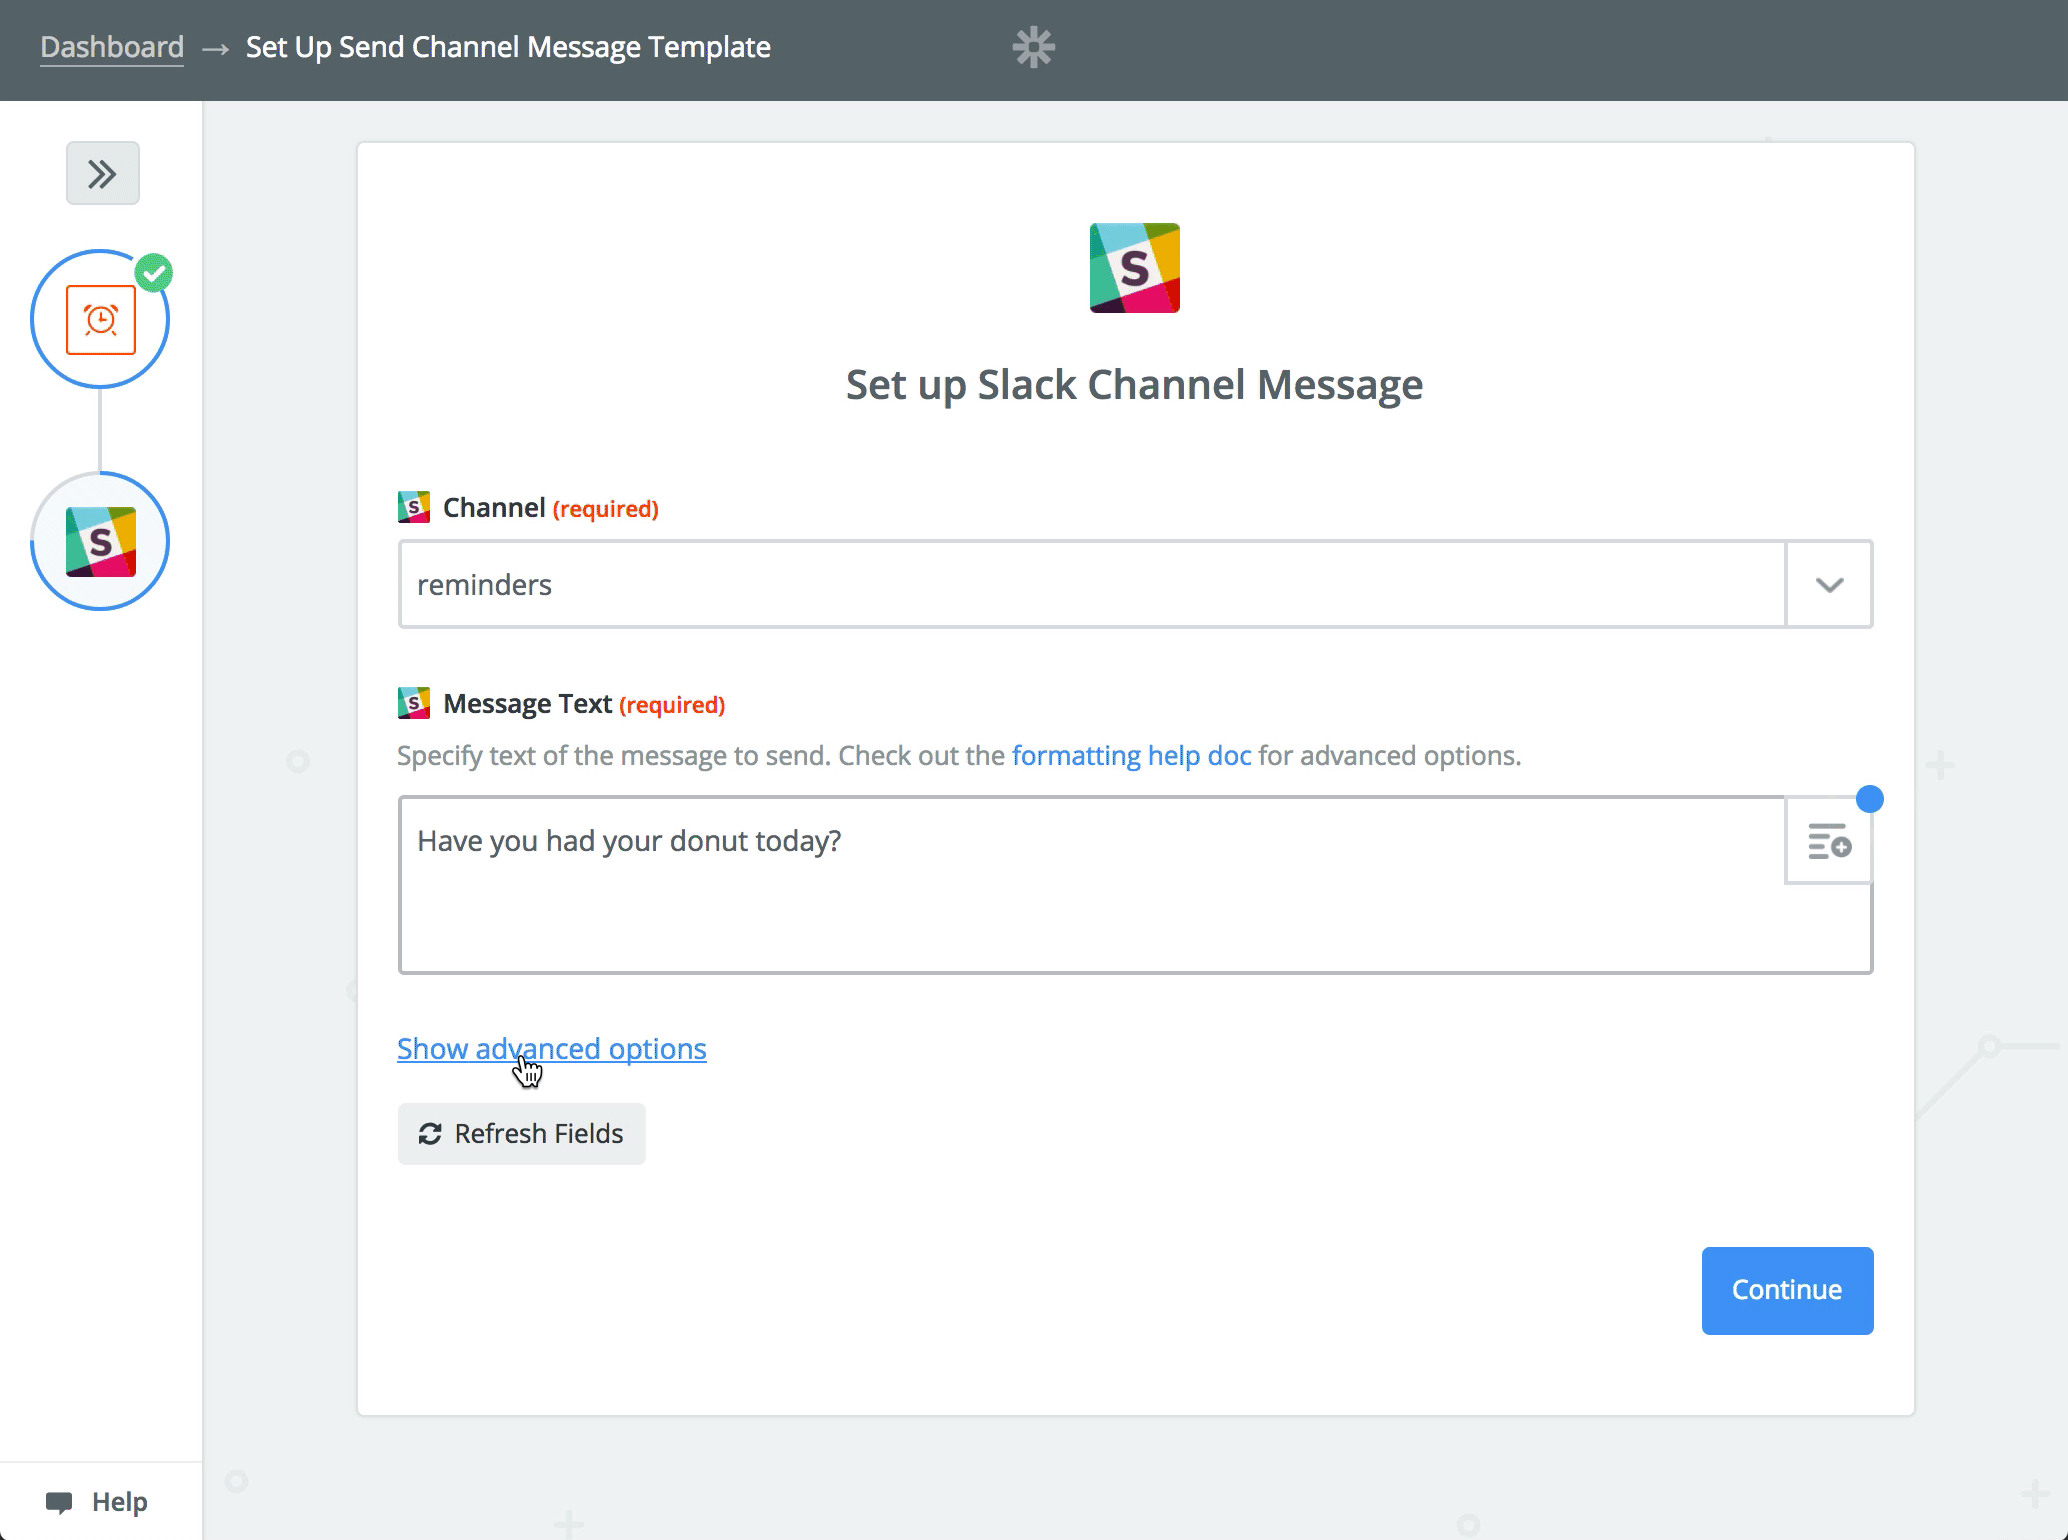
Step 4: Customize Your Zap: Choose the Slack Channel and Message Text
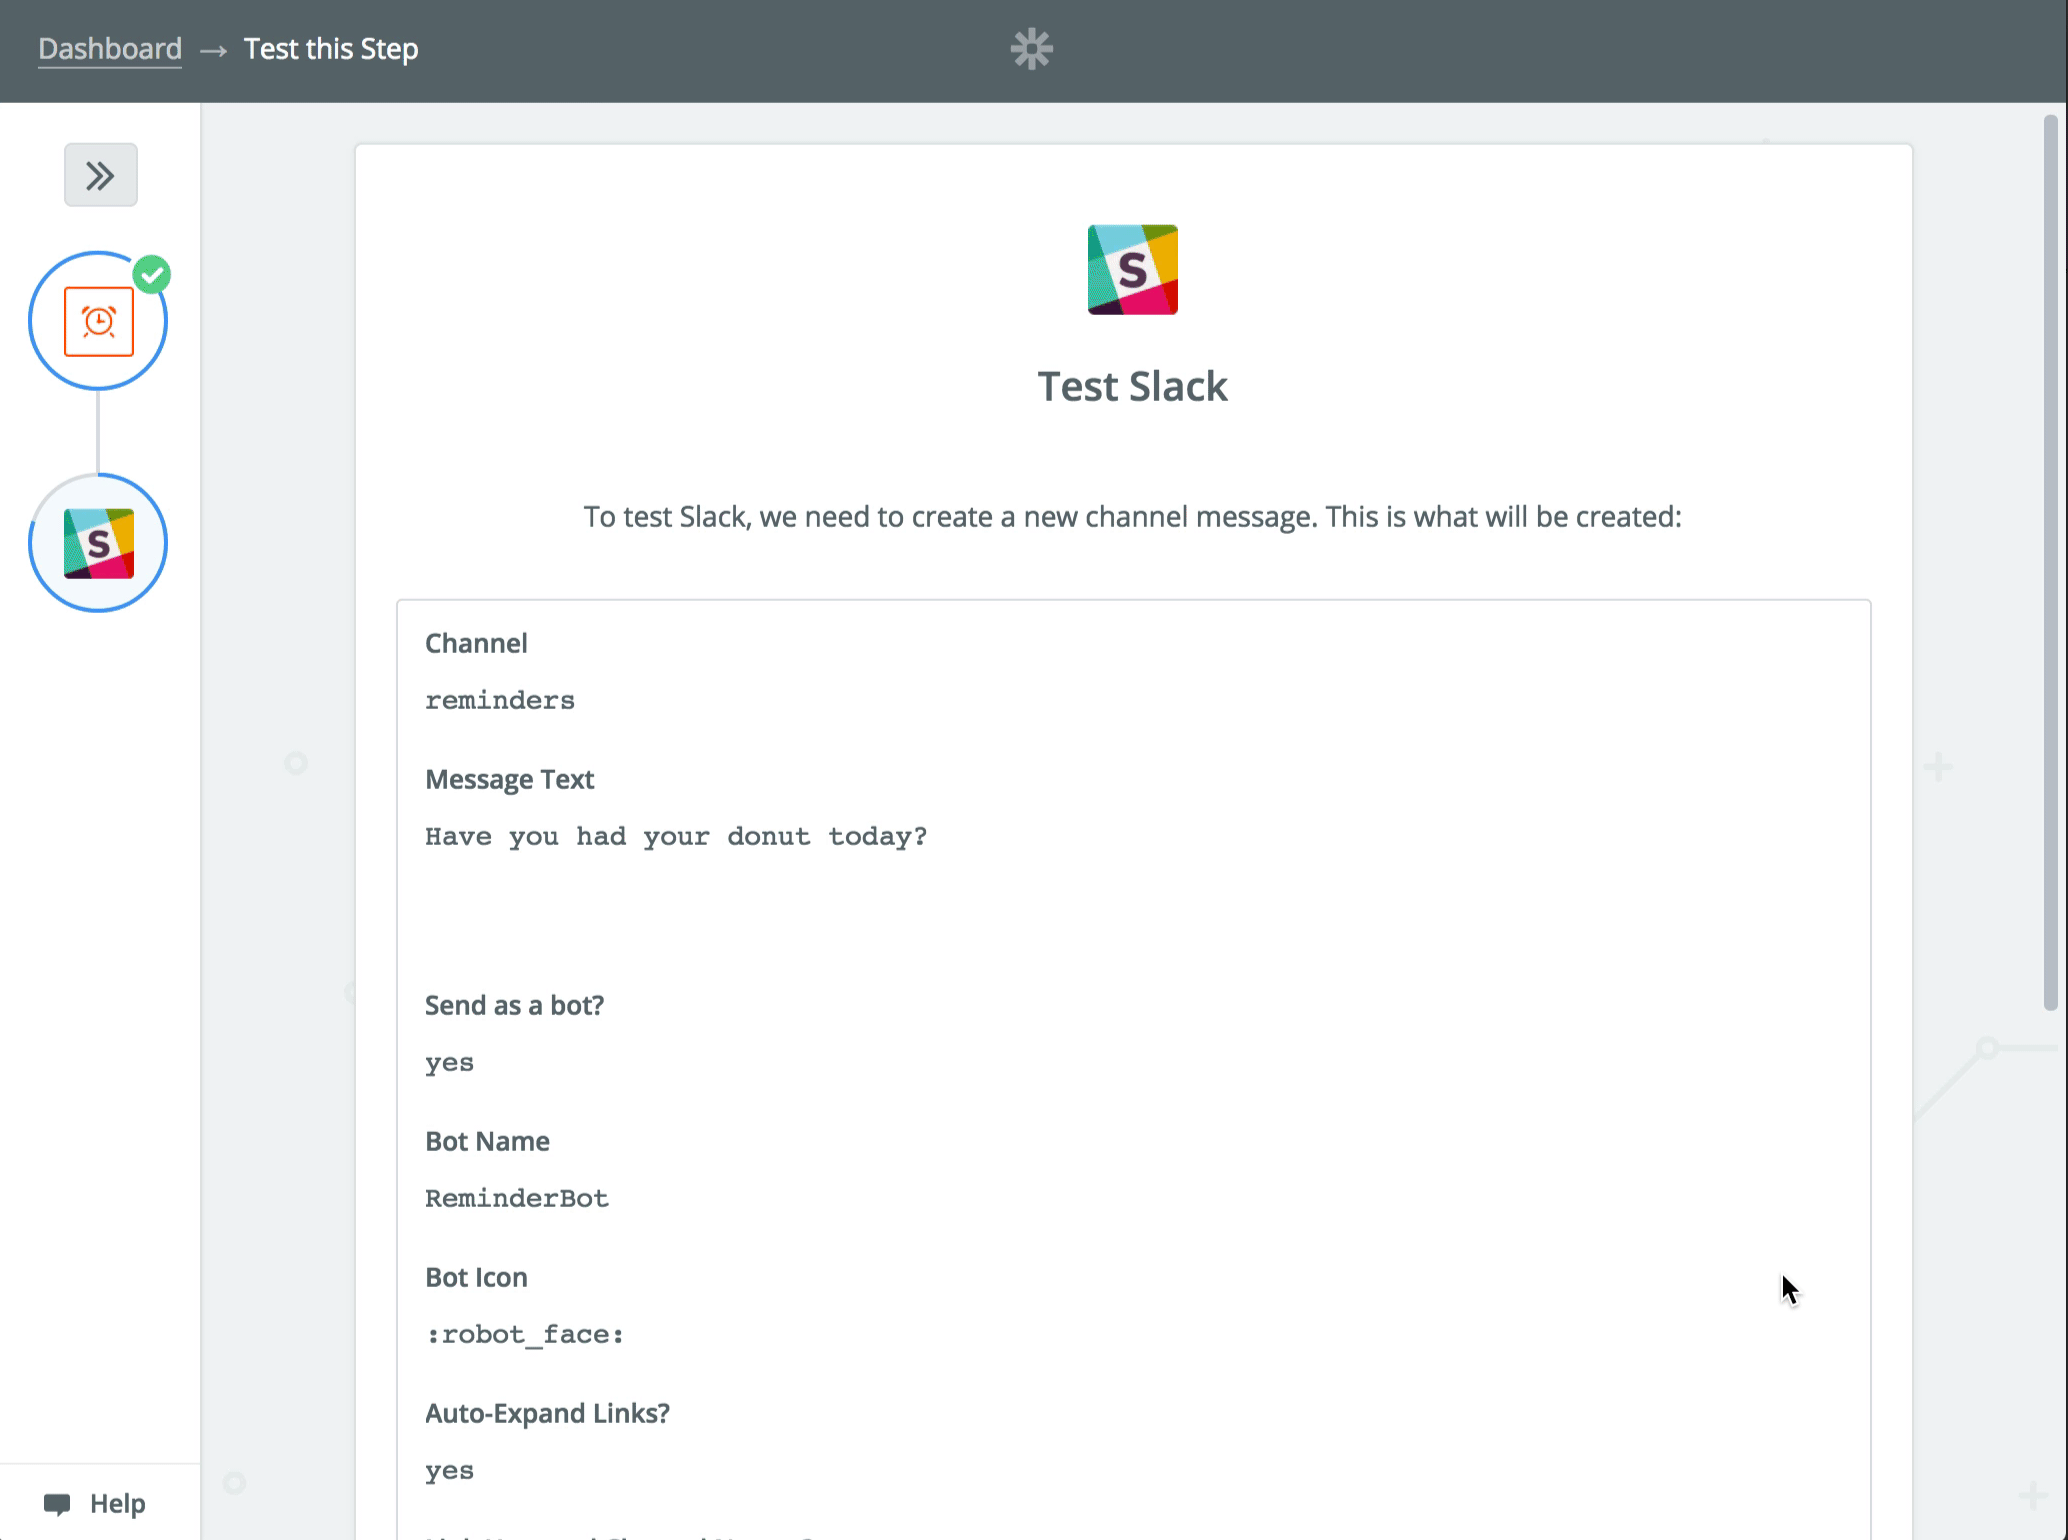
Now you need to tell your Zap where to send the Slack message. Choose a Slack channel from the dropdown. This will be where your automated messages are sent.
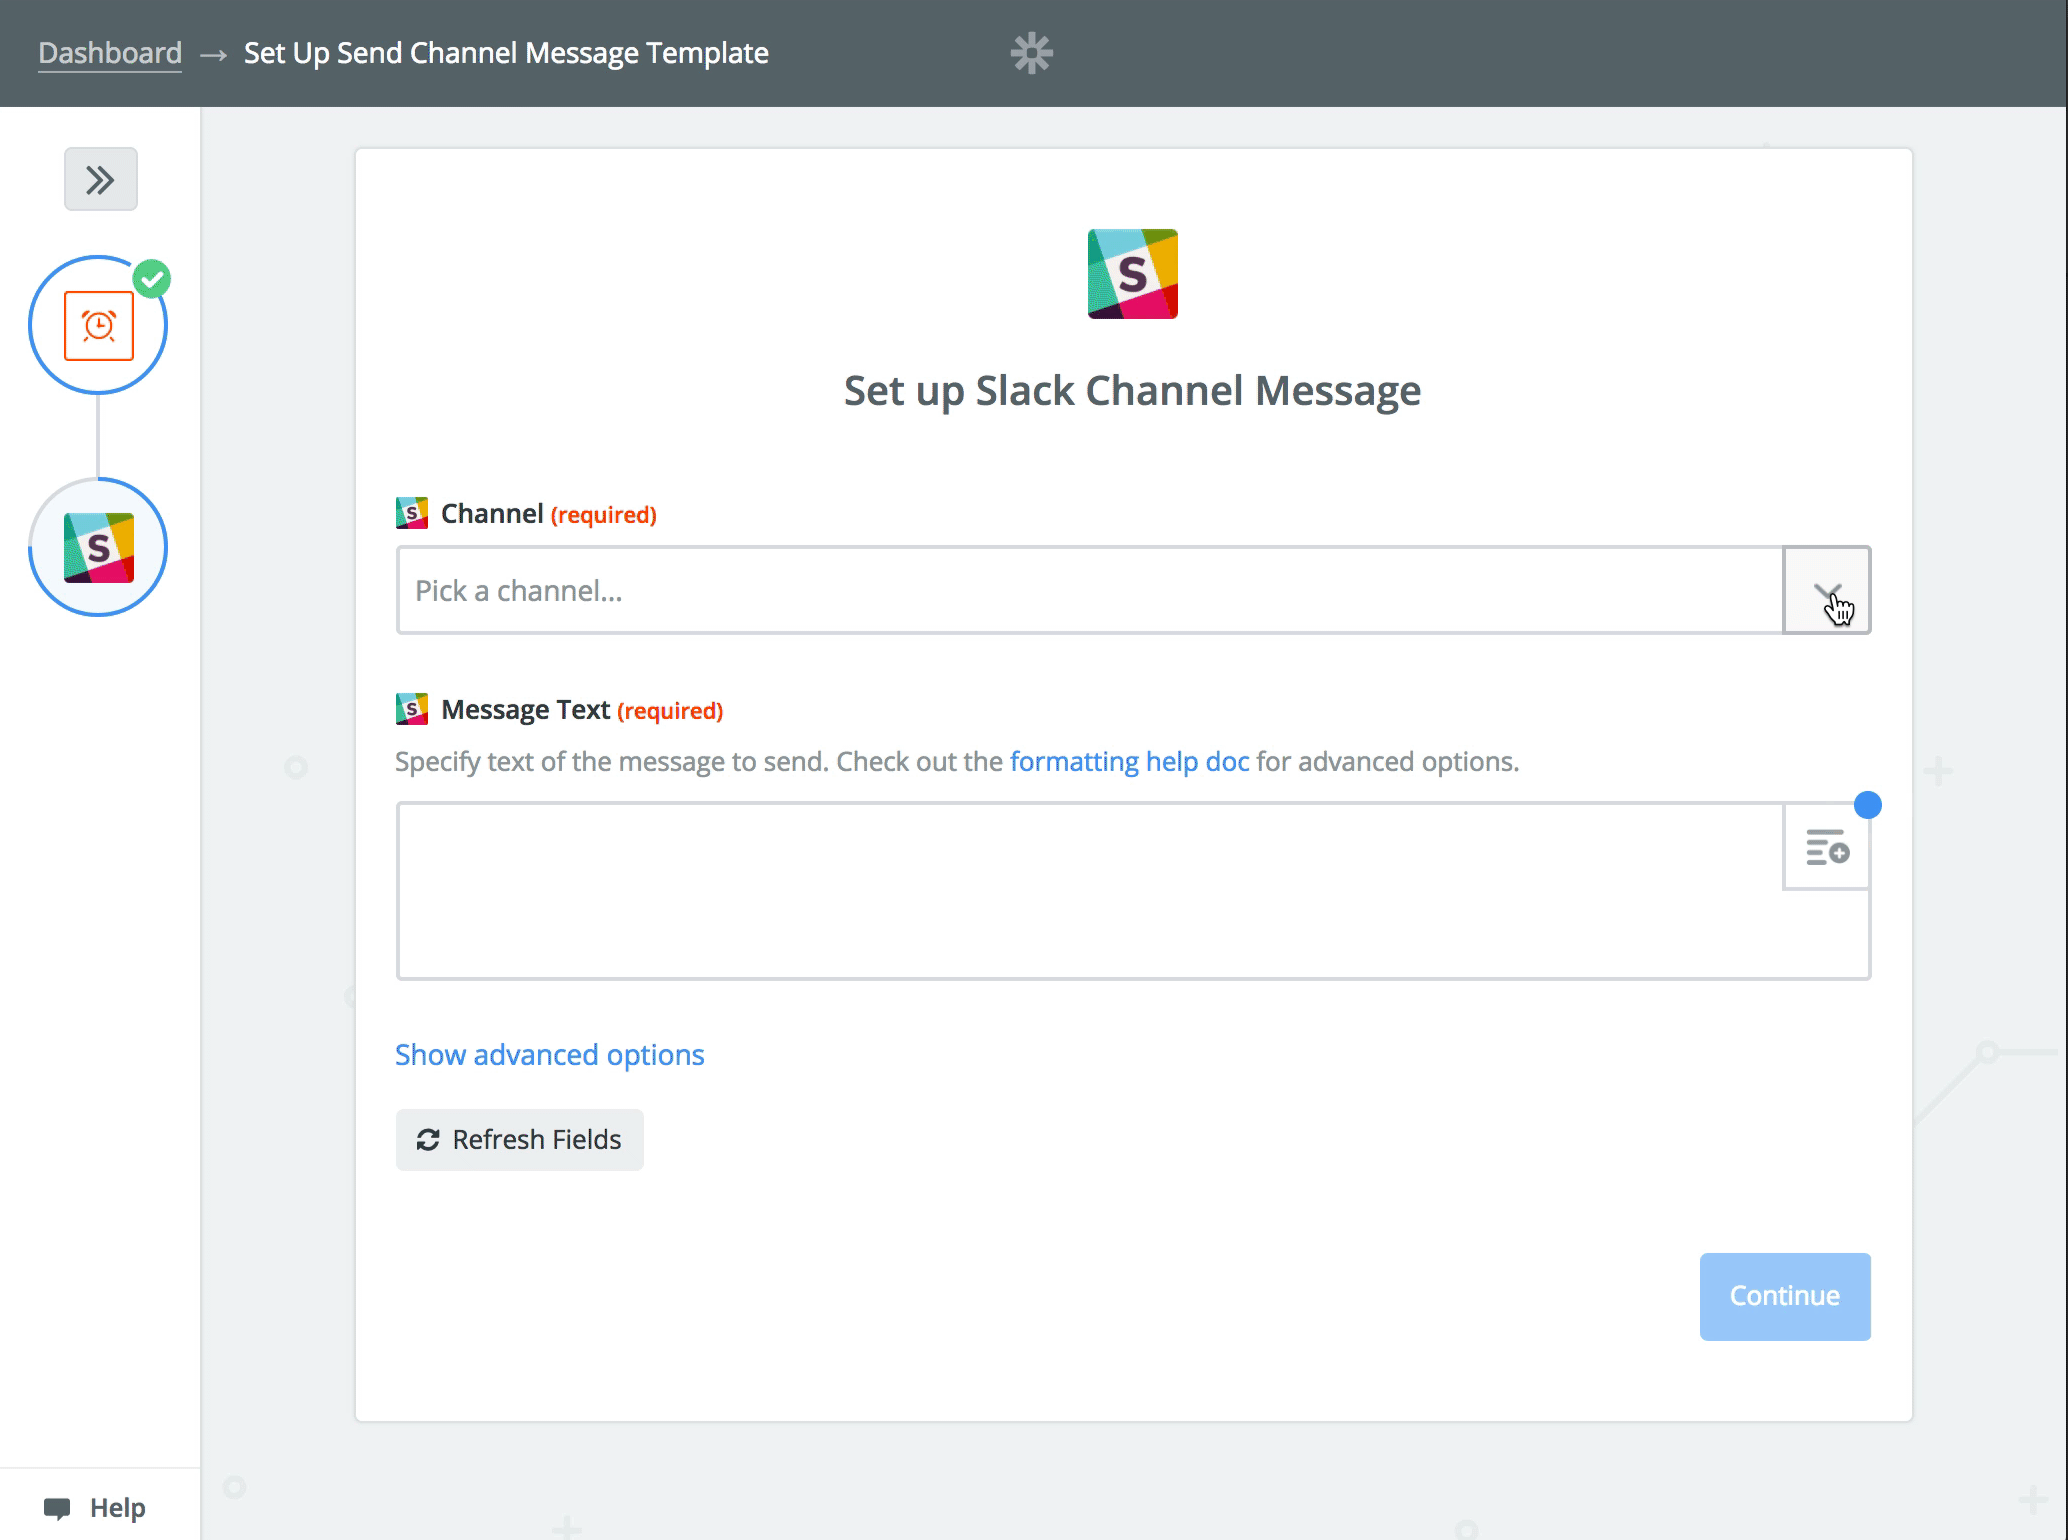
Next, type out the message that you'd like to send, with the option to map the fields from Schedule by Zapier (for example, maybe you want to include the day or time in the Slack message). Map fields in your Zap by clicking on the + button on the right-hand side of each field and selecting an option from the dropdown menu.
You can also fill in other details related to the Slack channel message such as "Bot Name" or "Bot Icon" by clicking "Show advanced options." Fill in as many fields as you'd like then click "Continue."
Step 5: Test Your Zap and View Your Automated Slack Channel Message
Zapier will show you a preview of the Slack channel message before it creates it. If you're satisfied with how the preview looks, click "Create & Continue."
Once your Zap has automatically sent the channel message to Slack, Zapier will display a "Test Successful!" message. If you're happy with the setup and results of your Zap, click the "Finish" button.

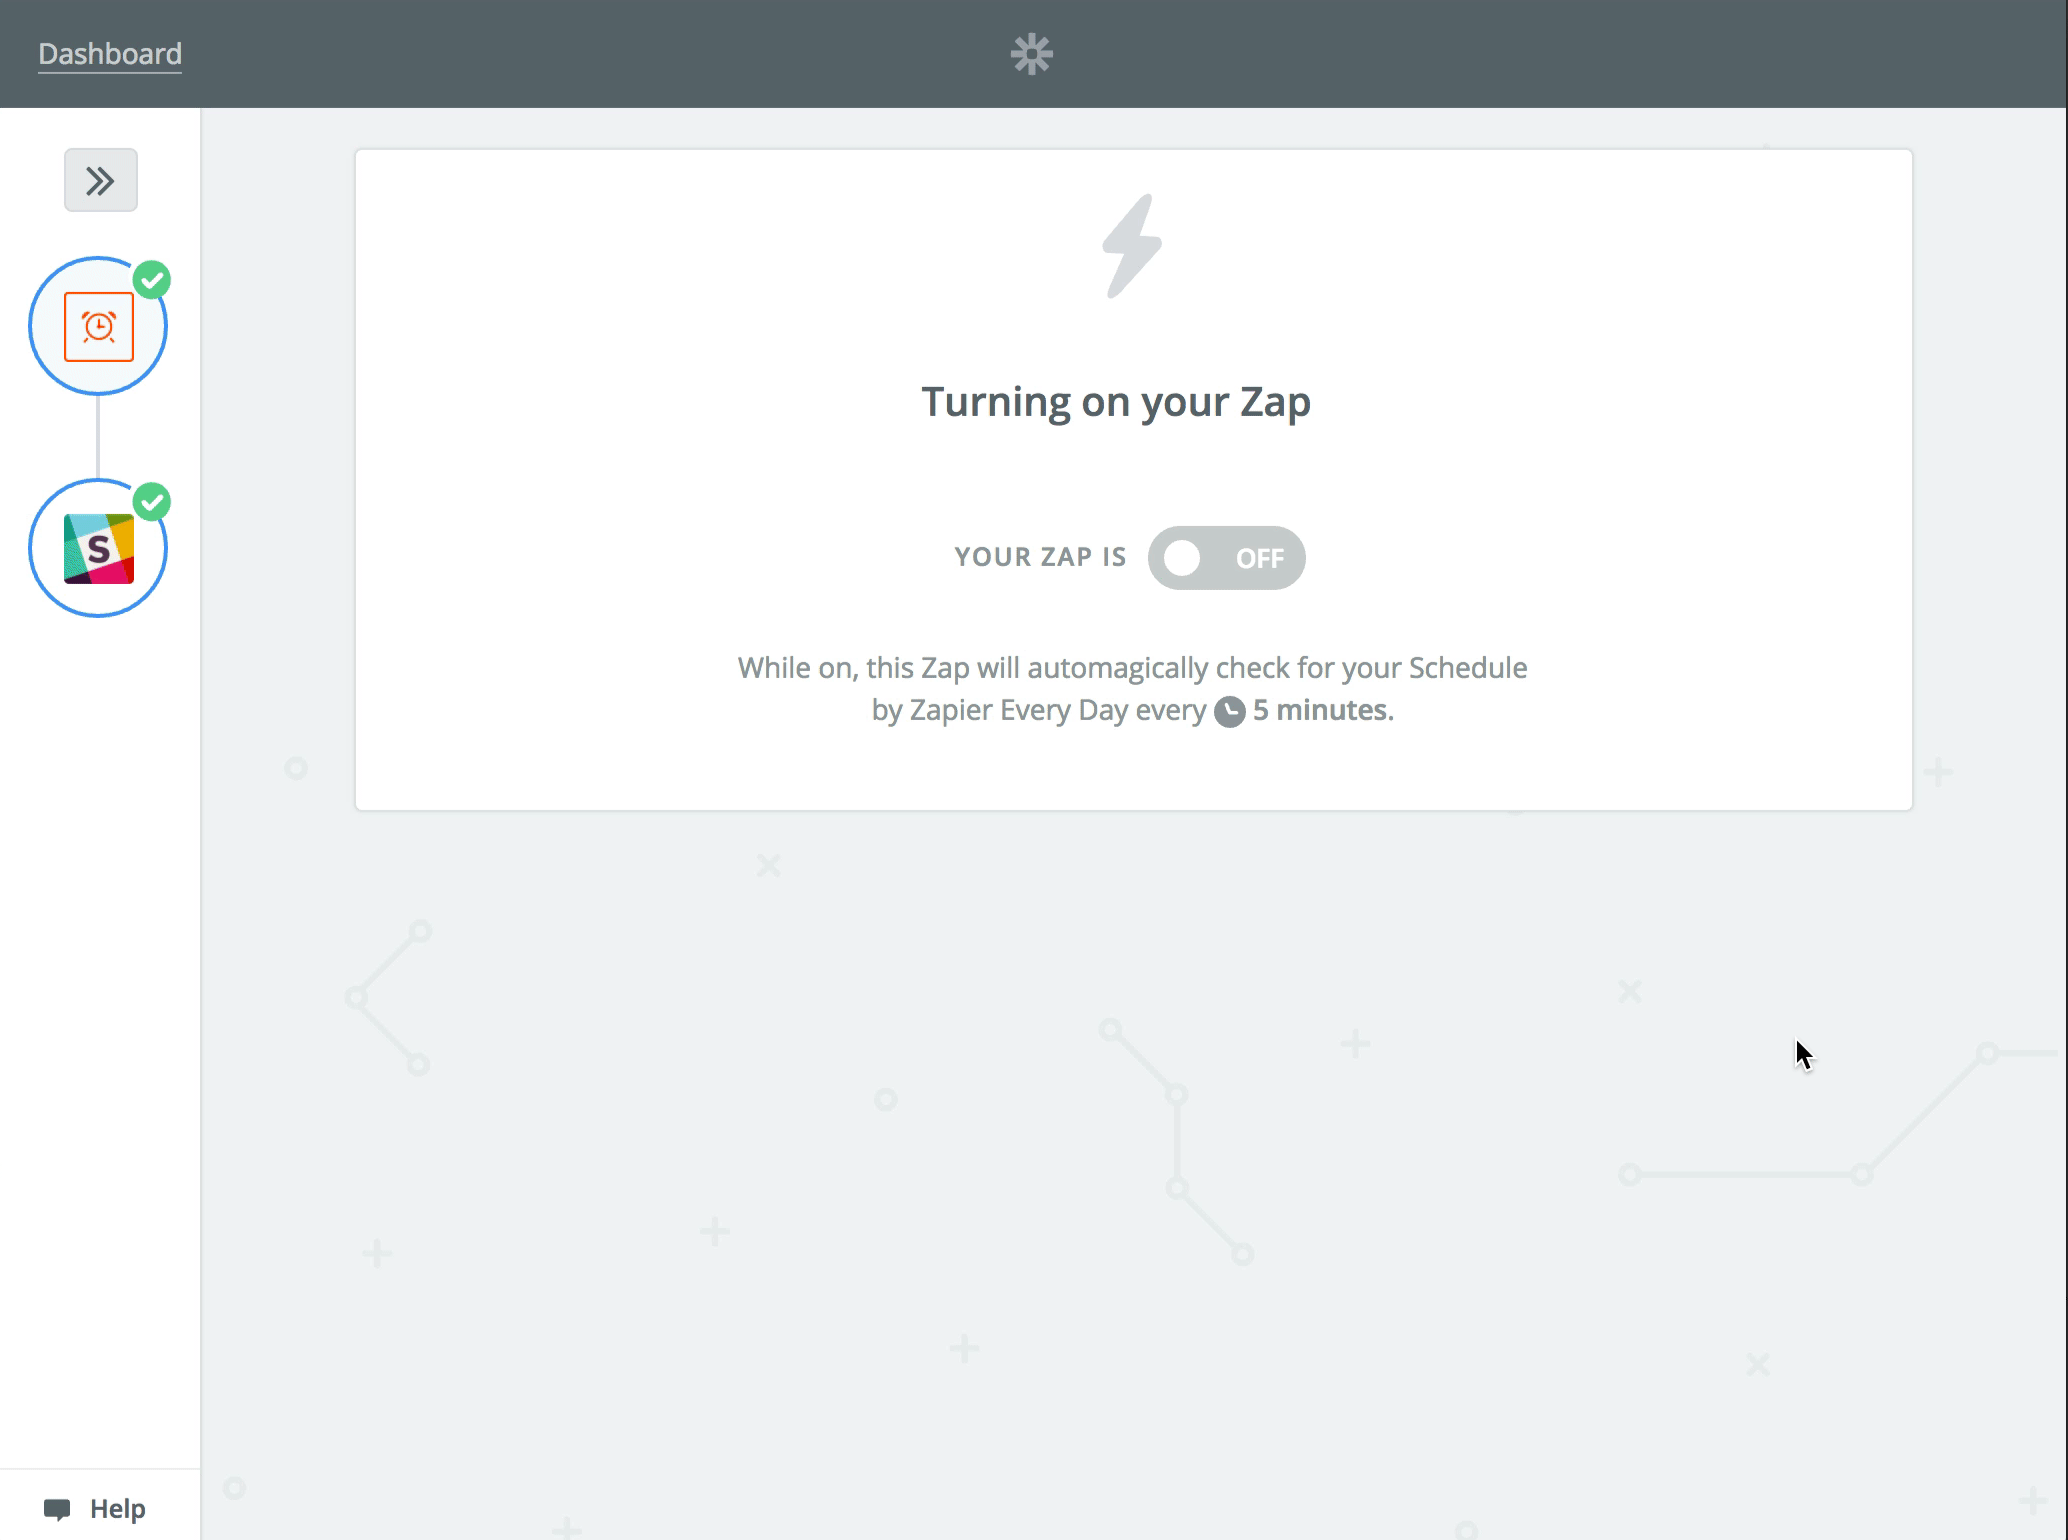
Step 6: Time to Turn Your Zap On
Now just toggle the "On" switch and you're good to go! Your Zap will now automatically create Slack channel messages every day at the time you've specified (excluding weekends, if you've enabled that option). It's now safe for you to navigate away from the page or close Zapier entirely — this Zap will work quietly in the background, giving you time to focus on more important things.
One pro tip: we highly recommend that you create a folder for your new Zap and any similar Zaps, as this keeps everything organized in your account and makes it easier to find Zaps again later.
Have questions? You can read about solutions to common problems in our help documentation or feel free to contact us.
source https://zapier.com/blog/daily-reminders-slack/
No comments:
Post a Comment