
You launch a major project at work, complete a complex task on deadline, or find a solution to an ongoing problem, but none of those accomplishments feel quite as rewarding as that rare moment when your email inbox is empty.
There’s good news: achieving Inbox Zero doesn’t have to be a rare occurrence. Take advantage of these sometimes-overlooked features in Outlook 365 to better organize your emails and start focusing on more important tasks.
1. Move Complex and Non-Critical Emails Into a To-Do Folder
In Outlook 365, you can create a structure of folders for organizing emails. Many people use the folder structure for archiving emails, but folders are also a great way to manage incoming emails as tasks and get them out of your inbox view. We're going to use these folders to do email triage, organize the messy inbox, and overcome email overload.
To do this, create three new folders under your inbox folder. The first is a "To Do" folder, and the second and third are subfolders called "Follow Up" and "Someday." These loosely follow the Getting Things Done or GTD methodology of organizing tasks.
To create these folders:
- Right-click your "Inbox" folder, and select "New Folder."
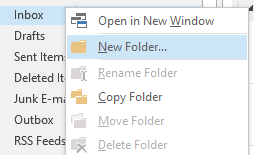
- Title the first folder "To Do."
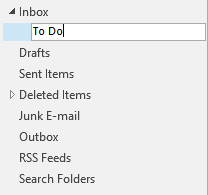
- Click the arrow next to the Inbox folder to view your new To-Do folder.
- Right-click the To-Do folder, select new folder, and name this folder "Someday."
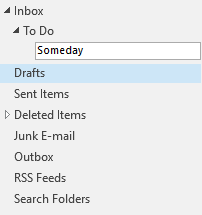
- Repeat to create a "Follow Up" subfolder under the To-Do folder.
Now you have four folders for incoming emails, and you can use all four to manage your tasks and keep your inbox clear.
When new emails arrive, move them to the appropriate folder:
Inbox – The only emails that stay in your inbox are those that you should answer immediately. They’re either urgent or can be handled quickly (in three minutes or less).
To Do – Drag non-urgent emails and emails that will require more than a three-minute response into your to-do folder. You’ll follow up on these items later, but moving them immediately keeps your inbox empty while you process the emails.
Follow Up – Move emails to this folder that are put on hold. Things like replies you're waiting to get or tasks that you've delegated.
Someday – Some emails don’t require a response. Instead, they’re things you’d like read/review one day when you have time. Drag those into the someday folder to review at some point in the future when work slows down and you need something to do. This might be the equivalent of an Archive folder, but you can use it for items that you'll need to quickly access in the next few weeks.
After processing your email, schedule time on your calendar every day to review and handle the items in your to-do folder. This method has three benefits:
First, it keeps your inbox clear, allowing you to achieve inbox zero and avoid getting overwhelmed by a cluttered inbox. New emails that come in at a steady stream don't get mixed up with existing emails you've already read, pushing all the important emails down.
Second, your emails are better organized! You have a set place to go now for emails that need your attention—just as many folders as you need to stay on top of your email, but no more than you need. Instead of creating countless folders (for different projects, clients, or other categories), you have just four to work with.
Third—and perhaps best of all—it allows you to manage your time better throughout the day, focusing on important tasks instead of getting distracted by constant email questions and requests.
2. Use Outlook’s Task List Instead of Clogging Your inbox
Some emails don’t require an immediate response, but they do need to be handled before the time you have scheduled to review items in your to-do folder. These items can still be moved to your to-do folder so they’re not clogging your inbox, but you’ll want to make sure that you have a reminder to take care of them before a deadline.
Create a reminder by adding these emails to Outlook’s task list:
- Drag the email and drop it on Outlook’s task list icon.
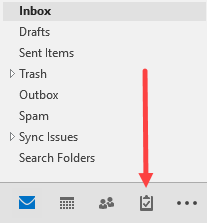
- Add a due date and set a date and time to receive a reminder. Save the task.

You can now hover your cursor over the task list icon to see a quick view of your task list, organized by due date. Click on the task list icon to open your to-do list and review the respective tasks.
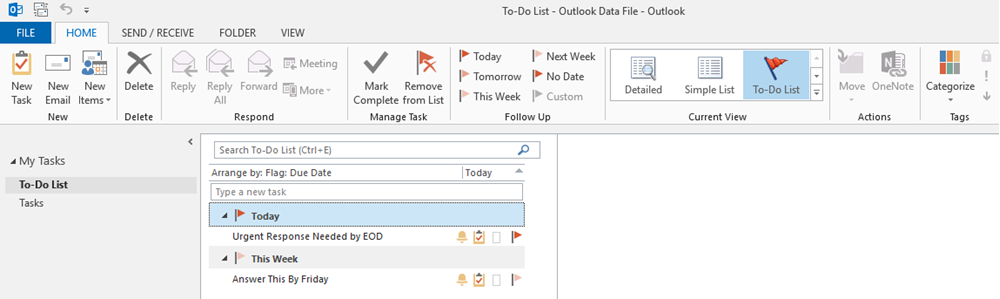
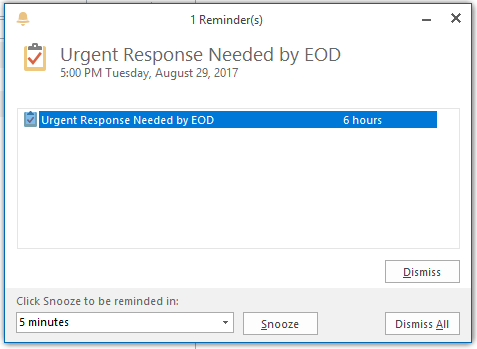
If you set a reminder, the task will pop up like a meeting reminder at the specified time.
Once the task is complete, mark it as such to remove the task from your to-do list. Open the task by double-clicking it, and click the "Mark Complete" button—or just press the Insert key to quickly mark the item complete.

Outlook’s task list is also useful if you’re in the habit of copying yourself on emails as a reminder to follow up, or if you’re emailing someone who is prone to ignoring your requests. Instead of keeping reminders as emails in your inbox, just move them to your to-do folder and add them to your task list.
3. Clean Up Your Inbox in One Click
Taking time off is wonderful until the moment you open your email after returning to work. If you work in an email-heavy company, you may have received hundreds of emails while you were out of the office, and now you’re faced with the difficult task of sorting through each one.
With Outlook’s clean-up function (introduced in Outlook 2010), you can drastically reduce the number of emails you have to deal with in just a few clicks—whether you're coming back from vacation or you just have too many emails piled up. The clean-up function removes all email replies that are duplicated in a later thread, allowing you to read a single thread instead of dozens of individual emails.
To clean up your inbox quickly:
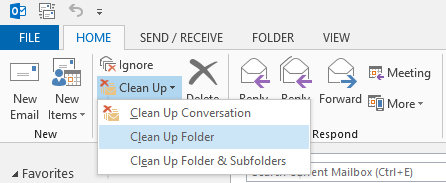
- While viewing your inbox, click the "Clean Up" button, and select "Clean Up Folder."
- Click the "Clean Up Folder" button in the popup to confirm the action.
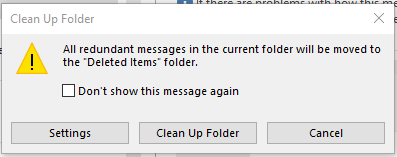
Outlook will automatically remove all duplicate emails, leaving you with significantly fewer emails to sort through.

The clean-up function can be a little disconcerting to use initially. What if it deletes something important like a reply that contained an attachment that was removed in a later thread?
Rest assured: the tool is sophisticated and will not delete any emails with attachments or text that aren’t exactly duplicated in later threads, and you can always review deleted items in the trash folder if needed.
4. Use Rules to Automatically Sort Emails and Stop Receiving Irrelevant Emails
Unfortunately, not all emails in the workplace come with an unsubscribe link. Day after day, emails arrive in your inbox that are just a distraction. Some common examples include:
-
Automatic Notifications: If you’re assigned to a team on one of the platforms you use at work—such as customer relationship management (CRM) software—that platform may send an email every time a change is made in the system.
-
"Fun" Emails: Sometimes a team leader or department will send daily/weekly emails with trivia, memes, or jokes designed to make work feel more fun.
-
Threads You Shouldn’t Have Been Included On: Occasionally, someone will send a mass email that gets dozens of replies—none of which have anything to do with you or your job.
These emails keep you from focusing on your important work. Use Outlook’s rules function to skip the inbox and send those emails straight to the trash—or to another folder for review.
You can also use Outlook rules to automatically sort incoming emails to the appropriate folder, such as always sending emails that are from your boss with a certain subject line to the To-Do folder and emails from a newsletter you regularly read to the Someday folder.
- Right-click the email, hover over "Rules," and select "Create Rule."
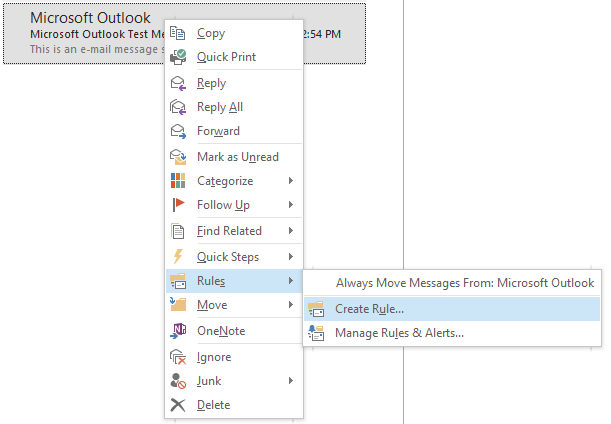
- Choose the criteria for the rule:
- "From [Sender]" will execute the rule any time you receive an email from a specific email address or contact.
-
"Subject contains" will execute the rule any time a specified subject line is used.
-
Select what happens when the rule runs. To sort emails out of your inbox and into the appropriate folder, check "Move the item to folder," and select the folder where you want the emails to be sent. You can choose the "Deleted Items" folder if you never want to see them, or you can create a separate archive folder if you may need to review the emails in the future.
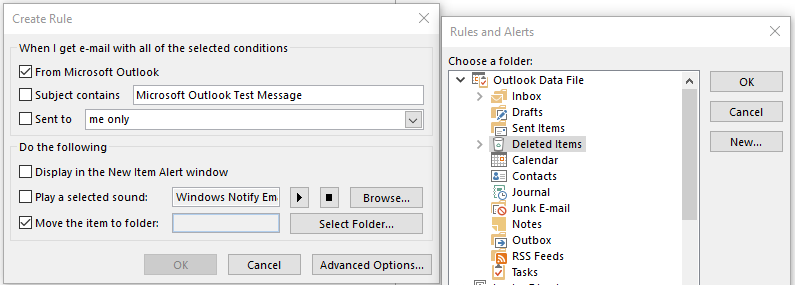
Click "OK" to apply the rule.
Want to prevent getting future emails on a specific thread? In that case, instead of creating a rule, you can just use Outlook's ignore function. Right-click the email, select "Ignore," and confirm the action.
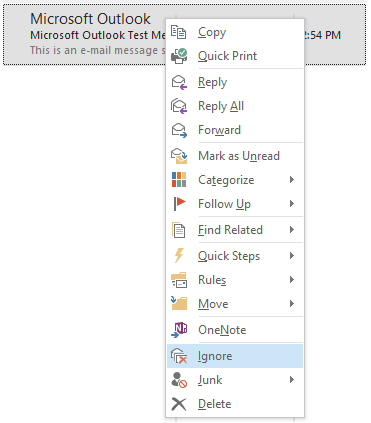
Ignore automatically sends future replies to that thread to your "Deleted Items" folder so you don’t receive them in your inbox.
5. Create Quick Parts for Default Responses to Common Questions
If you spend a lot of time typing the same answers to questions you get repeatedly, create Quick Parts to insert that text into email replies in just a few clicks. No need to keep typing the same thing over and over again or having to find an old response to copy and paste.
When you’ve finished typing a response that you expect to need to send again, follow the steps below to save the text as a Quick Part:
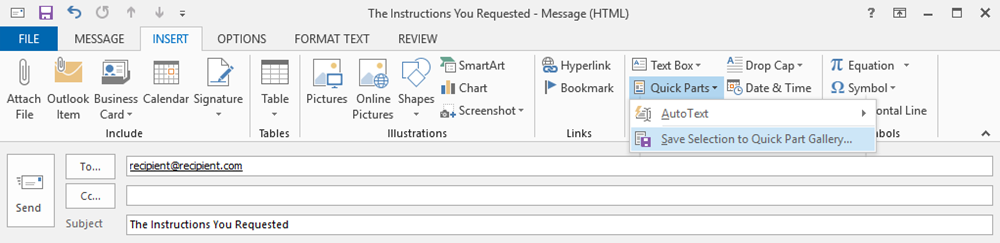
- Highlight the text you want to save in the email, and click the "Insert" tab.
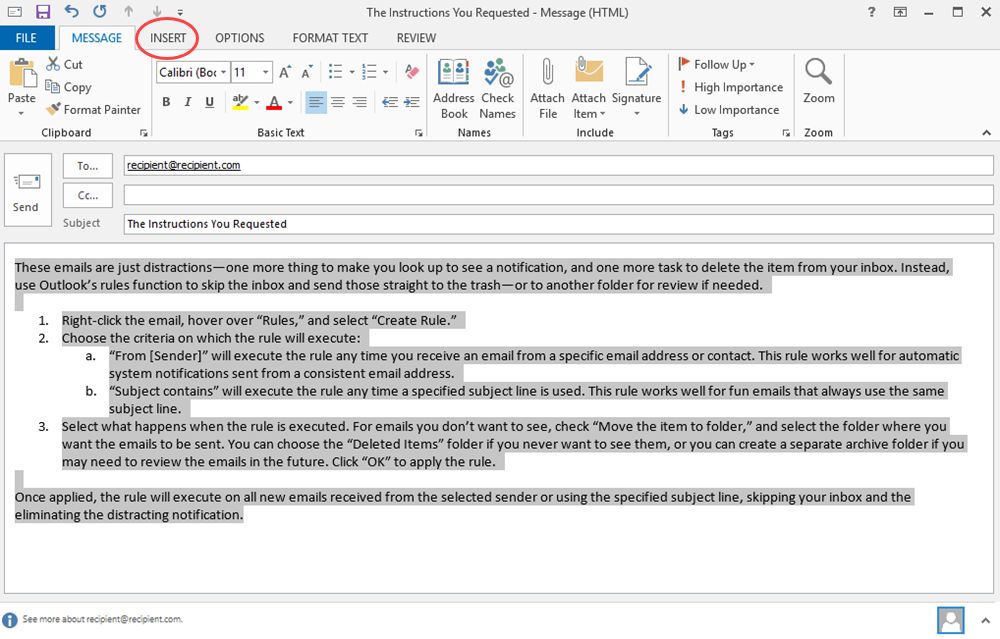
- Within the "Insert" menu, click "Quick Parts," and select "Save Selection to Quick Part Gallery."
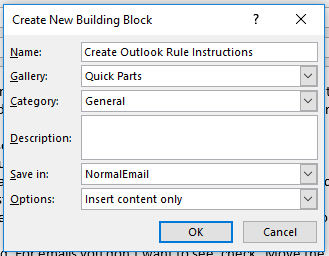
- Give your new Quick Part a descriptive name, and click "OK."
With this Quick Part saved, you can now add that text to any email with just a couple clicks.
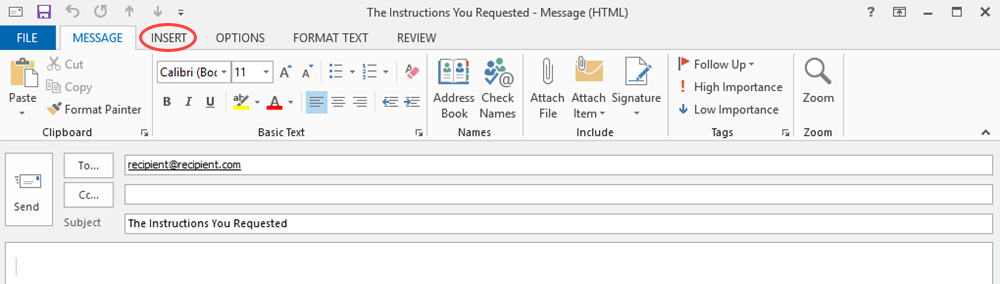
With your cursor in the body section of the email, click the "Insert" tab.
Click "Quick Parts," and then select the Quick Part you want to insert.
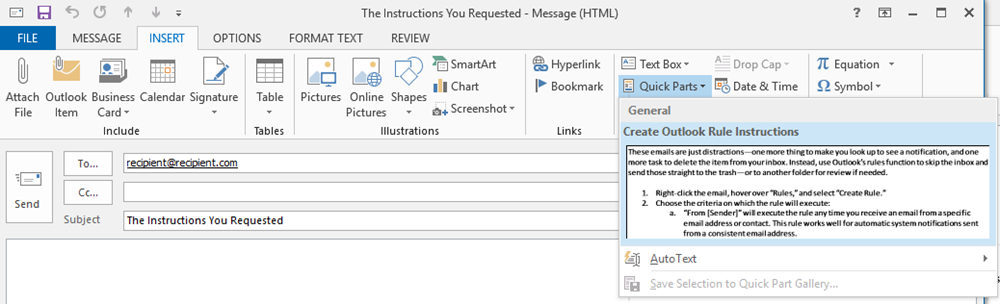
The prewritten text will automatically appear in the body of your email, and you can edit and customize it as needed for your new response.
6. Use Quick Steps to Take Instant Action on New Email
If you’ve had success with the previous Outlook tips and are interested in getting into more advanced email management, it’s time to take a look at Quick Steps. Quick Steps allow you to automatically perform long strings of actions based on a trigger.
Say at the end of the month you receive a series of invoices from vendors or contractors. Your normal process is to review the invoices, forward the invoices to your accountant, and create a reminder to follow up with the accountant a week later to make sure the invoices were paid.
Quick Steps can take care of the last two steps for you with fewer clicks than if you performed the tasks manually:
- Click the "Create New" button in the Quick Steps section of the Home ribbon.

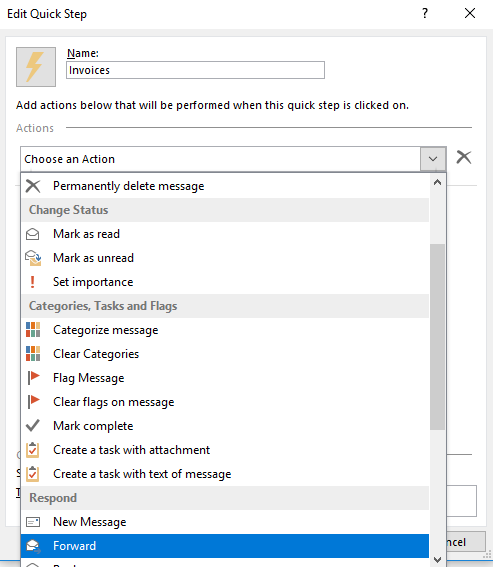
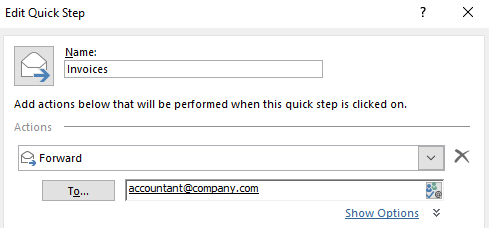
- Give the new Quick Step a descriptive name, and select the first action: "Forward."
- Type your accountant’s email address into the "To" field.
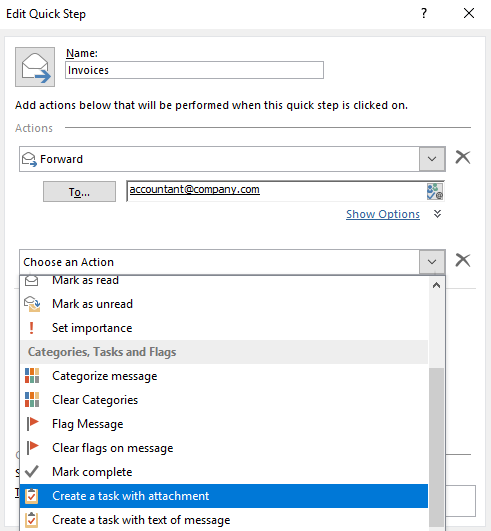
- Click the "Add Action" button to select the second action: "Create a task with attachment."
- Click "Finish" to create the Quick Step.
After you review an invoice, you can now execute the Quick Step to forward the email and create a reminder task. Select an email containing an invoice, and click the appropriate Quick Step in the Home ribbon.
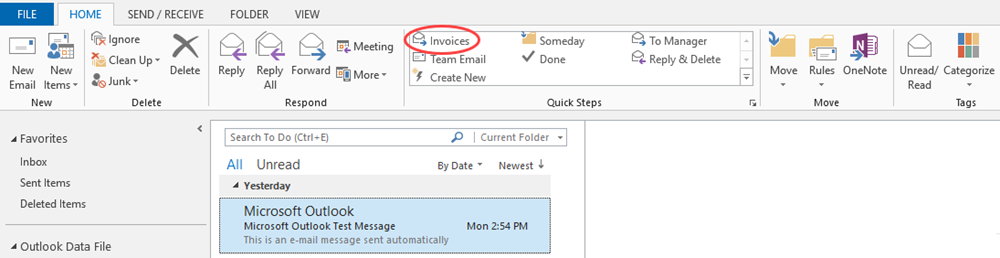
The email forward and task windows will open automatically. Click Send to forward the email, and set a due date and reminder for the task before saving, if you'd like.
There are many different ways to use Quick Steps to speed up email processing. Spend some time thinking about the repetitive actions you take on emails, and set up Quick Steps to make managing your emails so much quicker and almost painless.
7. Automate Outlook 365 and Your Other Favorite Apps
If you use the Office 365 Business or Office 365 Enterprise editions, you can connect Outlook to over 750 other apps and streamline even more email workflows. For example, you can send new emails you get from a specific sender to Slack or create a new Trello card for new emails sent to a specific Outlook folder. See all the Office 365 integrations available on Zapier or use one of the workflow templates ("Zaps") to get started right away:
Most of us spend too much time managing our emails. With the tips above, though, you'll have an easier time staying on top of emails, organizing your inbox, and perhaps consistently maintaining inbox zero.
Got any favorite Outlook tips or tricks? Share them with us in the comments!
source https://zapier.com/blog/outlook-tips-and-tricks/
Here are some more tips on
ReplyDeleteemail managament and my favorite GTD method.