Publishing the next great American novel requires more than just a text editor. You need somewhere to craft your prose, sure, but also need tools to organize your text into coherent chapters and compile them into a polished book. Even for longform blog posts, you often need something more than just a text editor to keep track of your references and notes and article sections.
That's where Ulysses comes in. The writing app looks almost as simple as Notes but is packed with powerful features to help you pull your thoughts together into a finished work. With it, you can write in a distraction-free mode, gather notes and reference materials, and organize all your documents. It just happens to have everything you need to publish your writing, too. Here's how to use it for your next writing project.
How to:
- Learn Your Way Around Ulysses
- Format Your Writing in Ulysses
- Organize Documents in Ulysses
- Sync and Automate Ulysses
- Export and Publish from Ulysses
Learn Your Way Around Ulysses
Writing apps are built for you to write anything, from simple letters to full books. At their most basic, they include tools to format your text—and at the most advanced, they should help you pull the disparate parts of your project together into a polished final draft. That's what Ulysses does. It's a Markdown-powered writing app with the option to remove the toolbars for writing in full-screen, as well as file organization tools to help you split, merge, combine, and organize your documents into a final, linear work. It's like Scrivener, only with a simpler user interface and more focus on plain text.
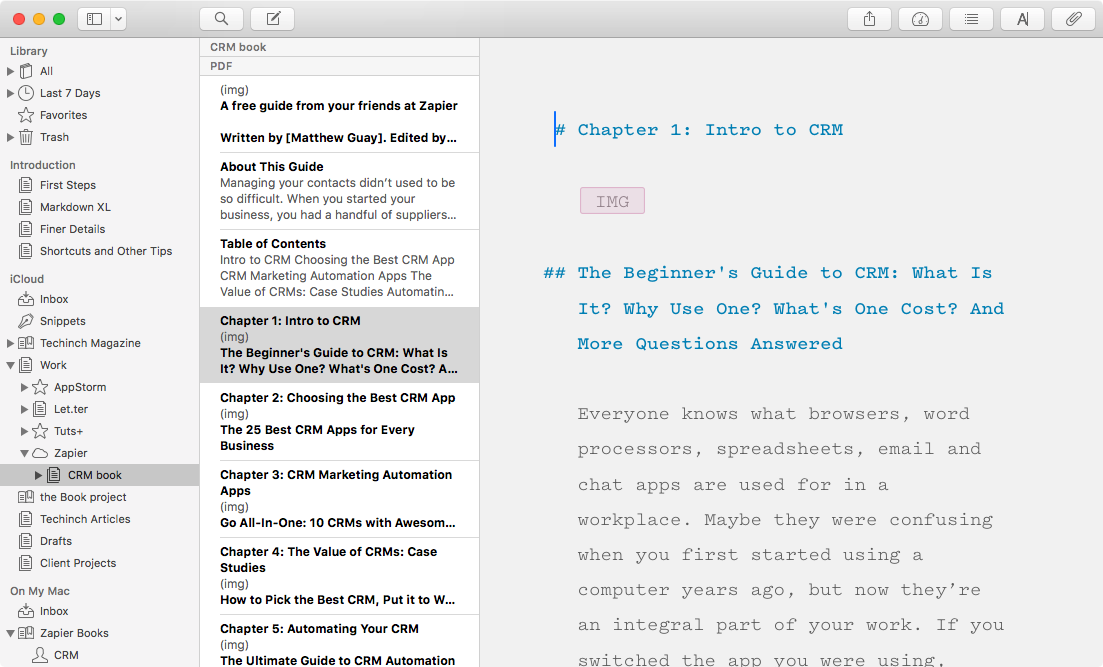
When you first open Ulysses, you'll see a familiar 3-column layout you've seen in other apps like Mail and Evernote: Folders on the left, files in the middle, and your text in the larger right pane. You could jump in right here. The Inbox folder is the default place you'll start writing. Tap it, then click the New Sheet button or press CMD + N to get a blank document and start writing.
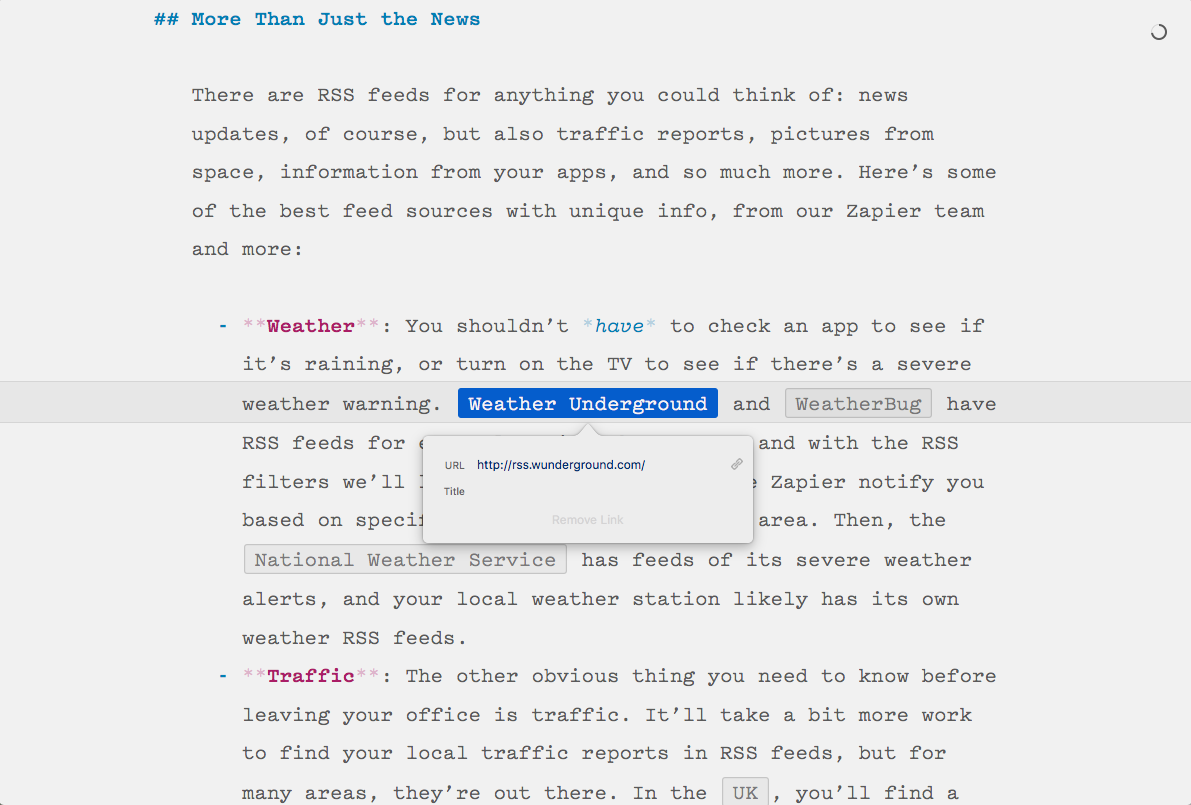
Swipe to the left on your trackpad or press CMD + 3 to clear out your screen. That'll leave you with just your text—no sidebars or toolbars to tempt you to jump to another document.
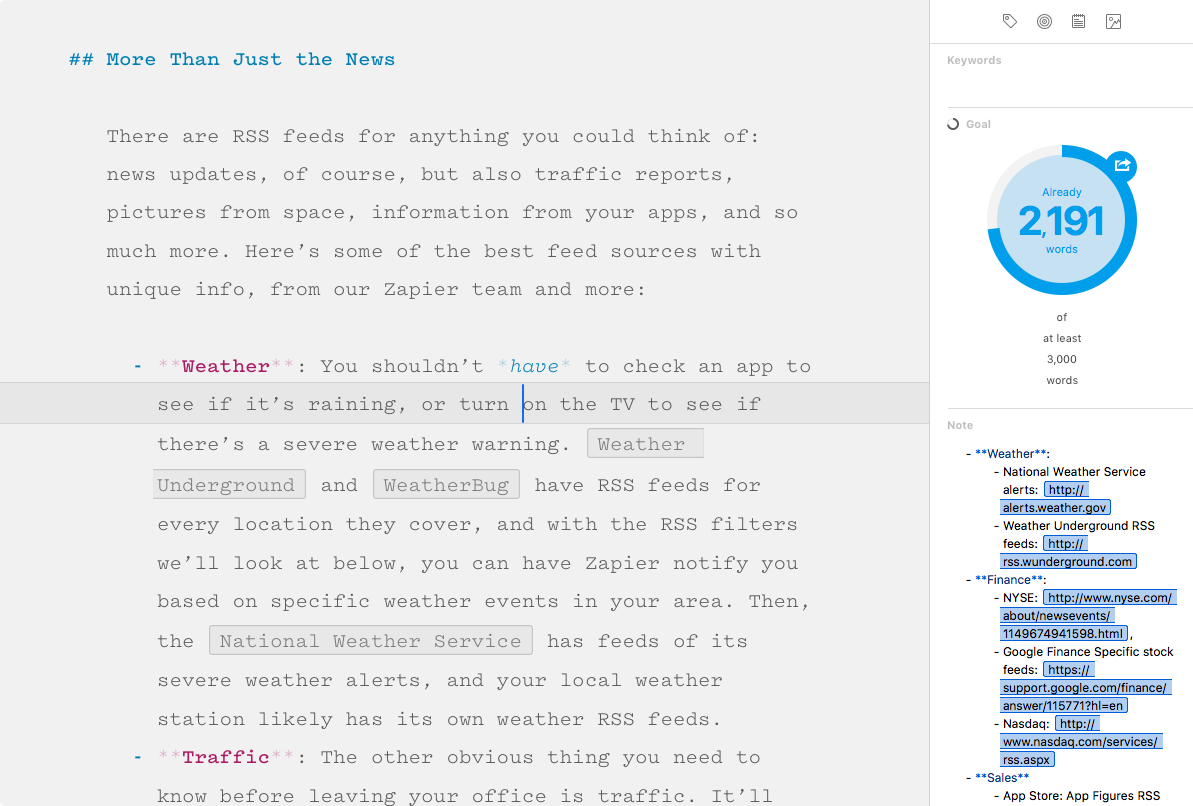
Or swipe left once more to open the Attachments pane. That lets you add notes to your document—where you could store your ideas and outline for reference while writing. You can also attach images and files there, include keywords to find your document in search, or add a goal to track how much you've written. When you're done, swipe right to close that pane and go back to your writing mode.
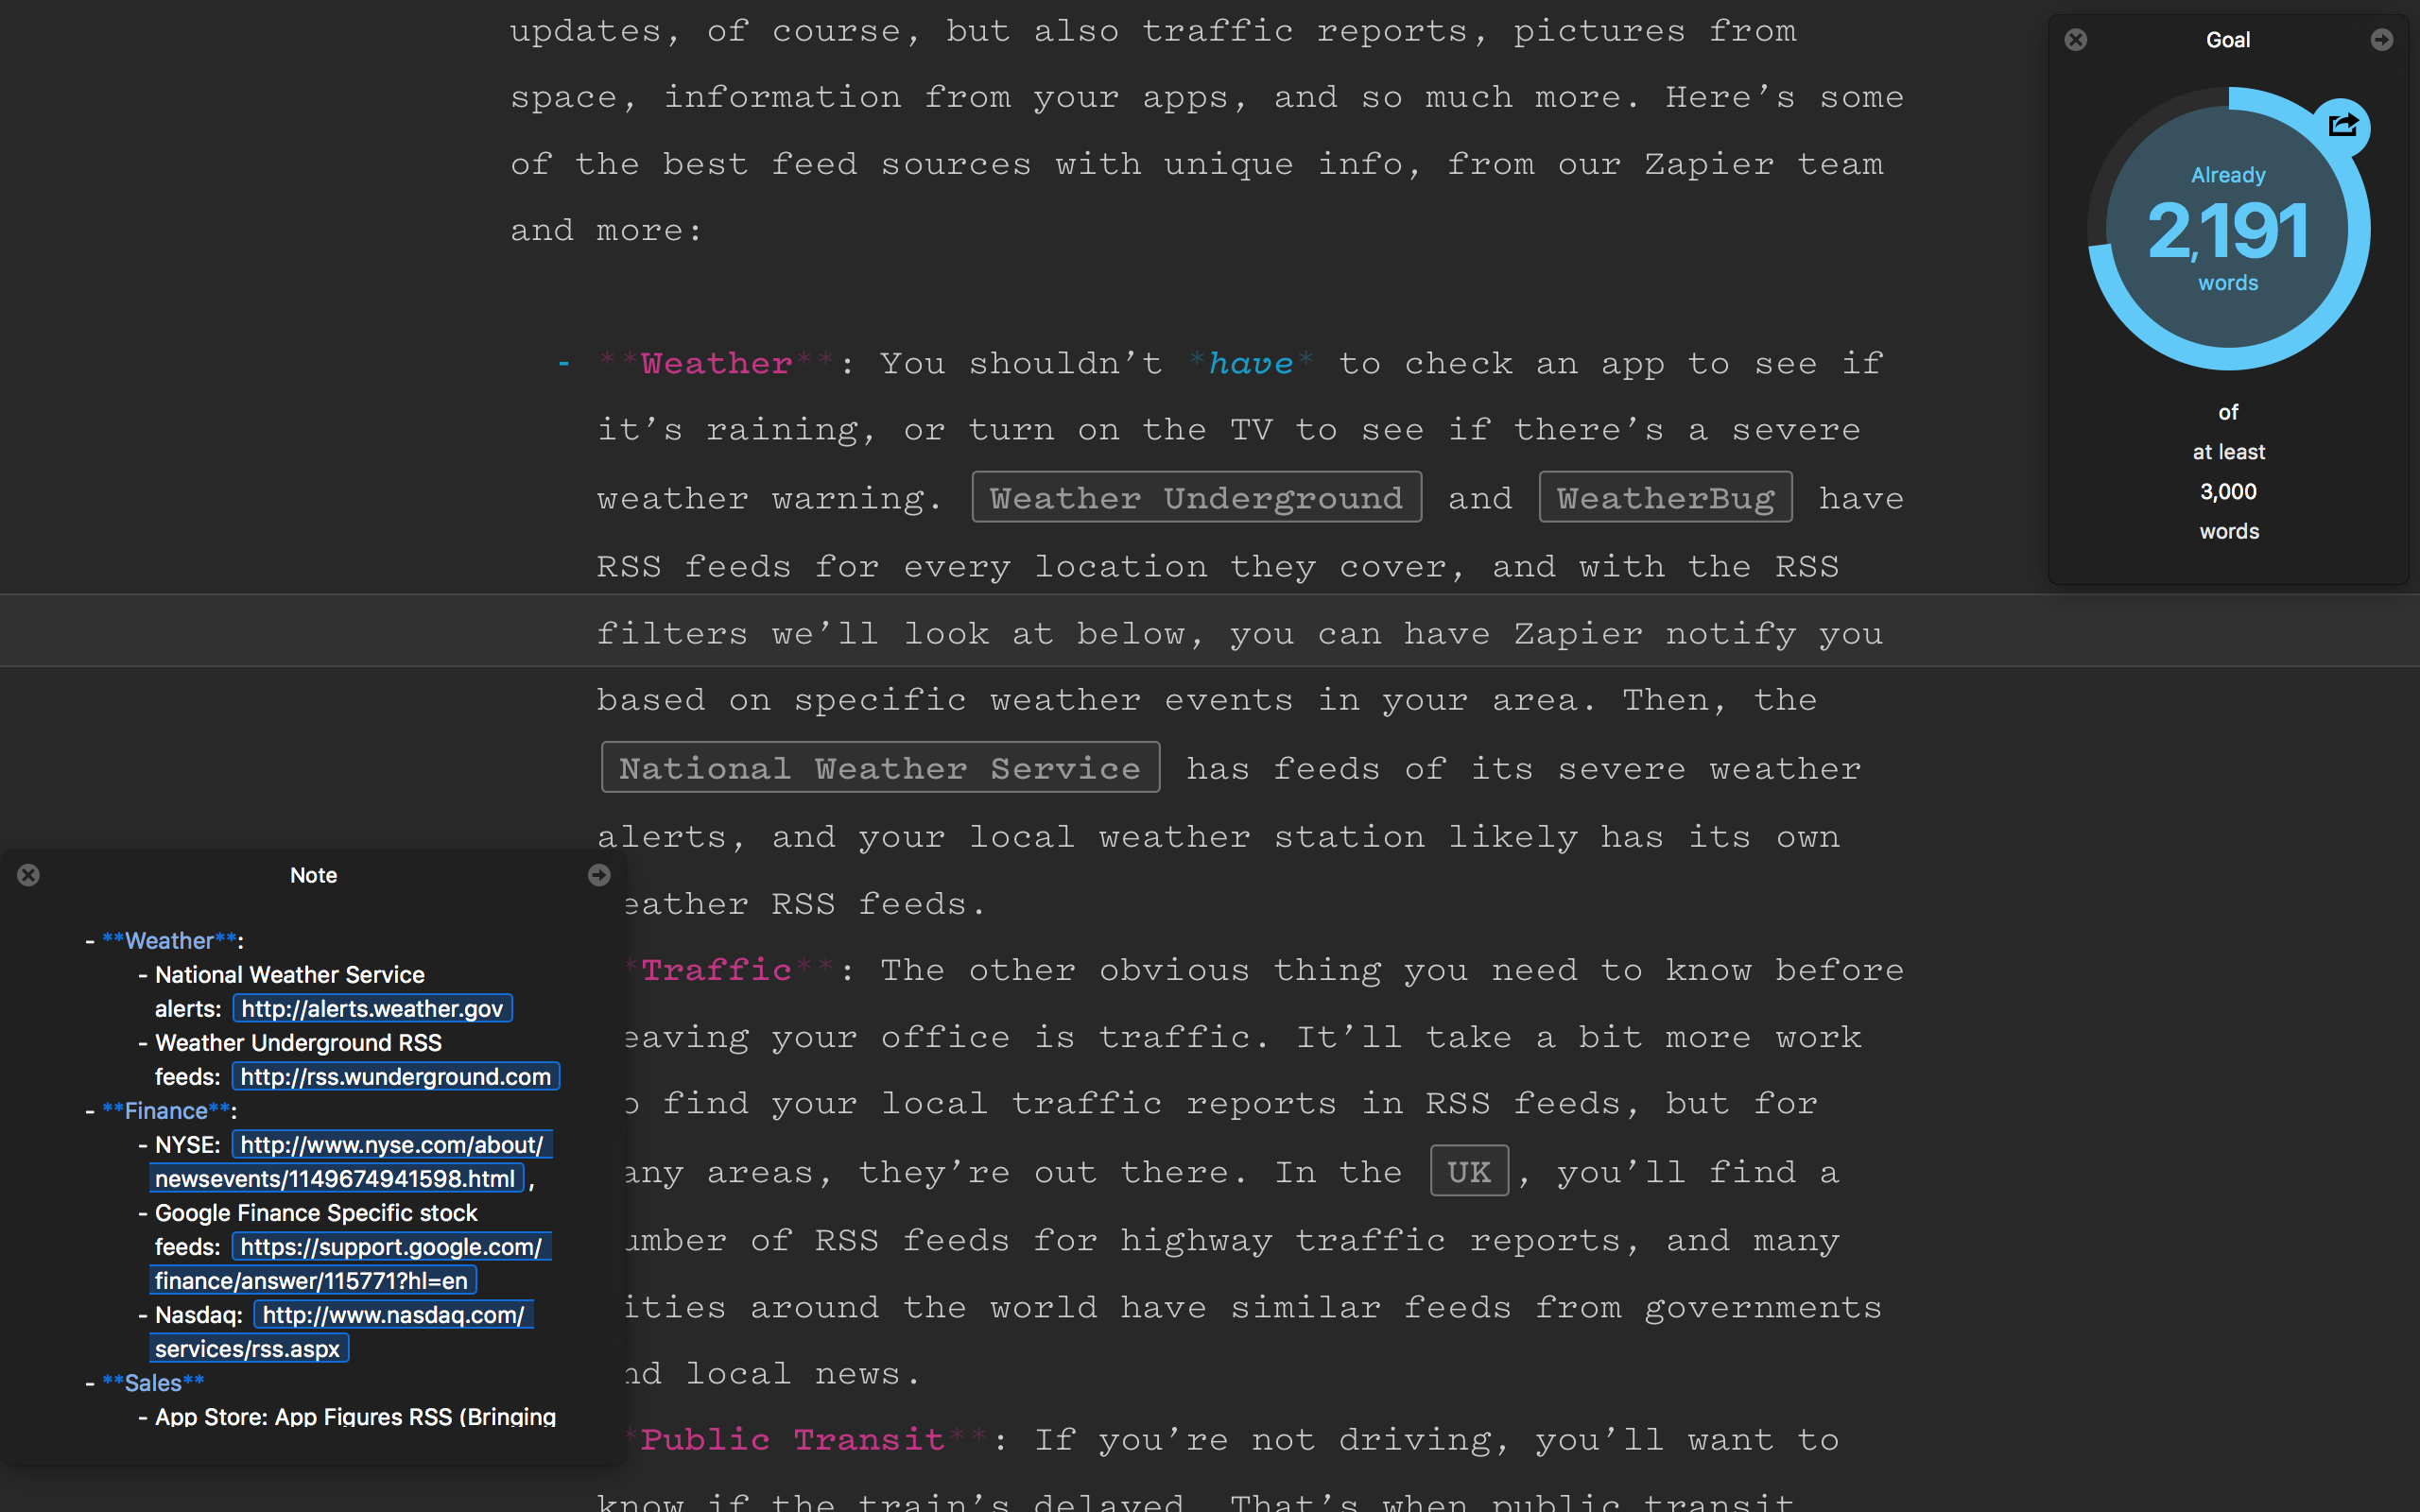
Want to keep your notes open without the whole sidebar? Tap the square button on the right of the notes, goals, or other attachment panes, and they'll float in their own window. You can then write full-screen, with a notes pane on the side to keep you focused but still with easy access to everything you need to write.
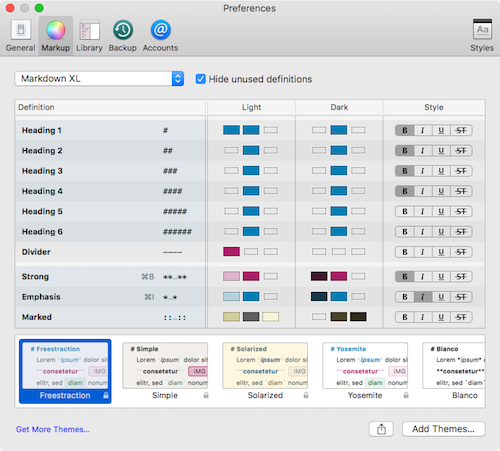
And, yes, you can customize Ulysses. It includes a dark mode for the app and editor, so you can have a black toolbar and/or a black writing background. From the Preferences pane, you can customize your own theme, choose from built-in ones, or browse the Ulysses theme gallery to find a new favorite—or code your own Ulysses theme. You can also set your writing typeface and font size.
Feel free to use whatever feels best—Ulysses uses plain text, so no matter which colors you write in, your final copy will look the same.
Need more help focusing? From the View menu, you can turn on Ulysses' "Typewrite Mode" which keeps you typing in the same line—your document moves up when you press Return instead of your cursor going down to the next line. It's similar to the way paper would move up as you write with a typewriter and—combined with the Highlight option to fade out everything other than the sentence or paragraph you're writing—can keep you even more focused.
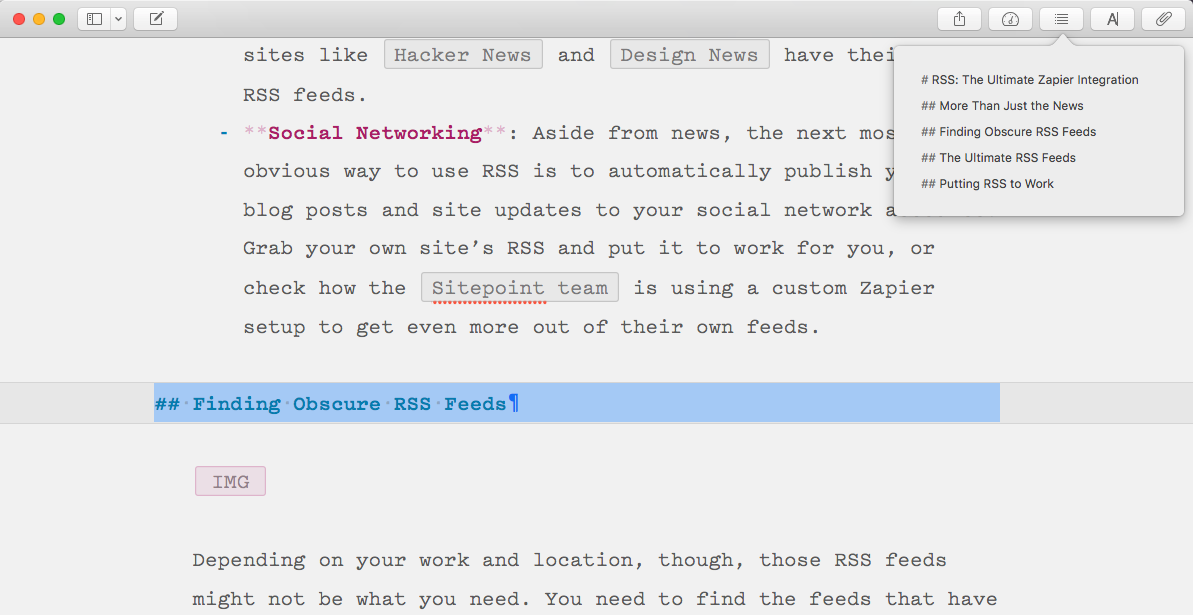
Ulysses keeps the toolbar hidden most of the time to leave the focus on your writing. Hover near the top of your document—or enable the Always show toolbar option from the View menu—and you'll get a few extra tools. That's where you'll find the export tools, along with a menu to see Ulysses' text formatting options and a handy document outline that lets you jump to sections of your work with a tap.
If you're used to Word, it might feel a bit limiting—and if you're used to a plain-text writing app, it might feel a bit overwhelming. But with a bit of practice at swiping, it'll be a focused writing app when you need and a powerful document organizer the rest of the time.
That's where Ulysses will help you the most, by keeping distractions away so you can write.
Format Your Writing in Ulysses
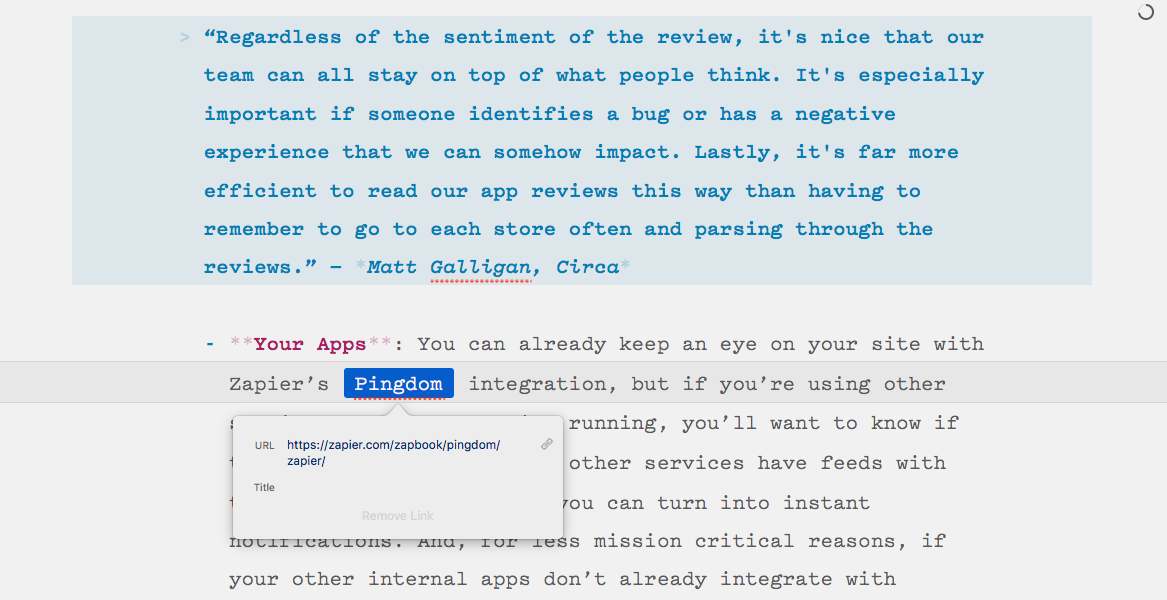
With the sidebars hidden and a theme you like, it should be easy to stay focused on writing in Ulysses. It works the exact same as other text editors for the most part, with a few extra things you can customize. Ulysses a variant of Markdown style editing—called Markdown XL—to format your writing. Add italics with single asterisks like *this*, start lists out with dashes, and add headers with hashtags. Or, use keyboard shortcuts—CMD + I will italicize your text, too.
Links and images are a bit different, though. To keep your writing cleaner, Ulysses hides links and images in the editor. Select text and press CMD+K to add a link, then paste your link and add alt-text in the popup. Or, if you've copied a link, select text and press CMD+V, and Ulysses will add the link automatically. Images work the same: Drag-and-drop them into Ulysses then add a caption and alt text in the popup, or type (img) to add an image block.
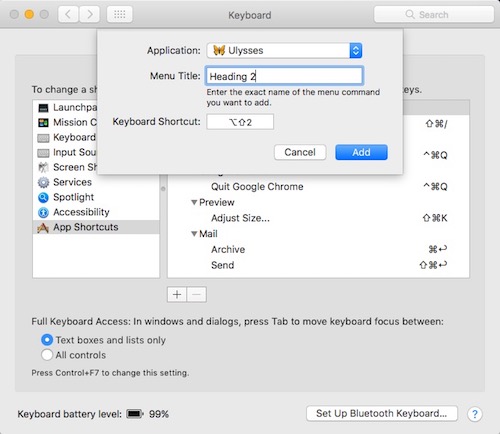
Ulysses doesn't support Markdown tables—though you can add your own tables and then use document exporting app Marked to export your table into HTML or a PDF file instead of using Ulysses' own export tools. It also doesn't include keyboard shortcuts to add headers, lists, or many other less-used formatting options. You can add those shortcuts yourself, though. Just open your Mac's Keyboard preferences, select Shortcuts then choose App Shortcuts in the list and tap the + icon. You can then add a custom shortcut for any markup or setting you frequently use in Ulysses.
You can embed code into your blog post by wrapping it with backticks, though Ulysses doesn't support including HTML code directly in your copy. If you're writing for your blog and need to include custom HTML code, try using the plain Markdown formatting (via the Edit -> Convert Markup -> Markdown menu option), or add the HTML code later outside of Ulysses.
Organize Your Documents in Ulysses
Now for the fun part, what makes Ulysses such a unique and powerful tool for longform writing: Organizing your text.
When you start writing something new, it'll likely take form in a handful of documents. Perhaps you'll write down some ideas in a new document in Ulysses' inbox and add another document with quotes from your research. Perhaps each section of your report or chapter of your book will get its own document—or maybe you'll need to move the ending of one document over to another.
You could copy and paste it all together into one massive document. Ulysses, however, has better options to help you navigate everything.
Groups: Much like folders in other apps, Groups let you organize your documents and other groups together. Right-click in the sidebar to add a new group. Give it a name and icon, then drag it to the position you want in the sidebar. Or drag it under an existing group to make a sub-group. When you select a group, the middle column will show all documents in that group—with a grey line dividing each sub-group.
Sheets: Just like a file in Microsoft Word or a document in Google Docs, a Sheet in Ulysses is a place for your text and its related images, attachments, and notes. If a sheet gets too long, right-click above the text you want to get rid of and select Split Sheet. That'll split the sheet in two, leaving the top copy in the original sheet and putting the lower copy into a new sheet. Want to undo that or combine any other sheets? Select the sheets that should be together, right-click in the sheets list, and select Merge Sheets.
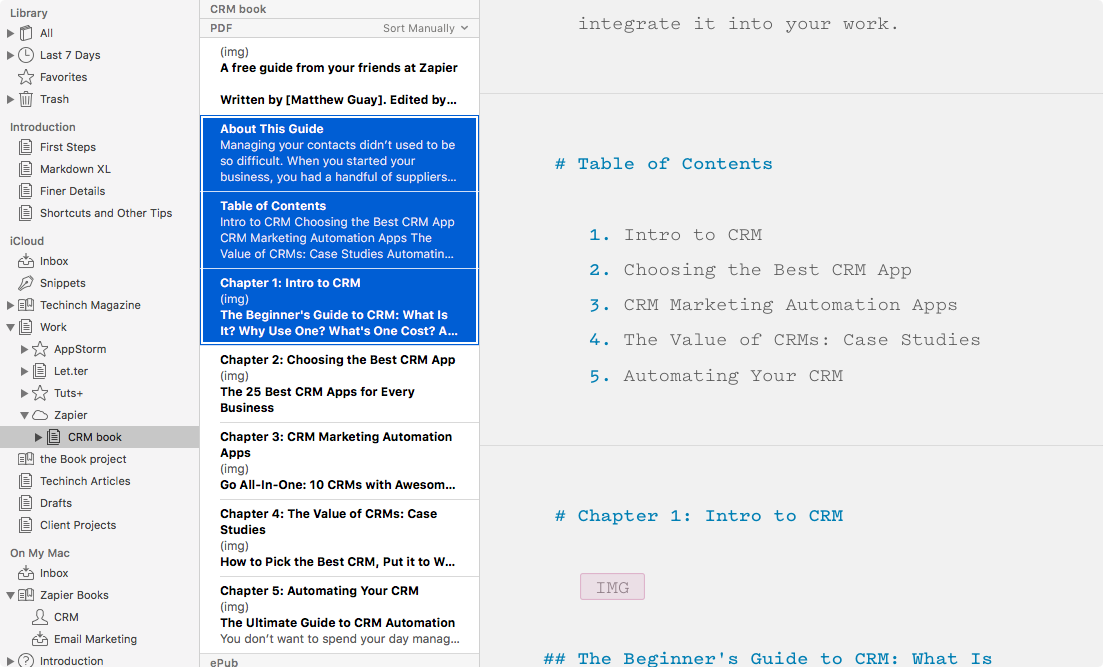
Glued Sheets: This is one of Ulysses' best features. If you have some sheets that you want to keep together, but don't want to actually combine them, you can glue them instead. Just select each of the sheets as before, then right-click in the sheets list and select Glue Sheets. They'll now be highlighted together in the list, as in the screenshot above, and you can scroll between each of them without switching sheets—there's a line to show when you're jumping between sheets in the group.
For the most part, glued sheets act like a single sheet. The word count will combine the words from all the sheets, the navigation pane will show the sections from the entire set, and all of the sheets you glued in that set will be exported together. But, you can still keep things separate with that sheet divider—and you can un-glue sheets if you ever want them apart.
Groups, like folders, are a simple way to organize things the way you want. I keep groups for companies I've worked with or larger personal writing projects. Inside those, I have sub-groups for specific projects or pieces—with sub-groups in them if needed. I'll then glue sheets that go together, perhaps to combine the intro with the other sections that make up a piece or to keep the table of contents and cover matter together for a book.
You can use the three to organize work the way that fits your needs—and mix it up. The ability to glue, merge, and split sheets lets you move text around far more easily than you can in most apps. That's the biggest reason to use Ulysses for your longform writing projects.
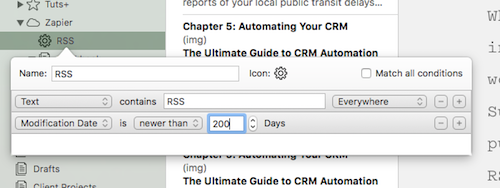
There's one more tool to organize your sheets: Filters. Click the + icon beside any group in your sidebar—or press CMD+ctrl+N—to create a new filter. Enter search filters to drill down and find the sheets you want. You'll get a new group of sheets that fit those criteria—they'll still be in their own groups, but will also be in the new filtered smart folder. That's a handy way, say, to keep everything about one topic or everything written this year in one place.
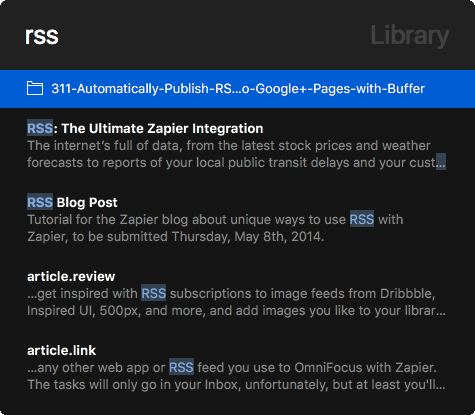
Groups, glued sheets, and filters can keep things organized, but it can still be tedious to find exactly what you want. The quickest option is to just search. Press CMD+O to open Ulysses search. Type anything you want and search for it across your entire Ulysses library—including external files, which we'll look at below.
Need two documents open at once? Just press CMD+T to open a new tab, then use search to find and open the sheet you need in that new tab.
Sync and Automate Your Writing
If you have a Mac and an iPhone or iPad, the Ulysses apps for each can keep all of your text with you everywhere. You can jot down ideas on your phone, add details and turn the idea into prose on your Mac, then reorganize the ideas and polish them on the iPad.
That's powered by Ulysses' iCloud sync. It keeps everything in your Ulysses library synced between all of your devices.
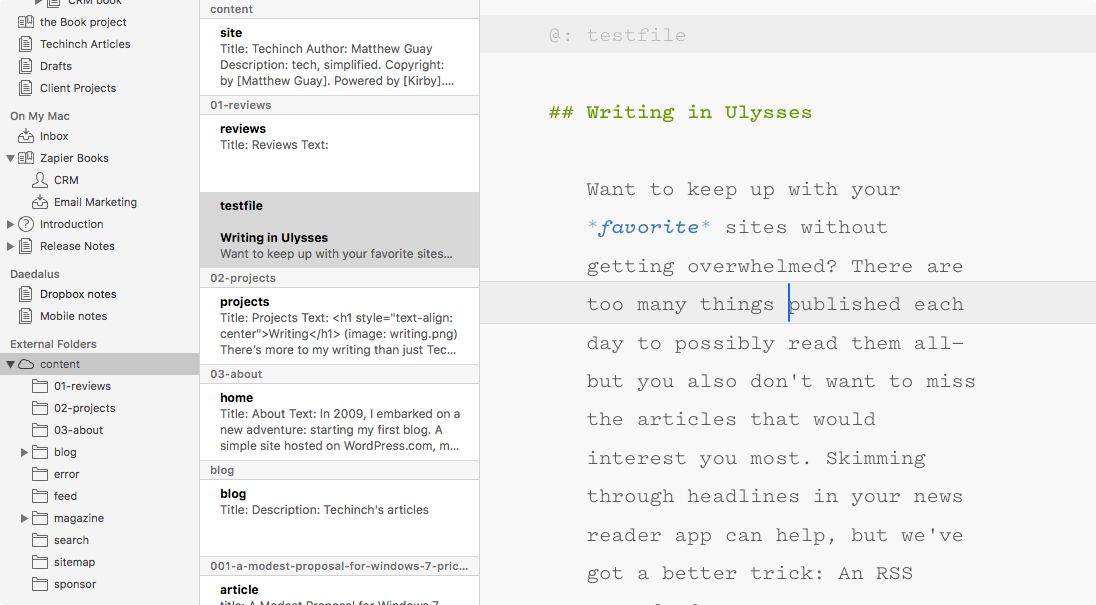
If you'd rather, though, you can manage your files yourself. Just drag a folder from your computer into Ulysses' sidebar to store it in the External Folders library. You can use Ulysses standard Markdown formatting on those files and even add new files to the folder (with their file name at the top of the document). It even indexes all of the documents in those folders for search, so you can quickly sort through everything you've written in any app.
Drag in your Dropbox or Google Drive folders, and you can even automate Ulysses. Want to write ideas in Evernote and then turn them into longform content in Ulysses? A Zapier automation could copy your Evernote note to a text file in Dropbox or Google Drive and Ulysses can automatically import it.
Need to notify your team when a document is ready for editing? Zapier can do that for you, sending an email or Slack notification—or even updating your project in Trello—when you've finished writing a document.
Zapier can even print your text files for you, so you can edit your rough draft with a red pen away from the screen.
Or, on your iPhone and iPad, you can use Workflow, a new automation app from Apple, with Ulysses. That way, you could save web pages to Ulysses, add a note to a sheet, save your clipboard to a new document, and more automatically on the go.
Export and Publish Your Work from Ulysses
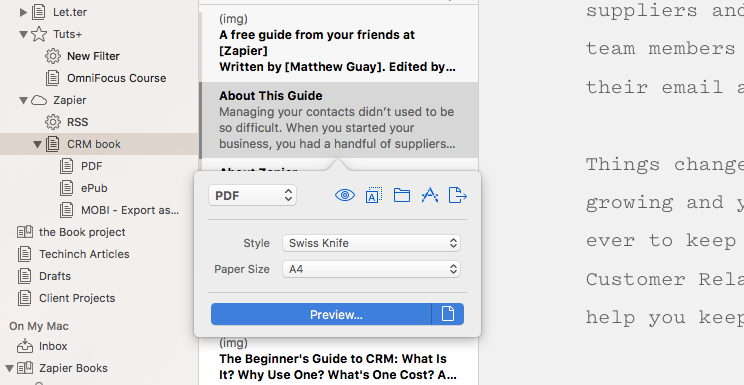
You're finally done, with your document written and your sheets organized into one piece. It's time to share it with the world.
The easy option is just to copy the text in the format you want. Via the Edit -> Copy As menu, you can copy your text in Markdown, HTML, or Rich Text formats—the former great for publishing on your blog or website, the latter to paste into an email or another editor like Word.
Or you can create a finished print-ready document right from Ulysses. Just select the sheet(s) or group you want to print, then right-click and select Quick Export (or click the Share icon in the menubar). That'll let you choose which format and page size to export as and which theme to use for your document.
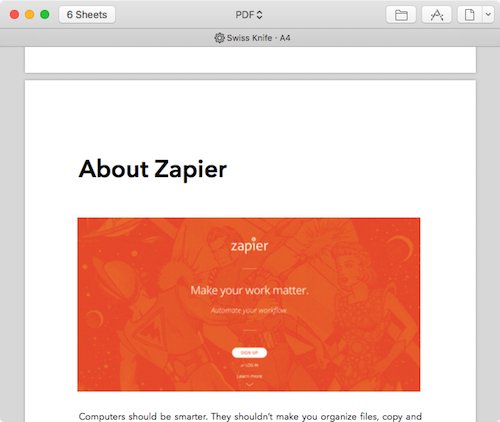
For a print document or one that looks great to read on a computer, PDF is a great option. Ulysses includes a number of PDF templates—or you can download others from the Styles gallery or code your own.
Just select the theme you want, then preview your entire document in the export pane. Then save it to your computer or send it to any app you want.
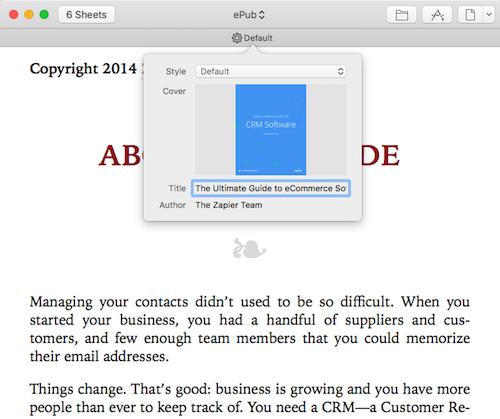
Or you can select a different format from the toolbar. Ulysses also supports plain text, ePub, and DOCX—Microsoft Word's document format. Each includes its own templates to style your text the way you want. If you plan on publishing your work in the Kindle or iBooks store, ePub format is what you want. You can add a cover image, title, and author name, then save the file and submit it directly to the Kindle or iBooks stores.
Do note, though, that Ulysses doesn't resize your images—so you'll need to optimize your images before exporting as an ePub or your finished file will be too large to submit to an eBook store. Here are more tips about publishing an eBook, including additional tips for using Ulysses.
There's one more option: Publishing. This option in the Quick Export pane lets you publish your copy as a draft post to Medium or WordPress. So whether you're writing a book or just working on a longform article, Ulysses can handle it all.
Writing is hard enough–generating ideas, turning them into a finished piece, and then getting it published. Ulysses can keep everything organized and focused, so you can concentrate on your text—and let Ulysses make sure everything looks great in the end.
Further Reading
- Publishing your work on your own? Check our complete guide to writing, editing, and publishing your first eBook, filled with tips we've learned about the Amazon Kindle Store and iBooks after publishing over a half-dozen books.
- Before that, be sure to polish your writing with these 15 editorial tools to help you proof your text.
- Writing in a team? You might want to write your own copy in Ulysses, then bring it together with your team's work in one of the best collaborative writing apps—including our team's favorite, Google Docs.
source https://zapier.com/blog/ulysses-markdown-writing-guide/

No comments:
Post a Comment